
AI Provider for Open WebUI
| 开发者 | pronomix |
|---|---|
| 更新时间 | 2026年4月9日 14:05 |
| PHP版本: | 7.4 及以上 |
| WordPress版本: | 6.9 |
| 版权: | GPL-2.0-or-later |
| 版权网址: | 版权信息 |
详情介绍:
AI Provider for Open WebUI connects the WordPress AI Client to your Open WebUI instance.
The plugin adds a dedicated connector and a focused settings page under Settings > Open WebUI.
Features:
- Connect to Open WebUI using a base URL and API key.
- Discover available models via
GET /api/models. - Generate text via
POST /api/chat/completions. - Select one preferred model for text, image, and vision requests (if the model supports these capabilities).
- Integrate with the existing AI connector management in WordPress.
- Translation-ready according to WordPress standards (text domain:
ai-provider-for-open-webui).
/api to the configured URL. The plugin handles endpoint paths automatically.
安装:
- Install and activate the WordPress AI plugin (AI Client).
- Upload this plugin to
/wp-content/plugins/ai-provider-for-open-webui/. - Activate AI Provider for Open WebUI.
- Open Settings > Open WebUI.
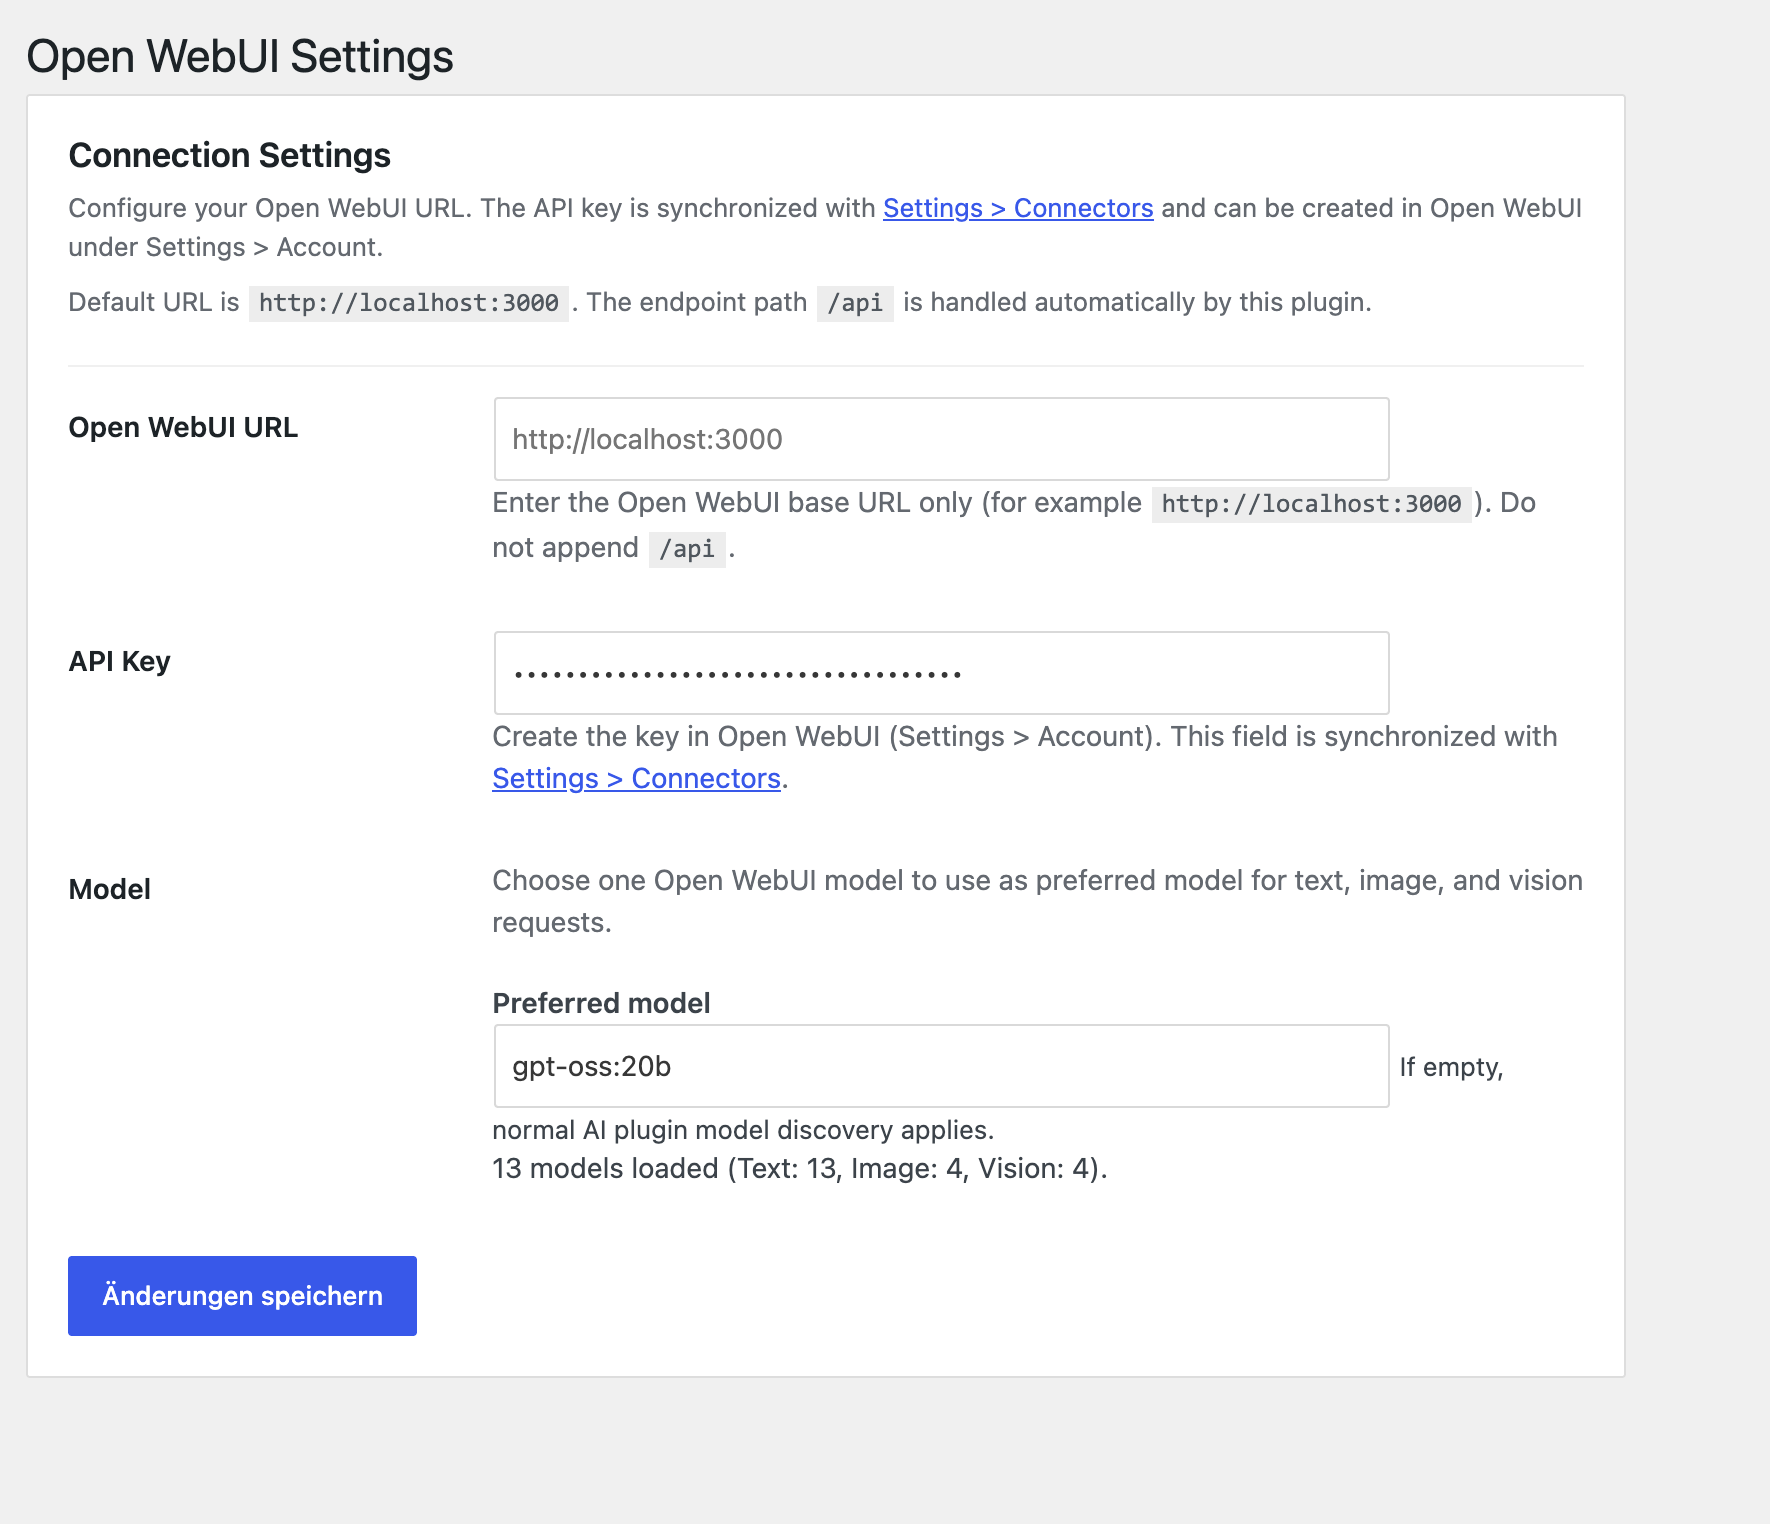
- Configure:
-
Open WebUI URL (for example
http://localhost:3000) - API key from Open WebUI (
Settings > Account) - Optional preferred model
屏幕截图:
常见问题:
Which URL should I enter?
Use the base URL of your Open WebUI instance, for example:
http://localhost:3000for local setupshttps://ai.example.comfor hosted setups
/api.
Where can I create an API key?
In Open WebUI, open Settings > Account and create or copy your key.
Why do I see “The AI plugin requires a valid AI Connector …”?
This message appears when no valid connector is available for the AI plugin. Check the following:
- The AI plugin is active.
- The Open WebUI URL is reachable.
- The API key is valid.
- The Open WebUI connector is connected.
Can I use environment variables?
Yes:
OPENWEBUI_BASE_URLOPENWEBUI_API_KEYOPENWEBUI_REQUEST_TIMEOUT
更新日志:
1.3.5 - 2026-04-09
- Version auf 1.3.5 erhöht.
- GitHub-Deploy für WordPress.org-Assets auf
assets/konfiguriert.
- Version auf 1.3.4 erhöht.
- Such-Tags für WordPress.org optimiert (AI Provider, Open WebUI, Chatbot, Content Generation, pronomix).
- WordPress.org-Assets (Banner, Icons, Screenshots) ergänzt.
- Präfixe für kollisionsrelevante Namen vereinheitlicht und Hauptdatei auf Slug-konformen Dateinamen umgestellt.
- WordPress.org-Verzeichnis-Assets aus dem Plugin-Paket entfernt.
- Improved language inheritance by prioritizing source language from
<content>blocks. - Added robust multi-candidate title fallback when Open WebUI returns only one choice.
- Hardened alt text generation to prevent prompt echoes.
- Enforced shorter excerpt output with prompt guidance and server-side word limiting.
- Moved provider prompt constraints into dedicated template files.
- Simplified configuration to a single preferred Open WebUI model.
- Added capability-based fallback handling for image and alt-text features.
- Improved model capability detection to avoid routing unsupported features.
- Added preferred model selection with manual fallback input and model suggestions.
- Added request timeout handling (
OPENWEBUI_REQUEST_TIMEOUT). - Improved settings page behavior and connector synchronization.
- Initial release.
- Registered Open WebUI as a provider for the WordPress AI Client.
- Added settings page for URL and API key.
- Added model discovery via the Open WebUI API.