WebYes WP Accessibility Checker – Easily Discover ADA & WCAG Compliance Gaps
| 开发者 |
tessawatkinsllc
webtoffee |
|---|---|
| 更新时间 | 2025年5月20日 21:20 |
| 捐献地址: | 去捐款 |
| PHP版本: | 5.4 及以上 |
| WordPress版本: | 6.8 |
| 版权: | GPLv3 or higher |
| 版权网址: | 版权信息 |
详情介绍:
安装:
- Log in to your WordPress dashboard.
- Navigate to Plugins > Add New.
- Where it says "Keyword" in a dropdown, change it to "Author"
- In the search form, type
TessaWatkinsLLC(results may begin populating as you type but my plugins will only show when the full name is there) - Once you've found my plugin in the search results that appear, click the Install Now button and wait for the installation process to complete.
- Once the installation process is completed, click the Activate button to activate it.
- Download my plugin from WordPress.org; it will be in the form of a zip file.
- Log in to your WordPress dashboard.
- Navigate to Plugins > Add New.
- Click the Upload Plugin button at the top of the screen.
- Select the zip file from your local file system that was downloaded in step 1.
- Click the Install Now button and wait for the installation process to complete.
- Once the installation process is completed, click the Activate button to activate it.
- Download my plugin from WordPress.org; it will be in the form of a zip file.
- Unzip the contents; you should have a single folder named
aurise-accessibility-checker. - Connect to your WordPress server with your favorite SFTP client.
- Copy the folder from step 2 to the
/wp-content/plugins/folder in your WordPress directory. Once the folder and all of its files are there, installation is complete. - Now log in to your WordPress dashboard.
- Navigate to Plugins > Installed Plugins. You should now see my plugin in your list.
- Click the Activate button under my plugin to activate it.
屏幕截图:
常见问题:
How do I use it?
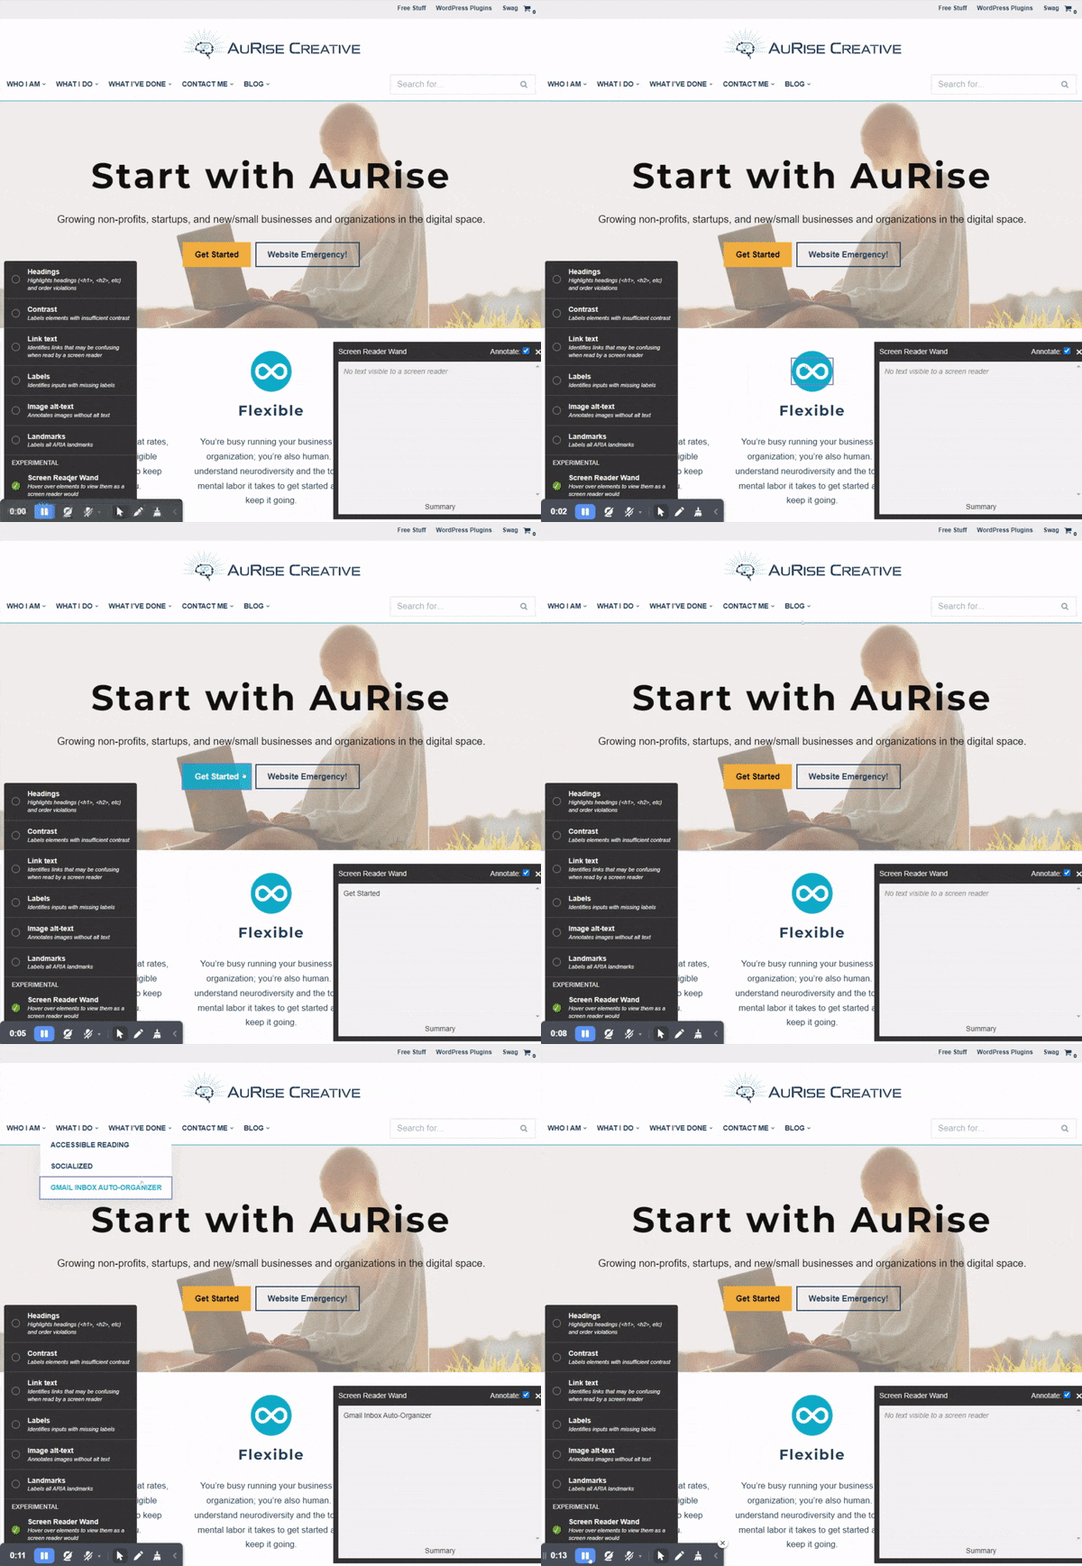
Simply install/activate the plugin and view the frontend of your WordPress website! The widget will appear as a small, black block with a pair of white sunglasses fixed to the bottom-left of your browser. Click on the widget to open its menu for the different types of tools you can use.
Who can see the testing widget?
By default, the widget will only appear for WordPress administrators, so your site's viewers will not see the widget.
How does it work?
This plugin uses an accessibility visualization toolkit called tota11y.
Can I turn it off if I don't have access to the plugin page?
Yes! You can turn it on or off from the settings screen under Settings > Accessibility Checker. It is the first setting labled Enabled
How can I enable this for my editors?
On the settings screen under Settings > Accessibility Checker, you can edit the text field for Allowed User Roles to be something like administrator,editor to allow users with the editor role to see the widget when it's enabled. This also works for custom user roles too. The default value is set to administrator and is inclusive of super admins for multisite installations.
How can I make it so it's only enabled if WP_DEBUG is set to true?
On the settings screen under Settings > Accessibility Checker, simply toggle the setting for Debug Mode to on and save your settings.
Can I set these settings using constant variables in my wp-config.php?
Yes! Whether you want to force all websites in a multisite installation to use the same settings or easily push settings from one installation to another, you can do so with these constant variables. define('AURISE_ACCESSIBILITY_CHECKER_ENABLED', true); // Display the widget for allowed roles define('AURISE_ACCESSIBILITY_CHECKER_ALLOWED_ROLES', 'administrator'); // Comma-separated list of user roles allowed to see the widget define('AURISE_ACCESSIBILITY_CHECKER_DEBUG_MODE', true); // If true, only show the widget to the allowed user roles when WP_DEBUG is also set to true
Does WebYes guarantee full ADA and WCAG compliance?
While WebYes identifies many common accessibility gaps, complete compliance may require additional manual checks beyond automated tools.
How do I fix the issues detected by WebYes?
Right-click on the annotated elements, select Inspect Element, and adjust the code or attributes to resolve the issue directly on your website.
Will the plugin slow down my website?
No, WebYes does not load anything on the frontend for your website visitors, ensuring it has zero impact on your site’s speed or performance.
更新日志:
- Tested up to WordPress 6.8
- Minor UI optimizations.
- Marked compatible with WordPress core 6.6.
- Updated tota11y's broken link to one that isn't broken.
- Update: Utilized the new feature to defer load the script in the footer.
- Marked compatible with WordPress core 6.5.
- First release to the official WordPress plugin repository!


