AV 2FA
| 开发者 | avrasys |
|---|---|
| 更新时间 | 2026年5月25日 20:45 |
| 捐献地址: | 去捐款 |
| PHP版本: | 7.4 及以上 |
| WordPress版本: | 7.0 |
| 版权: | GPL v2 or later |
| 版权网址: | 版权信息 |
详情介绍:
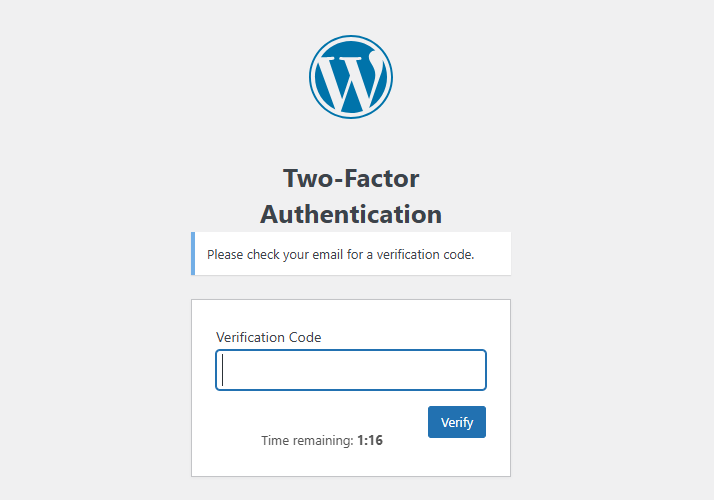
- Email-Based 2FA: Sends a 6-digit verification code to the user's email.
- Custom Login URL: Hide your login page by setting a custom login slug. The default wp-login.php becomes inaccessible, protecting against brute force attacks and bots.
- Rate Limiting & Account Lockout: Protects against brute force attacks on 2FA codes with configurable thresholds and temporary lockouts.
- Progressive Lockout: Automatically increases lockout duration for repeat offenders (2x, 4x, 8x multiplier).
- IP-Based Protection: Tracks failed attempts by IP address to prevent distributed attacks.
- Email Notifications: Alerts users when their account is locked due to suspicious activity.
- Admin Controls: View and manually unlock locked accounts from the settings page.
- Customizable Code Validity: Admin can set how long the code is valid for (default is 60 seconds).
- User Exclusion List: Easily bypass 2FA for specific users (e.g., admin or integration accounts) by adding their User ID to an exclusion list.
- Countdown Timer: The verification screen displays a countdown timer to show the user how much time is left.
- Secure & Reliable: Uses WordPress's built-in mailer and secure practices for code generation and verification.
安装:
- Navigate to
Plugins>Add New. - Search for "AV 2FA".
- Click
Install Now. - Activate the plugin through the
Pluginsscreen in WordPress. - Navigate to
Settings>AV 2FAto configure the options.
- Upload the
av-2fafolder to the/wp-content/plugins/directory. - Activate the plugin through the
Pluginsscreen in WordPress. - Navigate to
Settings>AV 2FAto configure the options.
屏幕截图:
常见问题:
How do I exclude a user from 2FA?
Navigate to Settings > AV 2FA. In the "Excluded User IDs" box, enter the numeric User ID of the user you wish to exclude. For multiple users, separate their IDs with a comma. You can find a user's ID by going to the "Users" list and hovering over their "Edit" link; the ID will be visible in the URL in your browser's status bar.
Can I change how long the code is valid for?
Yes. On the Settings > AV 2FA page, you can set the "Code Validity" in seconds. The default is 60 seconds. We recommend a value between 30 and 120 seconds.
What if emails are not being sent or received?
This plugin uses WordPress's built-in wp_mail() function. This means it relies on your server's email configuration or any SMTP plugin you have installed (like WP Mail SMTP). If emails are not arriving, please check your spam folder first, then ensure your WordPress site is configured to send emails correctly.
How does the Custom Login URL feature work?
When you set a custom login slug (e.g., "my-secret-login"), your login page will be accessible at yoursite.com/my-secret-login instead of yoursite.com/wp-login.php. The default wp-login.php and wp-admin (for non-logged-in users) will return a 404 error, hiding your login page from bots and attackers.
What happens if I forget my custom login URL?
You can recover access by adding define('AV_2FA_DISABLE_CUSTOM_LOGIN', true); to your wp-config.php file. This will temporarily disable the custom login feature and restore access to wp-login.php. Once you've logged in, you can view or change your custom login slug in the settings.
Can I set the custom login slug via wp-config.php for maximum security?
Yes! For maximum security, you can define the slug directly in wp-config.php using define('AV_2FA_LOGIN_SLUG', 'your-secret-slug');. When set this way, the slug is never stored in the database, making it impossible to discover even with database access.
How does the rate limiting work?
The plugin tracks failed 2FA code attempts on a per-user basis. After reaching the configured maximum (default: 5 attempts), the account is temporarily locked. The plugin also tracks attempts by IP address to prevent distributed attacks.
What is progressive lockout?
Progressive lockout automatically increases the lockout duration for users who repeatedly trigger lockouts. The first lockout lasts 15 minutes (default), the second lasts 30 minutes (2x), the third lasts 60 minutes (4x), and so on, up to 8x the base duration. This helps deter persistent attackers while being lenient with occasional mistakes.
How can I unlock a user who has been locked out?
Navigate to Settings > AV 2FA and scroll to the "Currently Locked Accounts" section. You'll see a list of all locked users with an "Unlock" button next to each. Click the button to immediately unlock the account. Lockouts also expire automatically after the configured duration.
Will users be notified when their account is locked?
Yes, by default users receive an email notification when their account is locked. This helps legitimate users understand why they can't log in and alerts them to potential security threats. You can disable this in Settings > AV 2FA if desired.
How long is security data kept?
Failed attempt records are automatically cleaned up after 24 hours. Lockout counts are reset after 30 days of no violations. The plugin runs a daily cleanup task to remove old data and prevent database bloat.
Does the lockout affect excluded users?
No, users in the exclusion list bypass all 2FA checks, including rate limiting and lockout mechanisms.
I use a legacy XML-RPC client. How do I keep it working?
As of version 1.2.1, AV 2FA blocks password-based XML-RPC authentication for any account that goes through 2FA, since XML-RPC cannot perform a second-factor check and would otherwise bypass 2FA entirely. This does not affect Jetpack, the WordPress mobile apps (which use Application Passwords), pingbacks, or any other XML-RPC features — only password-based authentication. You have two options:
- Recommended: Use Application Passwords instead. Go to your user profile, scroll to "Application Passwords", create one for your client, and use that in place of your account password. Application Passwords are not subject to this restriction.
- Legacy clients only: Add
define('AV_2FA_ALLOW_XMLRPC', true);to your wp-config.php to allow password-based XML-RPC site-wide. This re-opens the 2FA bypass and should only be used if option 1 is not possible.
更新日志:
- SECURITY: Hardened the login flow to prevent 2FA bypasses from third-party plugins.
- SECURITY: Rate-limited outgoing 2FA verification emails per user and per IP.
- SECURITY: Blocked XML-RPC password authentication for 2FA-protected accounts.
- SECURITY: Made failed-attempt counter atomic to prevent race conditions under concurrent attacks.
- TWEAK: Removed obsolete code and filters for cleaner 2FA state management.
- TWEAK: Explicitly blocked non-standard logins (AJAX/REST) that cannot support 2FA redirects.
- PERFORMANCE: Security log option is no longer autoloaded.
- PERFORMANCE: Reduced security log cap from 100 to 50 entries.
- TWEAK: Improved styling of notifications on the 2FA verification page.
- TWEAK: Confirmed compatibility with WordPress 7.0.
- TWEAK: Updated "Tested up to" to 7.0.
- FIX: Resolved a MySQL error in the daily cleanup routine that prevented expired failed-attempt records from being deleted.
- NEW: Custom Login URL feature - Hide your login page by setting a custom login slug, making wp-login.php return a 404 error.
- NEW: Support for defining custom login slug via wp-config.php constant for maximum security.
- NEW: Emergency recovery mechanism via AV_2FA_DISABLE_CUSTOM_LOGIN constant.
- NEW: Encrypted storage of custom login slug in database for enhanced security.
- NEW: Rate limiting - Prevents brute force attacks on 2FA codes with configurable max attempts.
- NEW: Account lockout - Temporarily locks accounts after multiple failed 2FA attempts.
- NEW: Progressive lockout - Automatically increases lockout duration for repeat violations (2x, 4x, 8x).
- NEW: IP-based rate limiting - Prevents distributed attacks from multiple IPs.
- NEW: Email notifications - Alerts users when their account has been locked.
- NEW: Admin unlock functionality - Manually unlock user accounts from the settings page.
- NEW: Security event logging - Tracks lockout and unlock events for audit purposes.
- NEW: Automatic cleanup - Daily cron job removes expired security data.
- TWEAK: Converted frontend JavaScript from jQuery to vanilla JS for better performance.
- TWEAK: Enhanced security with comprehensive attempt tracking and lockout mechanisms.
- FIX: Added missing nonce check to input calls.
- FIX: Resolved a critical bug that could lock users out by preventing the 2FA form from displaying.
- TWEAK: Refactored the entire plugin into a modern, object-oriented structure for better stability and maintenance.
- TWEAK: Added comprehensive inline and PHPDoc commenting to meet WordPress.org standards.
- Initial release.