Back In Stock Notifier for WooCommerce | WooCommerce Waitlist Pro
| 开发者 |
codewoogeek
propluginslab |
|---|---|
| 更新时间 | 2026年2月10日 00:08 |
| 捐献地址: | 去捐款 |
| PHP版本: | 7.4 及以上 |
| WordPress版本: | 6.9 |
| 版权: | GPL-3.0+ |
标签
下载
详情介绍:
安装:
- PHP version 7.4 or greater
- MySQL 5.6 or greater
- WooCommerce 3.0+
- WordPress 4.7+
屏幕截图:
常见问题:
Difference between this plugin and other similar plugins?
Actually, we sync and send the email to your subscribers in a background process, so server crashes or timeouts are ignored when using our plugin. This ensures a 99.99% success rate for sent emails.
How to import subscribers' data to my new site?
You can do this by using the native way of WordPress. Go to Admin Dashboard -> Tools -> Export -> Subscribers -> Download Export File (xml). Later, you can import that data into your new site by visiting Admin Dashboard -> Tools -> Import -> Upload Downloaded XML file and Finish Import. Now you've successfully migrated subscribers' data.
Something went wrong error upon subscription and how to get rid of such error?
Actually,
Something went wrong error upon subscription and how to get rid of such error?
Actually, We use one layer of security to our ajax request which is WP Nonce – but due to caching mechanism from third party plugins/hosting this security nonce also cached which cause this error "something went wrong, please try again after some time", some cases by setting up cache timeout in plugin settings reduce this kind of issue. How to get rid of this error? We added new techniques in version 2.0 to avoid the Something Went Wrong Error –If your site has encountered such issues, we suggest you try the below steps to get rid of the Something Went Wrong Error.
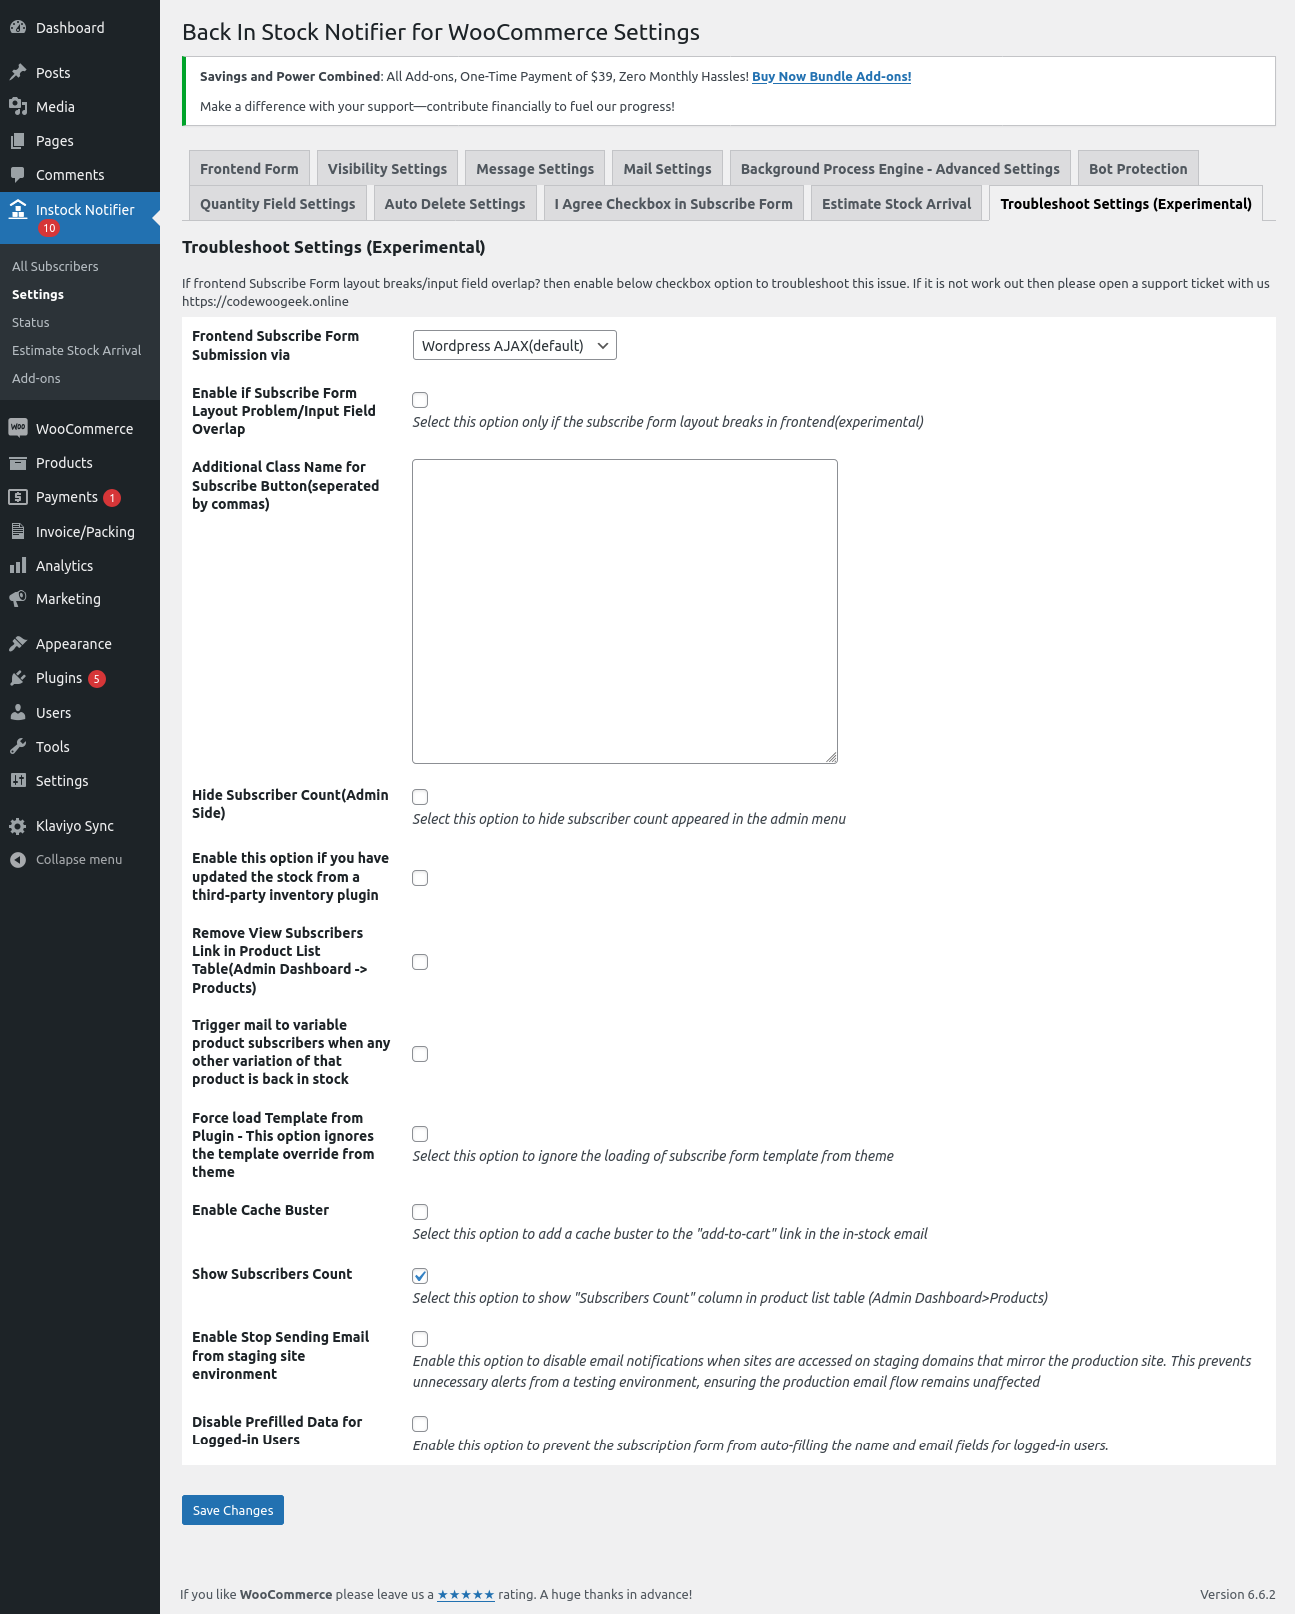
- Switch to the WordPress REST API Route: Go to Admin Dashboard -> Instock Notifier -> Settings -> Troubleshoot Settings Section -> Frontend Subscribe Form Submission via Oneis WordPress AJAX (default) and the other one is WordPress REST API Route. Try changing that option to "WordPress REST API Route" and checking it out (purge your cache and check it out).
- Google reCAPTCHA: Consider using Google reCAPTCHA v2 or v3. You will need a Site Key and a Secret Key for this. (Go to Admin Dashboard -> Instock Notifier -> Settings -> Bot Protection -> Bot Protection through -> Google reCAPTCHA -> 1. Enable Google reCAPTCHA in Subscribe Form : Enable 2. Select Google reCAPTCHA version -> v2/v3. Enter the Site Key and Secret Key corresponding to the selected version for proper operation.)
- Turnstile: Consider using Turnstile as an additional bot protection option. You will need a Site Key and a Secret Key for this. Go to Admin Dashboard -> Instock Notifier -> Settings -> Bot Protection -> Bot Protection through -> Turnstile -> Enable Turnstile in Subscribe Form (Enable) -> Turnstile Site Key -> Turnstile Secret Key.
How to override/create a custom template for the front-end subscribe form?
- Create a folder inside your current theme with the name "back-in-stock-notifier-for-woocommerce." For example: wordpress -> wp-content -> themes -> storefront/(your theme) -> back-in-stock-notifier-for-woocommerce.
- Go to our plugin folder, then inside, find the "templates" folder. (wordpress -> wp-content -> plugins -> back-in-stock-notifier-for-woocommerce -> templates -> default-form.php)
- Open the "templates" folder and copy the file with the name "default-form.php" from that folder.
- Now, paste the copied file inside your theme under the folder with the name "back-in-stock-notifier-for-woocommerce" (step 1).
- That's all. Now, you've successfully loaded the template from your theme, and you can edit it however you want.
I manage stock inventory in thirdparty inventory management will your plugin handle this?
Not all site owners manage stock within the website; some of them manage their stock through third-party inventory management. The problem with our plugin is that Automatic Instock Email is not triggered/detected because some third-party software directly updates the stock in the database. From v2.4, we methodologically implemented support for Third-party stock management to send our Automatic Instock Email. Do the following: Go to Admin Dashboard -> Instock Notifier -> Settings -> Troubleshoot Section -> Enable this option if you have updated the stock from a third-party inventory plugin. Enable that checkbox option and save changes. Now we check the product every five minutes to trigger our Automatic Instock Email when the stock status becomes "In Stock."
How can I manually check for subscribers' email?
Our plugin syncs with WordPress users who subscribe to our plugin. In some cases, an email id can be added without subscriptions (like cart abandonment, checkout page, etc.) by website owners. To check such emails, you can go to Admin Dashboard -> Users -> Add any data you want. For example, custom text.
What to do when a product is in stock but subscribers didn't get emails?
If your product is in stock and your subscribers didn't get emails, do the following:
- Go to Admin Dashboard -> Instock Notifier -> Settings.
- Go to the Troubleshoot Section.
- Set "Enable to send Instock Email after 'X' time when stock becomes Instock" to something like 5 minutes.
- Save Changes.
Does your plugin support REST API?
From Version 2.0, we added support for REST API, which allows you to create/update/get/delete subscribers. For this, you need Consumer Key and Consumer Secret.
How to generate Consumer key and Consumer Secret?
We designed our plugin to work on top of WooCommerce, so the credentials created from WooCommerce (consumer key and consumer secret) can also be used for our REST API Endpoint to perform different actions. Go to WooCommerce -> Advanced -> REST API -> Create Keys (with read/write permissions).
What endpoints are provided by your plugin?
We created documentation for the REST API, which you can check here https://documenter.getpostman.com/view/15423262/TzJrDfTe
How to contact your support?
You can contact us via the support Forum of WordPress or by creating a support ticket from our site https://propluginslab.com/
更新日志:
- Tweak: Added Sortable Columns for Mail Sent on and Required Quantity Columns in List Table
- Tweak: Tested with WooCommerce v10.5.0
- New: Delete Subscribers Cron Schedule can be customized in the Troubleshoot settings.
- New: Added custom From Name, From Email, and Reply-To Email settings
- Tweak: POT File updated
- New: Dashboard Report Widget enhanced
- Tweak: Added option to check variable level stock when "Trigger mail to variable product subscribers when any other variation of that product is back in stock" option enabled
- Tweak: Tested with WooCommerce v10.4.3
- Tweak: POT File updated
- Fix: Webhook not firing after queued status integration.
- Tweak: Code enhanced for variable product subscribers with transient set to 180 seconds.
- Tweak: Tested with WooCommerce v10.3.6
- Tweak: Tested with WordPress v6.9
- Fix: View Subscribers Count showing 0 in Product display
- Tweak: Removed unwanted code
- Tweak: Tested with WooCommerce v10.3.5
- Fix: Deprecated notice for jQuery BlockUI
- Tweak: Tested with WooCommerce v10.3.3
- Fix: Prevented custom post statuses from being injected into WooCommerce product queries, which previously caused SQL errors in MariaDB
- Tweak: Tested with WooCommerce v10.3.0
- Tweak: Tested with WordPress v6.8.3
- Fix: Egulias EmailValidator library PHP Dependency.
- New: Added email validation using the Egulias EmailValidator library.
- Syntax validation (RFC compliance)
- DNS-level validation (MX/A record check)
- Tweak: Improved security and reliability of email input handling.
- Tweak: Removed unused JavaScript files.
- Tweak: Tested up to WooCommerce v10.2.1.
- Tweak: Updated POT file.
- Fix: Invalid Email Address not displayed
- Tweak: Priority set to 999 for the upgrader_process_complete hook
- Tweak: Added Checkbox option to Turn Auto Purge Cache for W3Total Cache when Product Stock Status Change in Troubleshoot Settings
- Tweak: POT file updated.
- New: Built-in support to automatically purge the corresponding product cache in W3 Total Cache when stock status changes.
- Tweak: Third-party cron recurrence is now customizable.
- Tweak: POT file updated.
- Tweak: Added e.stopPropagation() in the subscribe button click handler to prevent event bubbling into the WooCommerce cart form.
- Tweak: URL updated
- Tweak: Tested upto WooCommerce v10.1.0
- Tweak: Added logging for deleted subscription entries.
- Fix: Resolved issue where REST API status updates triggered subscription success emails for all statuses.
- Fix: Fatal error related to Bulk Variations Grid compatibility
- Tweak: Displayed "Product Deleted" info in list table instead of leaving it blank
- Tweak: Enhanced dashboard report
- Tweak: Updated POT file
- New: Added "Delete Subscribers Data" option on the Status page with confirmation prompt
- Tweak: Removed unwanted HTML tags in Dashboard Widget report
- Tweak: Updated POT file
- Fix: "Subscribe" button remained disabled when bot protection was turned off
- Tweak: Added fallback option when Turnstile fails to load implicitly
- Fix: Issue with "Keep Subscribed" status option when using the new "Queued" status
- Fix: Conflict between Turnstile and Contact Form 7 Turnstile Integration
- Tweak: Compatibility tested with WooCommerce 10.0.0
- New: Added Queued status
- New: Reports Dashboard Widget
- Tweak: Map variable product name when the option "Trigger mail to variable product subscribers when any other variation of that product is back in stock" is enabled
- Tweak: Enhanced status color code
- Tweak: Tested with WooCommerce 9.9.5
- Tweak: POT File updated
- New : Hide Subscribe Form on Free or Zero Price Out of Stock Products
- Tweak: JS variable appended with proper prefix
- Tweak: Required Quantity Shortcode {cwginstock_quantity} added for Email
- Tweak: Translation missing for reCAPTCHA copyright notice
- Tweak: Tested with WooCommerce 9.9.4
- Tweak: Tested with WordPress 6.8.1
- Tweak: POT File updated
- Fix: Turnstile Secret Key localized to the JS variable
- Fix : Google reCAPTCHA breaks with v5.8.0
- Tweak : Phone library updated and code enhanced
- New : {total_subscribers} count to display in Frontend Subscribe Form using Estimate Stock Arrival Settings
- Tweak: Code enhanced as per WordPress Coding Standards - Plugin Check (PCP) by WordPress
- Tweak: Removed WooCommerce Waitlist Pro from Plugin Name due to Copyright Notice by Plugin Check (PCP)
- Tweak: Tested with WooCommerce 9.7.0
- Tweak: POT File updated
- Tweak : Optimized Subscribers Count Display in Admin Menu
- Tweak : Tested with WooCommerce 9.6.1
- Tweak : Tested with WordPress 6.7.2
- Tweak : Enhanced code to increase ajax variation threshold
- Tweak : Tested with WooCommerce 9.6.0
- Tweak : POT File updated
- New : Compatibility with the Plugin "WooCommerce Bulk Variations by Barn2Plugins"
- New : Added a new setting "Trash Subscribers upon Product Deletion"
- Tweak : Tested with WooCommerce 9.5.2
- New : Compatibility with the Plugin "PVT - Product Variation Table for WooCommerce"
- Fix : Depreceted error:CWG_Detection\MobileDetect::__construct(): Implicitly marking parameter $headers as nullable is deprecated, the explicit nullable
- Tweak : Improved the test email functionality on the Status Page by integrating the as_schedule_single_action event to verify the proper functionality of scheduled actions, particularly for automatic emails
- Tweak : Tested with WooCommerce 9.5.1
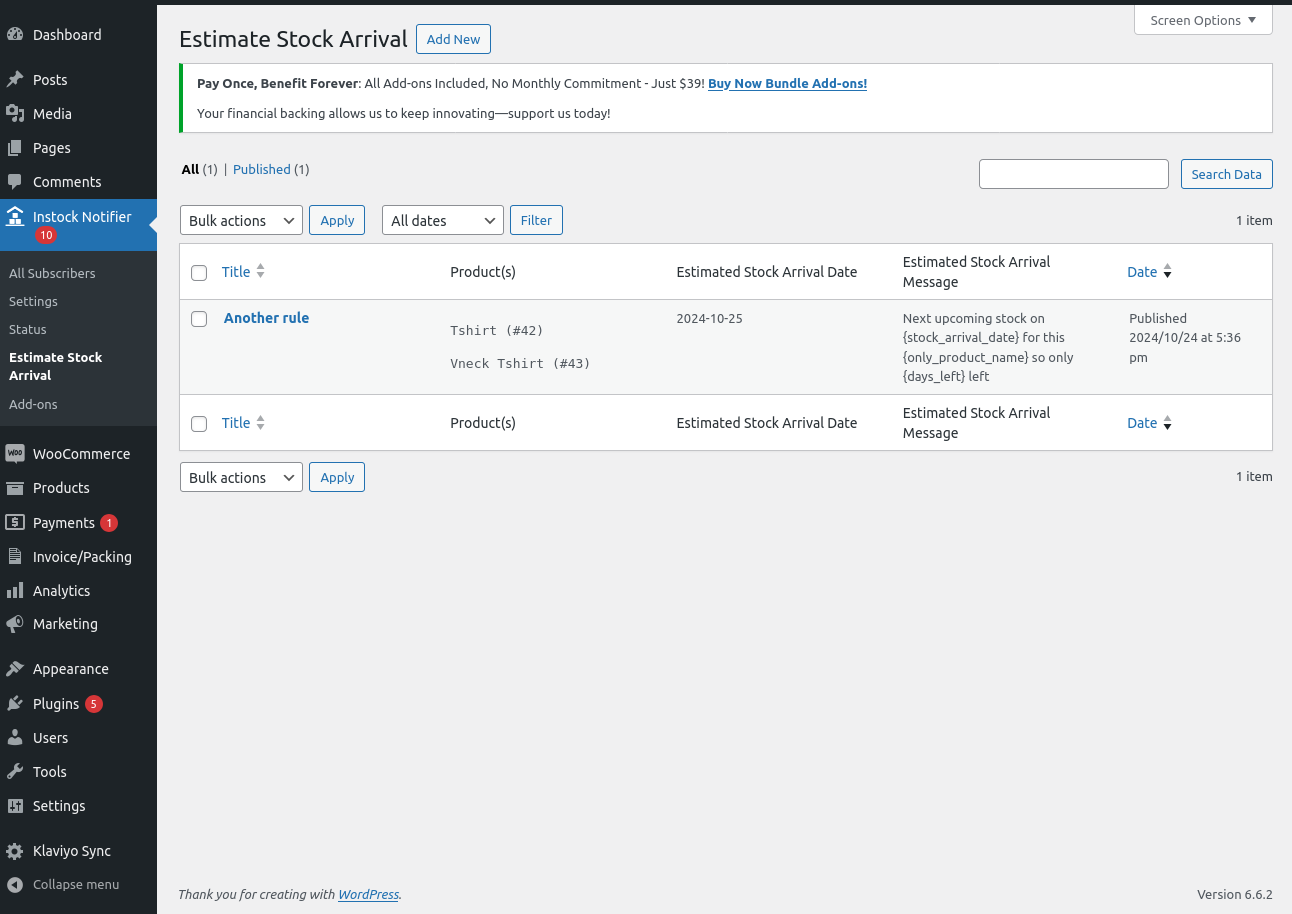
- Fix : Product titles extend into other columns when they are too long in the 'Product(s)' column under the Instock Notifier > Estimate Stock Arrival > Estimate Stock Arrival List table
- Tweak : Enhanced Mobile view for "All Subscribers" List table
- Tweak : Added the display of the 'Backorder' status in the 'Current Stock Status' of the product in the Product column (Admin Dashboard > Instock Notifier > All Subscribers > Subscribers List Table > 'Product' column > Current Stock Status)
- Tweak : Repositioned the 'Copy Subscription Mail Subject' and 'Copy Subscription Mail Message' options next to the 'Enter Email Ids separated by commas that you want to receive subscription copy mail' in the 'Mail Settings' section
- Fix : Estimated stock arrival remaining days are displayed as negative when the stock date is earlier than the current date
- Tweak : Tested with WooCommerce 9.4.3
- Tweak : Tested with WordPress 6.7.1
- Fix : Code enhanced to display the button only on the JetProduct table
- Fix : An error of type E_ERROR due to JetProductTables Plugin Compatibility
- Fix : Duplicate emails to the variable product subscribers when restock variations
- New : JetProductTables Compatibility
- Fix : Duplicate emails to the variable product subscribers when restock variations
- Fix : Create variations triggers instock email
- Fix : Added clear scheduled event "cwg_schedule_third_party_support" upon plugin deactivation
- Tweak : Tested with WooCommerce 9.4.1
- Tweak : Minimum version of PHP is 7.4
- Tweak : Renamed the option "Enable Stop Sending Email from staging site environment" to "Disable sending emails on staging environments" in the "Troubleshoot Settings (Experimental)" settings section
- Tweak : Added a confirmation alert when clicking the "Send Instock Mail" in the "Subscribers" List table (Admin Dashboard > Instock Notifier > All Subscribers)
- Tweak : Enhanced email masking in the log file
- New : Register Deactivation Hook to clear scheduled events
- Tweak : Code Enhanced
- Tweak : Tested with WordPress 6.7
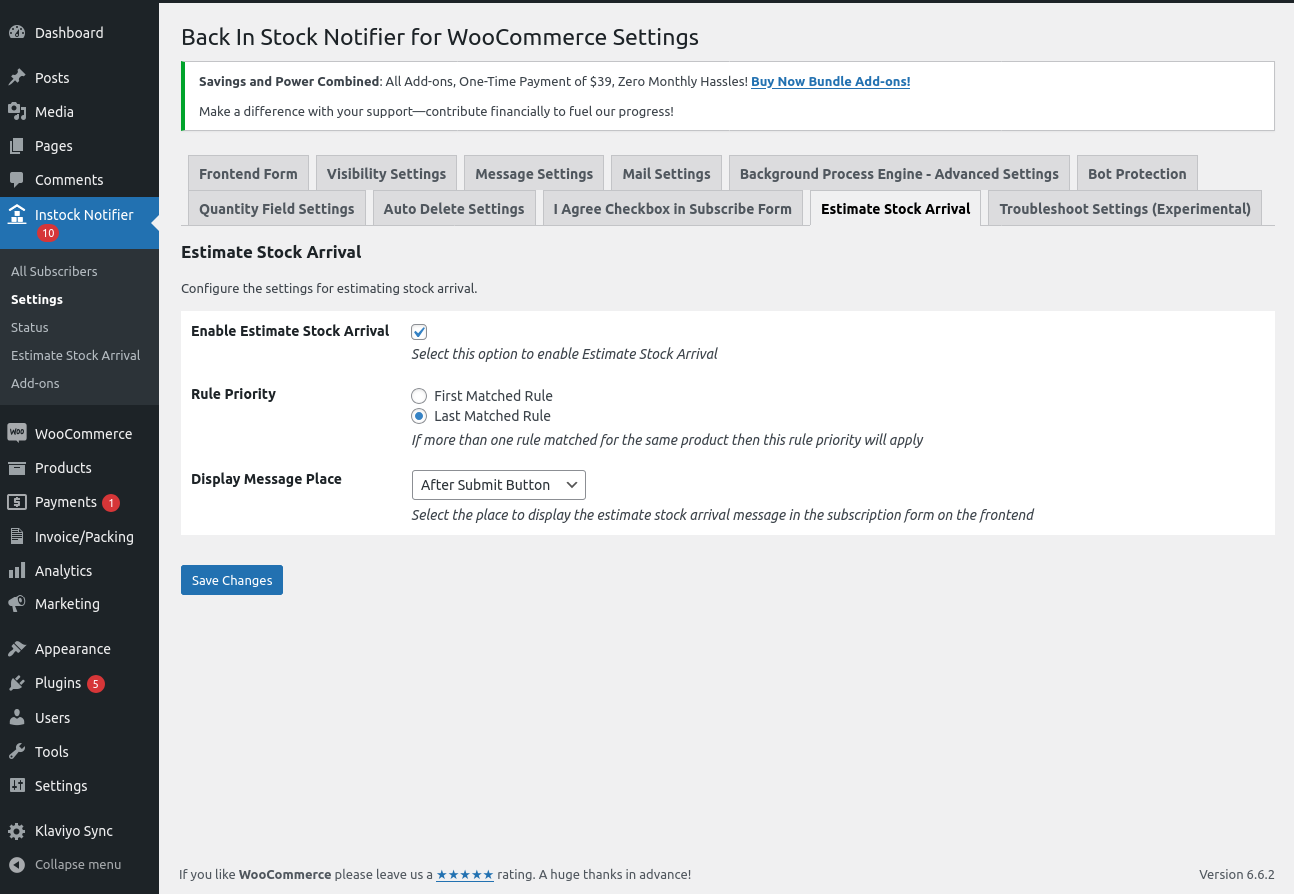
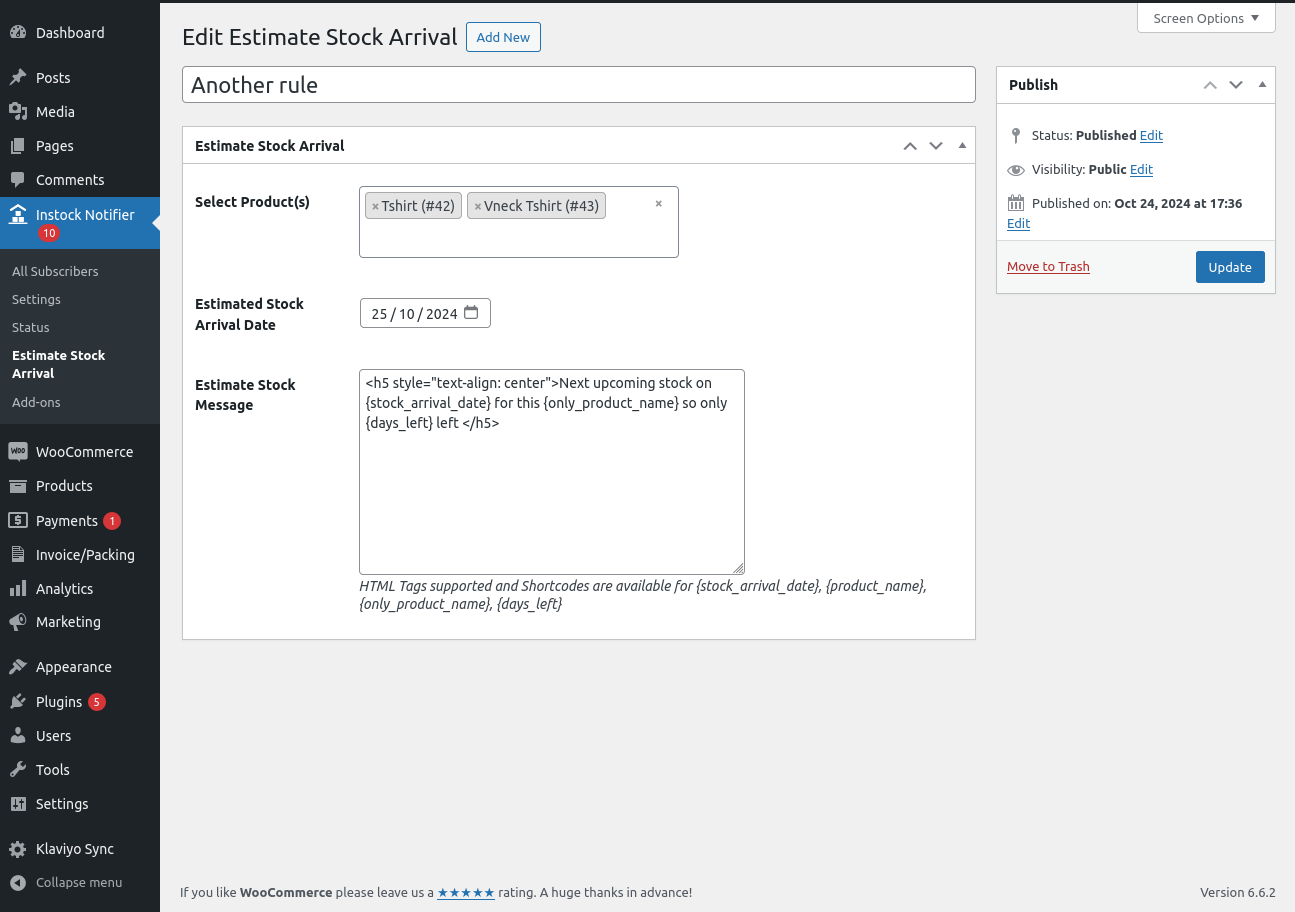
- New : Added a new setting "Estimate Stock Arrival"
- New : Added a new setting "Disable Prefilled Data for Logged-in Users"
- Tweak : Keep Subscribed Status option info in Status Page
- Tweak : Requires Plugins WooCommerce added
- Tweak : POT File Updated
- New : Added a new setting "Enable Stop Sending Email from staging site environment"
- Tweak : Added support for HTML/Markdown in the "Hide Subscribe Form for Guests message" option.
- Tweak : Tested with WooCommerce 9.3.3
- New : Added a new setting "Hide Subscribe Form for Guests message"
- Tweak : Added dynamic class wrapper for subscriber form
- Tweak : POT File updated
- Tweak : Tested with WooCommerce 9.3.2
- Tweak: Tested with WordPress 6.6.2
- Tweak : Updated Webhook payload (only_product_name, product_link , product_image)
- Tweak : Tested with WooCommerce 9.2.3
- Tweak : Tested with WooCommerce 9.2.1
- Fix: Fatal error – Cannot access offset of type string on string in the file "class-copy-mailer.php"
- Tweak: Tested with WooCommerce 9.1.4
- Tweak: Tested with WordPress 6.6.1
- New: Added a new setting "Keep Subscription Entry to Subscribed Status even Instock Email Sent (Unless it is Unsubscribed)".
- Tweak:Tested with WooCommerce 8.9.1
- Fix: Vulnerability Unauthenticated Arbitrary Shortcode Execution reported by WordFence
- Tweak: Tested with WooCommerce 8.8.3
- Fix: Critical error on access Bot Protection Section in Default UI Settings
- Tweak: POT file updated
- New: Added New Bot Protection Settings and moved Google reCAPTCHA under Bot Protection
- New: Added Cloudflare Turnstile Captcha(Supported Visible Captcha)
- New: Added {subscriber_firstname} and {subscriber_lastname} shortcode in Mail Settings
- Tweak: POT file updated
- Tweak: Tested with WooCommerce 8.7.0
- Tweak: Tested with WordPress 6.5
- New: Added new webhook topic "Subscriber upon Mailsent Status (Back In Stock)"
- Tweak: Enhanced subscriber name retrieval
- New: Display "Current Stock Status" of the product in the Product column (Admin Dashboard > Instock Notifier > All Subscribers > Subscribers List Table > "Product" column > Current Stock Status)
- New: Display the "Available Quantity" of the product in the Product column if it is in stock and managed by quantity (Admin Dashboard > Instock Notifier > All Subscribers > Subscribers List Table > "Product" column > Available Quantity).
- New: Added Slovak translation files(Thanks to Vlado Laco)
- Tweak: Modified "Quantity" column to "Required Quantity"
- Tweak: Tested with WooCommerce 8.6.1
- Fix: PHP Deprecated: str_contains(): Passing null to parameter #1 ($haystack) of type string is deprecated
- Fix: PHP Deprecated: Creation of dynamic property CWG_Instock_Mail::$get_message is deprecated
- Tweak: Updated REST API support for fields 'subscriber_phone' and 'custom_quantity' in subscriber endpoints
- Tweak: Updated Webhook support for fields 'subscriber_phone' and 'quantity'
- Tweak: Updated minimum PHP version requirement to 7.0 or greater
- Tweak: Tested with WooCommerce 8.5.2 and WordPress 6.4.3
- New: Show Subscribers Count for Product List Table option added in Troubleshoot Settings
- New: WooCommerce Composite Products Compatibility(From WooCommerce)
- Fix: In Log file email not masking properly when email contain .(dot)
- Fix: Instock Emails trigger in Ascending Order
- Tweak: Revoked display of subscribers count column in product list table(It can be enable it in Troubleshoot settings)
- Tweak: Code Enhanced
- Tweak: POT File Updated
- Tweak: Tested with WooCommerce 8.3.0 See changelog for all versions.

