
Contact Form 7 to Robly
| 开发者 | macbookandrew |
|---|---|
| 更新时间 | 2018年12月30日 03:38 |
| 捐献地址: | 去捐款 |
| PHP版本: | 4.3 及以上 |
| WordPress版本: | 4.8.2 |
| 版权: | GPLv2 or later |
| 版权网址: | 版权信息 |
详情介绍:
Robly is a paid email marketing service provider that helps you send emails to large numbers of people at once and allows contacts to be in multiple lists for targeted marketing purposes. Using Robly’s API, this plugin adds Contact Form 7 submissions to one or more Robly lists, including custom fields.
This plugin requires an active Robly account as well as Contact Form 7. You’ll also need to contact Robly support to get an API ID and key for your account.
安装:
- Upload this folder to the
/wp-content/plugins/directory or install from the Plugins menu in WordPress. - Activate the plugin through the Plugins menu in WordPress.
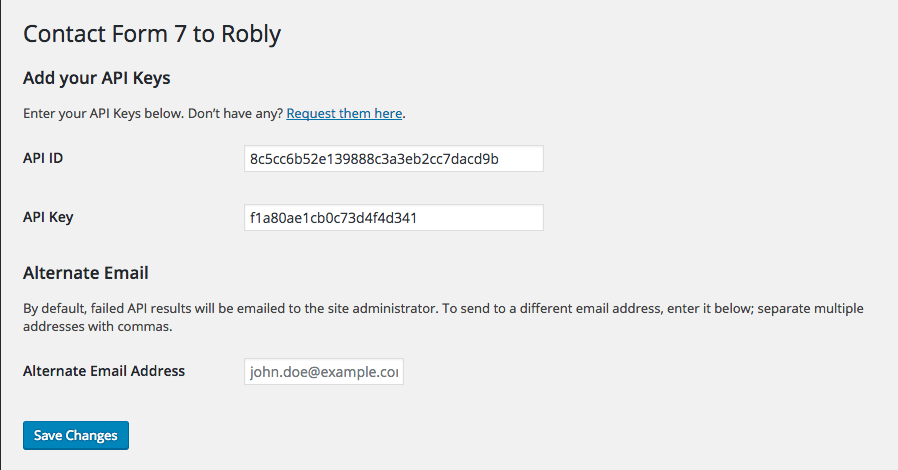
- Go to Settings > CF7 to Robly in WordPress, enter your Robly API ID and key, and save the settings.
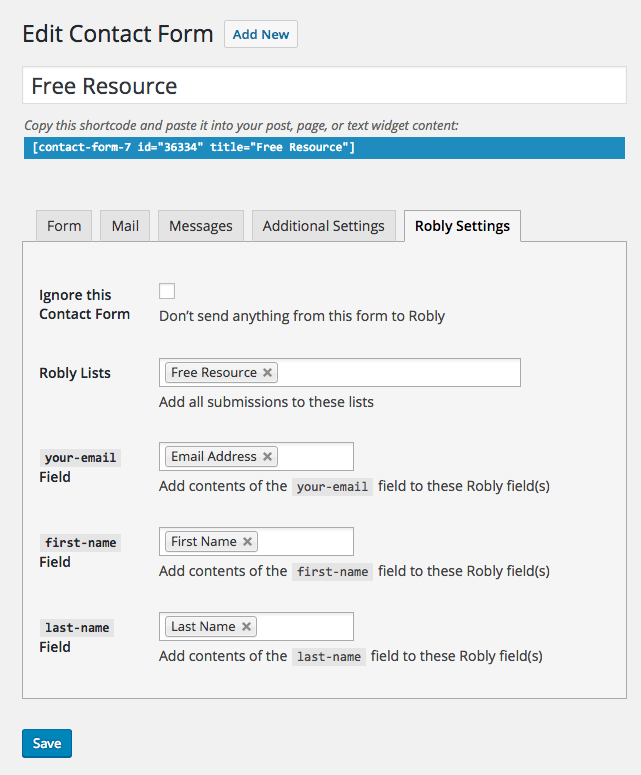
- On each of your Contact Form 7 forms, go to the “Robly Settings” tab and specify the list(s) you would like to add submissions to, as well as specifying the form fields and Robly data fields. Save the contact form.
- If you need advanced list handling (adding contacts to specific lists based on which checkboxes are active, etc.):
- Add a hidden field named
robly_lists:[hidden robly-lists] - Get the ID numbers of the appropriate lists from Robly: go to lists summary and click on a list. The URL will have a
valueparamater with the ID field you need (example: https://app.robly.com/email/contacts?lookup_type=sub_list&value=11111) - Use Javascript on the frontend to watch for changes and dynamically set the
robly_listsfield value to a comma-separated list of the Robly list IDs - For an example, look in the plugin folder at js/advanced-checkboxes.js
屏幕截图:
常见问题:
What is Robly?
Robly is a paid email marketing service provider that helps you send emails to large numbers of people at once.
What do I need to use this plugin?
This plugin requires an active Robly account as well as Contact Form 7. You’ll also need to contact Robly support to get an API ID and key for your account.
API-what?
API stands for “Application Programming Interface,” which basically means computer code that is able to talk to other computer systems and get or send information. Most API providers require an API key of some sort (similar to a username and password) to ensure that only authorized people are able to use their services.
What info is sent or received?
- When you install the plugin and enter your API ID and key, your WordPress site will contact the Robly API, asking for all the lists you have set up in your account. You are then able to choose certain lists to which contact form submissions are added, and those choices are saved in your WordPress options.
- When somebody submits a contact form, WordPress will contact the Robly API and search for that email address in your Robly account. If found, it will update their information according to the settings you specified; otherwise, it will create a new contact with the contact information and add them to the list(s) you selected.
I have a hard-coded HTML field and it doesn’t show up in the list of fields; what do I do?
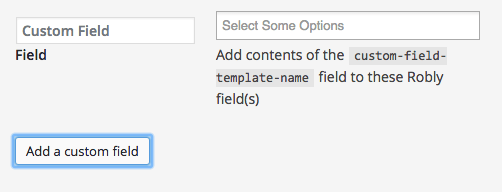
- Click the “Add a custom field” button at the bottom of the Robly settings section.
- In the “Custom Field Name” field, enter the
nameattribute of your custom field. - Choose the Robly field(s) for the custom field and save the contact form.
更新日志:
1.2.5
- Update documentation
- Fix a bunch of PHP undefined index issues for new installations
- Fix issue preventing form submission if no sublists are set for that form
- Update readme
- Fix some sublist and field caching issues if credentials not set on first run
- Add support for custom fields
- Fix some array bugs
- Ignore more field types that don’t make sense for Robly data fields
- Major upgrade
- Add individual form and field settings to capture all data
- Add option to ignore a form
- Check for email address in submitted data
- Improve debugging
- Add GitHub Plugin Updater URL
- Initial plugin