
Chill Survey Lite
| 开发者 | simonelogicimage |
|---|---|
| 更新时间 | 2018年7月25日 21:40 |
| PHP版本: | 5.2.4 及以上 |
| WordPress版本: | 4.9.7 |
| 版权: | GPLv2 or later |
| 版权网址: | 版权信息 |
详情介绍:
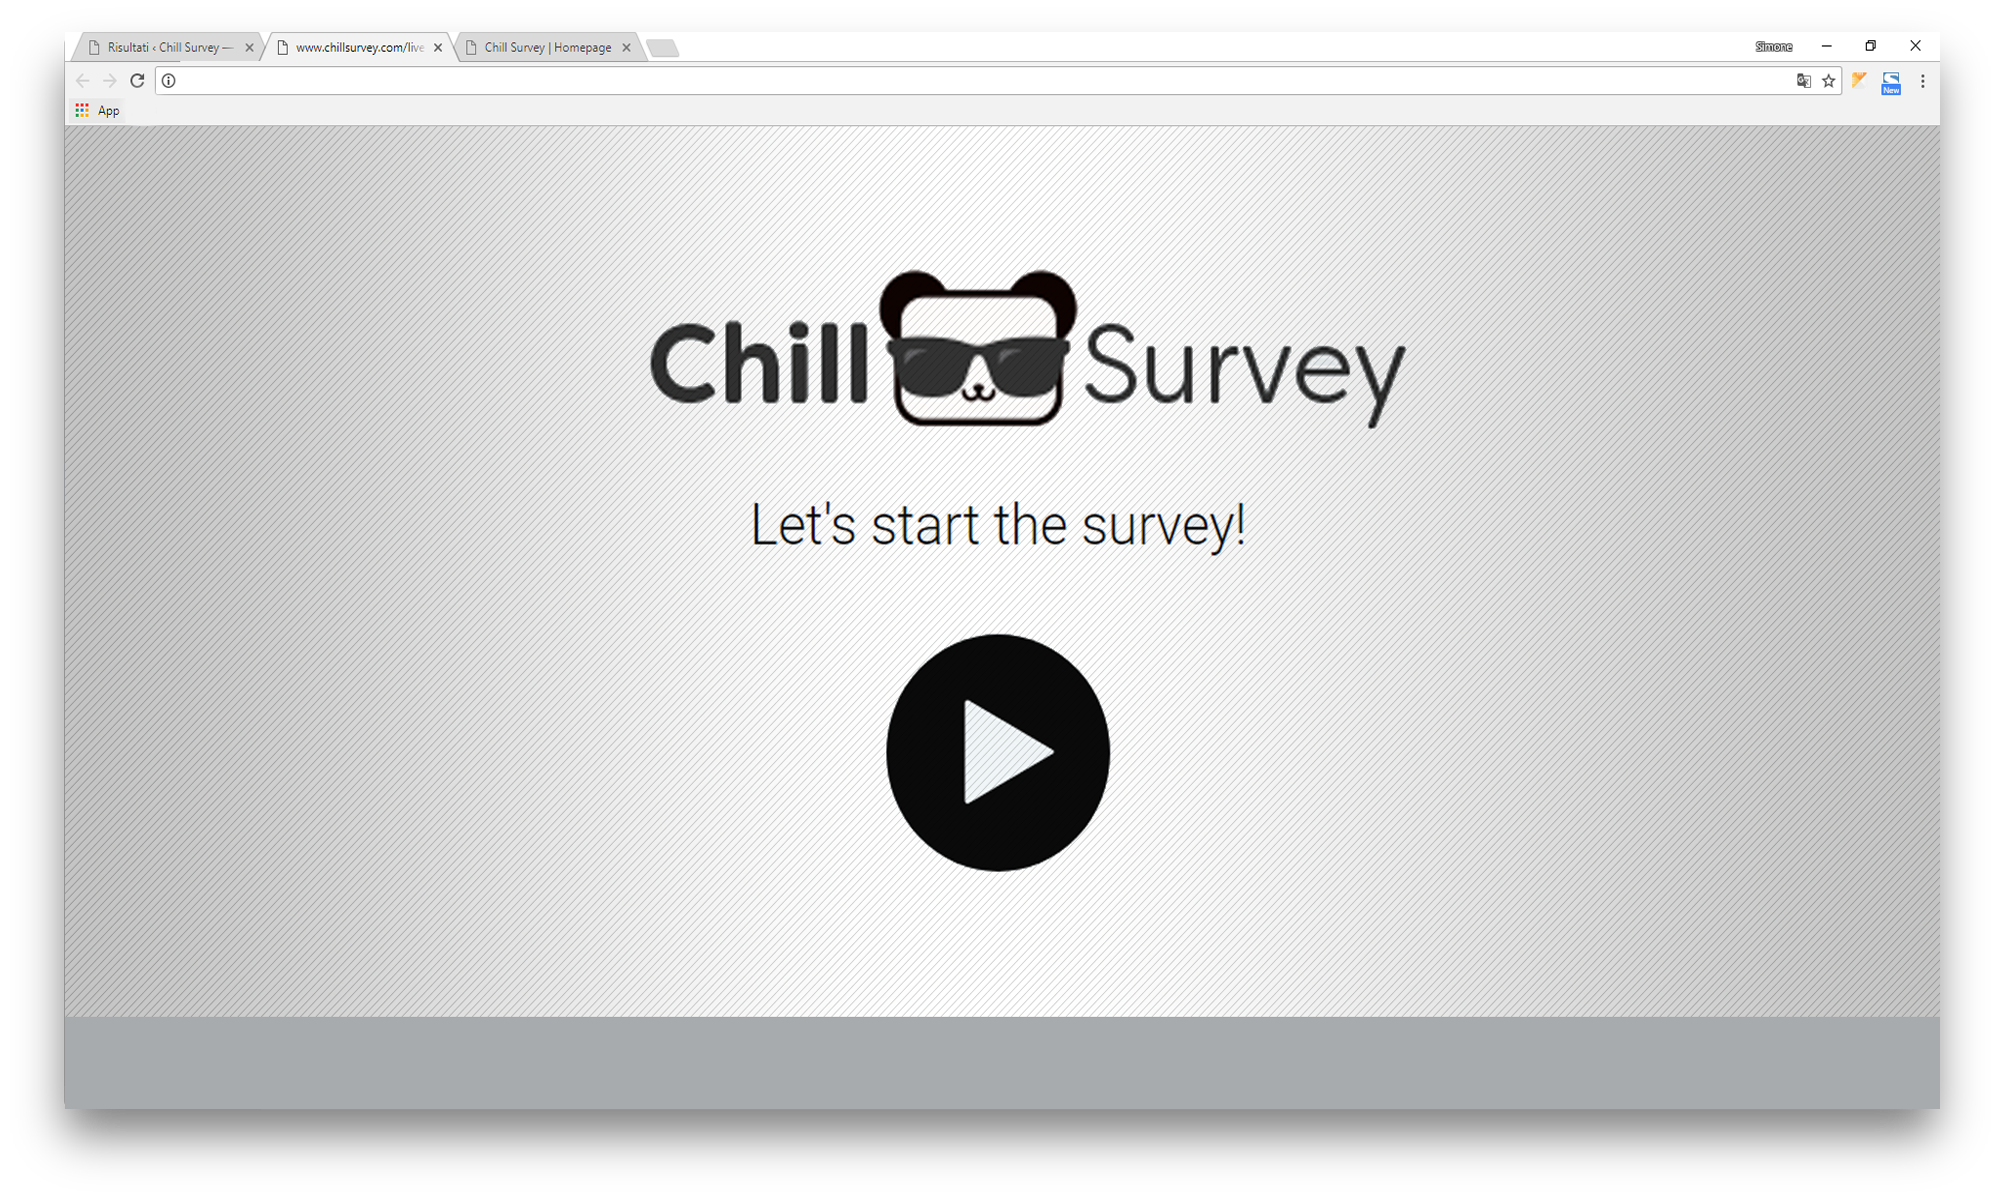
The coolest solution to create online surveys, customer satisfaction interviews (csi) and sentiment analytics.
You can easily create questions and analyze the users responses. The responses will be completely anonymous.
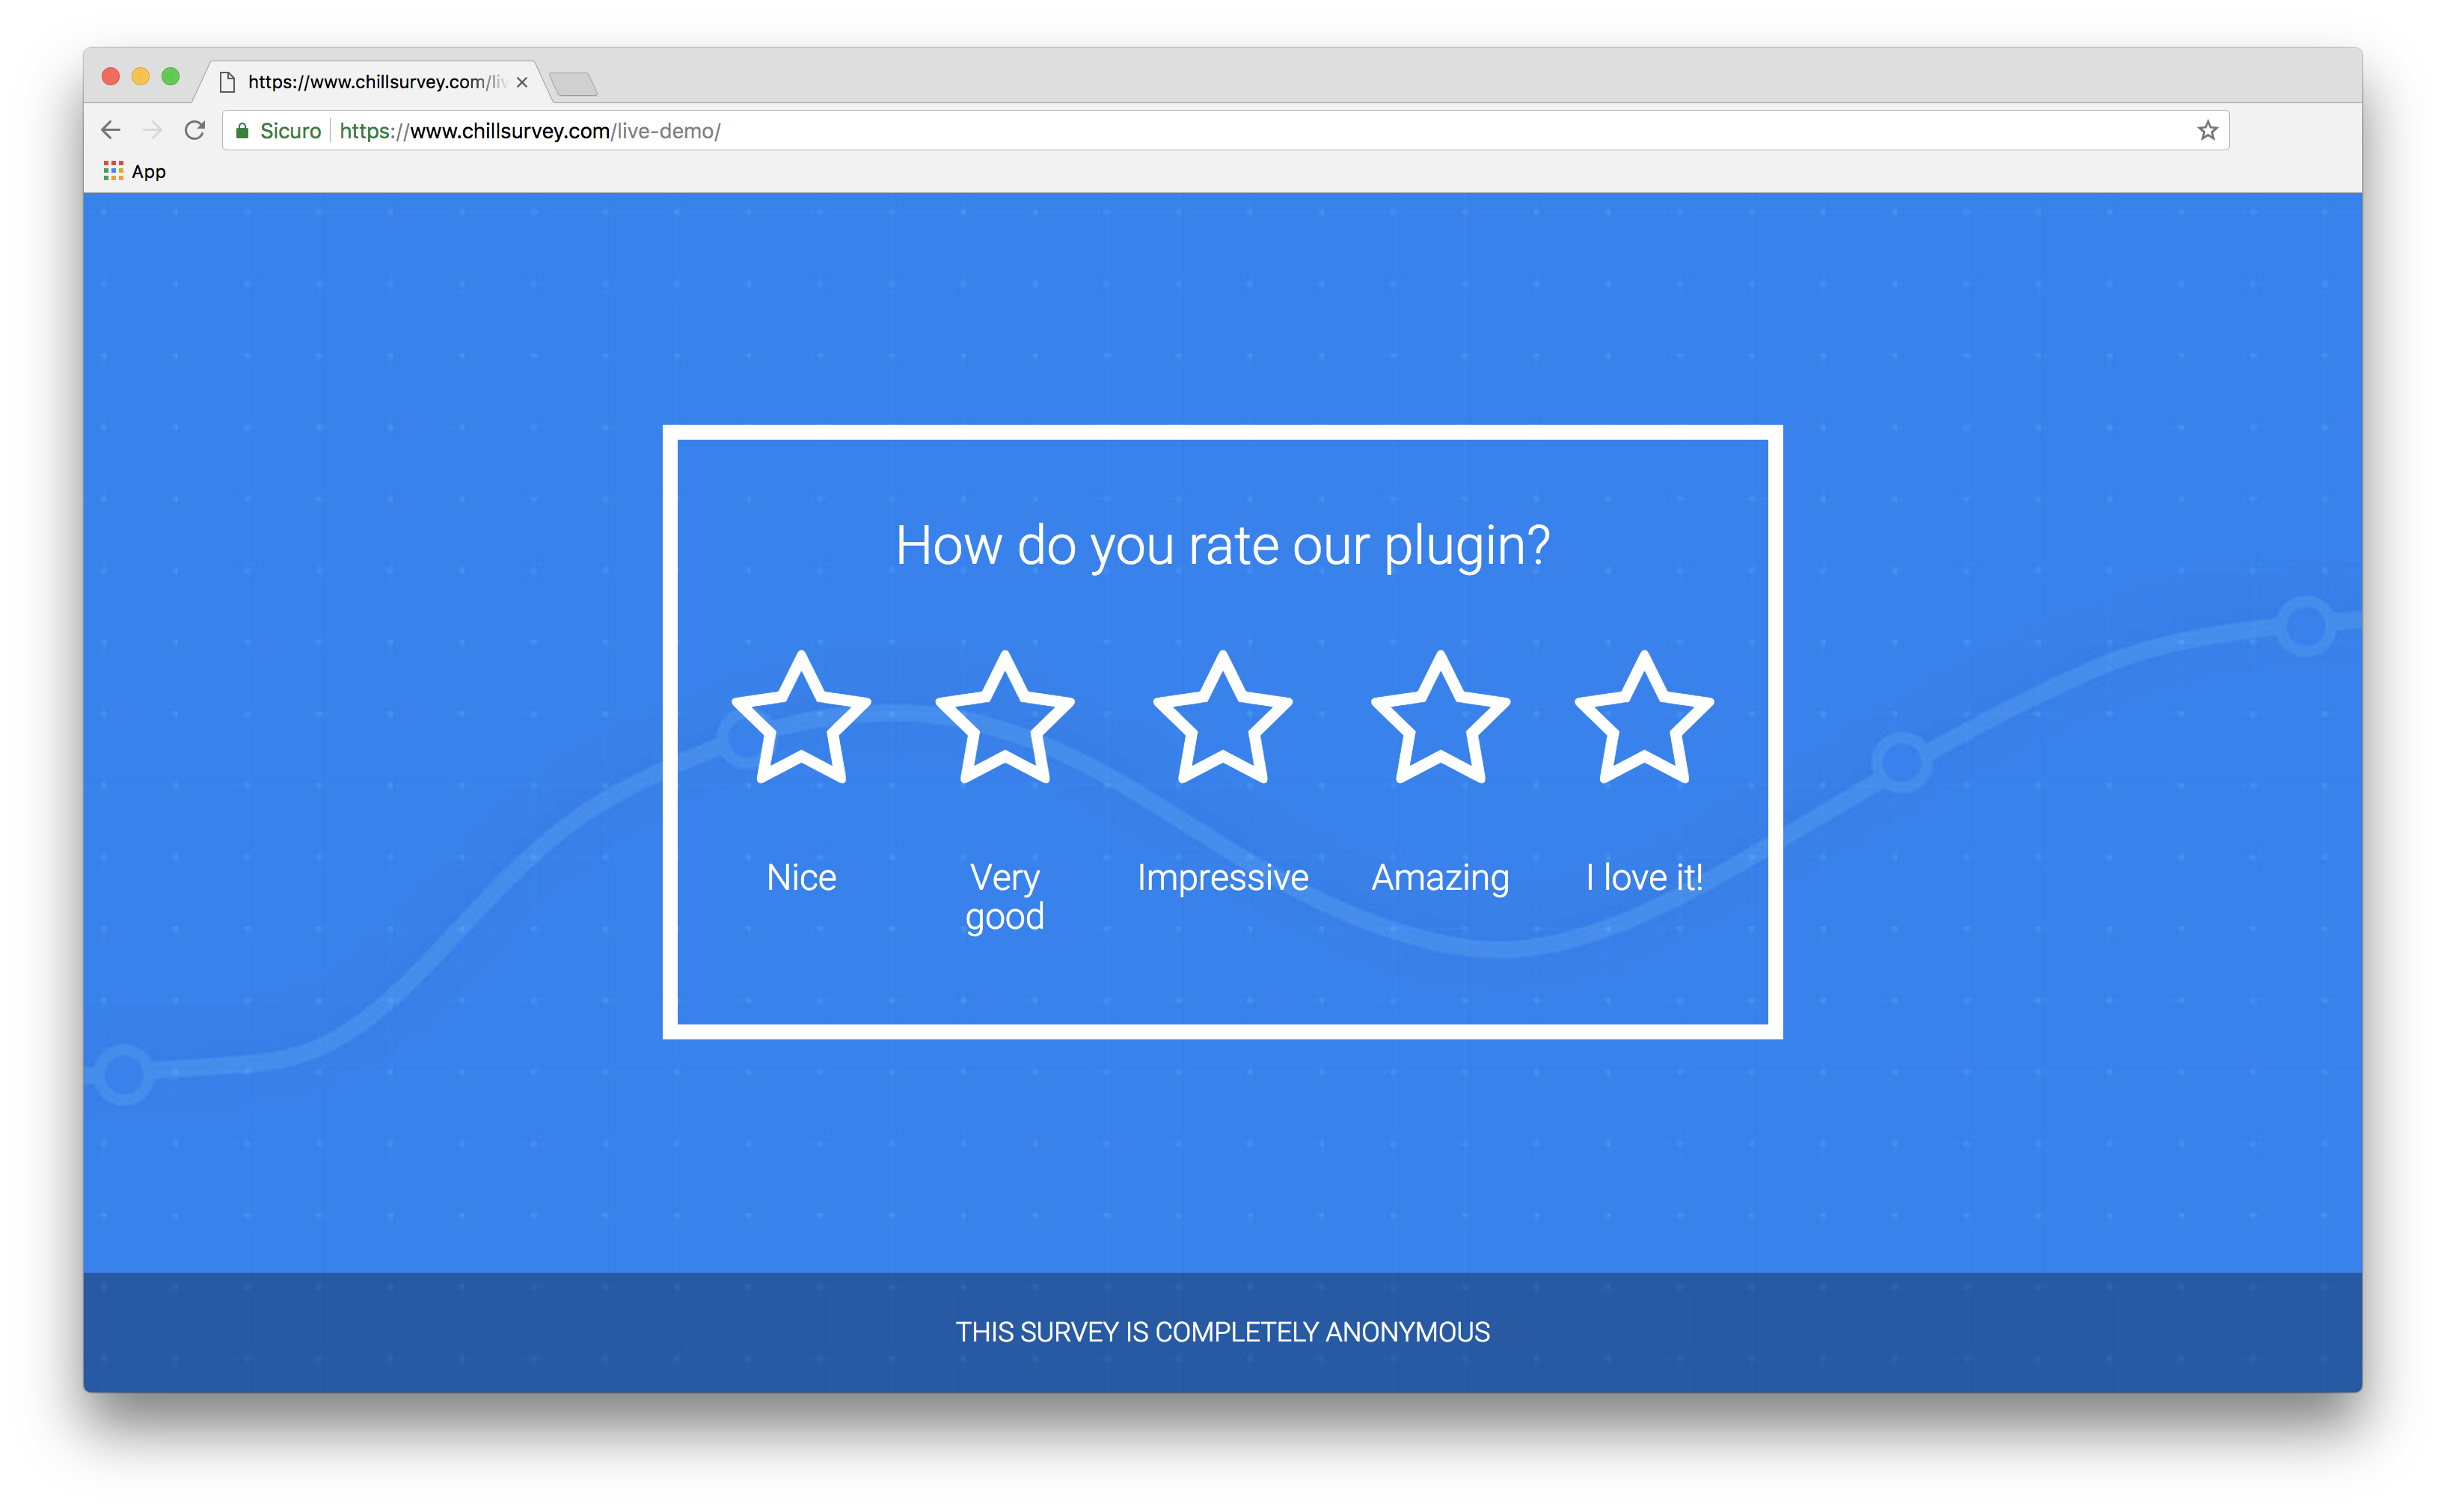
In the free version you can choose only the rate question's type which give to the users the opportunity to make a choise between 1 and 5 stars to answer your question.
Please read the documentation before using the plugin.
安装:
- Click on install
- Activate the plugin through the \'Plugins\' menu in WordPress
- Manage settings from Chillsurvey by the Wordpress menu
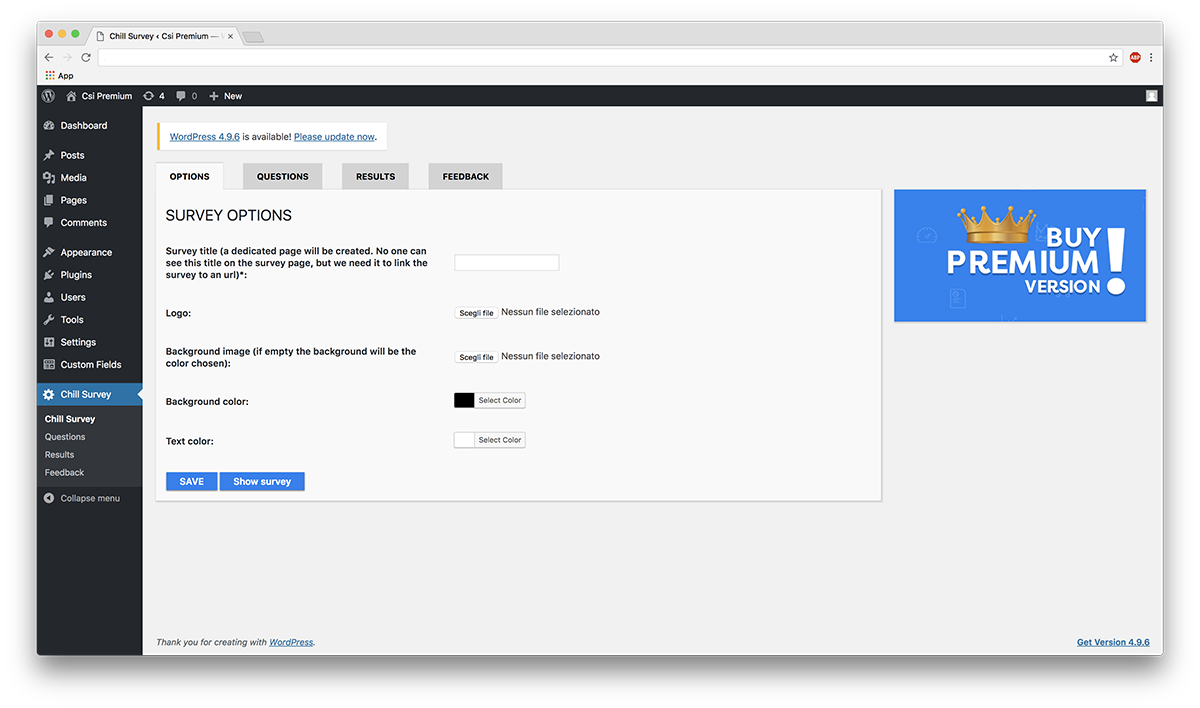
- SURVEY CREATION Click first on CHILLSURVEY on the sidebar, then on the tab OPTION. Insert the name of the new survey you are going to create (mandatory) and set the other elements (optional): logo, background image, background color, text color. IMPORTANT: in the LITE version you can create only 1 survey, if you need to create multiple surveys you need to purchase the Premium version of the plugin from here.
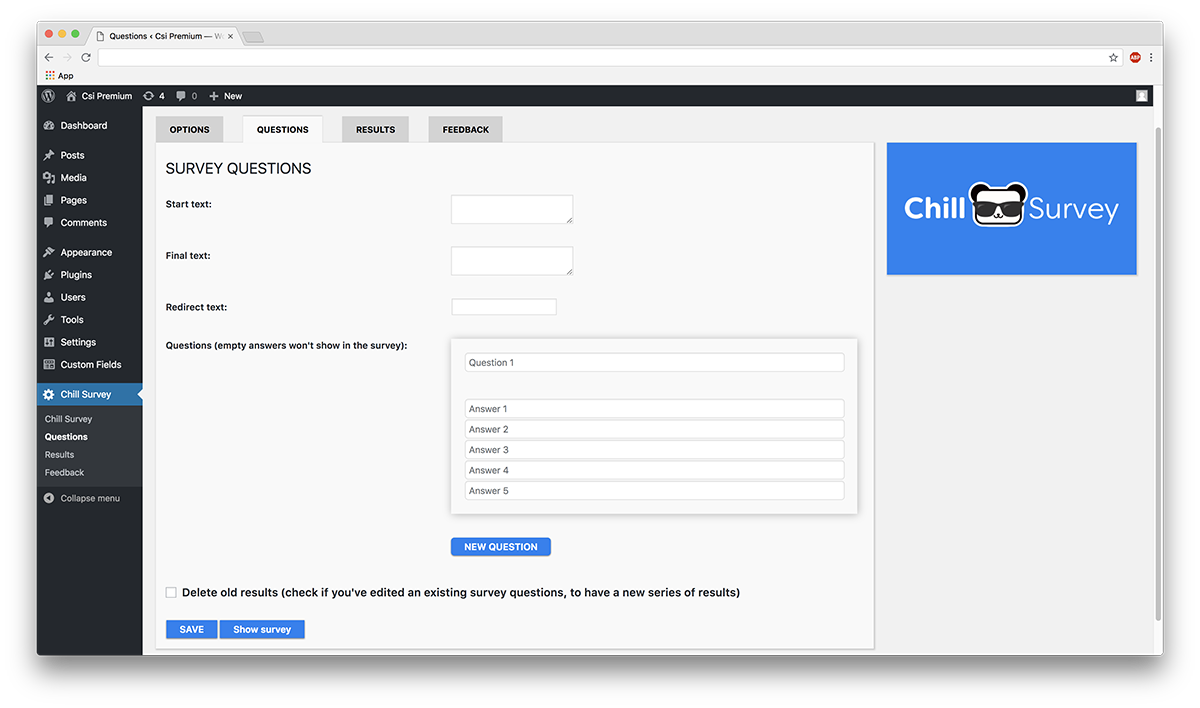
- QUESTION TYPES In the LITE version you have only 1 type of questions to choose from, the RATING one: the classic rating stars will be shown to answer the question (min 1, max 5 stars). If you need to choose from other kind of questions for your surveys (single/multiple option, yes or no and essay question) you need to purchase the Premium version of the plugin from here. Click on the tab QUESTIONS then insert: The start text that will be shown to the user before starting the survey The final text that will be shown to the user once the survey will be completed The redirect text, shown below the final text to indicate that the survey has been saved correctly and soon it will be possible to take a new one.
- ADD NEW QUESTION To add questions to your survey, you need to click on the button NEW QUESTION after the existing questions. A new box will be created after the existing one. You can add max 5 questions with max 5 answers for each one.
- DELETE A QUESTION To delete a question you have to click on the DELETE button, then click on SAVE button on the bottom of the page. IMPORTANT: Once you have deleted the question, to avoid false results you probably need to delete also the survey results you have obtained by now, by clicking the option near the SAVE button.
- VIEW AND EDIT THE SURVEY Go to the \"Questions\" section and click on SHOW SURVEY button on the bottom of the page to view the survey, or go to the WordPress menu on PAGES and view the page of the survey created. You can edit the element of the survey in every moment. IMPORTANT: Once you have edited some part of the questions, to avoid false results you probably need to delete also the survey results you have obtained by now, clicking the option near the SAVE button.
- RESULTS To see the results of your surveys you can click on the RESULTS sub-voice on the menu in the sidebar, then you have to choose the name of the survey of interest. Results could be filtered by date using the specific selectors, choosing a starting date and a finish date. Then click on FILTER. If you don\'t choose any filter, all the results will be shown. The results are ordered by default from the most recent to the oldest. Results could be reset by clicking on the trash icon in the RESULTS section.
- FEEDBACK From the feedback panel it is possible to ask for an implementation or report a problem encountered. Moreover, you can leave a plugin evaluation.
屏幕截图:
更新日志:
1.0
First release