
CodingCush Login Guard
| 开发者 | codingcush |
|---|---|
| 更新时间 | 2026年11月16日 00:34 |
| PHP版本: | 7.4 及以上 |
| WordPress版本: | 7.1 |
| 版权: | GPLv2 or later |
| 版权网址: | 版权信息 |
详情介绍:
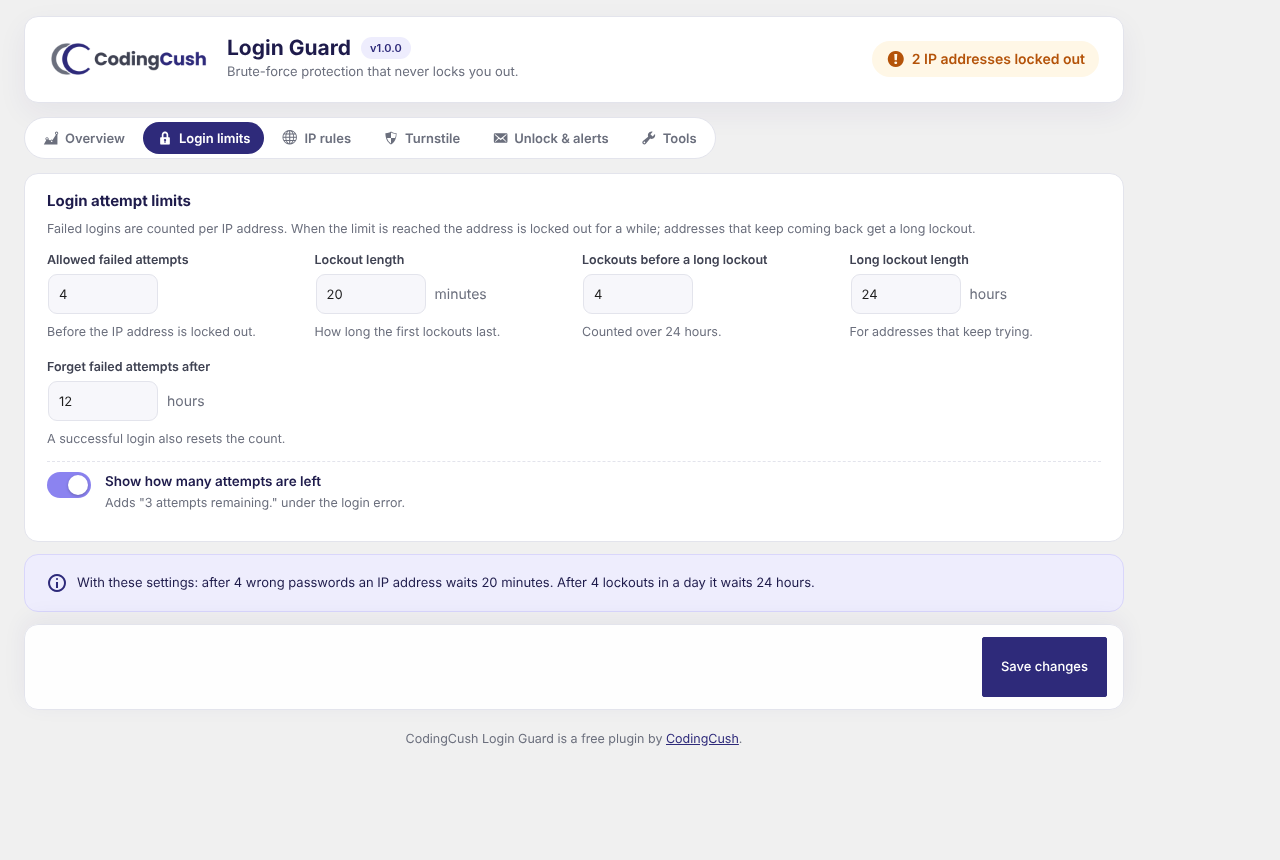
- Login attempt limits – choose how many failed attempts are allowed, how long a lockout lasts, and when repeat offenders get a long lockout.
- Attempts remaining – optionally show "2 attempts remaining." under the login error.
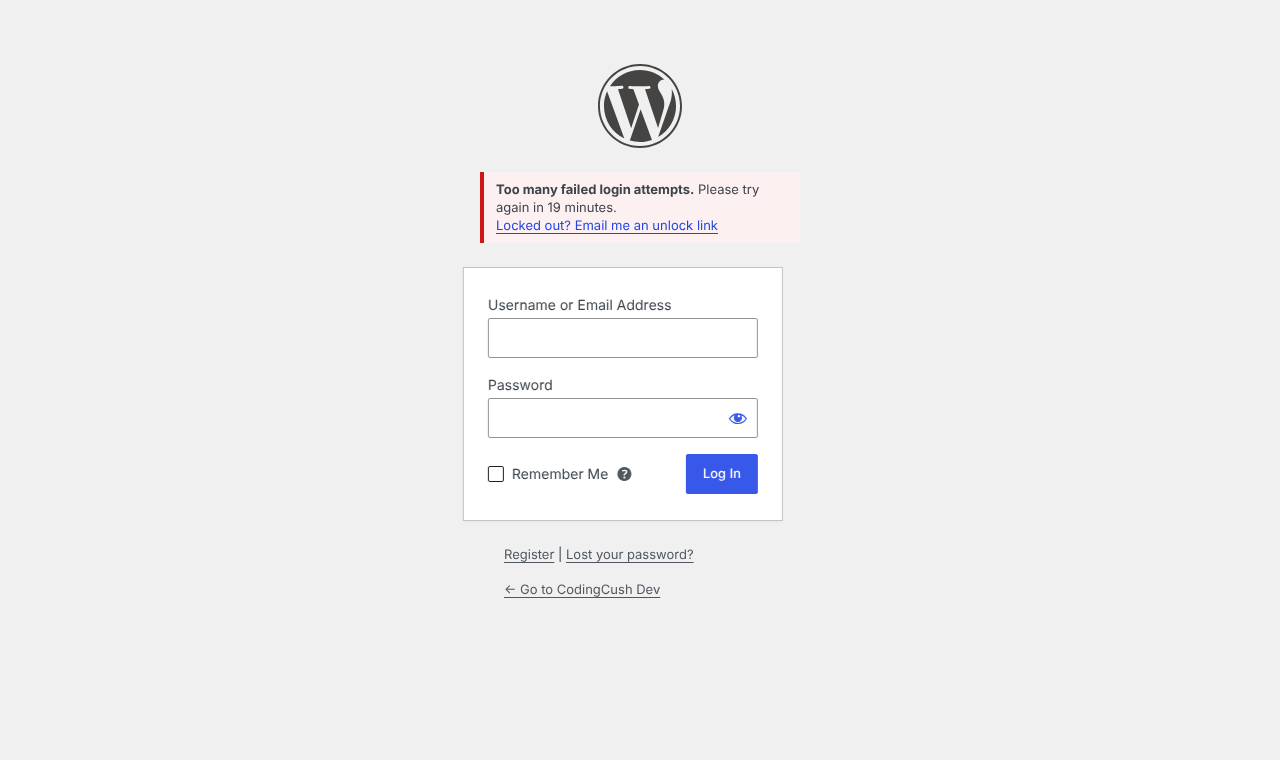
- Email unlock link – a locked-out administrator can request a one-time link (valid for 15 minutes). It only lifts the lockout; the password is still required.
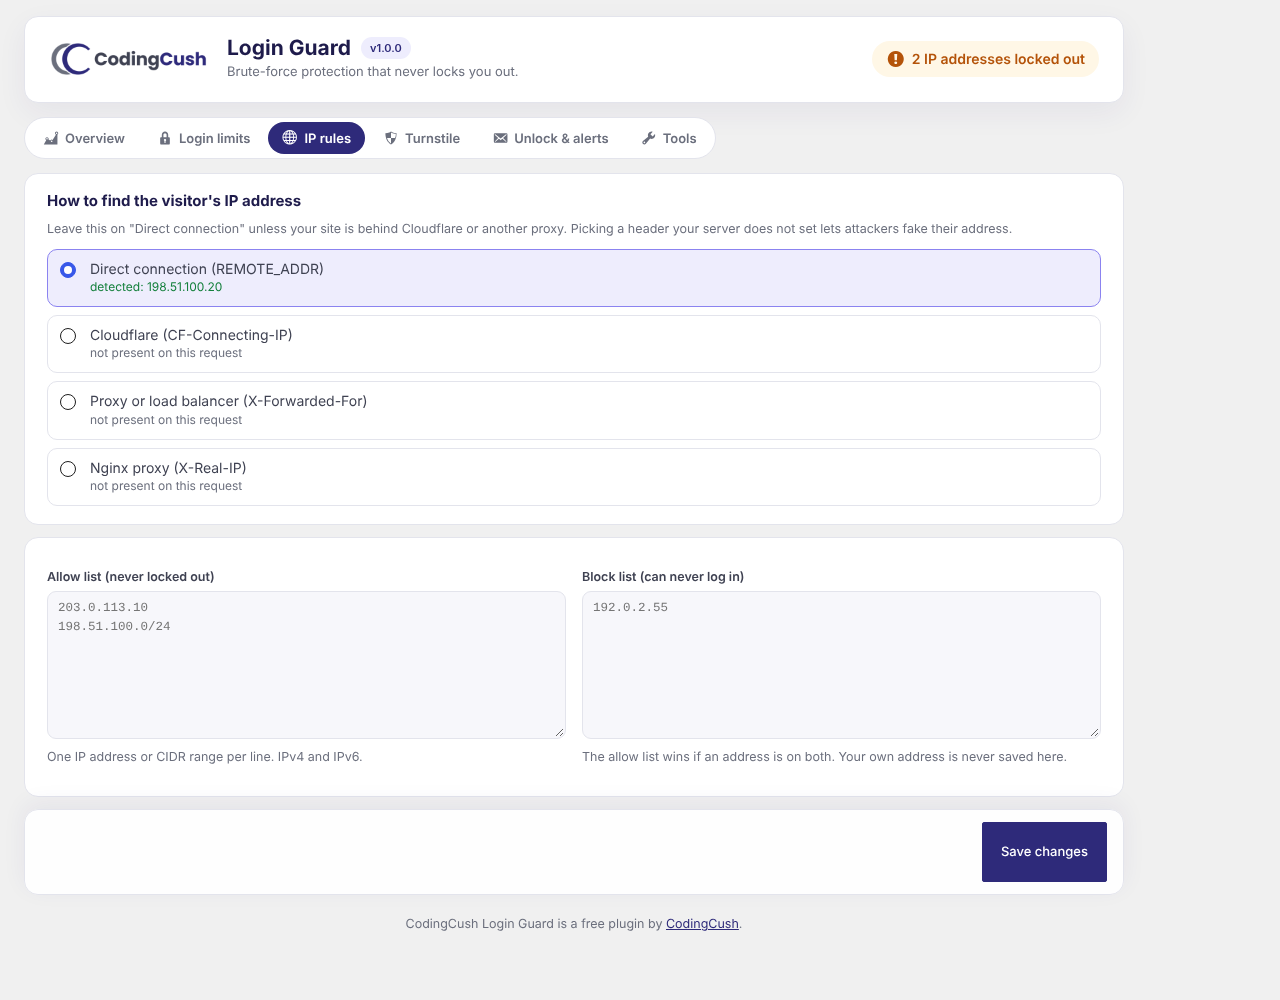
- IP allow list and block list – single addresses or CIDR ranges, IPv4 and IPv6. Your own address can never be saved to the block list.
- Correct visitor IP behind proxies – choose direct connection, Cloudflare, X-Forwarded-For or X-Real-IP. The screen shows which headers your server actually sends.
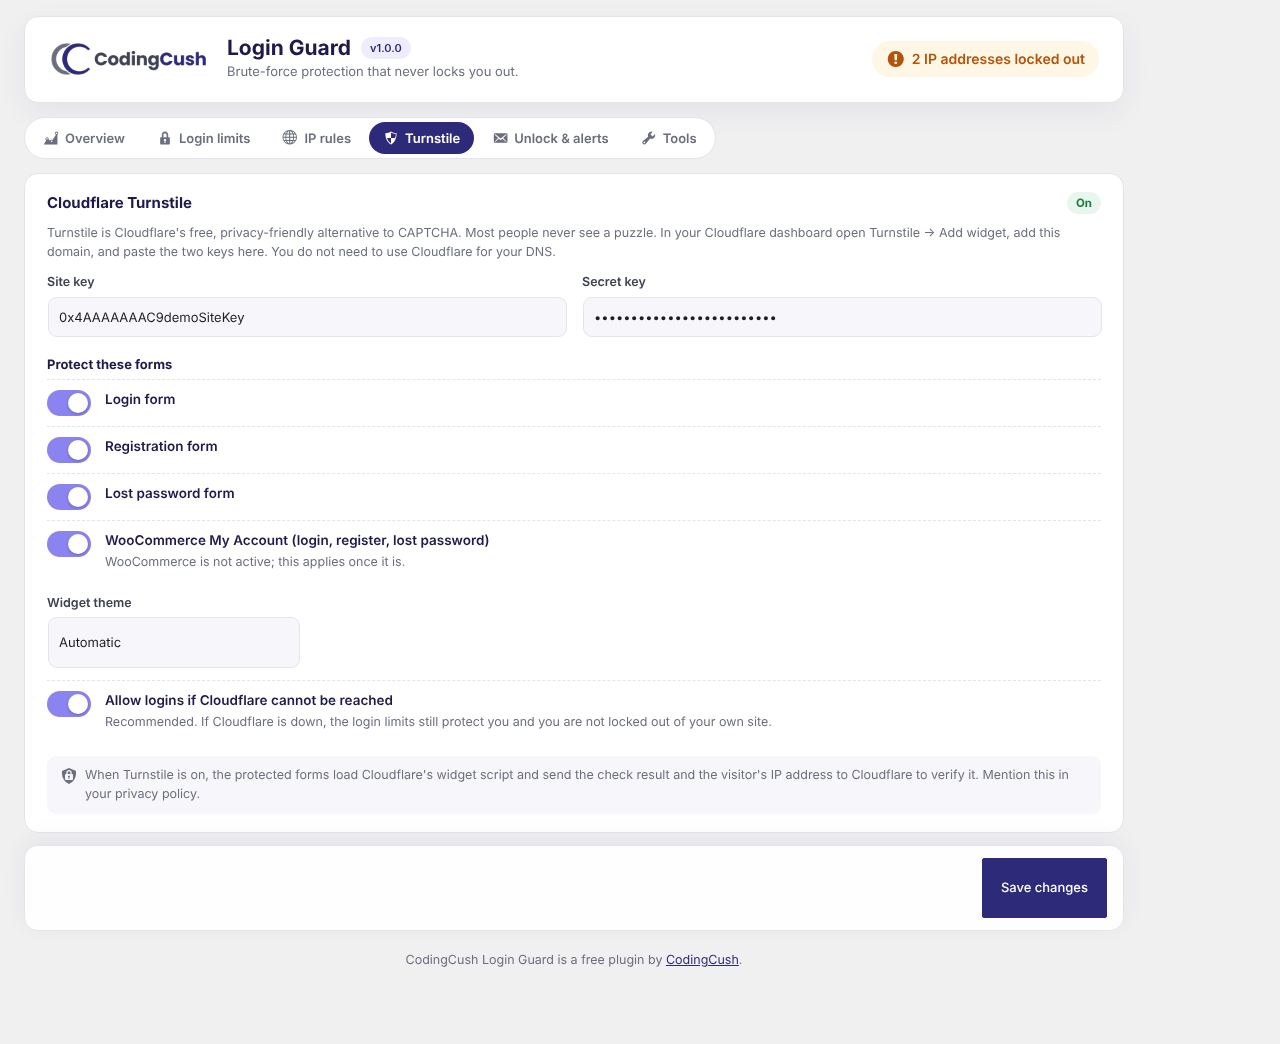
- Cloudflare Turnstile – a free, privacy-friendly CAPTCHA alternative on the login, registration and lost-password forms, and on the WooCommerce My Account forms. Off until you add your own keys.
- Activity log – every failed login, lockout, unlock and Turnstile failure, with filters and search, plus the usernames attackers try most.
- One-click unlock – unlock a single address or every lockout from the Overview screen.
- Lockout emails – get an email for every lockout, only for long lockouts, or never.
- Settings import – copies settings, allow lists and block lists from Limit Login Attempts or Limit Login Attempts Reloaded if they are installed.
- Works with XML-RPC, application passwords and WooCommerce – every login path goes through the same limits.
- Lockout state is kept in transients, so a normal page view does no extra database work.
- The admin CSS and JavaScript load only on the plugin's own settings screen.
- The Turnstile script loads only on the forms you protect, and only after you add your keys.
- Uninstalling removes the settings, the log table and every lockout.
安装:
- In your dashboard go to Plugins → Add New, search for "CodingCush Login Guard", then click Install Now and Activate.
- Open Settings → Login Guard. Protection is on straight away with sensible defaults (4 attempts, 20-minute lockout, 24-hour lockout after 4 lockouts in a day).
- If your site is behind Cloudflare or another proxy, open the IP rules tab and choose where the visitor's IP address comes from.
- Optional: add Cloudflare Turnstile keys on the Turnstile tab.
屏幕截图:
常见问题:
What happens if I lock myself out?
On the login screen, under the lockout message, click "Locked out? Email me an unlock link", and enter your administrator username or email address. Open the link from the email on the same device and you can log in again. You can also add your IP address to the allow list in advance (there is a one-click button on the Overview tab).
Does the unlock link log me in?
No. It only lifts the lockout for the device that opens it, for one hour. You still need your password. Links work once, expire after 15 minutes and are only sent to accounts that can manage the site.
My site is behind Cloudflare and every visitor has the same IP.
Open Settings → Login Guard → IP rules and choose "Cloudflare (CF-Connecting-IP)". The screen shows which headers your server receives so you can pick the right one. Only choose a proxy header if your site really is behind that proxy.
Is Turnstile required?
No. The login limits work on their own. Turnstile adds a second layer that stops most bots before they even try a password.
Does it work with WooCommerce?
Yes. WooCommerce logins count towards the same limits, and Turnstile can be added to the My Account login, registration and lost password forms.
Does it protect XML-RPC and application passwords?
Yes. Those logins go through the same check, so a locked-out address is refused everywhere. Turnstile is skipped for them because there is no form to show it on.
Can I use it alongside another login-limiting plugin?
It is best to use one. If you are switching from Limit Login Attempts, use Tools → Import to copy your settings, then deactivate the other plugin so failed logins are not counted twice.
What is removed when I delete the plugin?
Everything: the settings, the activity log table, running lockouts and any unused unlock links.
更新日志:
- First release.