
Bitcoin payments for Getpaid
| 开发者 | coinsnap |
|---|---|
| 更新时间 | 2026年5月25日 02:03 |
| WordPress版本: | 7.0 |
| 版权: | GPLv2 |
| 版权网址: | 版权信息 |
详情介绍:
Enable your visitors to make purchases or subscriptions with Bitcoin using GetPaid by adding Bitcoin payment to the over payment methods that are available with GetPaid with this simple-to-install plugon.
With the Coinsnap Bitcoin payment plugin for GetPaid you only need a Lightning wallet with a Lightning address, a Coinsnap account, and a minute to set up GetPaid to accept Bitcoin Lightning payments on your WordPress website.
With this plugin you can then accept Bitcoin for all kinds of payments transacted thourgh GetPaid – you need no shop system, no other payment provider or anything else to accept Bitcoin with GetPaid.
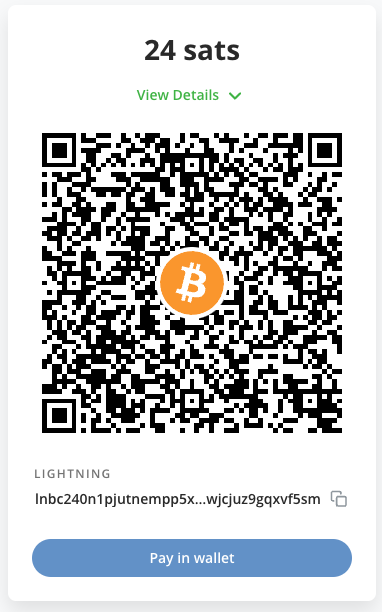
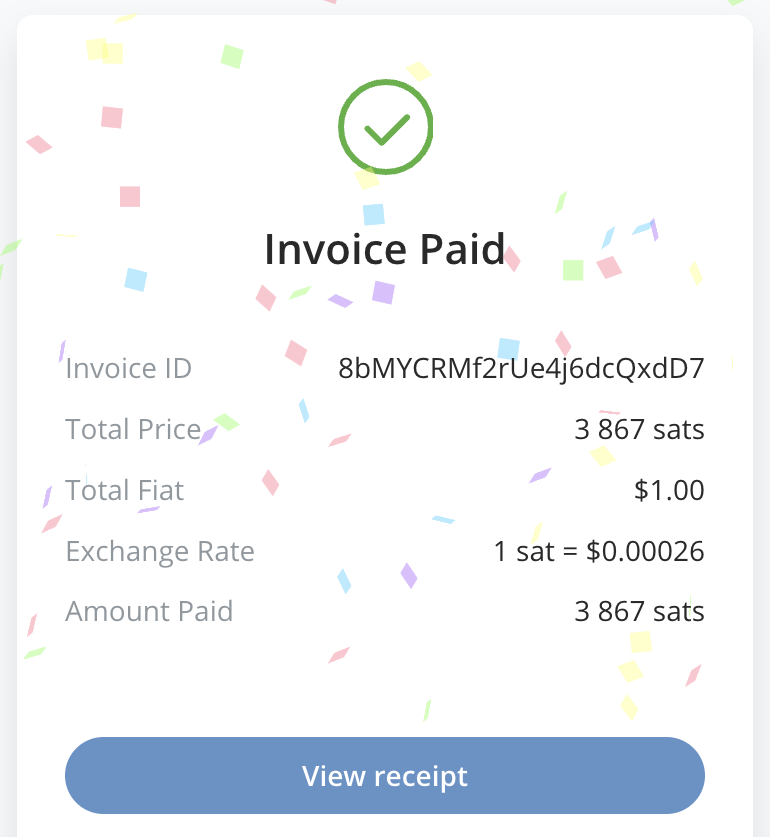
Coinsnap’s Bitcoin payment plugin for GetPaid makes it amazingly simple for your customers to donate or contribute with Bitcoin-Lightning: They can make their transactions with just a scan of the QR code generated by the Coinsnap for GetPaid plugin, and their authorization of the payment. When authorized, the payment will be credited directly and immediately to your Lightning wallet.
Accept Bitcoin payments with GetPaid in only 3 steps:
- Get your free Coinsnap account with just your email
- Install, activate and configure the plugin in your WordPress backend (see the installation guide)
- Create payment buttons, invoice forms etc. in GetPaid, place them at the appropriate places on your WordPress website and accept Bitcoin contributions from your global audience
- Simple installation directly in your WordPress: select, install and activate the plugin.
- Flexibility in payment methods: Use only Coinsnap Bitcoin or offer it in addition to your other payment methods.
- You don’t have to set up your offers separately: Coinsnap for Get Paid is fully integrated into your GetPaid plugin. Once you’ve installed and connected it, Bitcoin will automatically appear as a payment option in the checkout!
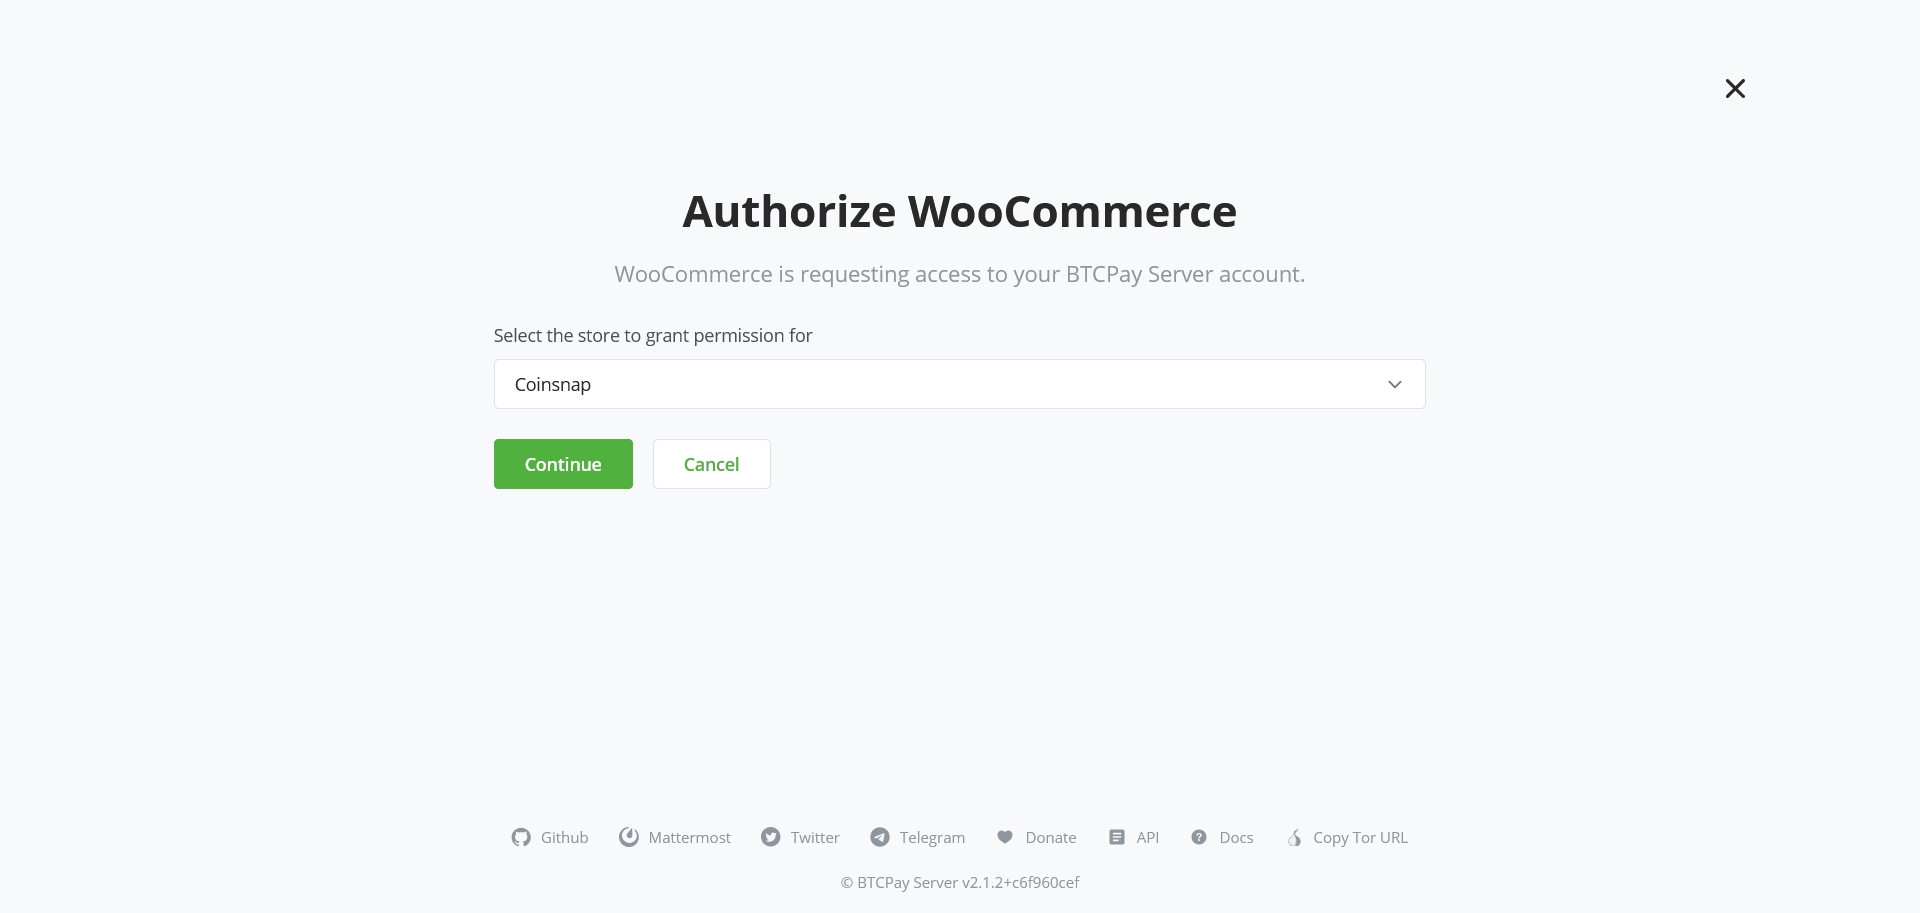
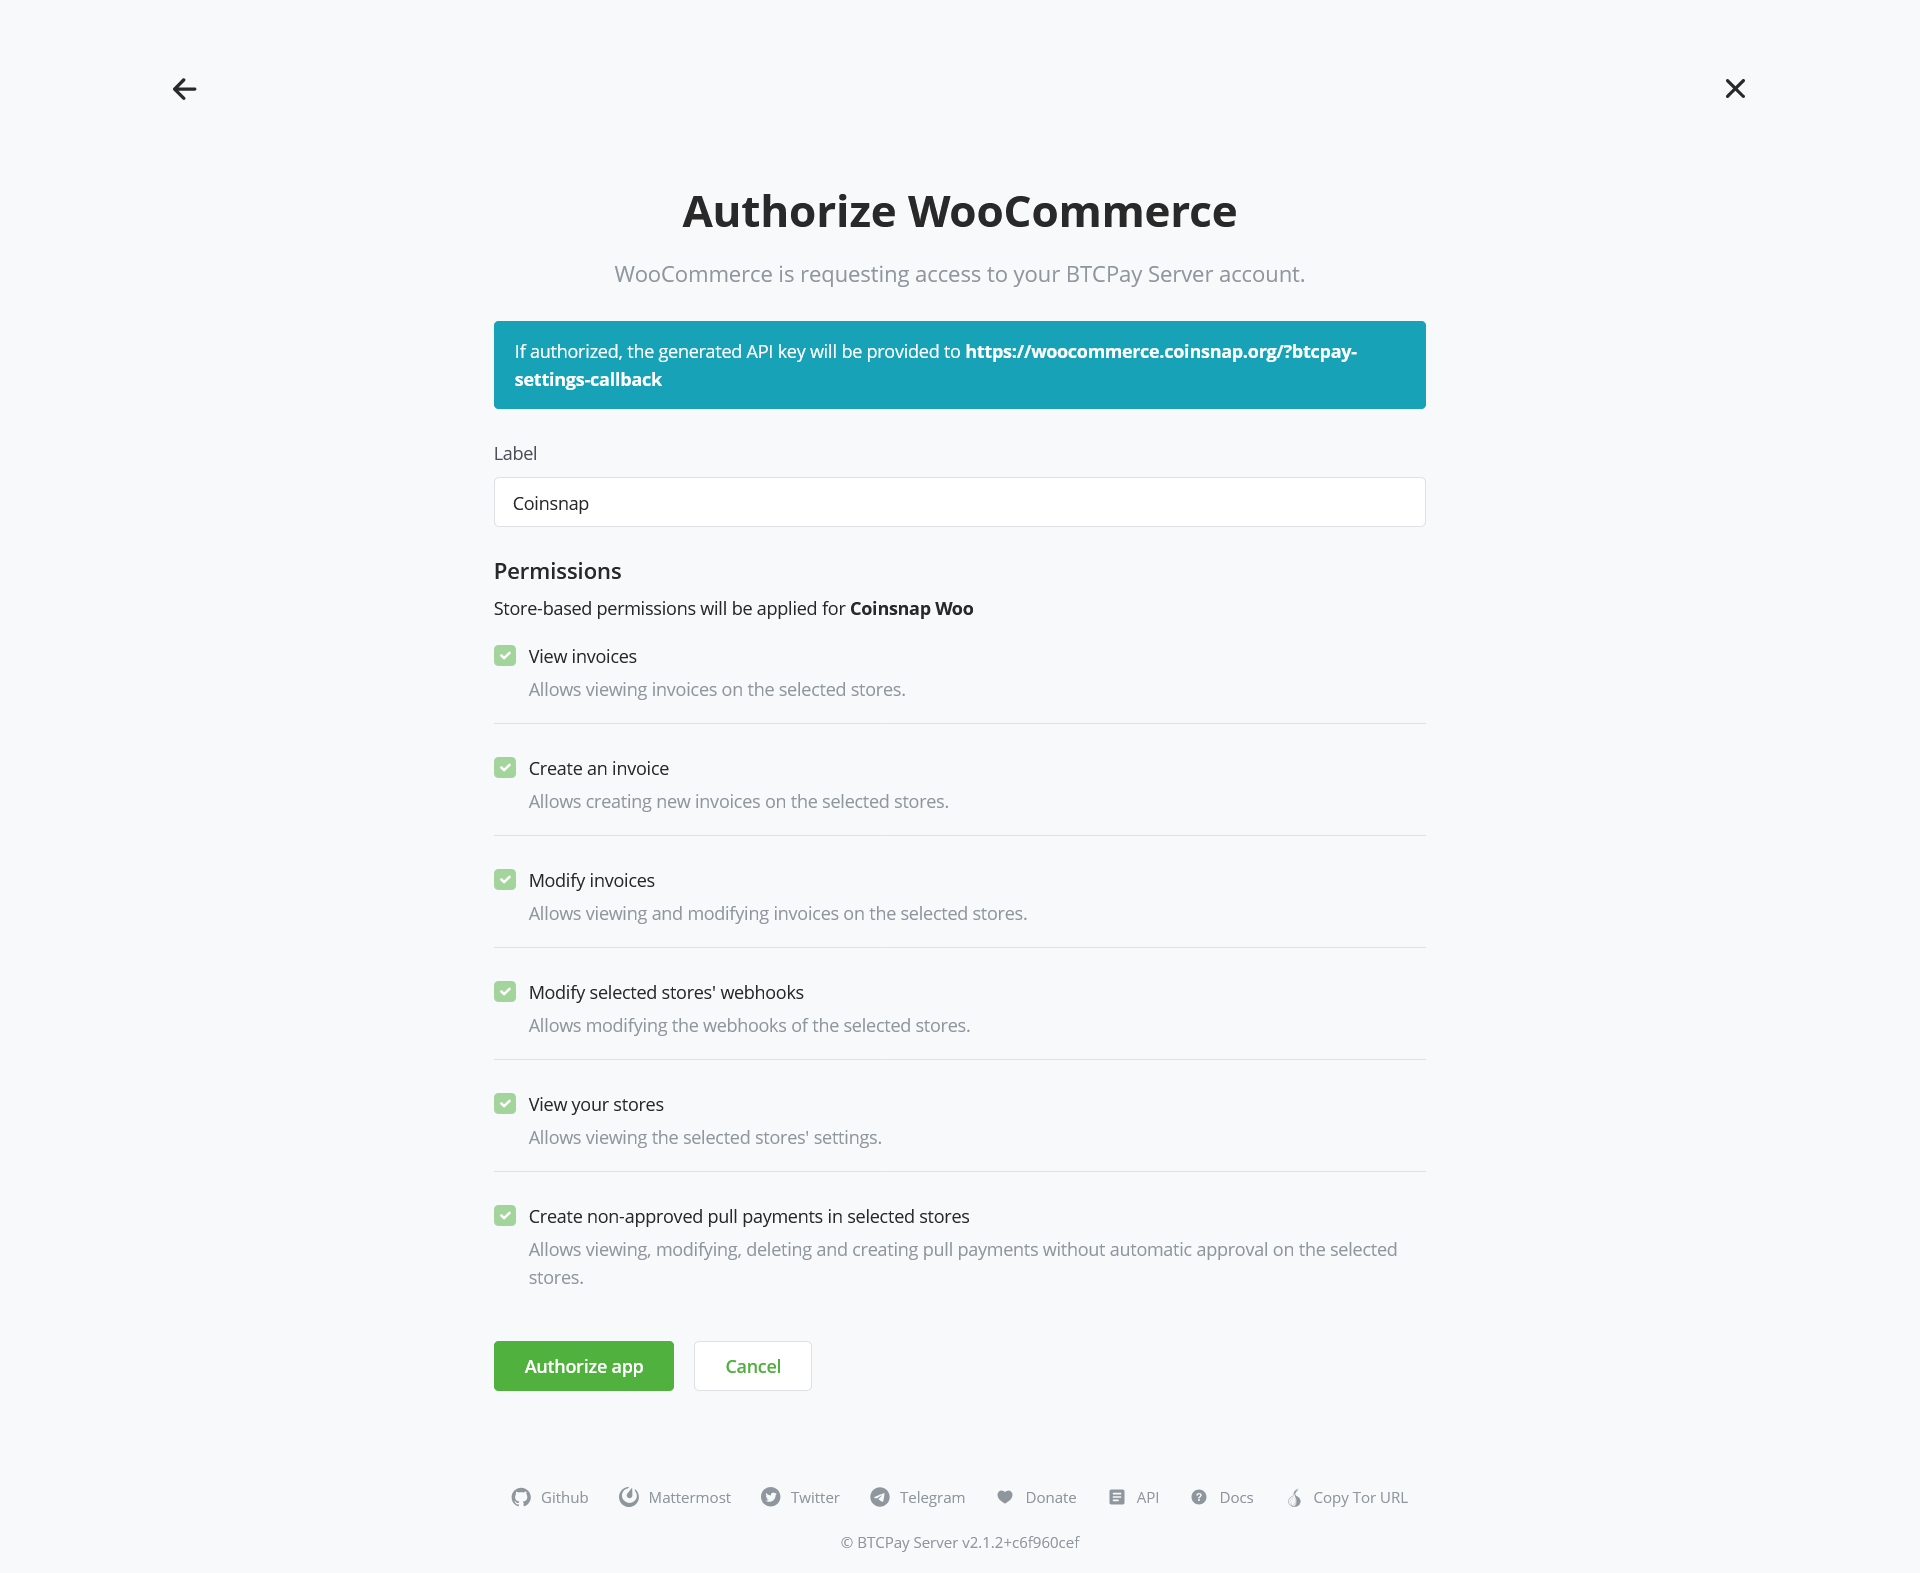
- Works with Coinsnap or your BTCPay server: Use the Coinsnap gateway or your own BTCPay server – both are easy with this plugin. With the integrated Coinsnap BTCPay Server Wizzard you can connect Get Paid and your BTCPay server in just 3 minutes and WITHOUT any programming knowledge. And if you use your own BTCPay server, you don’t even need a Coinsnap account.
- Quick and easy registration: Just enter your email address and your Lightning address – and you are ready to integrate the payment module and start selling for Bitcoin Lightning.
- Immediate crediting of all payments to your wallet.
- Payment transfer directly from your customer’s wallet to your wallet.
- Low transaction fee of only 1 % of the invoiced amount (with referrer code).
- The plugin is free of cost, including all future updates. Stay up to date at absolutely no cost today or in the future.
- Outstanding privacy: Direct, P2P payments into your Lightning wallet, no intermediaries and paperwork. Any transaction information is only shared between you and your customer.
- Detailed reporting and advanced filtering for all transactions, simple data export for your accounting.
- Sophisticated merchant’s admin dashboard in Coinsnap: See all your transactions at a glance, follow-up on individual payments or see issues with payments.
- No need for any technical infrastructure: Accept Bitcoin and Lightning payments in your online store without having to set up your own server or your own Lightning node.
- On-chain and Lightning transactions are supported: Let your donors choose their preferred payment method.
- No chargebacks: All Bitcoin payments are irreversible.
- Lightning fast transactions: Receive your payment within seconds (with the Lightning payment method), in minutes with on-chain.
- Low fees (with Lightning), no fees with your BTCPay Server
- Global reach: Enable purchases and payments for any customer anywhere – all they need to pay Bitcoin via GetPaid is a Lightning wallet.
安装:
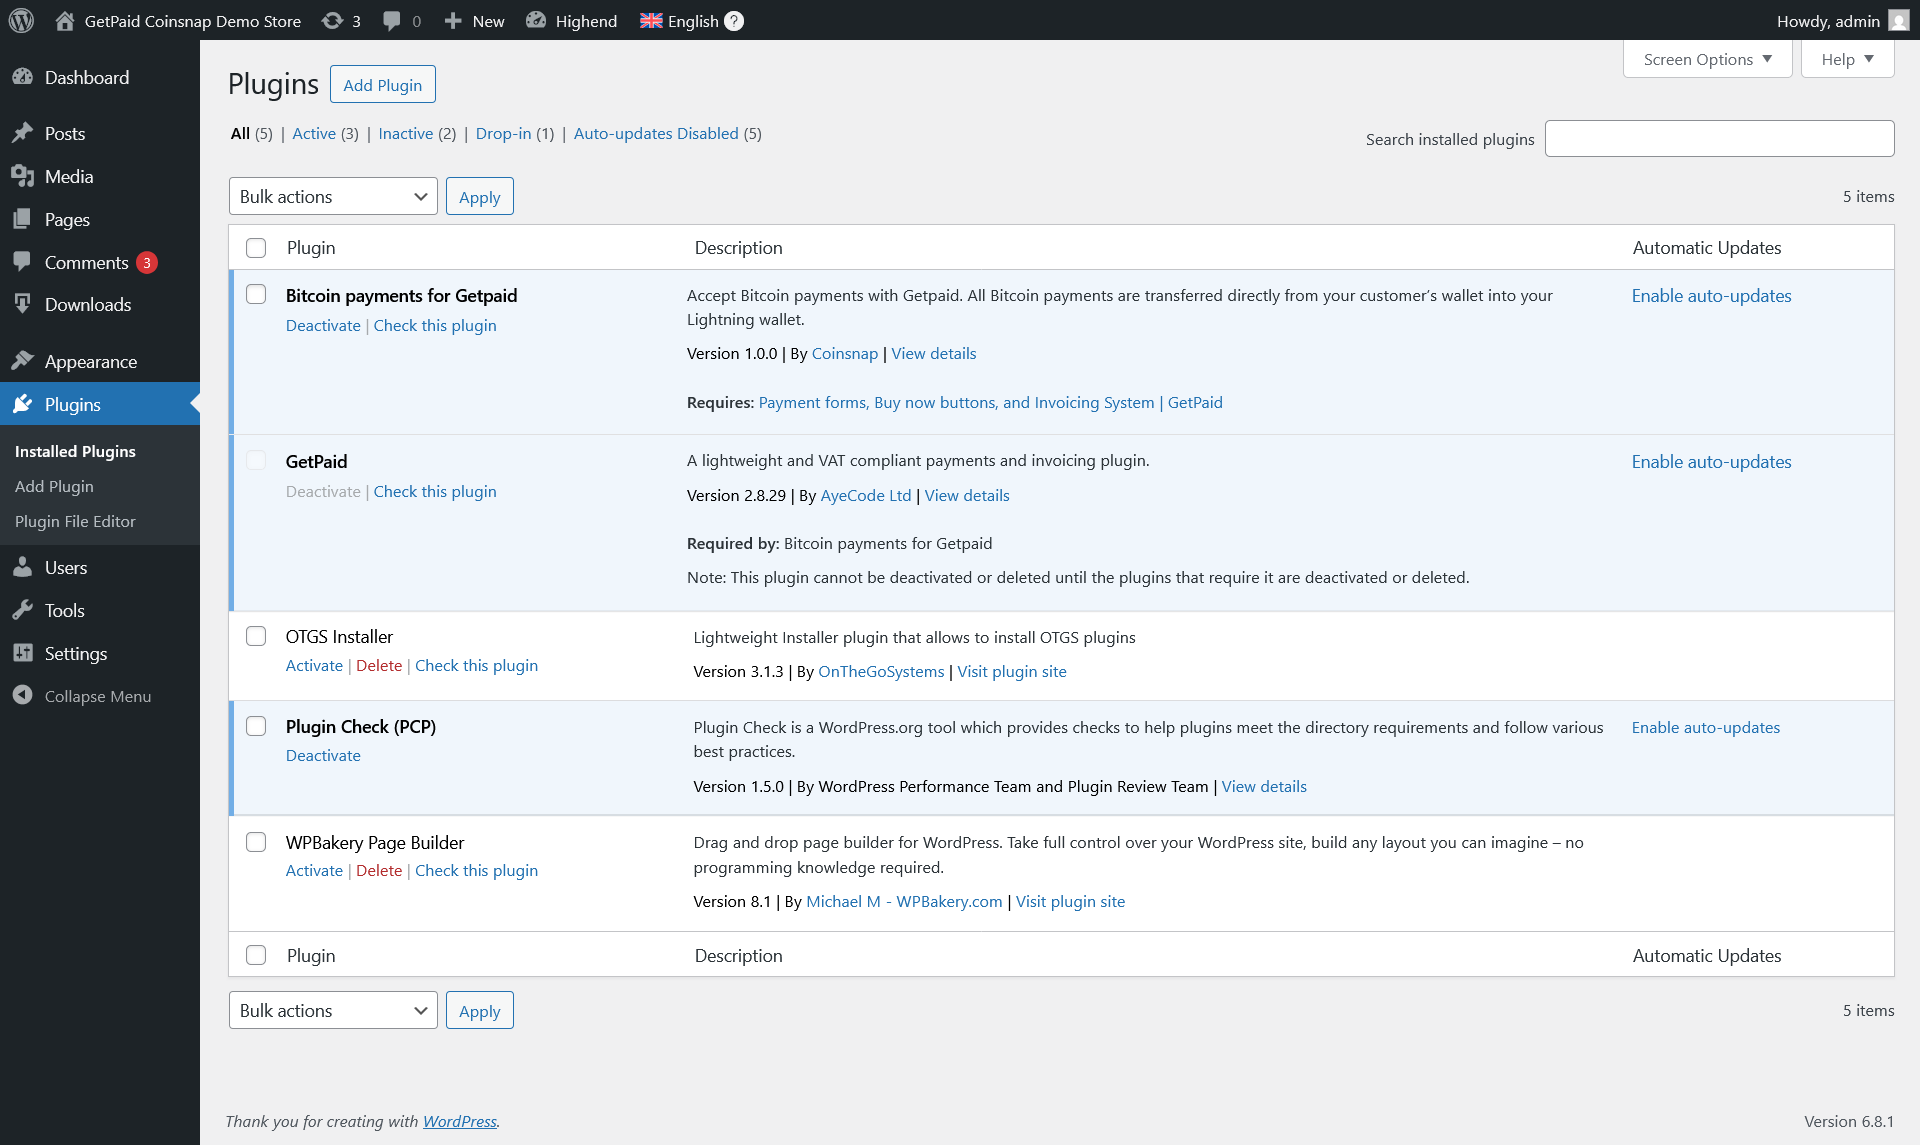
1. Install the Coinsnap GetPaid plug-in from the WordPress directory.
The Coinsnap GetPaid plug-in can be searched and installed in the WordPress plugin directory.
In your WordPress instance, go to the Plugins > Add New section.
In the search you enter Coinsnap and get as a result the Coinsnap GetPaid plug-in displayed.
Then click Install.
After successful installation, click Activate and then you can start setting up the plugin.
1.1. Add plugin
If you don’t want to install add-on directly via plugin, you can download Coinsnap GetPaid plug-in from Coinsnap Github page or from WordPress directory and install it via “Upload Plugin” function:
Navigate to Plugins > Add Plugins > Upload Plugin and Select zip-archive downloaded from Github.
Click “Install now” and Coinsnap GetPaid plug-in will be installed in WordPress.
After you have successfully installed the plugin, you can proceed with the connection to Coinsnap payment gateway.
1.2. Configure Coinsnap GetPaid plug-in
After the Coinsnap GetPaid plug-in is installed and activated, a notice appears that the plugin still needs to be configured.
1.3. Deposit Coinsnap data
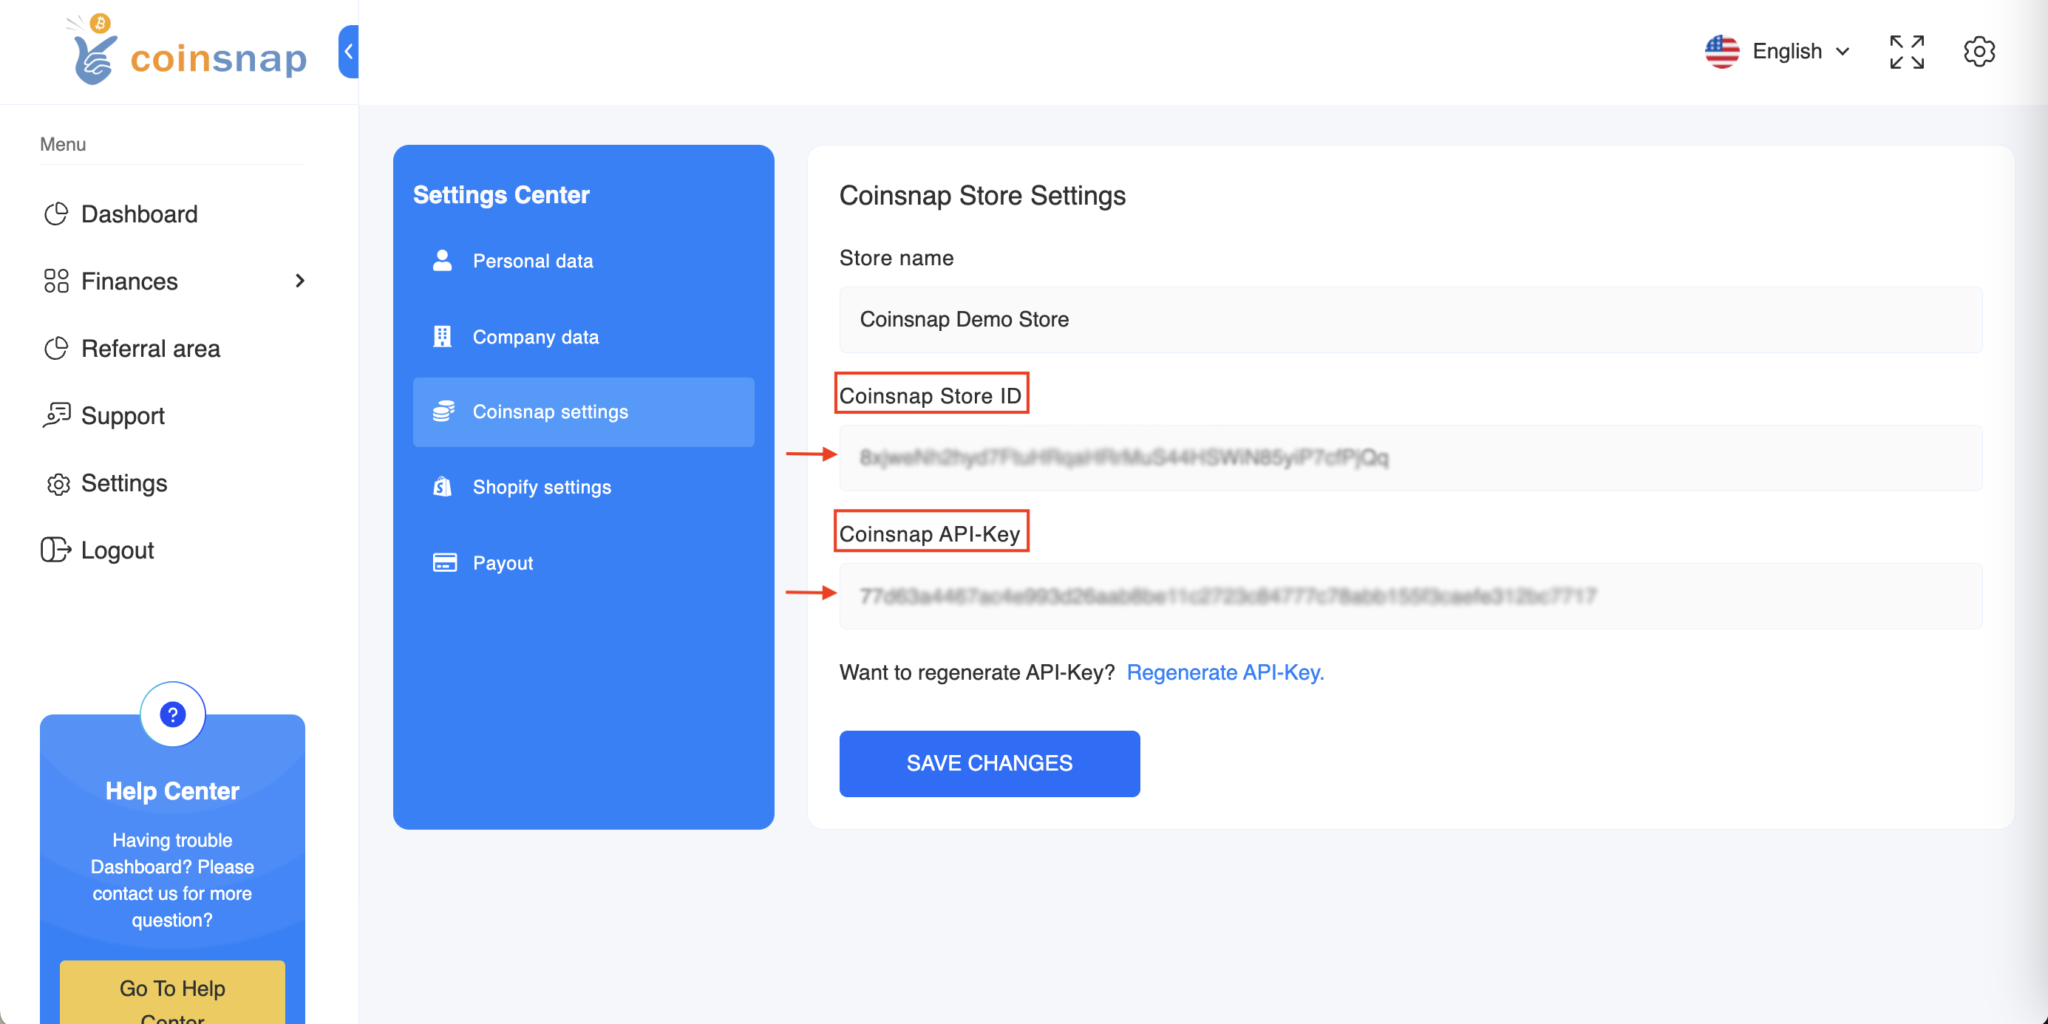
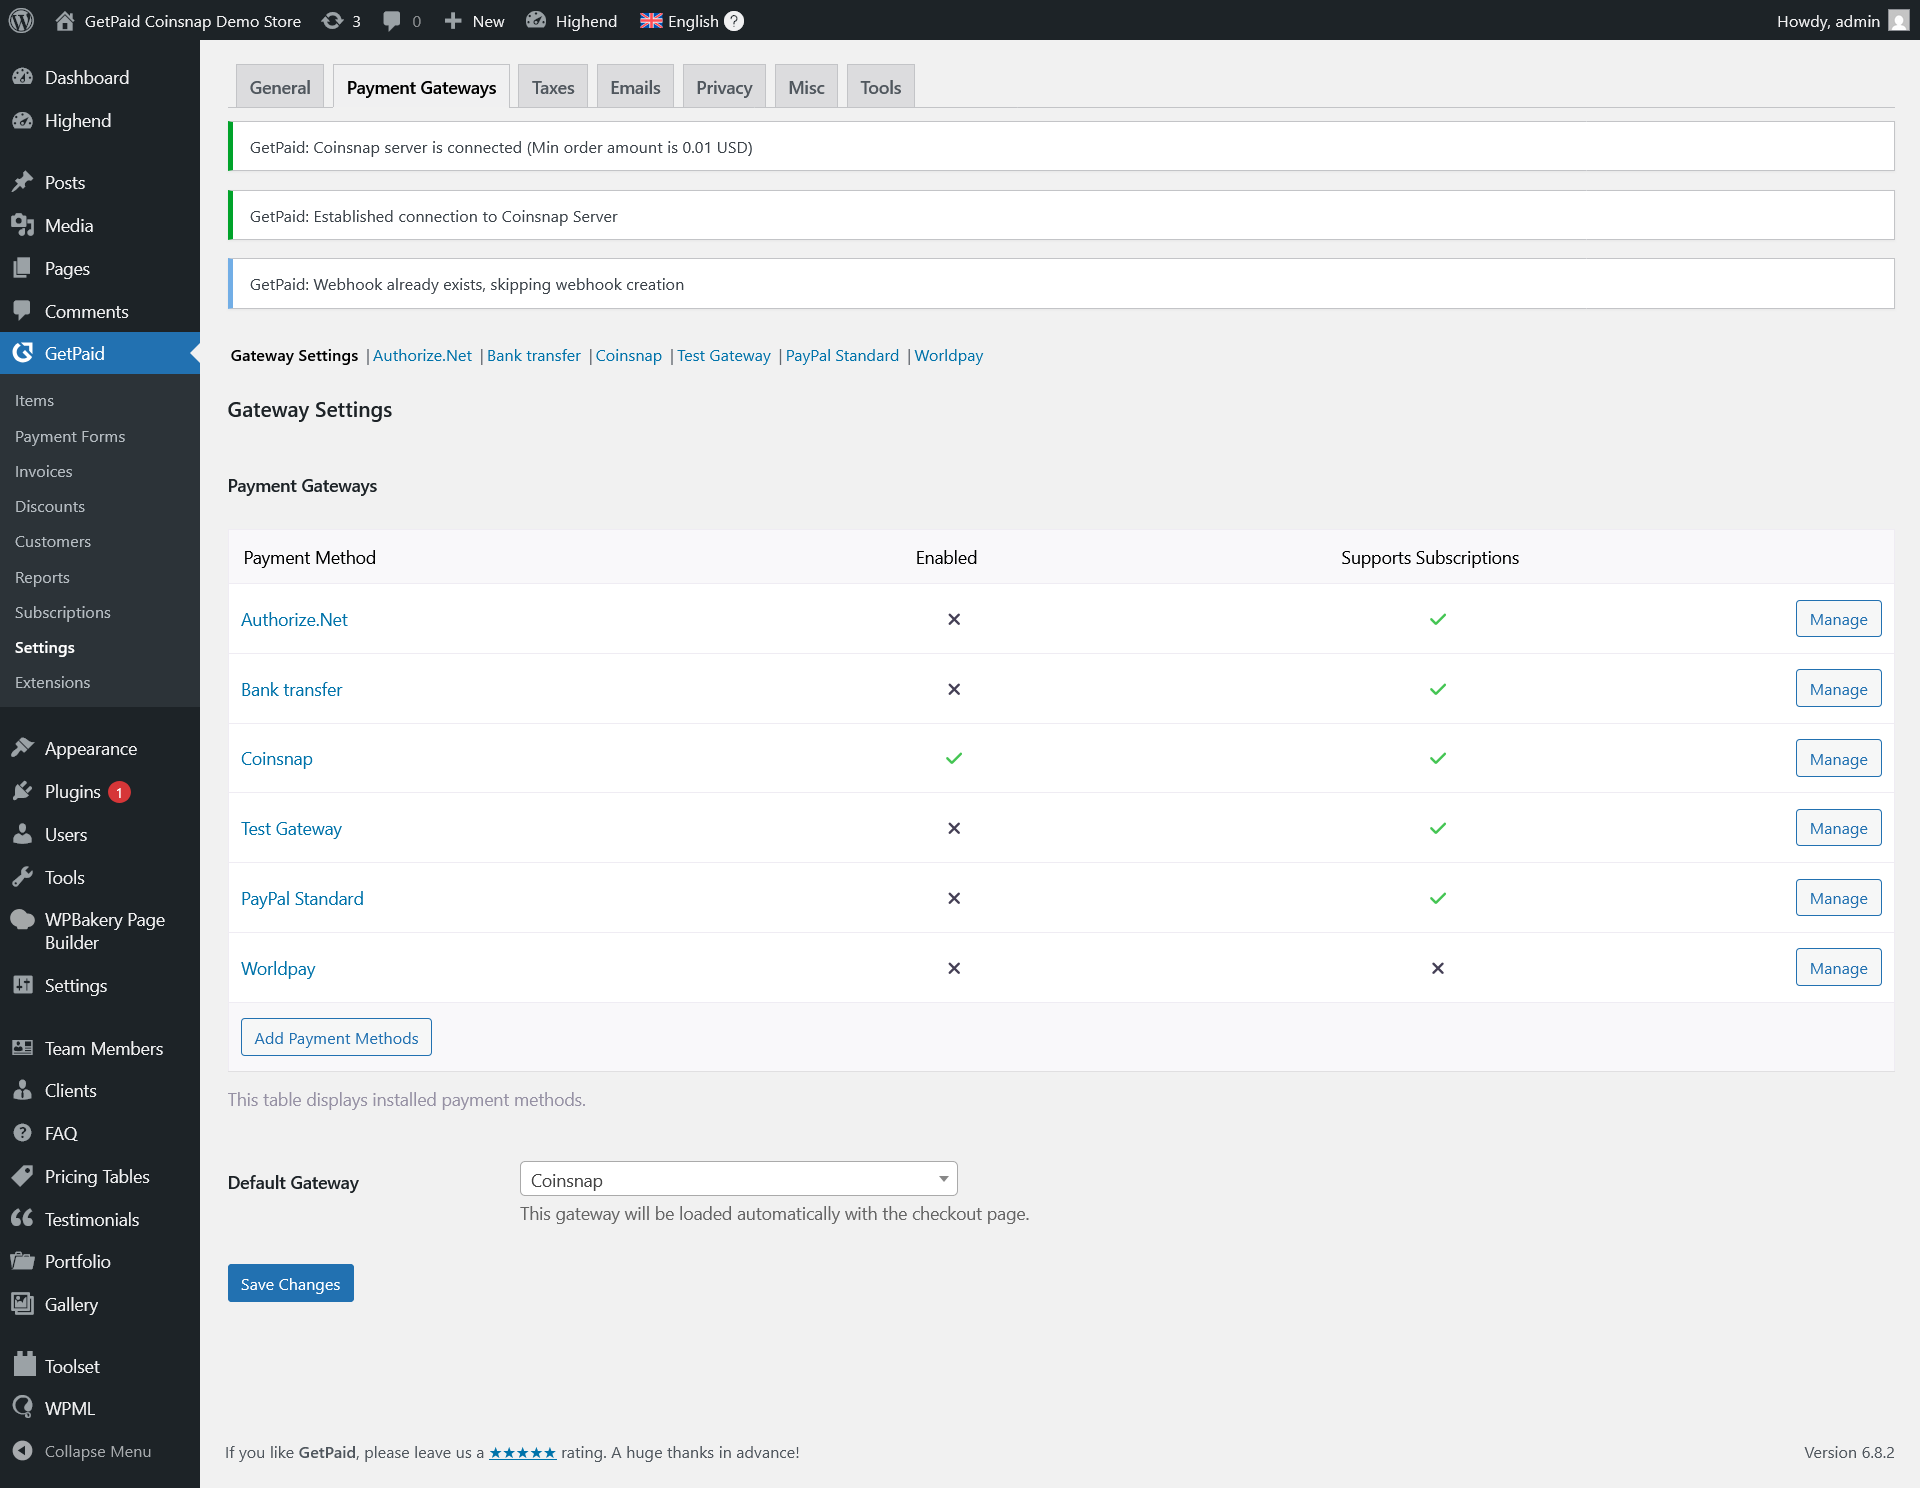
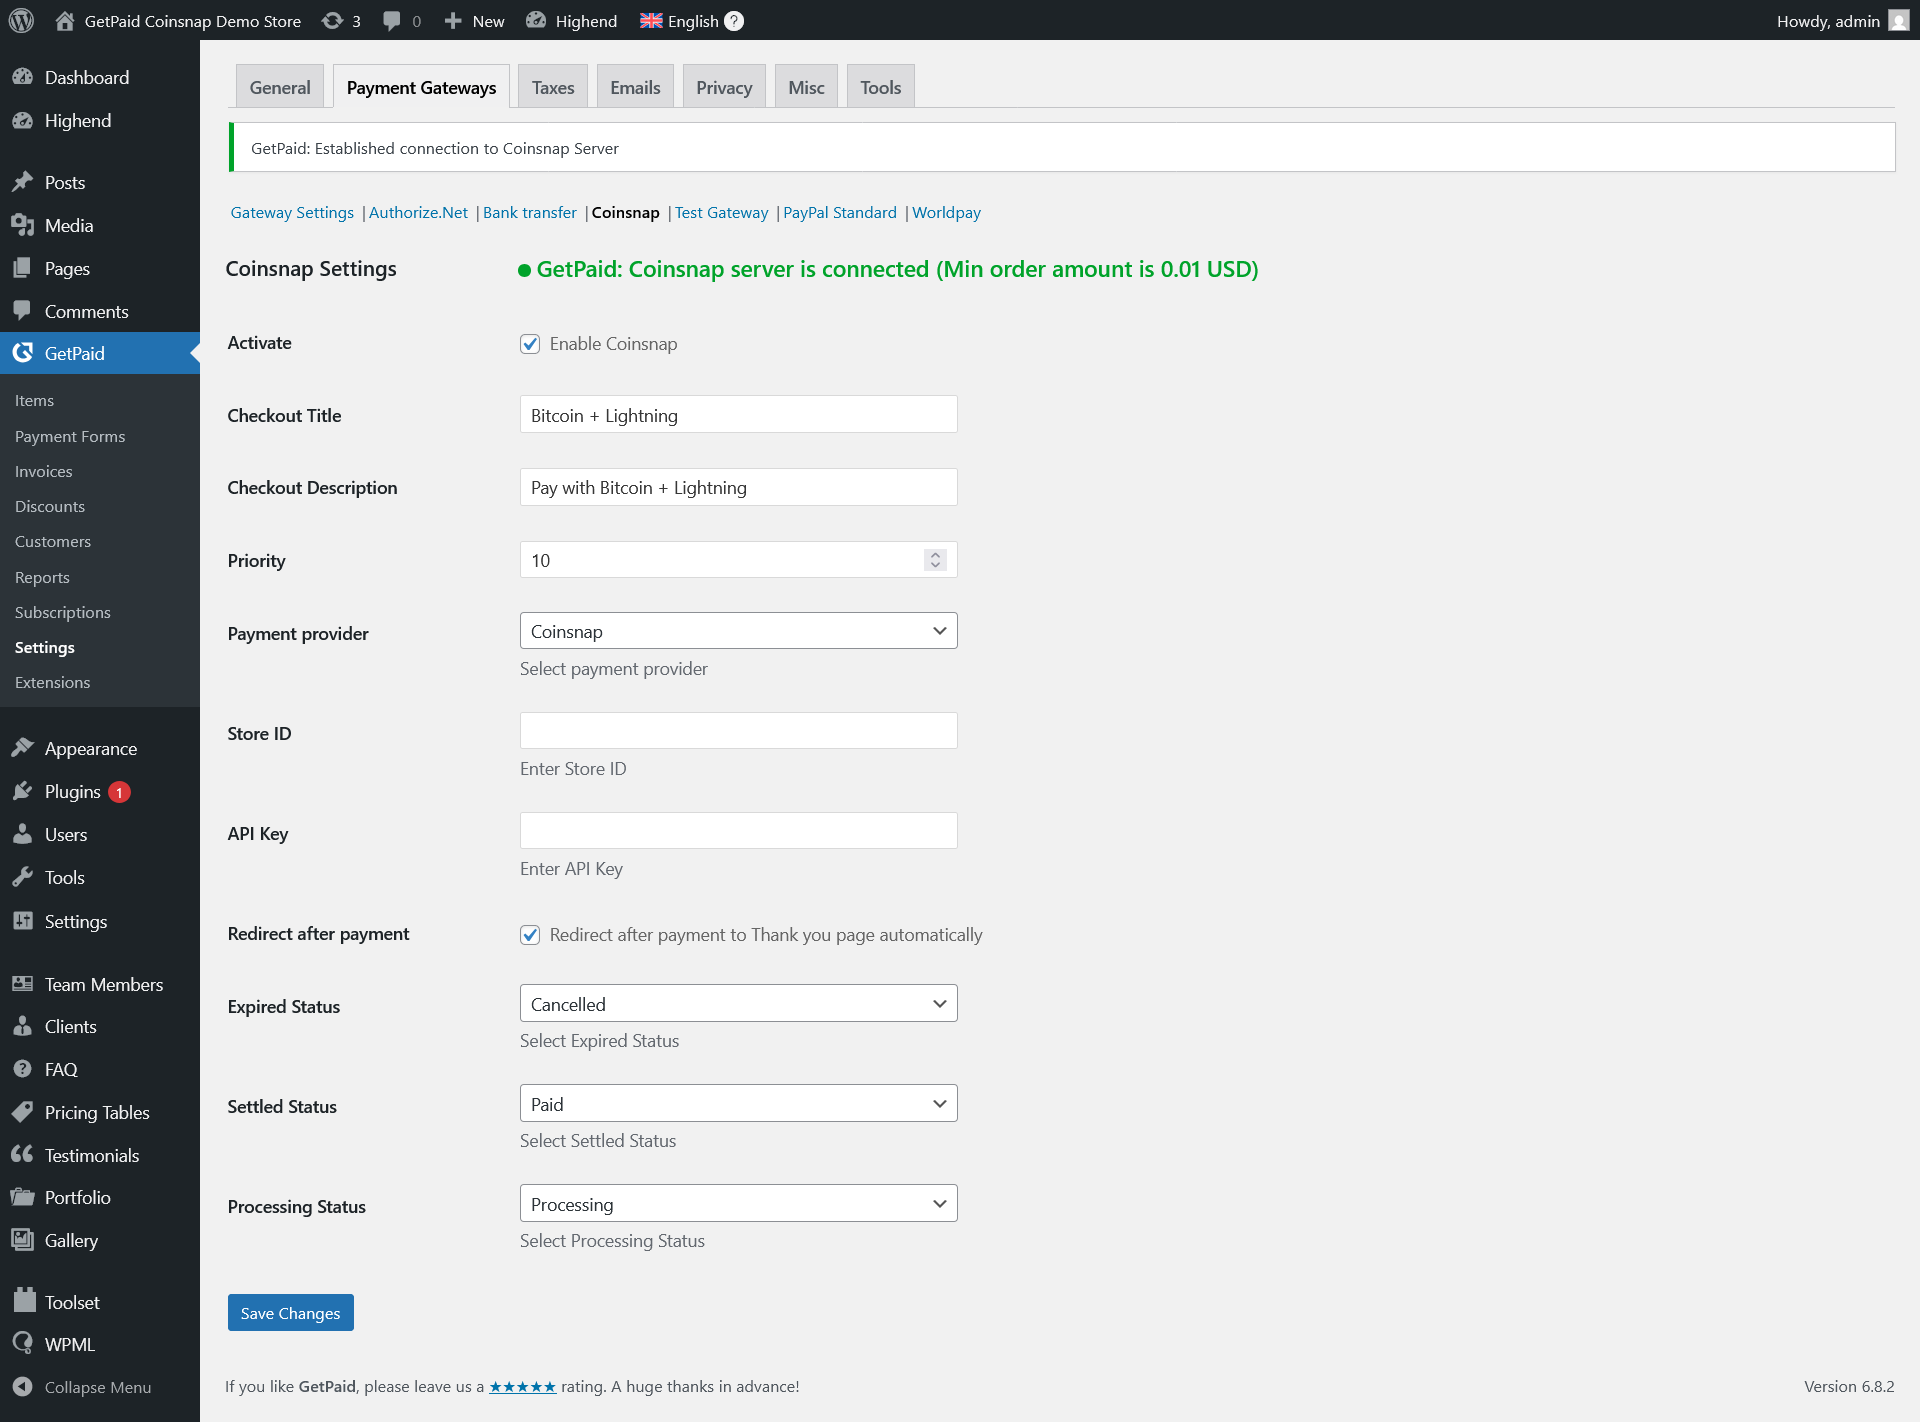
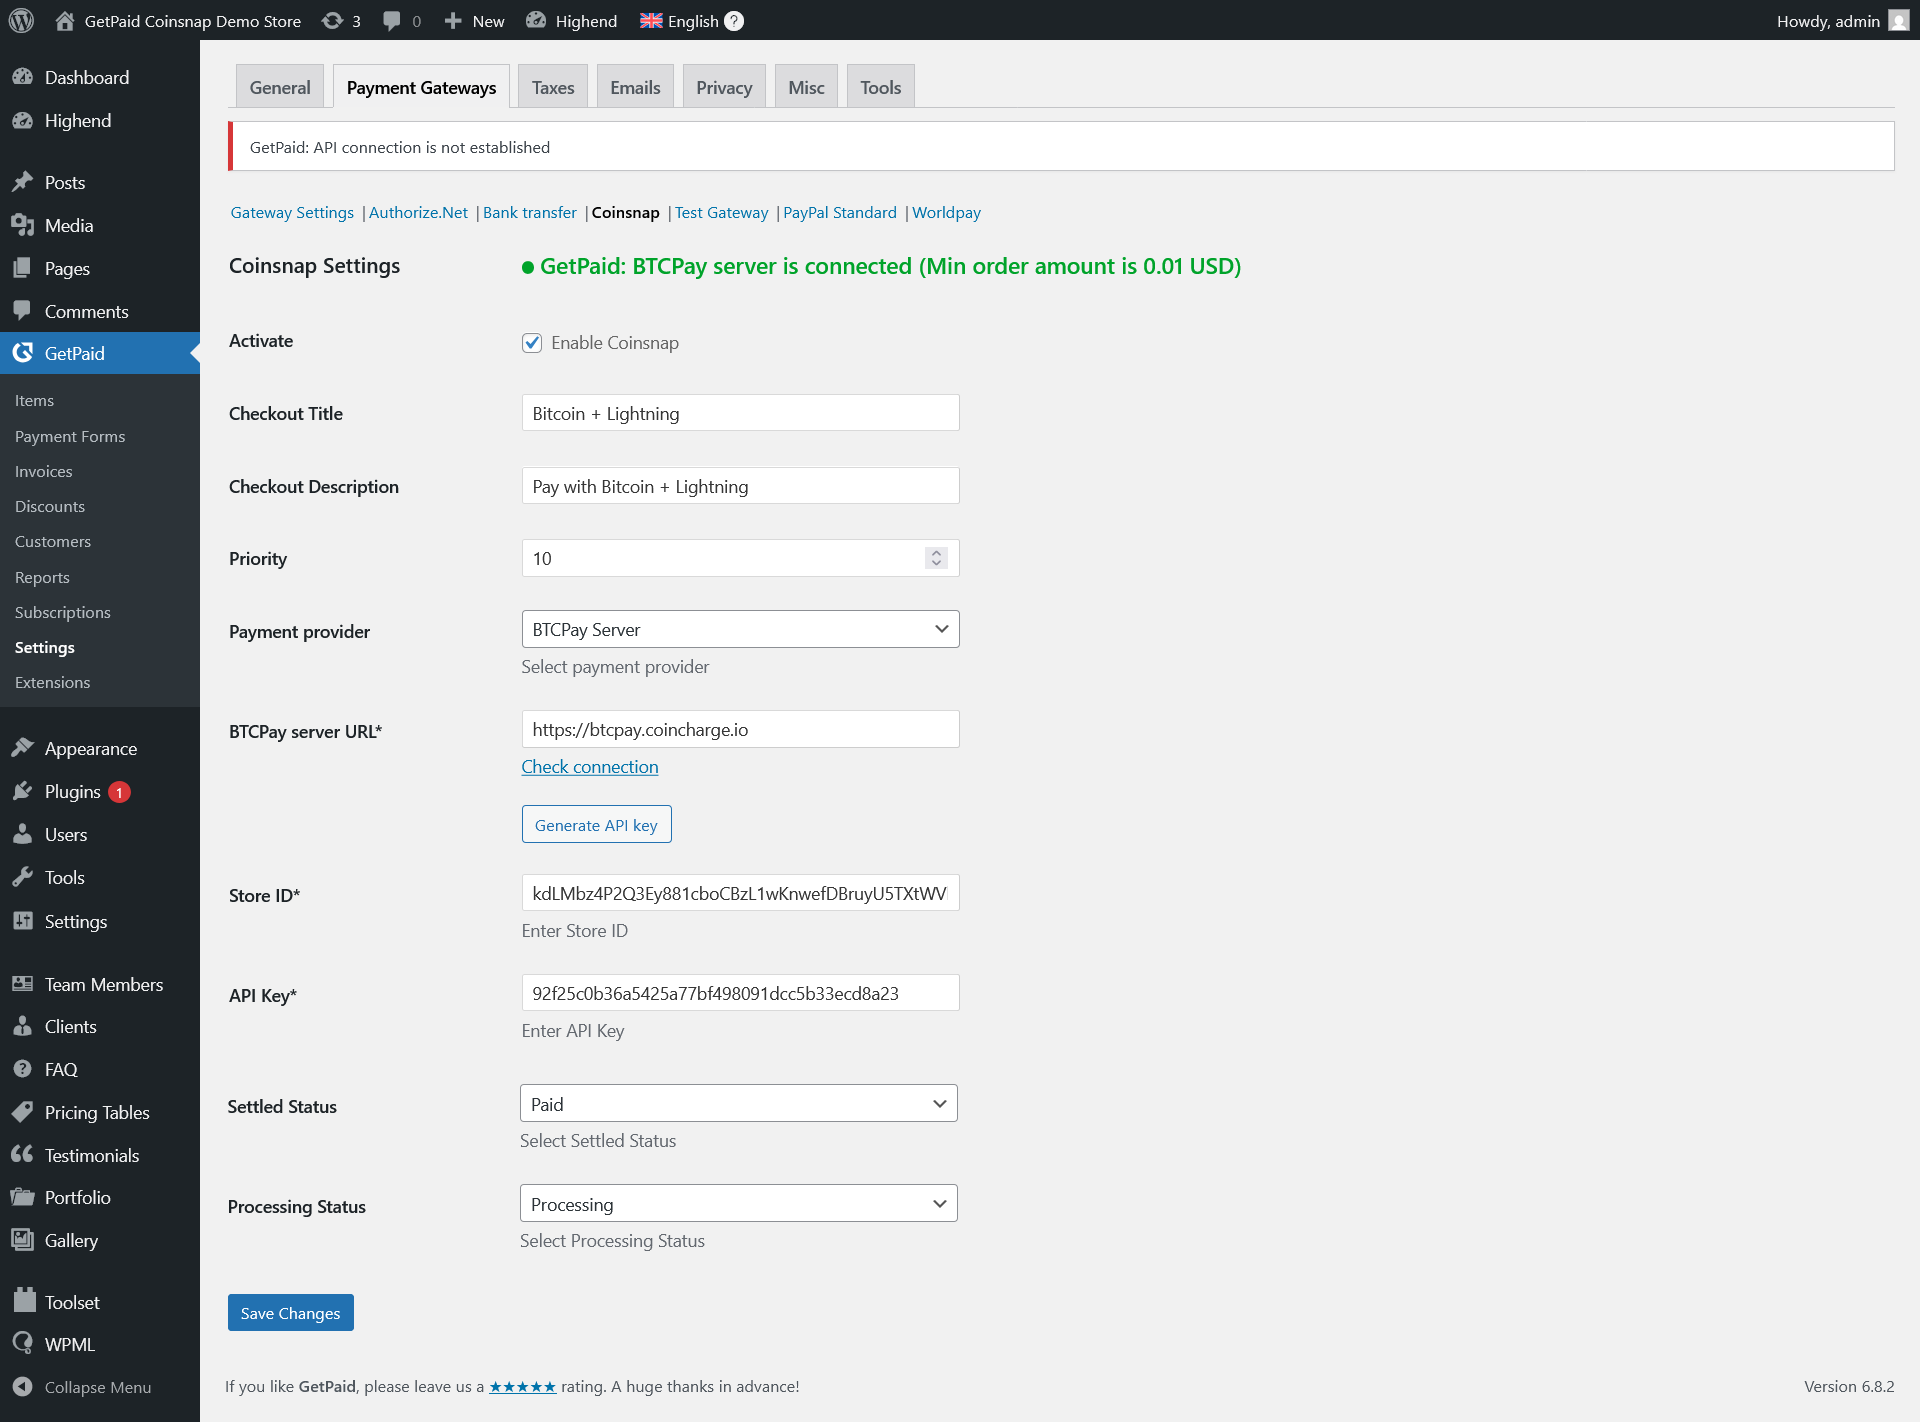
- Navigate to GetPaid > Settings > Payment Gateways and select coinsnap
- Enter Store ID and API Key
- Click Save Setting
- Navigate to GetPaid > Settings > Payment Gateways and select coinsnap
- Enter Store ID and API Key
- Click Save Setting
屏幕截图:


更新日志:
1.0.0 :: 2025-08-04
- Initial release published in Wordpress Plugin Directory.
- Updated Generate API Key button behavior.
- Updated connection check errors handler.
- Update: added convertation from SATS to BTC for BTCPay server.
- Compatibility with GetPaid 2.8.31 is tested.
- Update: Added non-supported by BTCPay server currencies handler on invoice request flow.
- Update: Added custom redirect after payment page in module settings.
- Compatibility with GetPaid 2.8.35 is tested.
- Compatibility with Wordpress 6.9 is tested.
- Compatibility with GetPaid 2.8.36 is tested.
- Compatibility with GetPaid 2.8.39 is tested.
- Updated PHP files protection
- Compatibility with GetPaid 2.8.40 is tested.
- Compatibility with GetPaid 2.8.41 - 2.8.44 is tested.
- Updated add-on description
- Updated \Coinsnap\Client\Invoice class.
- Updated \Coinsnap\Client\Store class.
- Compatibility with GetPaid 2.8.47 is tested.
- Compatibility with Wordpress 6.9.4 is tested.
- Compatibility with GetPaid 2.8.48 is tested.
- Compatibility with Wordpress 7.0 is tested.