Email Reminders
| 开发者 |
wpdevelop
oplugins |
|---|---|
| 更新时间 | 2025年12月3日 17:48 |
| 捐献地址: | 去捐款 |
| PHP版本: | 5.6 及以上 |
| WordPress版本: | 6.9 |
| 版权: | GPLv2 or later |
| 版权网址: | 版权信息 |
详情介绍:
Reminders it's ready to send emails, that was created based on Rules from specific Contacts.
It can be emails that are sending before or after specific time to the event from Contact data.
Like follow-up emails or friendly reminders about upcoming events.
Plugin Homepage | SupportFEATURES Reminders
- Create and send email reminders and follow-up emails.
- Automatic sending of email reminders via CRON.
- Manually send specific email reminder(s) from admin panel.
- Listing and real time (ajax) text searching of specific email reminder at reminders page. You can easily send or delete certain reminder.
- You can filter reminders to show only sent or waiting to send emails reminders, or both.
- Checking the status near each reminder (sent or not sent), as well as the name of the email template that uses the specific email reminder.
- Easily create new contact based on customized contact form.
- Ability to import contacts from CSV files.
- Native integration with [Booking Calendar] (https://wordpress.org/plugins/booking/ "Booking Calendar") plugin. Import all existing bookings. Create contacts in real time after creation of new bookings.
- Real time (ajax) text searching of specific contact.
- Ability to edit contact details and deletion of specific contacts.
- Rules configuration for creation of new email-reminders from existing contacts based on multiple parameters. For example, creation new email-reminders from contacts, where country is USA, and date of creation of contact 7 days ago, etc...
- Configuration of time based parameters, which provide ability to configure rules, like: "reminder - 1 day before the event", "follow-up email - 7 days after the event", "after 1.5 months", etc...
- Ability to create several email templates and select specific email template for specific rules for creation of email reminders.
- Manually run specific rule to create email reminders from admin panel.
- Automatic creation of email reminders via CRON.
- Ability to edit rule details and delete of specific rules.
- If you have thousands of contacts, and you only need to handle the latest and not all together, you can define contact ID from which the rule will be executed.
- Mobile friendly.
- Ajax based admin panel.
- Send friendly reminders about upcoming events.
- Send follow-up emails after specific action.
安装:
Automatic installation
To do an automatic install, log in to your WordPress admin panel, navigate to the Plugins menu and click Add New.
In the search field type "Email-Reminders" and click Search Plugins.
Once you've found the plugin you can view details about it such as the point release, rating and description.
Now, you can install it by clicking "Install Now".
Manual installation via WordPress admin panel
- Download plugin zip file to your computer
- In your WordPress admin panel, navigate to the Plugins menu and click Add New.
- Click "Upload Plugin" button and hit "Choose File" button
- When the popup appears select your downloaded zip file of plugin
- Follow the on-screen instructions and wait as the upload completes.
- When it's finished, activate the plugin via the prompt. A message will show confirming activation was successful.
- Download plugin zip file to your computer and unzip it
- Using an FTP application, or your hosting control panel, upload the unzipped plugin folder to your WordPress installation's
wp-content/plugins/directory. - In your WordPress admin panel, navigate to the Plugins menu and find your uploaded plugin
- Click on Activate link under the plugin. A message will show confirming activation was successful.
屏幕截图:
常见问题:
Email Reminders overview
- Reminders it's ready to send emails, that was created based on Rule(s) from specific Contact(s).
- It's can be emails that are sending before or after specific time to the event from Contact data. Like follow-up emails or friendly reminders about upcoming event.
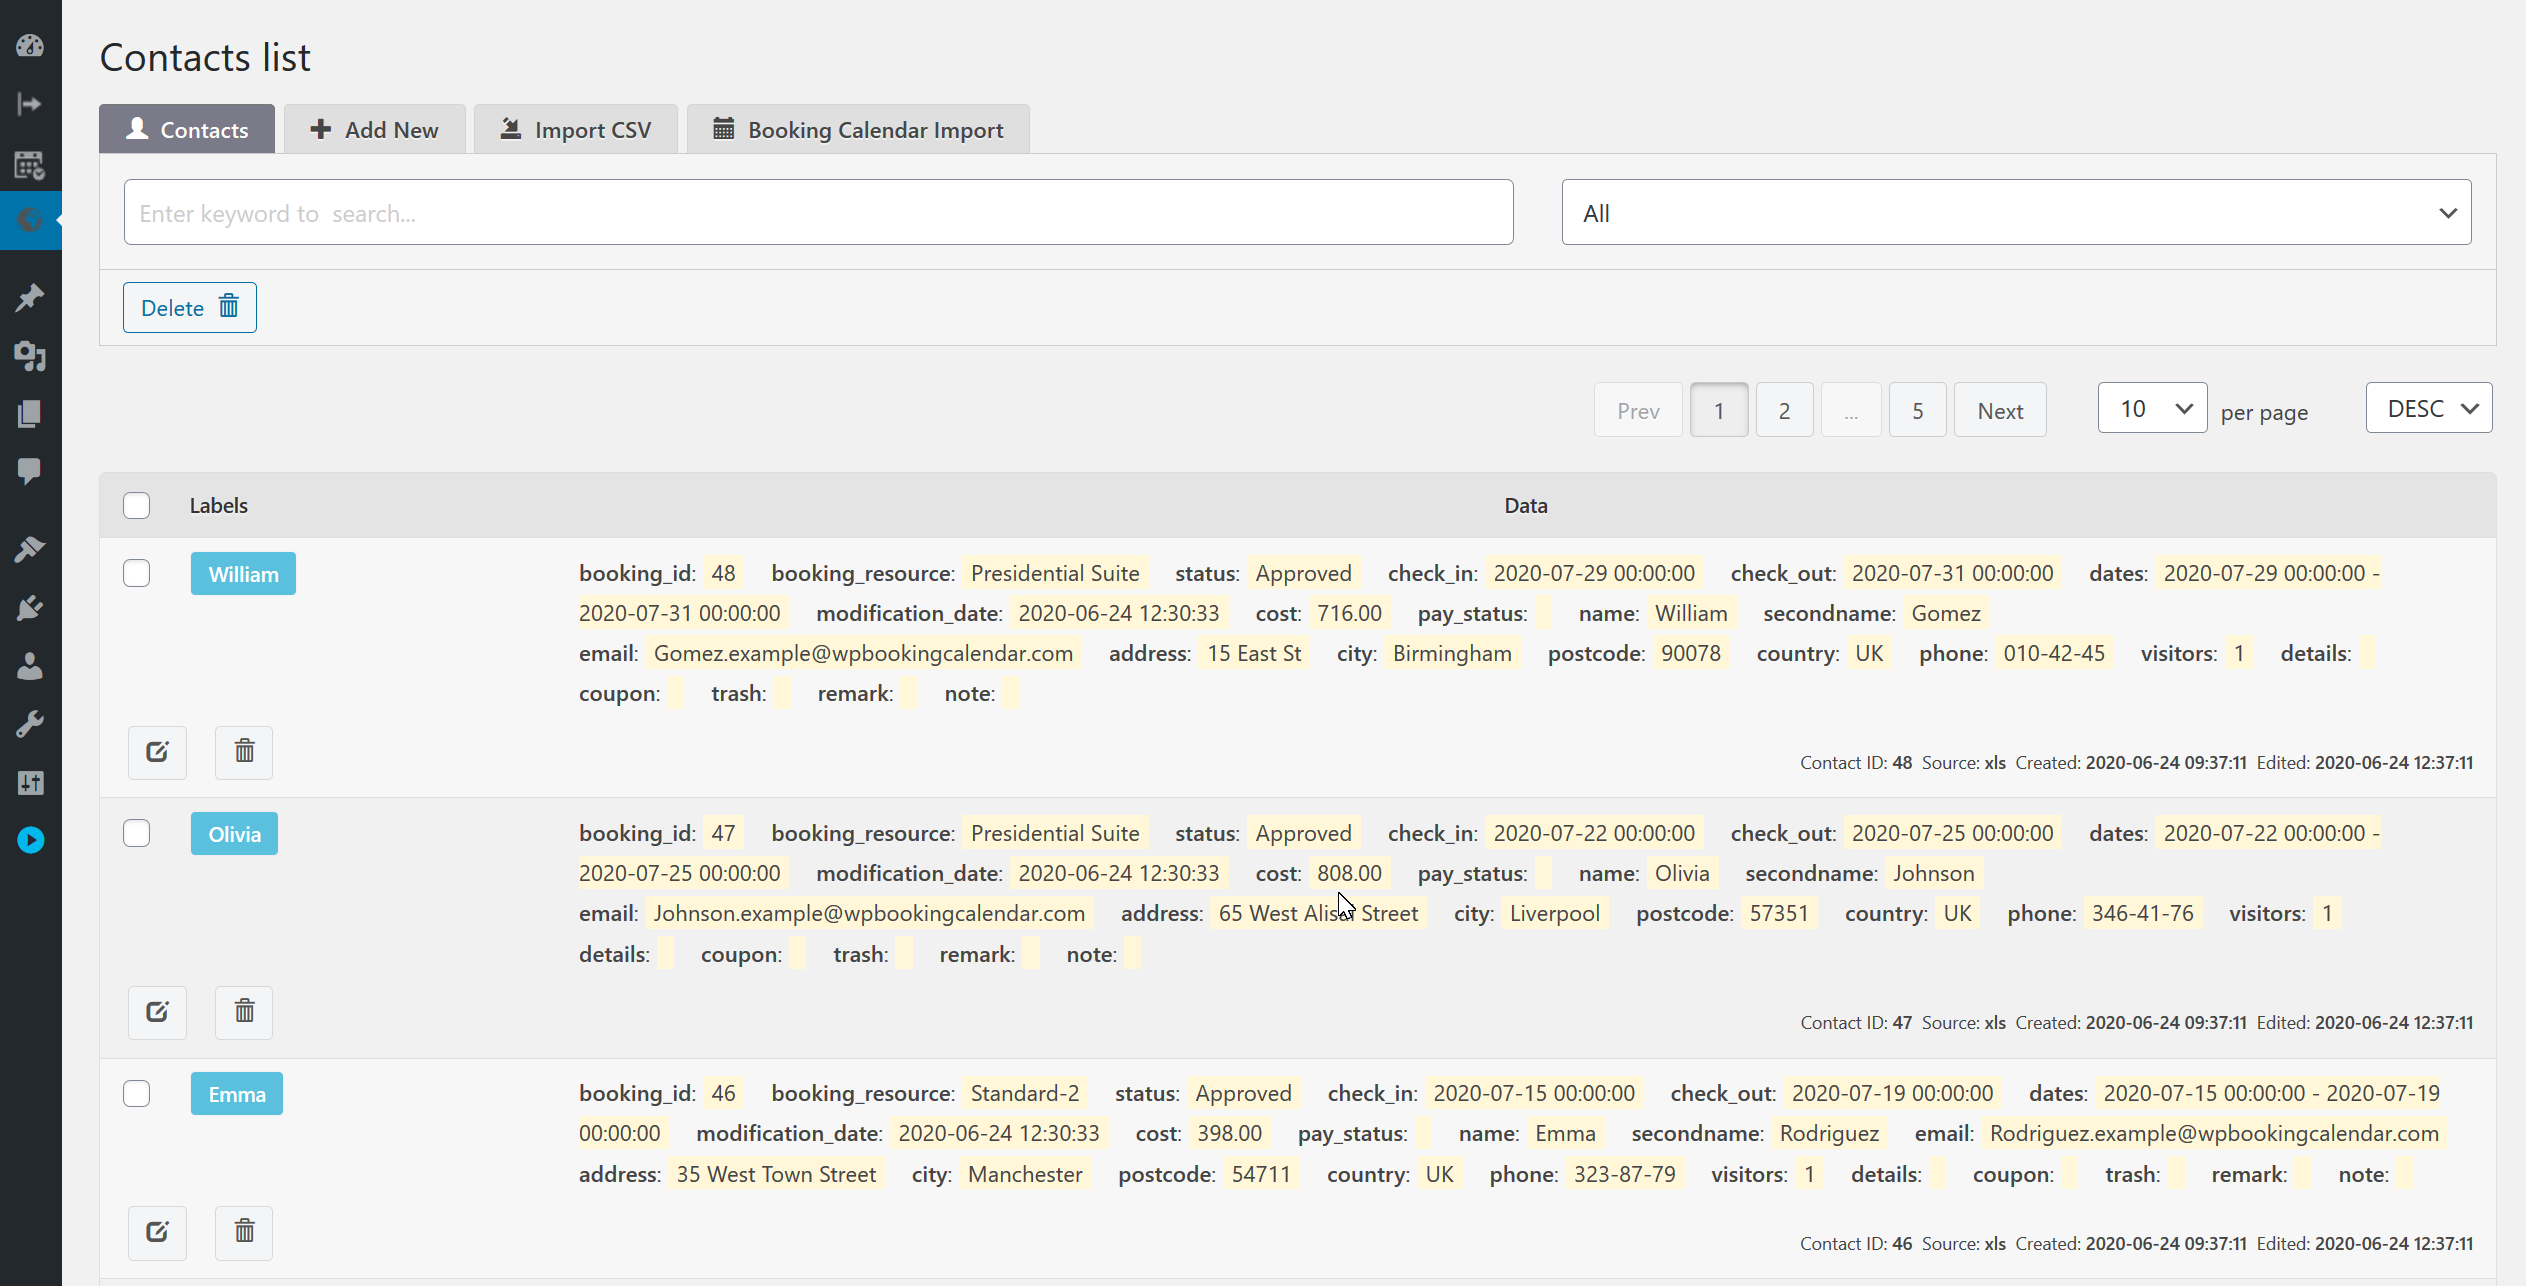
Contacts
- The term contact refers to the order of your product or service. It must contain all contact details and information about purchased product or service.
- At contacts page lists all your contacts. You can easily search for specific contacts by keyword, edit contact details or delete contacts.
- Contact fields structure depend on how a particular contact was added. If you add a contact manually, the system uses fields from contact form configuration. When importing contacts from a CSV file, the system uses columns as separate fields. And during importing from the Booking Calendar plugin, the system uses the structure of booking fields from that plugin.
- You can define specific contact fields as labels, which will be displayed separately with a specific color in the labels column on the contacts page. Labels can be defined as field names on the "Email Reminders > Settings General page" in the contacts section.
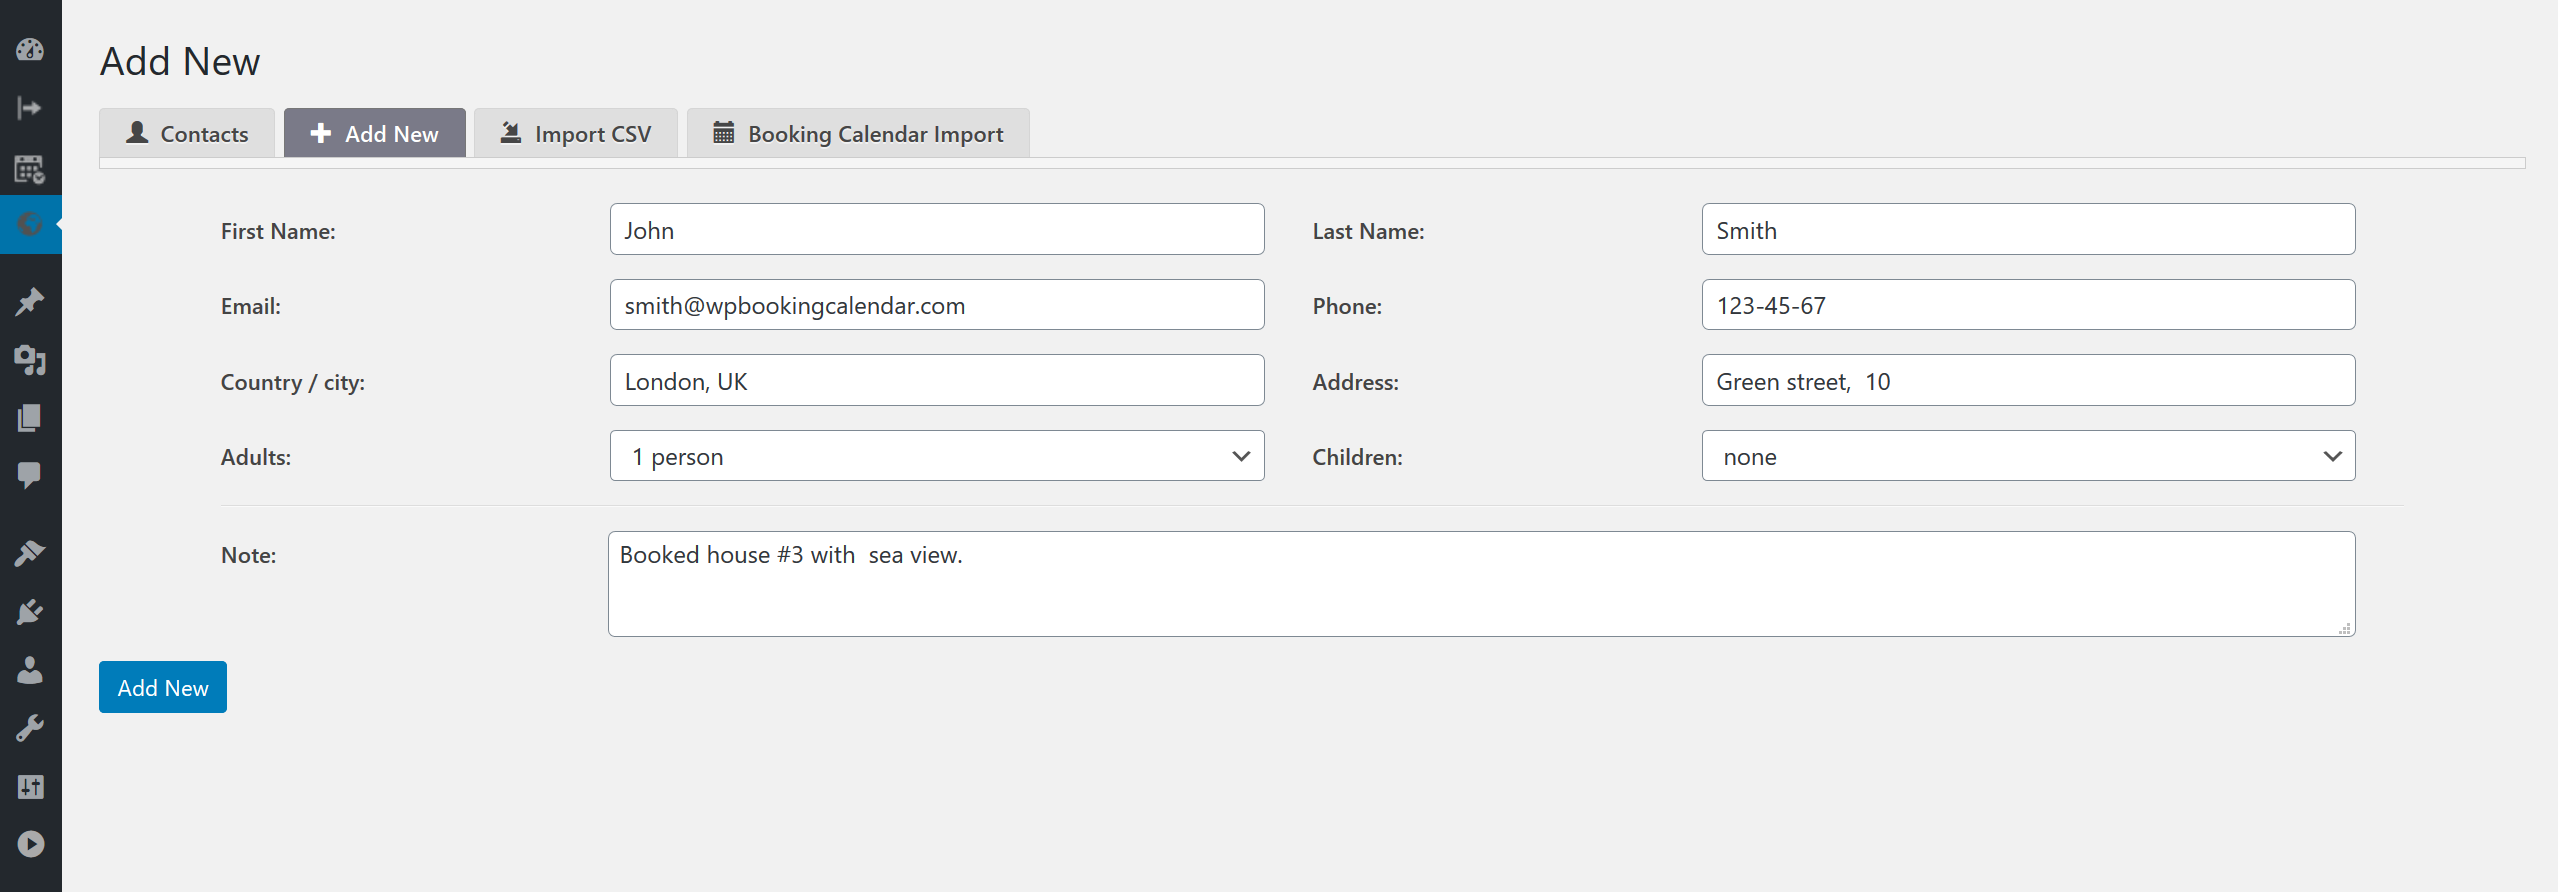
How to add a contact manually?
- Configure the fields to add a new contact on Email Reminders > Settings > Contact Form page.
- Fill in contact details on Email Reminders > Contacts > Add new page.
- Click the "Add New" button to create a new contact.
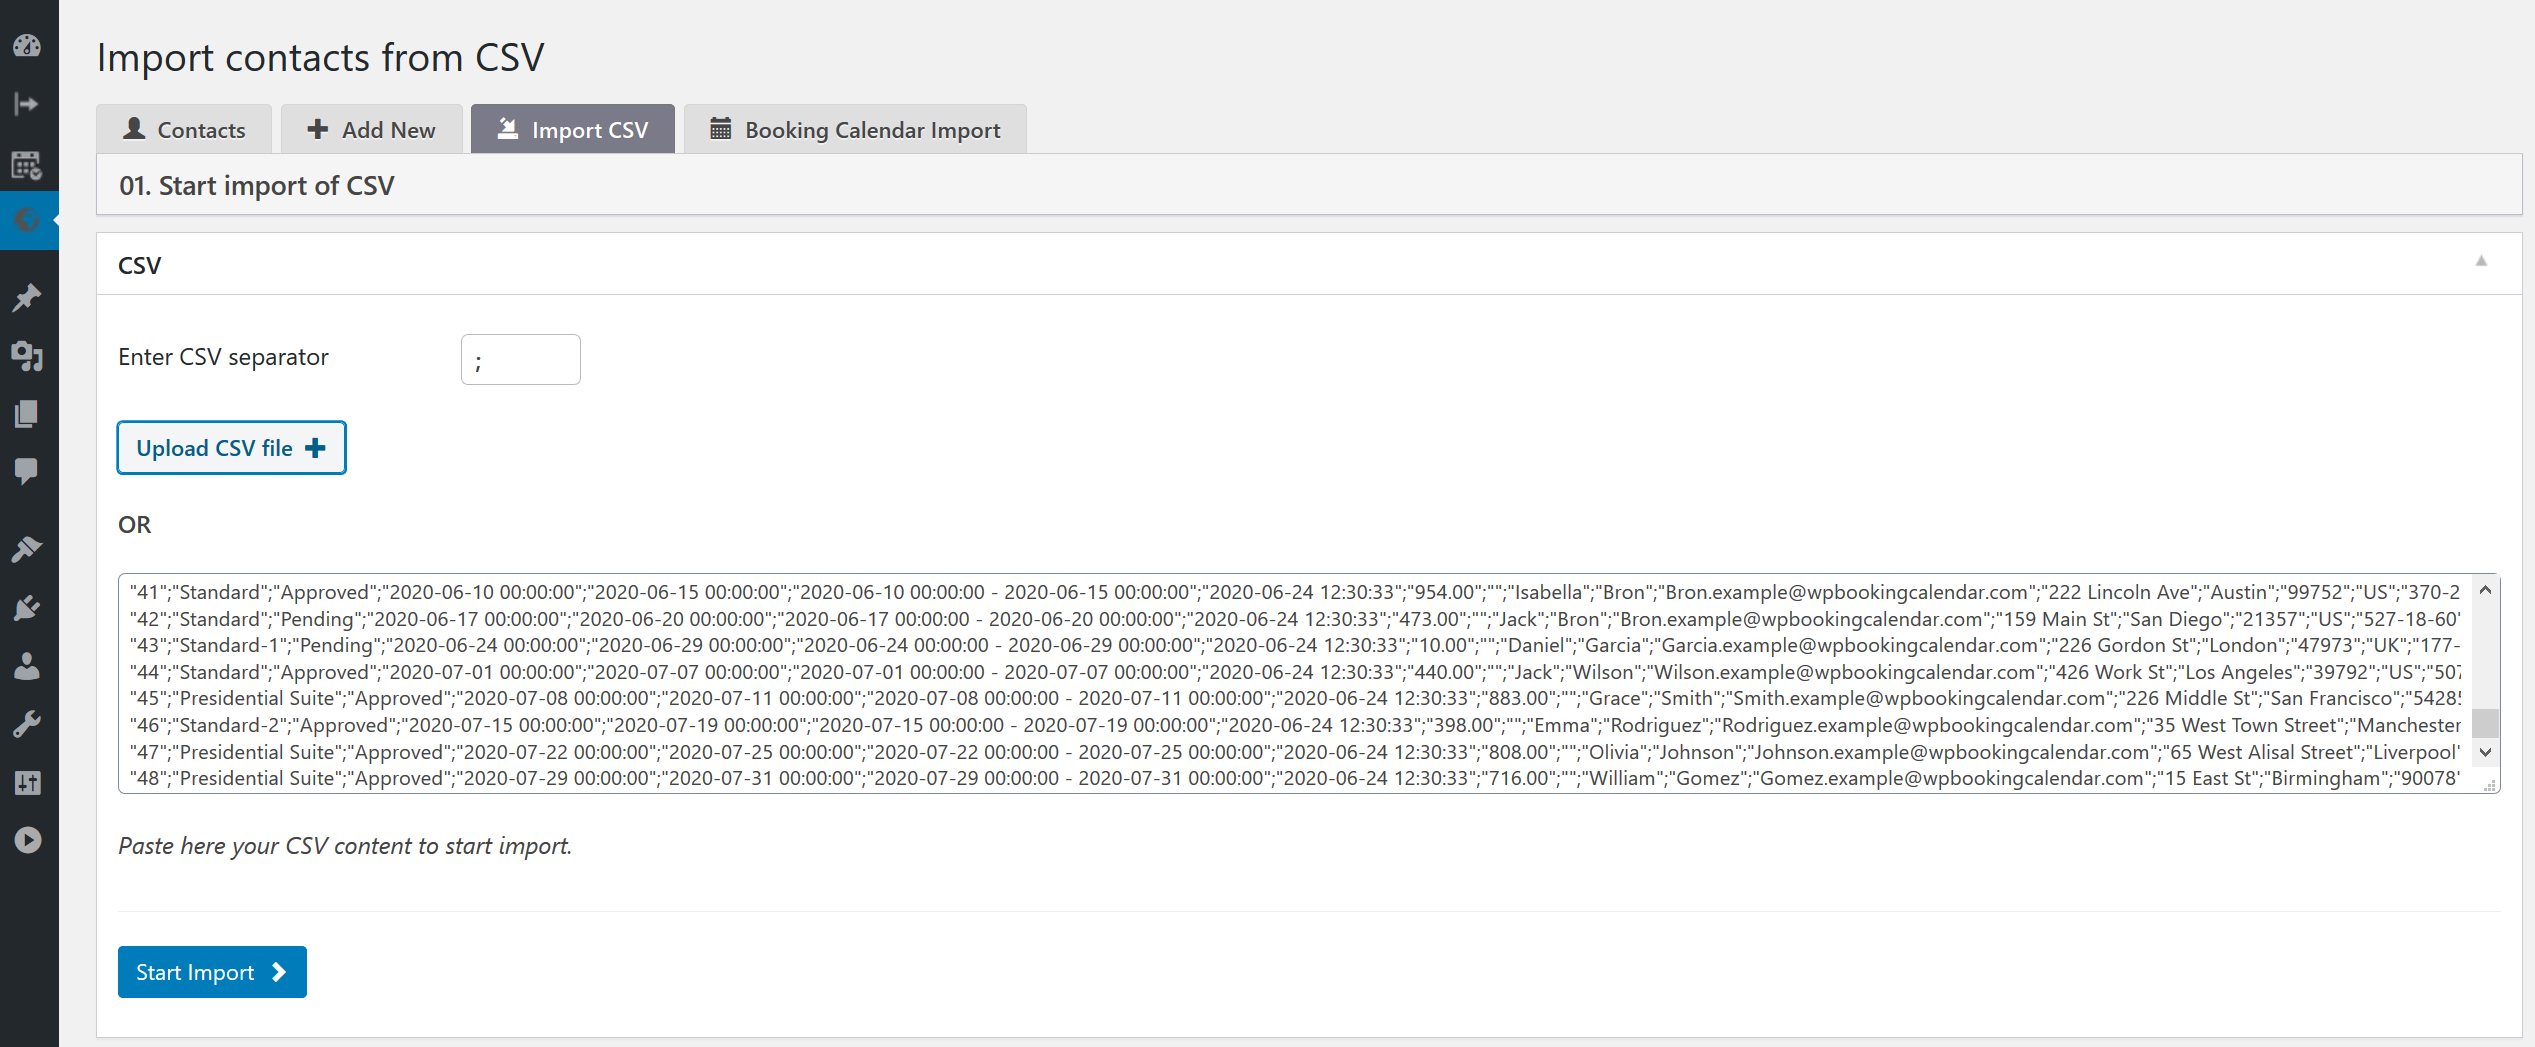
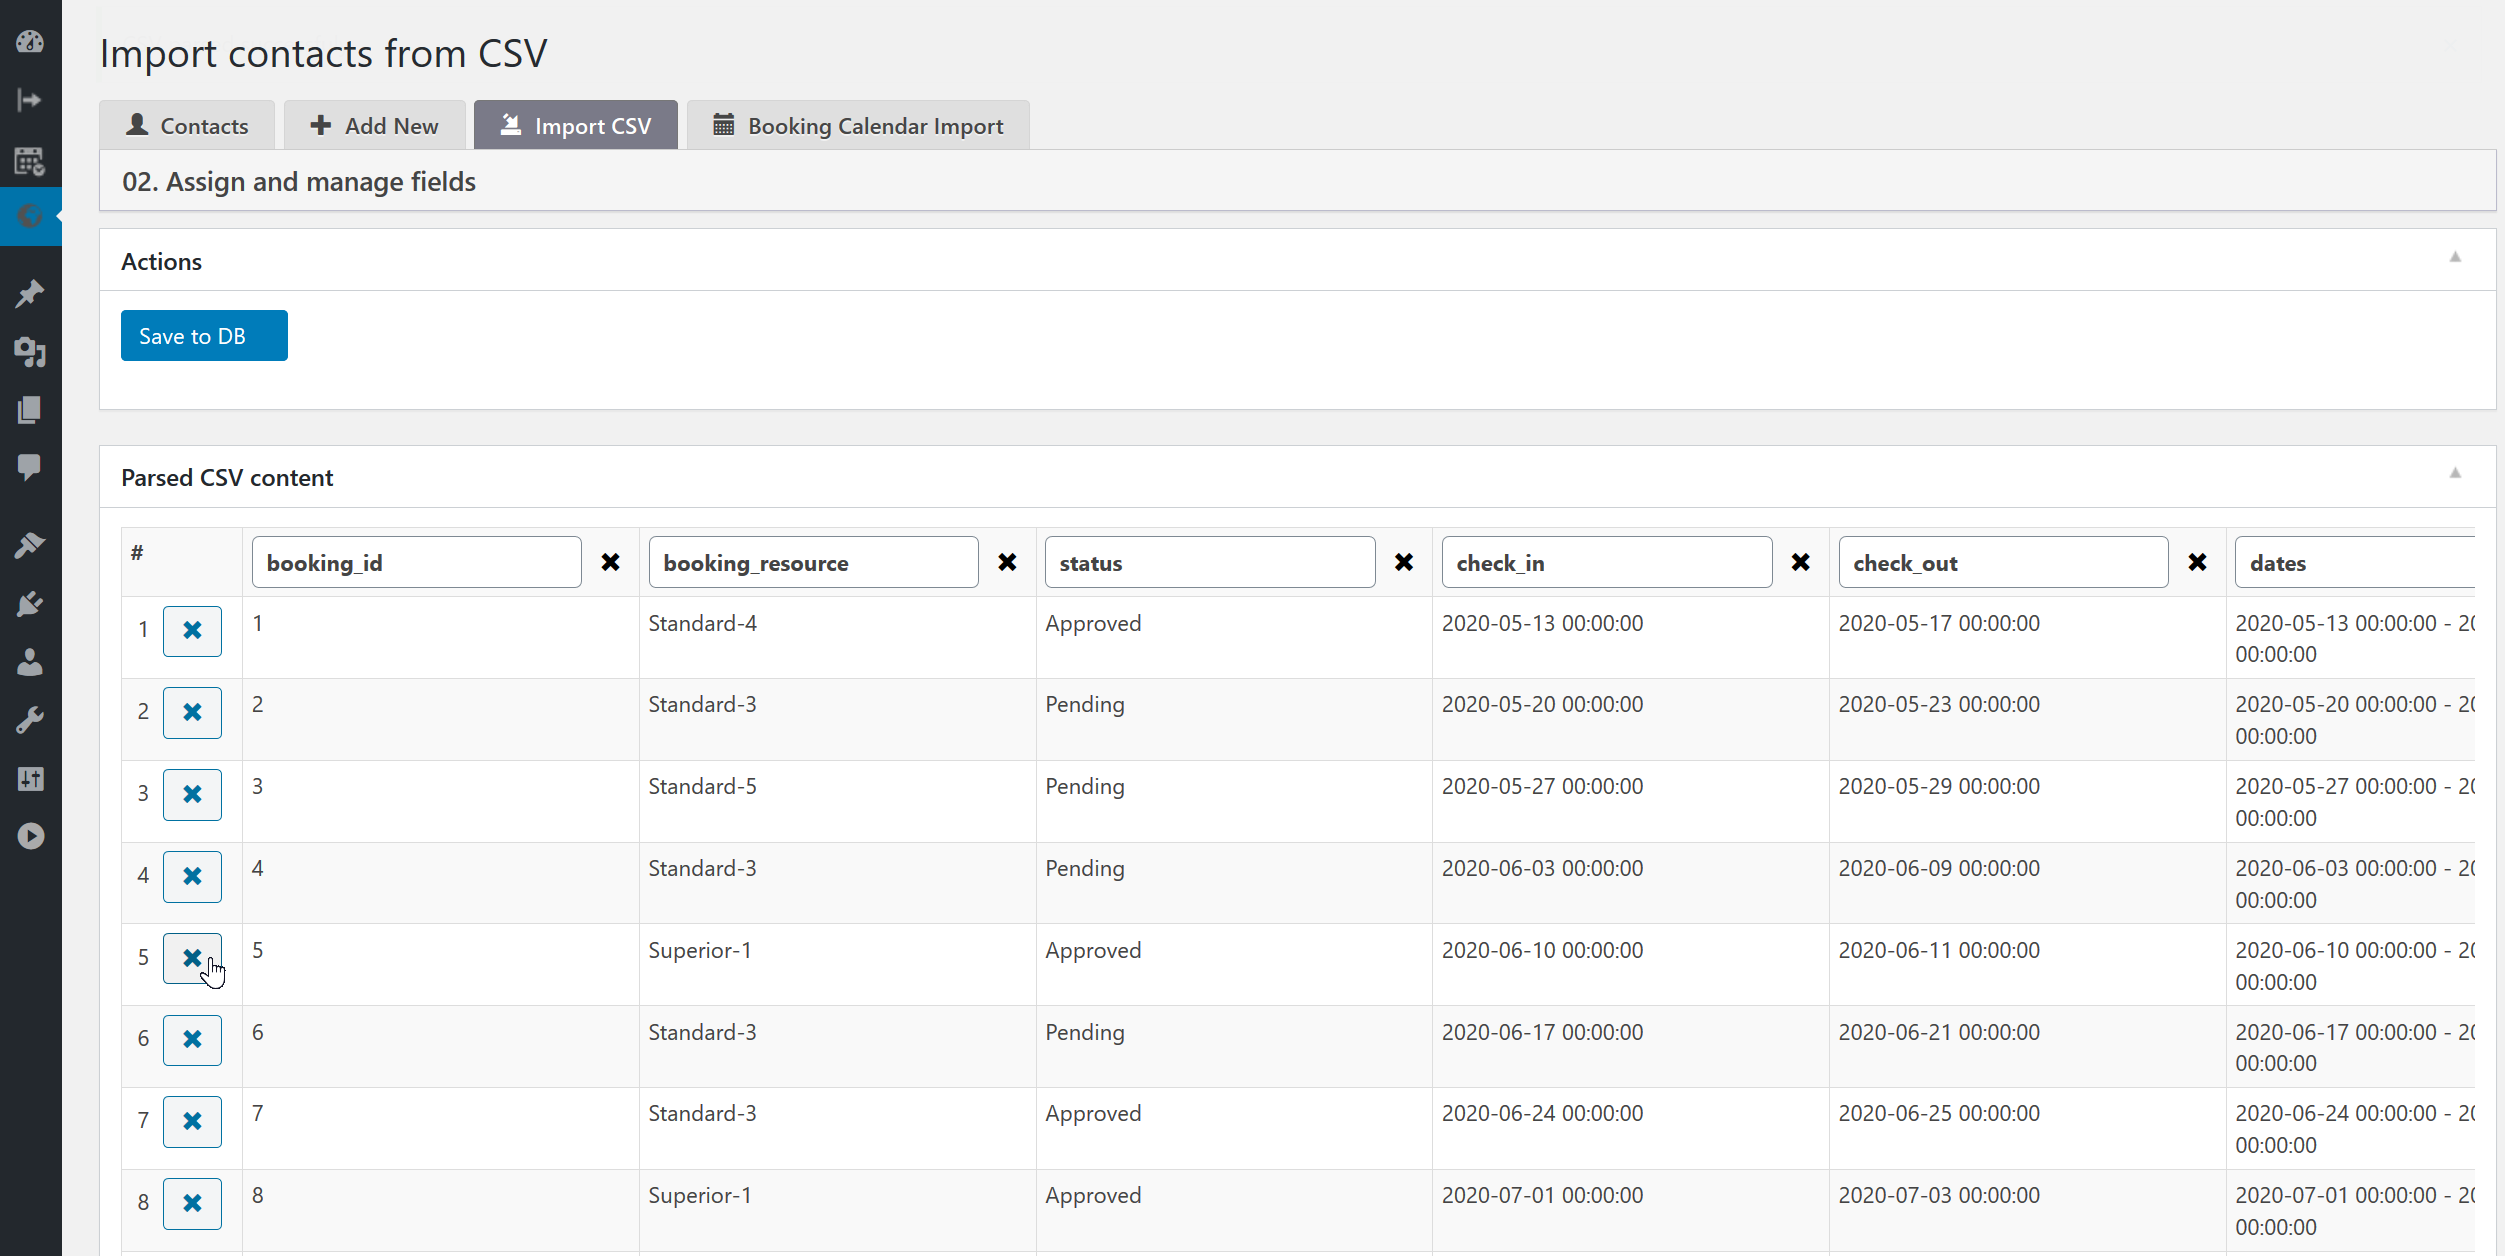
How to import contacts from CSV file?
- Please enter a separator for the CSV file, usually it can be a comma (,) or a semicolon (;) on Email Reminders > Contacts > Import CSV page.
- You can upload and select the CSV file (by clicking the Upload CSV file button), or simply copy / paste the contents of the CSV file into the text field on Email Reminders > Contacts > Import CSV page.
- Click the Start Import button to start the import process.
- On the new screen, you can delete specific columns or rows in the CSV table. You can also change the column names - it will determine the name of the contact fields. Please use only standard characters for fields such as A..Za..z0..9_.
- Click the Save to DB button for saving contacts.
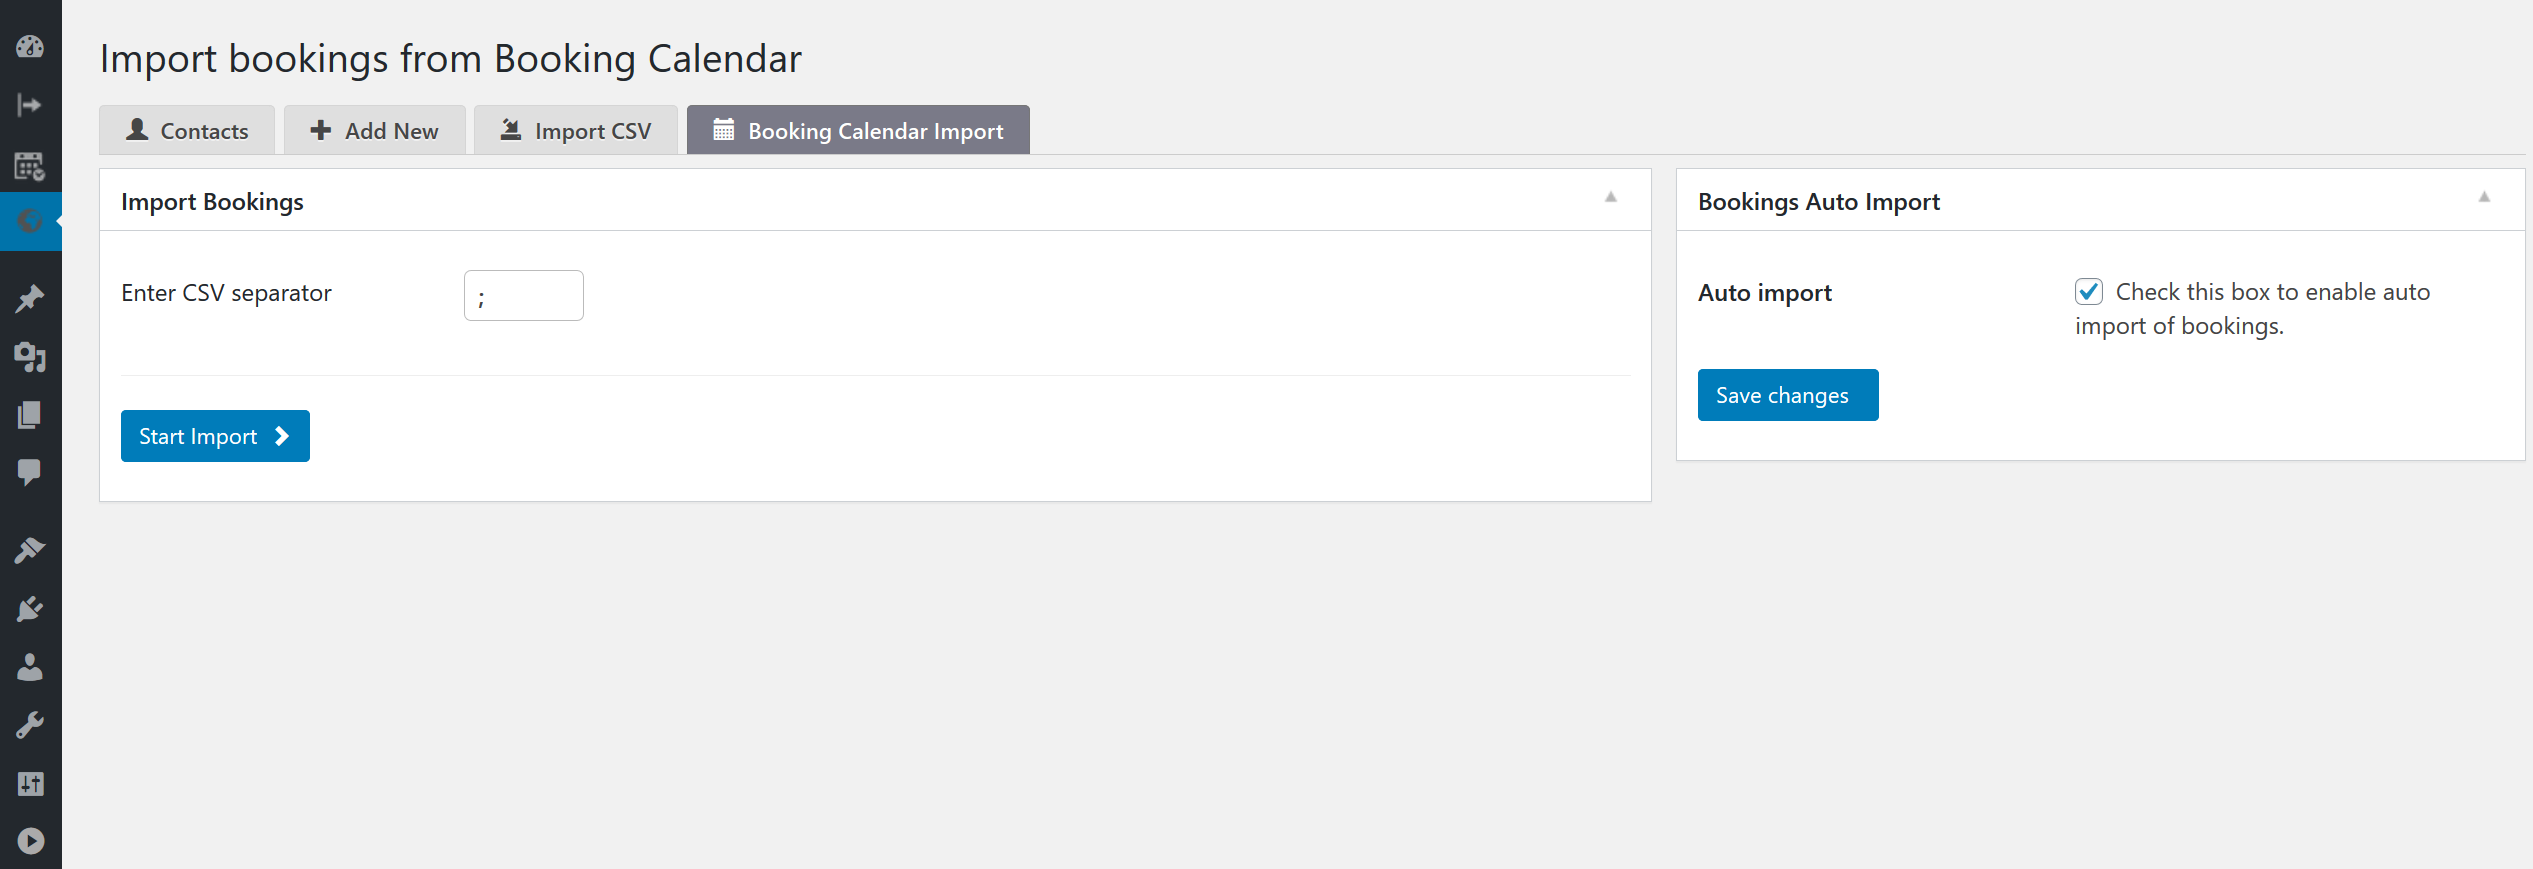
How to import contacts from Booking Calendar plugin?
- It's possible to import all bookings from the [Booking Calendar] (https://wordpress.org/plugins/booking/ "Booking Calendar") plugin.
- Please note that the bookings import is similar to importing CSV files. Because of this, you need to enter a separator for the CSV file, usually a (;) semicolon.
- Note. For automatically import of new bookings, set checked option Auto import on Email Reminders > Contacts > Booking Calendar Import page.
How to import contacts from Booking Calendar plugin?
- Click the Start Import button to start bookings importing on Email Reminders > Contacts > Booking Calendar Import page.
- On the new screen, you can delete specific columns or rows in the CSV table. You can also change the column names - it will determine the name of the contact fields. Please use only standard characters for fields such as A..Za..z0..9_.
- Click the Save to DB button for saving contacts.
Rules
- The term rules refers to the conditions for creating contact-based email reminders.
- Why do we need rules at all? Such conditions give us great flexibility to create new email reminders depending on any fields in contacts, and not just on certain specific predefined fields.
- The rules page lists all your rules. You can easily edit, delete or run certain rules.
- Typically, rules should be run once a day to create new email reminders, depending on the date(s) in contacts and current day. Of course, this can be more often if the conditions depend on the time of day relative to the current day. Or rarely, if the conditions are not dependent on dates and only on some other fields. In this case, the conditions may depend on how often new contacts are added to the system
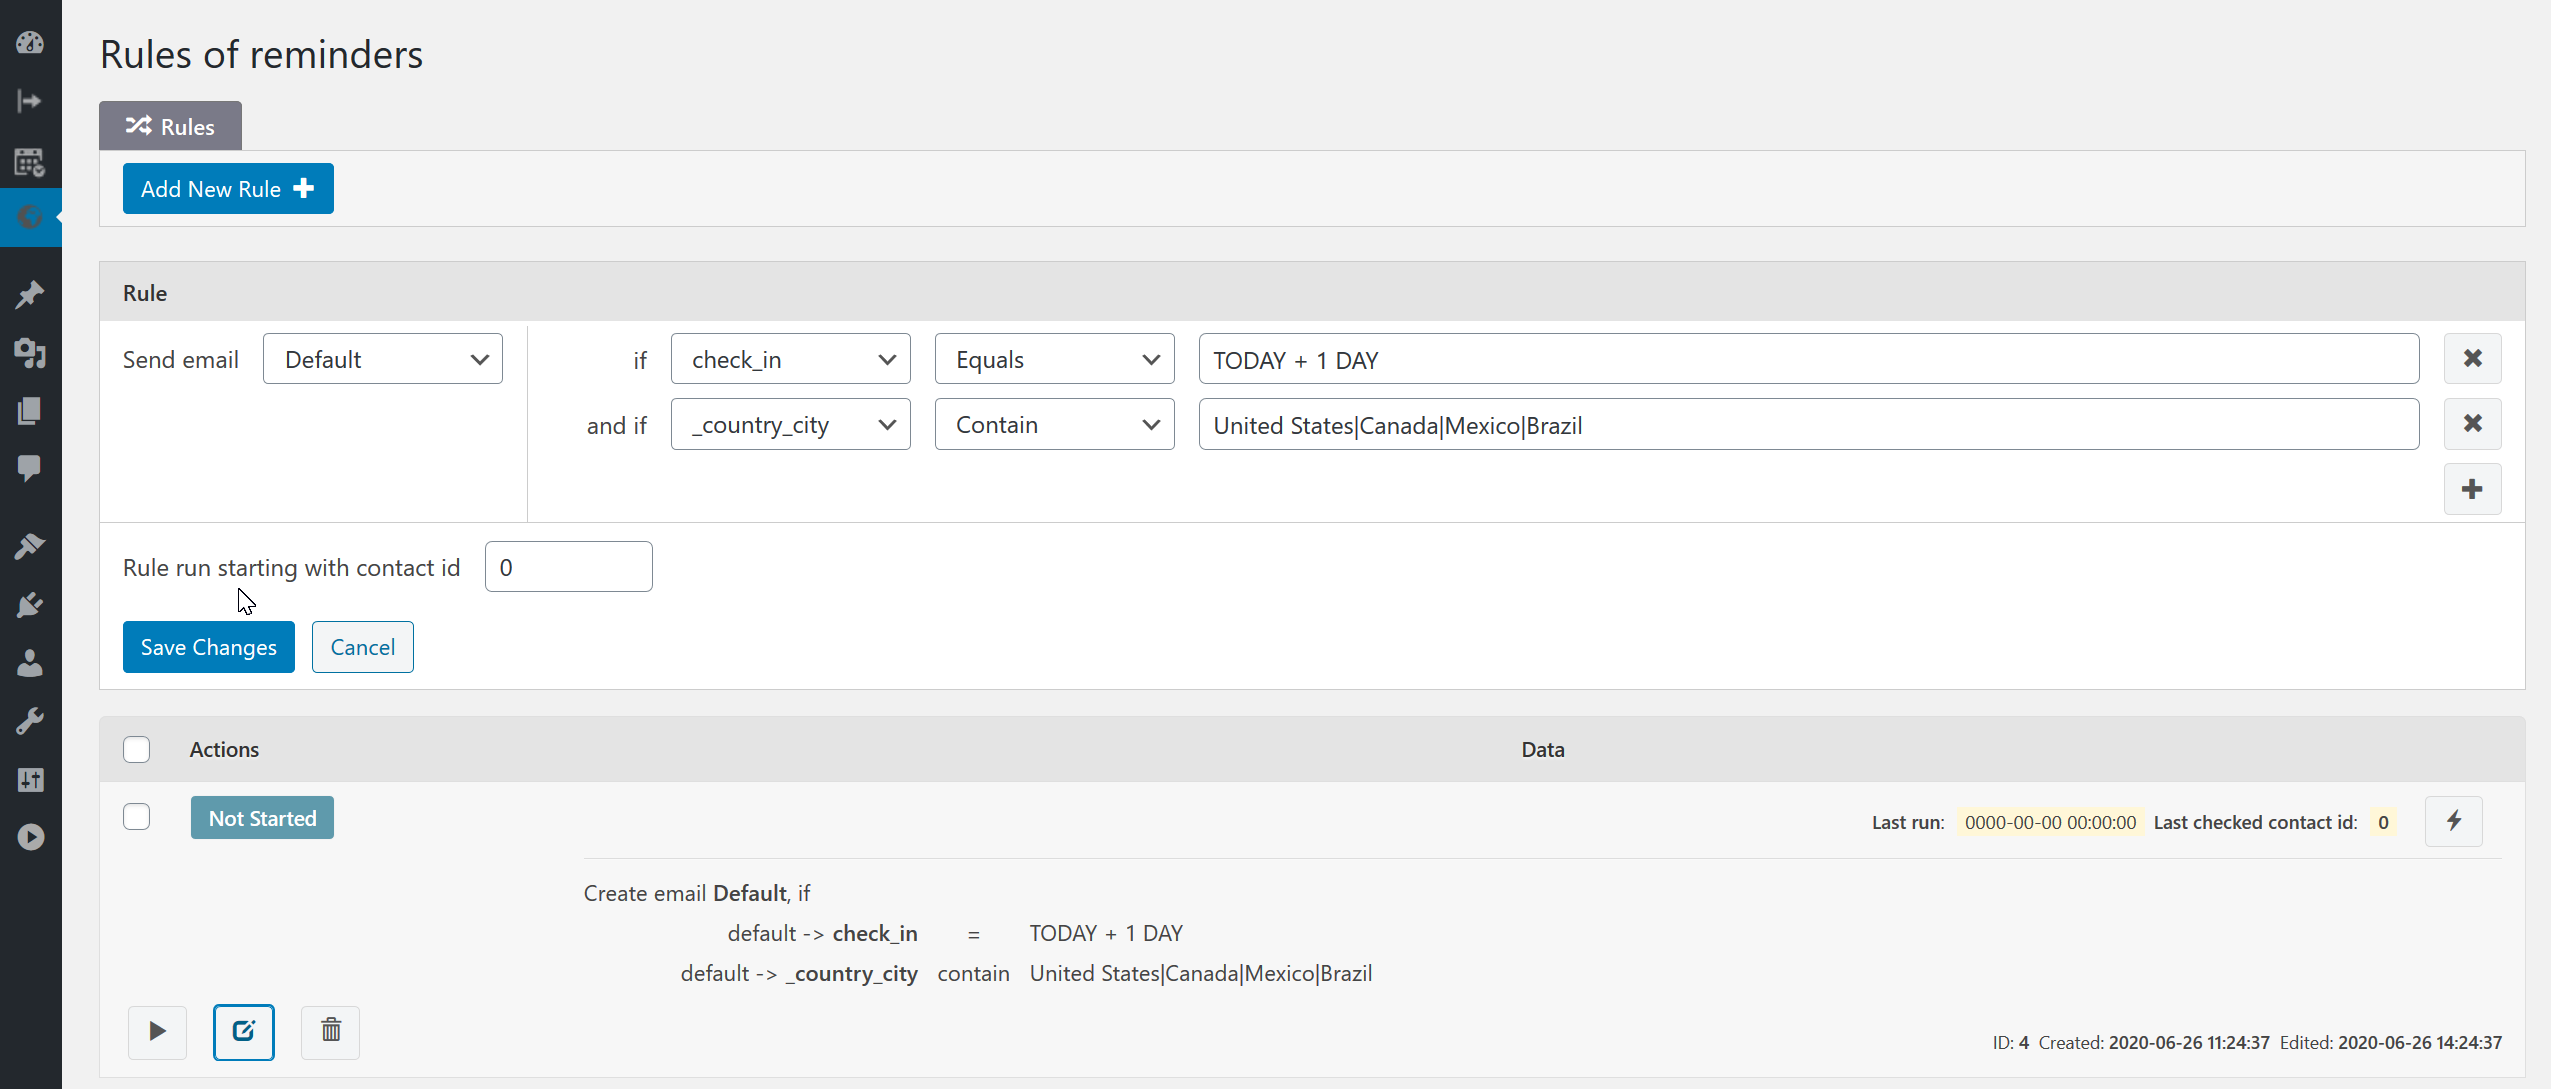
How to import contacts from Booking Calendar plugin?
- Click on "Add New Rule" button.
- Select the email template you want to use as an email reminder for sending. You can create and customize email templates on the emails settings page.
- Configure one or several conditions.
- Note. If your condition is for a date field, then you can use a configuration that can be used in the strtotime function.
- For example: If today is "2021-12-01", we need to search for all contacts with check_in date: "2021-12-02" ( e.g. TODAY + 1 DAY). If check_in date field contain times (like 2021-12-02 10:01:00), then we need to use 2 conditions: check_in > TODAY + 1 DAY ( e.g. 2021-12-02 00:00:00 ) check_in <= TODAY + 2 DAYS - 1 SECOND ( e.g. 2021-12-02 23:59:59 ) Follow-up email. 7 days after the event (TODAY - 7 DAYS): check_in > TODAY - 7 DAYS check_in <= TODAY - 8 DAYS + 1 SECOND
- Click on Create Rule button.
What does the “starting with contact id” field mean in rules page?
- This field indicates the contact ID from which the rule will be executed. This is useful for situations where you have thousands of contacts and you only need to handle the latest and not all together. Please note that the system runs the rule with iterations by 1000 contacts per iteration to distribute the load on the server. And this field is updated automatically after each run. This is also useful in situations where the execution was interrupted for some reason, and the next time you start with the last processed contact lists.
How to run rule manually?
- Click on "Run" button to execute specific rule.
- System will run rule and create email reminders from contacts based on conditions of current rule. How all this work? When you click the run button, the system starts processing contacts from the last time checked contact ID. In case you need to start processing from the beginning of contacts, you can click the Reset button (at right side near specific rule), or edit this rule and set "Rule run starting with contact id" to certain value. The system process of 1000 contacts per iteration, which you can see on the log screen on the Rules page. Each rule can have several statuses: Not Started - when the rule starts from the beginning of contacts. In Process - the rule was executed early, but all existing contacts have not yet been processed. Finished - the rule was processed all exist contacts.
How to set up run rule automatically to create reminders?
Check more about how to set up run rule automatically to create reminders via CRON.
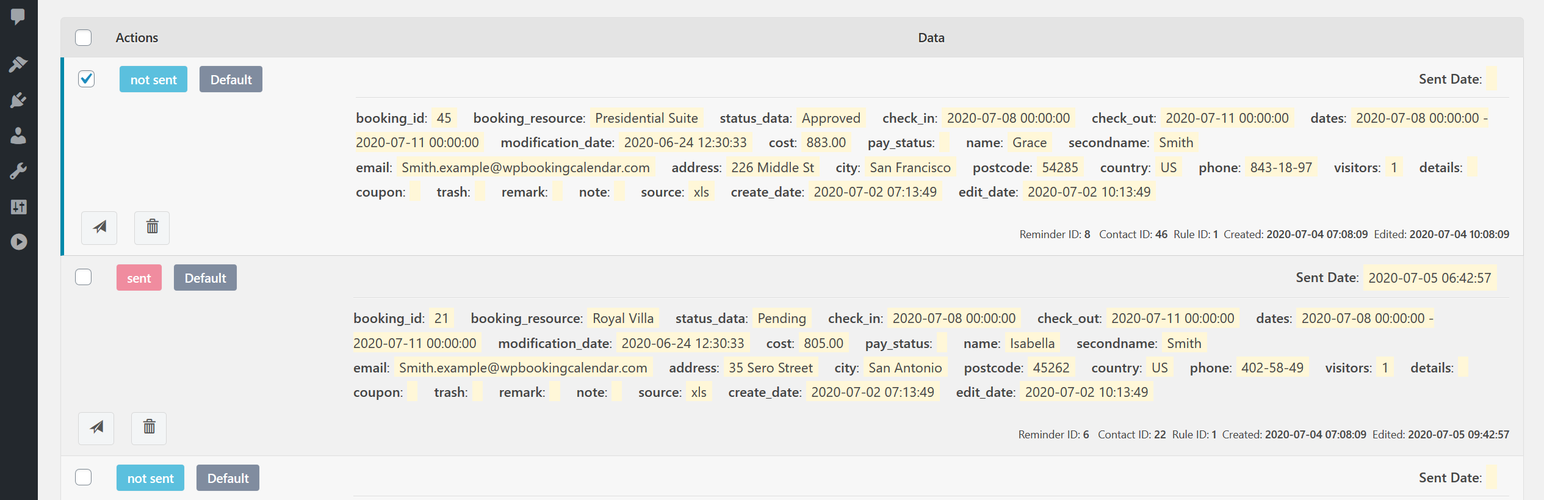
Reminders
- Reminders it's ready to send emails, that was created based on Rule(s) from specific Contact(s). It can be emails that are sending before or after specific time to the event from Contact data. Like follow-up emails or friendly reminders about upcoming event. How does it all work? The reminders page lists all your reminders. You can easily send or delete certain reminder. You can filter reminders to show only sent email reminders or emails reminders pending sending, or both. Next to each email reminder, you can check the status of this reminder (sent or not sent), as well as the name of the email template that uses the specific email reminder. To be able to send a specific reminder, you need to determine the name of the email field from the contact data that is used to send emails. You can define it at the Settings page for the "Email field name" option.
How to create reminders manually?
- Create or import contact(s) at contacts menu page.
- Create rule for creation new reminders at rules menu page.
- Execute rule - by clicking on "Run" button near specific rule. After this you will have new reminders at current reminders menu page.
- Now you can send one or multiple email reminders at current reminders menu page.
How to send reminder manually?
- Click the "Send" button next to a specific reminder to send it on the reminders page.
- Or select several email reminders (by checking checkbox next to each specific reminder), and then click on Send button on the toolbar. It will send all selected reminders.
How to set up automatic sending of reminders?
Open "Email Reminders" > Settings > Automate (CRON) menu page and set checked this option "Enable CRON to send reminders" to send email reminders automatically. You can define the time intervals, when CRON system will check for sending email reminders and define Number of reminders to send option. Check more about CRON configurations.
Languages
Plugin supports following languages:
- English
Requirements
- WordPress 5.4 or newer
- PHP 5.6 or newer
- MySQL version 5.0 or newer
更新日志:
2.0.7
- Fix Notice: Function _load_textdomain_just_in_time was called incorrectly.
- Fix Escaping the Labels at Customer page to prevent the vulnerable to XSS in shortcode. (2.0.6.1)
- Fix Escaping the ID parameter in shortcode to prevent the vulnerable to XSS in shortcode. (2.0.5.1)
- New Added support Booking Calendar 9.8 and newer versions.
- New modern design in the admin panel that offers a sleek interface. (2.0.3.1 -> 9.5.5.1)
- Load some CSS files only at admin panel (2.0.2.1)
- Added custom input fields for internal usage (2.0.2.2)
- Fix: Deprecate_d: trim(): Passing null to parameter #2 ($characters) of type string is deprecate_d in ..\email-reminders\includes\csv-parser\class-csv-parser.php on line 193 (2.0.2.3)
- New. Icon for WordPress side menu. (2.0.1.2)
- Fix. Issue with expand WordPress side menu (2.0.1.3)
- Fix Warning: fopen(..\plugins\email-reminders/languages/): failed to open stream: No such file or directory in ..\wp-includes\pomo\streams.php on line 160 (2.0.1.1)
- Automate sending email reminders and rules running for creation of reminders via CRON. Check more here https://oplugins.com/faq/how-to-set-up-run-rule-automatically-to-create-reminders-via-cron/ (2.0.0.1)
- Support WordPress 5.8
- Support WordPress 5.7 (1.0.3.1)
- New. Added new "Expire in" option for Rules. You can define time, when rule will be reset "contact ID" to 0 for starting checking this rule again for contacts from beginning. (1.0.2.2)
- Fix. Showing Notice: Undefined index: ... in ..\email-reminders\includes\page-reminders\reminders_send.php on line 357 (1.0.2.1)
- Support WordPress 5.6
- Fix. Fatal error: Uncaught Error: Call to undefined function wpdebk_get_keyed_all_bk_resources() in ... (1.0.1.1)
- Fix. Showing Notice: Undefined property: stdClass::$remark in ... (1.0.1.2)
- Initial release