
JetHost Total Care – Security & Enhancements
| 开发者 | jethost |
|---|---|
| 更新时间 | 2026年5月7日 16:20 |
| PHP版本: | 7.4 及以上 |
| WordPress版本: | 6.9 |
| 版权: | GPLv2 or later |
| 版权网址: | 版权信息 |
详情介绍:
JetHost Total Care simplifies your WordPress management by consolidating essential features like security, site enhancements and performance into a single, user-friendly plugin. This eliminates the need for multiple plugins, reducing conflicts, improving performance, and streamlining your workflow.
安装:
Installing the JetHost Total Care Plugin
Method 1: Direct Installation from the WordPress Admin Panel
- In the WordPress admin menu, go to Plugins > Add New.
- Search for "JetHost Total Care".
- Click Install Now, then Activate.
- The JetHost Total Care menu item will now be available in your main WordPress admin menu.
- Download the JetHost Total Care plugin .zip file.
- Upload the .zip file to the /wp-content/plugins/ directory on your server (via FTP, SFTP, or your hosting control panel\'s file manager).
- In the main WordPress admin menu, go to Plugins.
- Activate the JetHost Total Care plugin.
- The JetHost Total Care menu item will now be available in your main WordPress admin menu.
- Download the JetHost Total Care plugin .zip file.
- In the main WordPress admin menu, go to Plugins > Add New.
- Click Upload Plugin at the top of the page.
- Choose the downloaded .zip file and click Install Now.
- Click Activate.
- The JetHost Total Care menu item will now be available in your main WordPress admin menu.
屏幕截图:

更新日志:
2.5.1 2026-05-07
Fixes
- Image Converter: simplified the
wp_get_attachment_image_srcfilter callback to accept only the image array, preventing fatal errors when other code invokes the filter with unexpected argument types.
- Added "Image Converter" page under JetHost Total Care menu for next-gen image optimization.
- WebP format support.
- Auto-convert on upload — original image and all thumbnail sizes are converted using Imagick.
- Bulk conversion tool with progress bar to convert all existing media library images.
- Configurable quality setting (75 / 80 / 85 / 90 / 95).
- "Only keep if smaller" toggle — discards the converted file when it is larger than the original.
- "Auto-delete originals" toggle — removes original files after conversion and updates WordPress metadata so the media library shows correct thumbnails.
- Automatic URL rewriting via PHP filters — images are served with .webp URLs directly in src and srcset attributes. No .htaccess rules required.
- Per-format cleanup — delete WebP files or originals independently with per-format file counts.
- Page-load statistics: total images, already converted, and pending counts.
- Server capability detection showing WebP support status.
- Fixed error 500 returned from admin-ajax when using SVG images
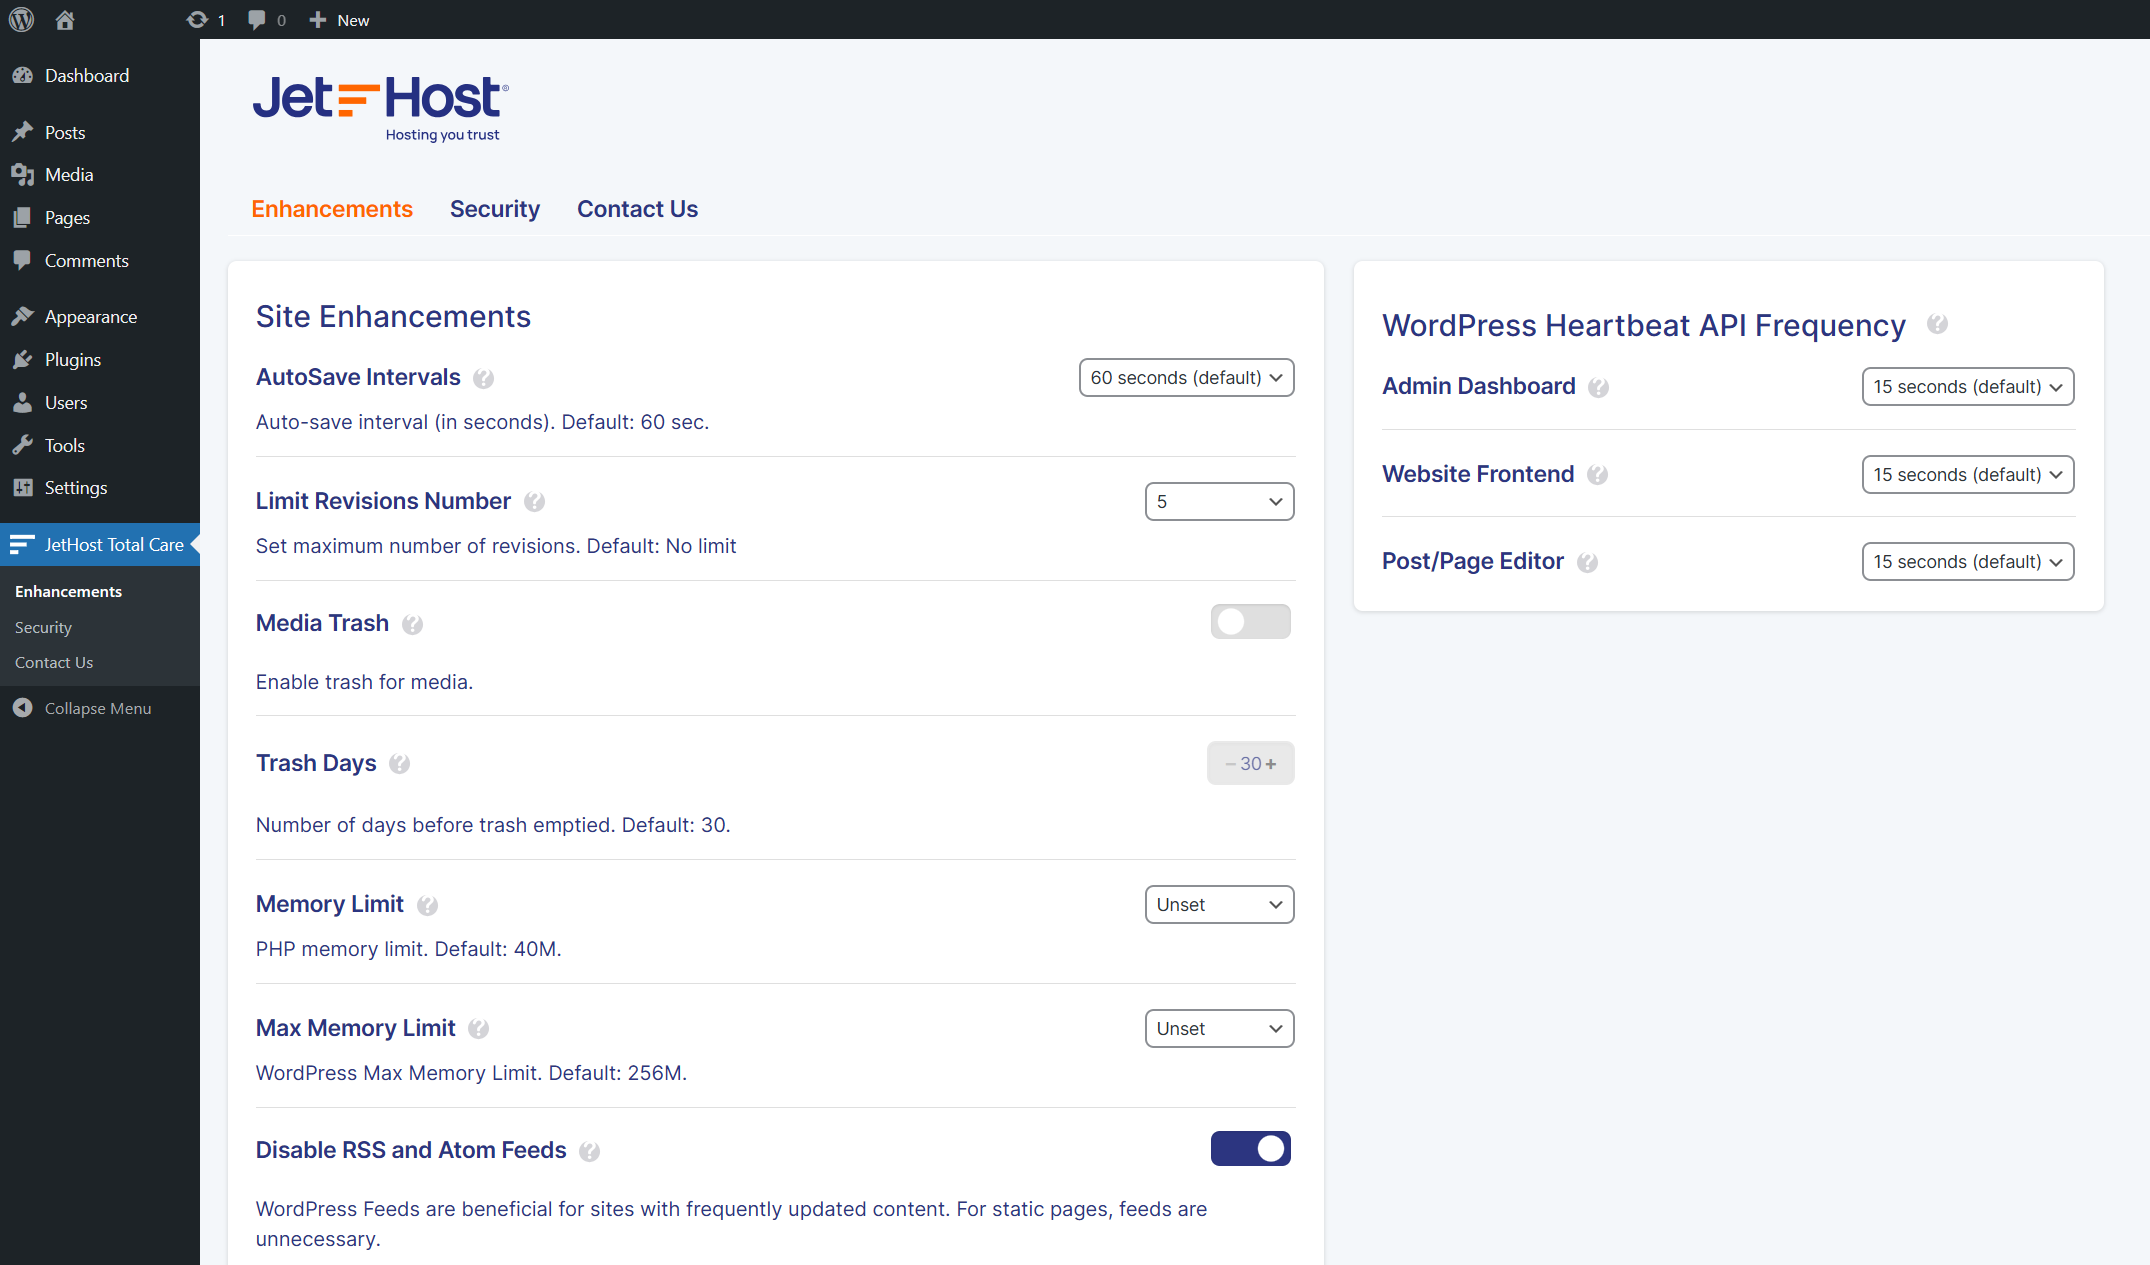
- Added "Disable Search Engine Indexing" toggle under Admin Enhancements to discourage search engines from indexing the site.
- Added "Enable SVG Uploads" toggle under Admin Enhancements allowing safe SVG file uploads with automatic sanitization. Disabled by default. Enhancements
- Moved the "Disable Embeds" option to the bottom of the Site Enhancements page for better organization.
- Tested up to WordPress 6.9. Fixes
- Removed redundant blog_public write on every page load.
- Corrections after plugin check review.
- Introduced "Database Optimization" section:
- Manual tools for optimizing database tables, revisions, comments, transients, and more.
- Scheduled automatic optimization with options for daily, weekly, or monthly intervals.
- Displays last optimization time using WordPress date format.
- Added "Under Maintenance Mode" under Admin Enhancements:
- Replaces frontend with multilingual maintenance page.
- Auto-detects sites language (EN/BG).
- Added option to change the default WordPress login URL to improve login security.
- Introduced a feature to disable comments on posts, pages, and attachments:
- Option to prevent future comments.
- Option to hide existing comments. Enhancements
- Improved visibility of the success notice bar with a new dark blue background and white text for better contrast.
- Introduced new "Admin Enhancements" section with the following tools:
- Duplicate posts/pages easily.
- Hide the admin bar on the frontend for all or selected users.
- Customize the WordPress login page with your own logo.
- Disable access to the Theme Editor and Plugin File Editor.
- Enforce usage of the Classic Editor by disabling Gutenberg.
- Password-protect the entire website with a single toggle.
- Configure custom login and logout redirects. Security Improvements
- Added "Limit Login Attempts" to prevent brute-force attacks.
- Added control for WordPress Heartbeat API frequency.
- Configure or disable heartbeat separately for Admin Dashboard, Post/Page Editor, and Website Frontend.
- Added option to disable WordPress emojis for performance boost.
- Added option to remove Dashicons from the frontend.
- Added option to disable oEmbed and associated scripts.
- Added option to remove jQuery embed from the frontend.
- Added a Bulgarian translation.
- Fixed issue with tags appearing in tooltips.
- Removal of hidden messages from other plugins that appeared in our plugin.
- Updated readme.txt with corrections and improvements.
- Added a language template file (.pot) for easier translation.
- Initial release