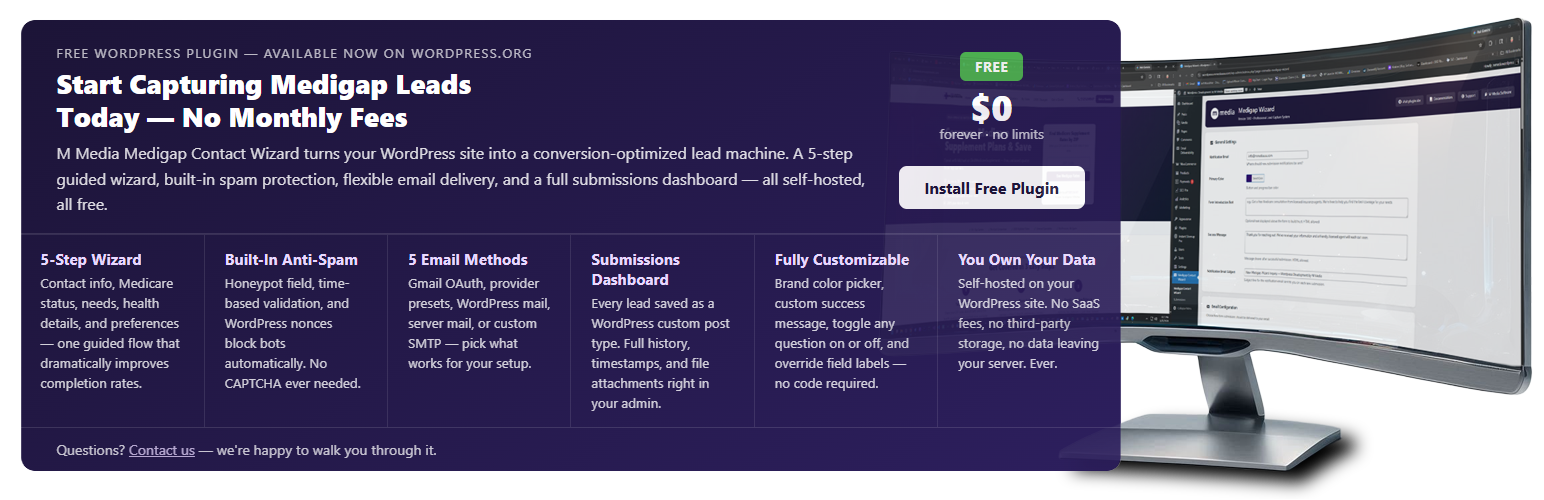
M Media Medigap Contact Wizard
| 开发者 | mmediasoftwarelab |
|---|---|
| 更新时间 | 2026年5月22日 09:49 |
| PHP版本: | 7.4 及以上 |
| WordPress版本: | 7.0 |
| 版权: | GPL2 |
| 版权网址: | 版权信息 |
详情介绍:
- Explicit, standalone consent checkbox separate from the Privacy Policy, never bundled with a purchase condition
- FCC-required disclosure language: names your agency, lists covered contact methods (calls, pre-recorded messages, SMS/MMS), and states consent is not required to receive a quote
- Phone field note tells prospects what they are consenting to before they reach the final step
- Every submission stores a full consent record as WordPress post meta: consent given (yes/no), Unix timestamp, submitter IP address, and the exact consent text presented at submission time
- Consent is optional prospects who prefer email-only contact can leave the box unchecked; the form still submits
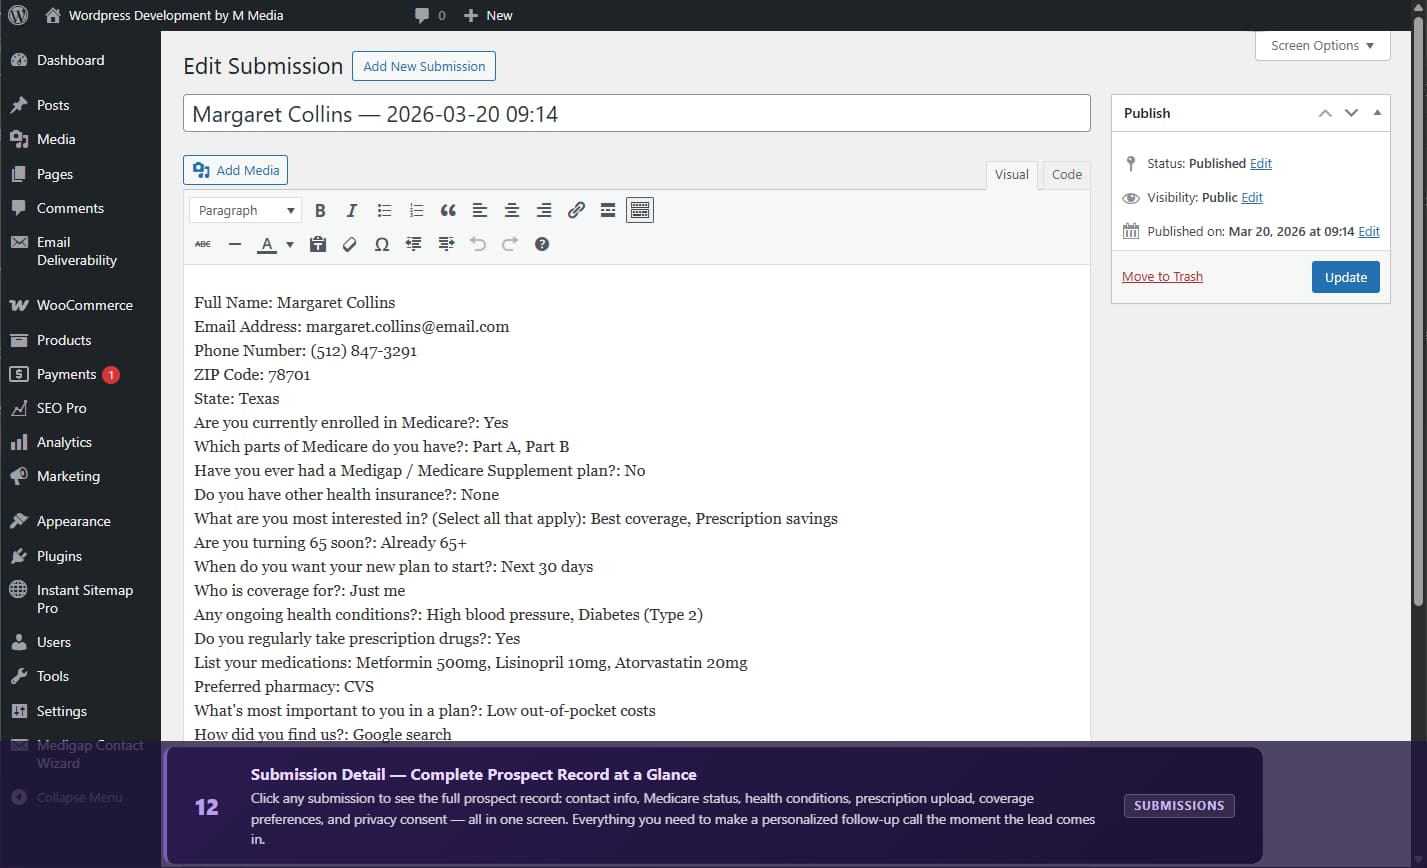
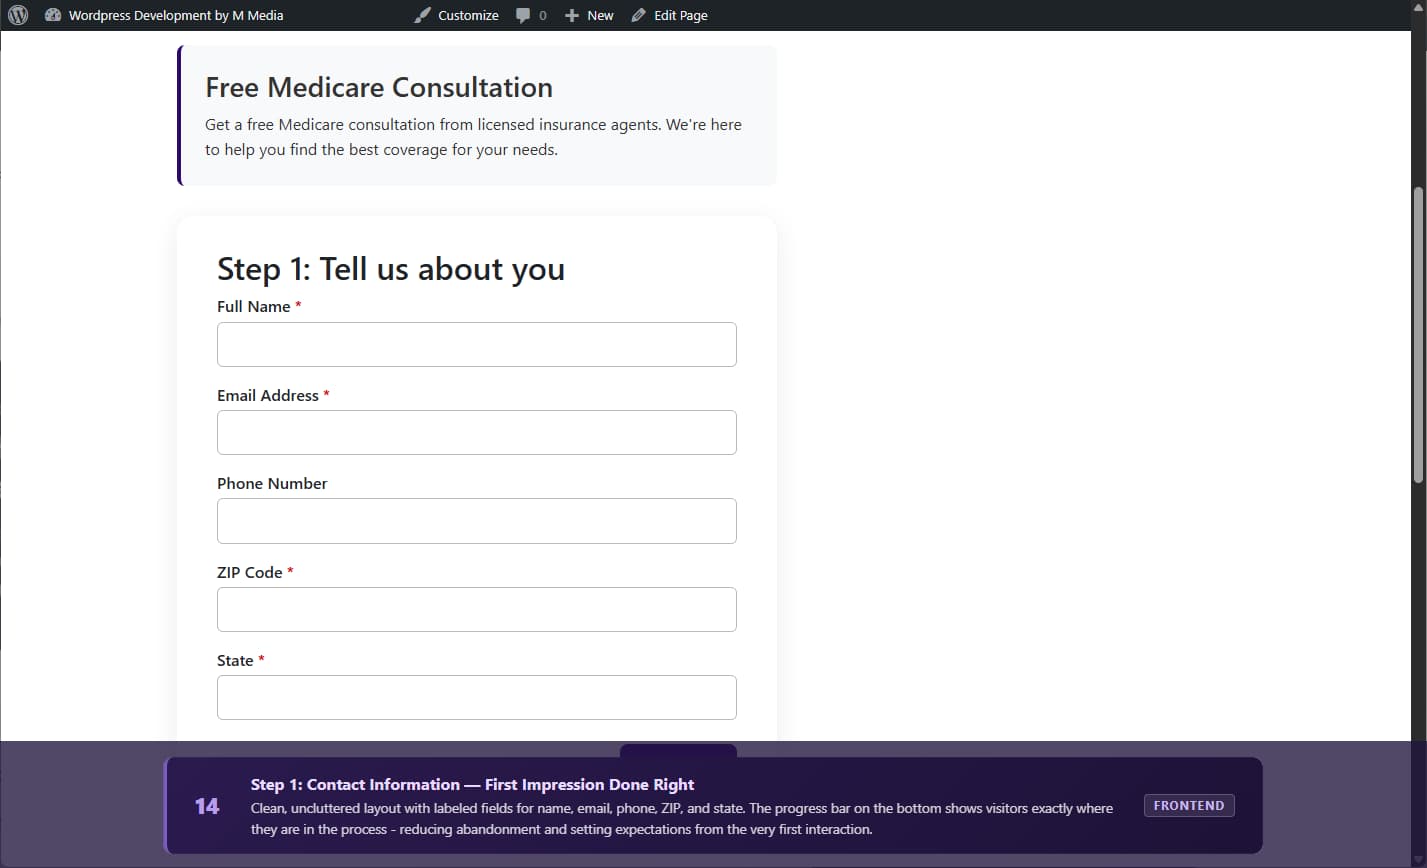
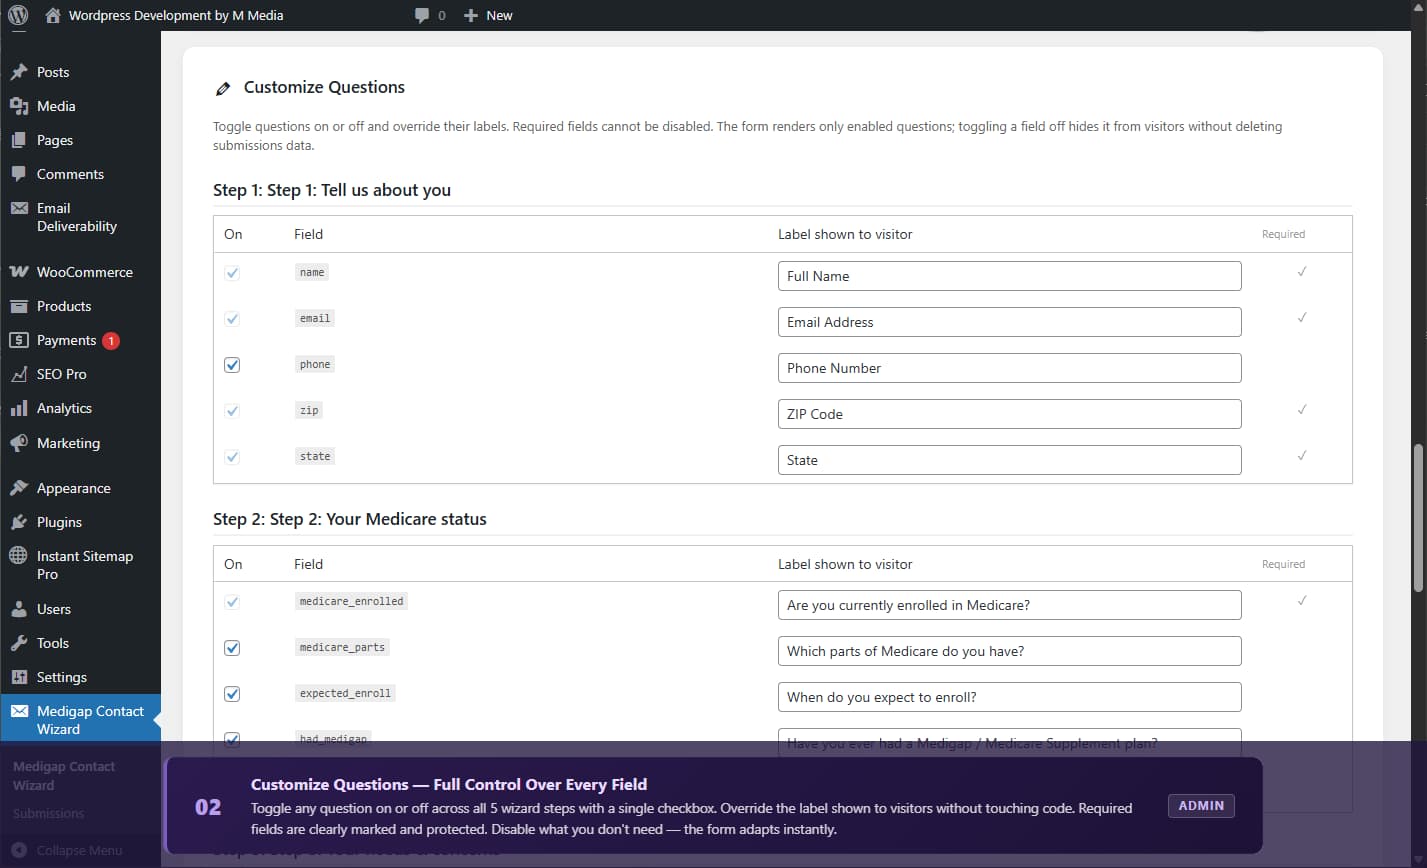
- Step 1: Contact Information (Name, Email, Phone, ZIP, State)
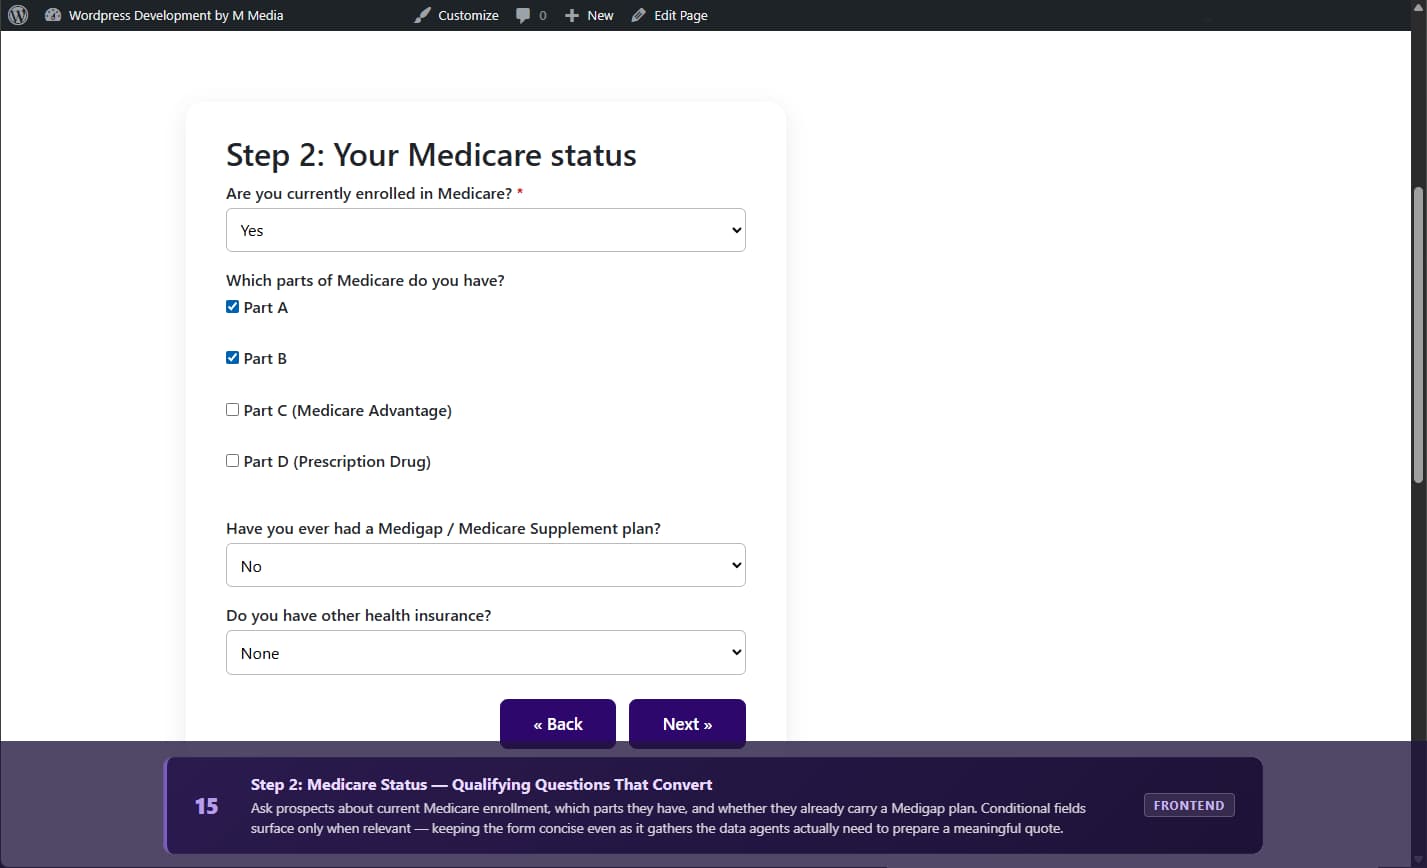
- Step 2: Medicare Status (Current enrollment, parts, existing coverage)
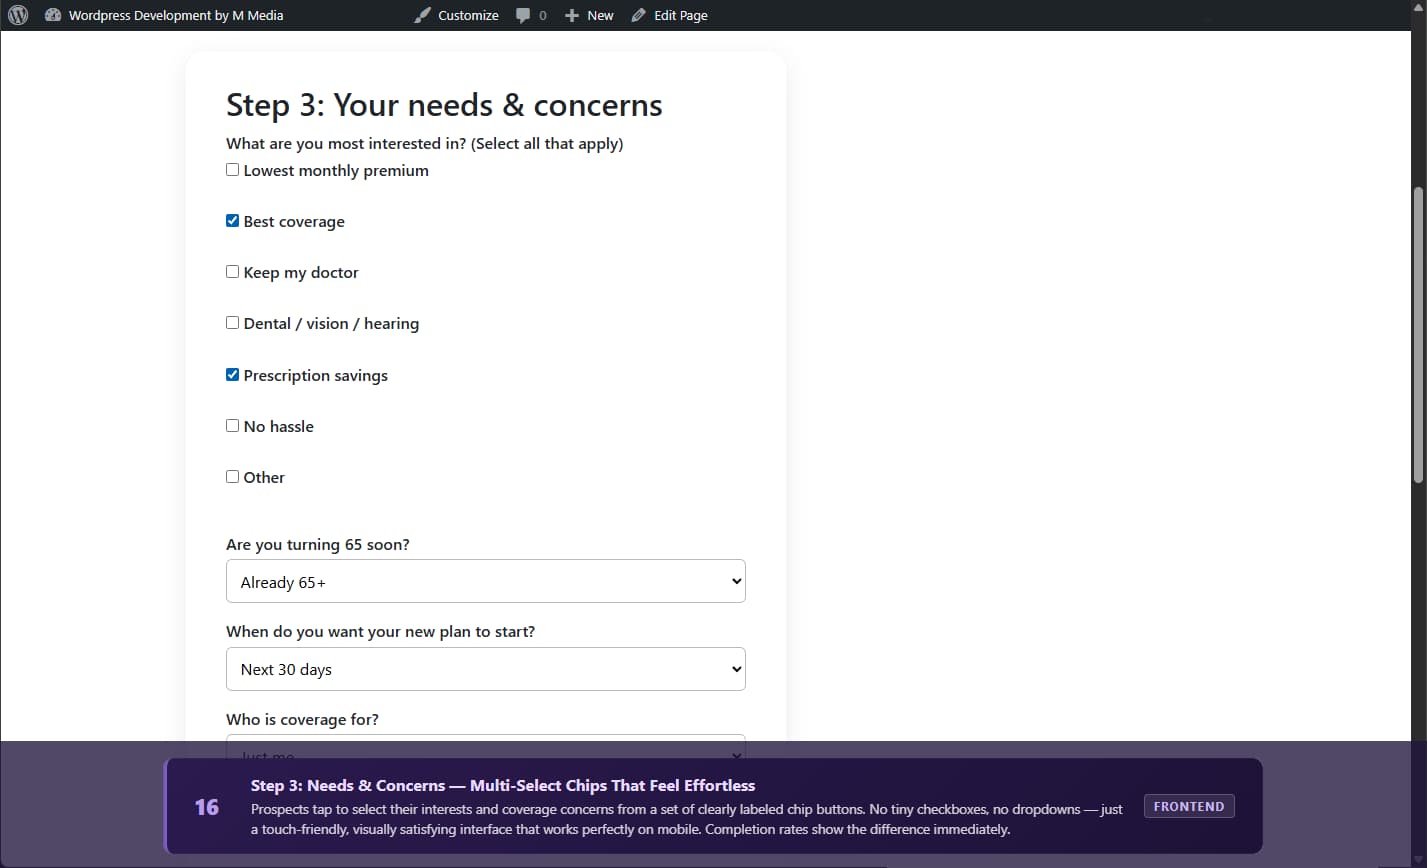
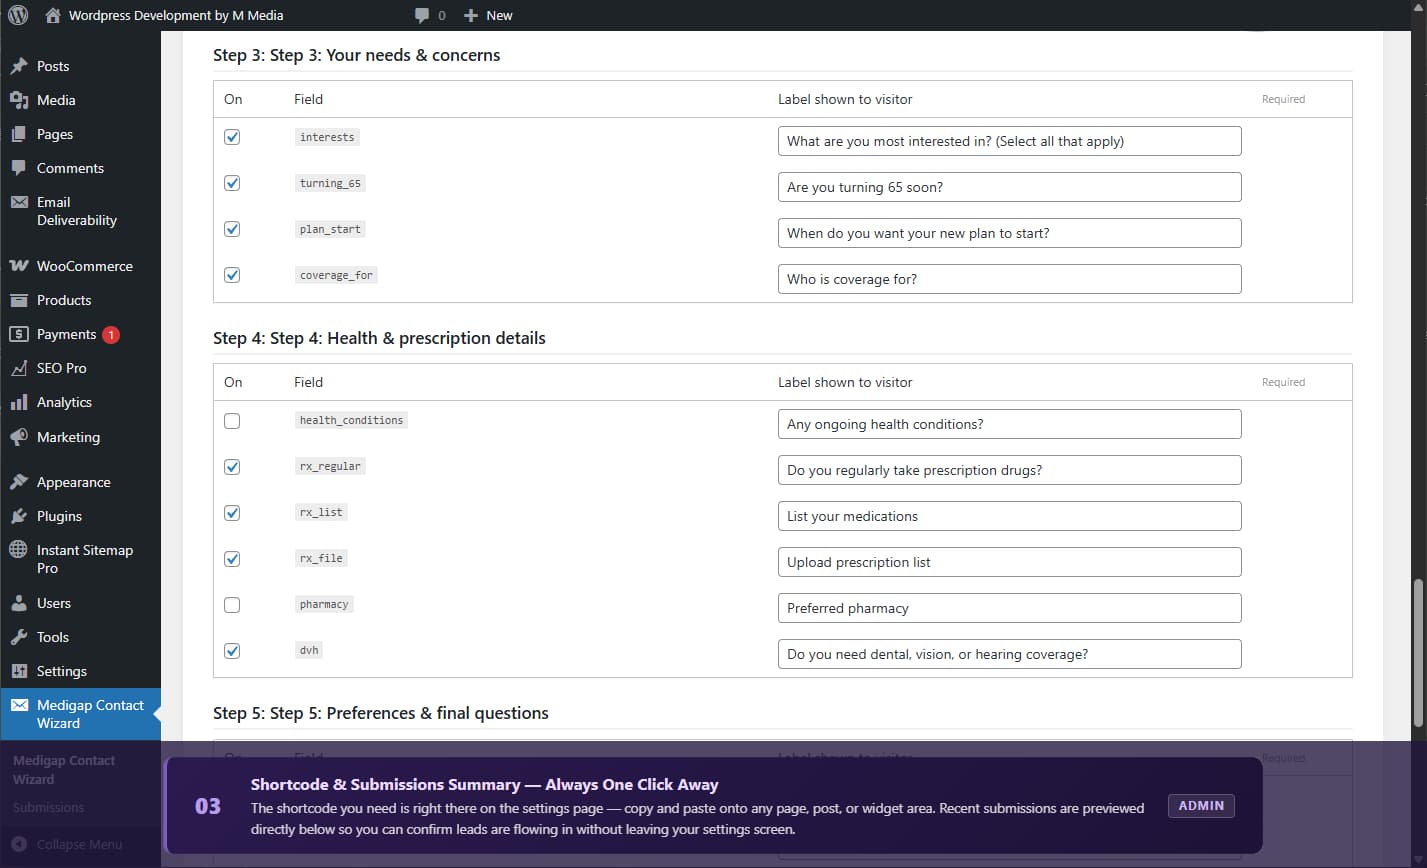
- Step 3: Needs & Concerns (Interests, timing, coverage requirements)
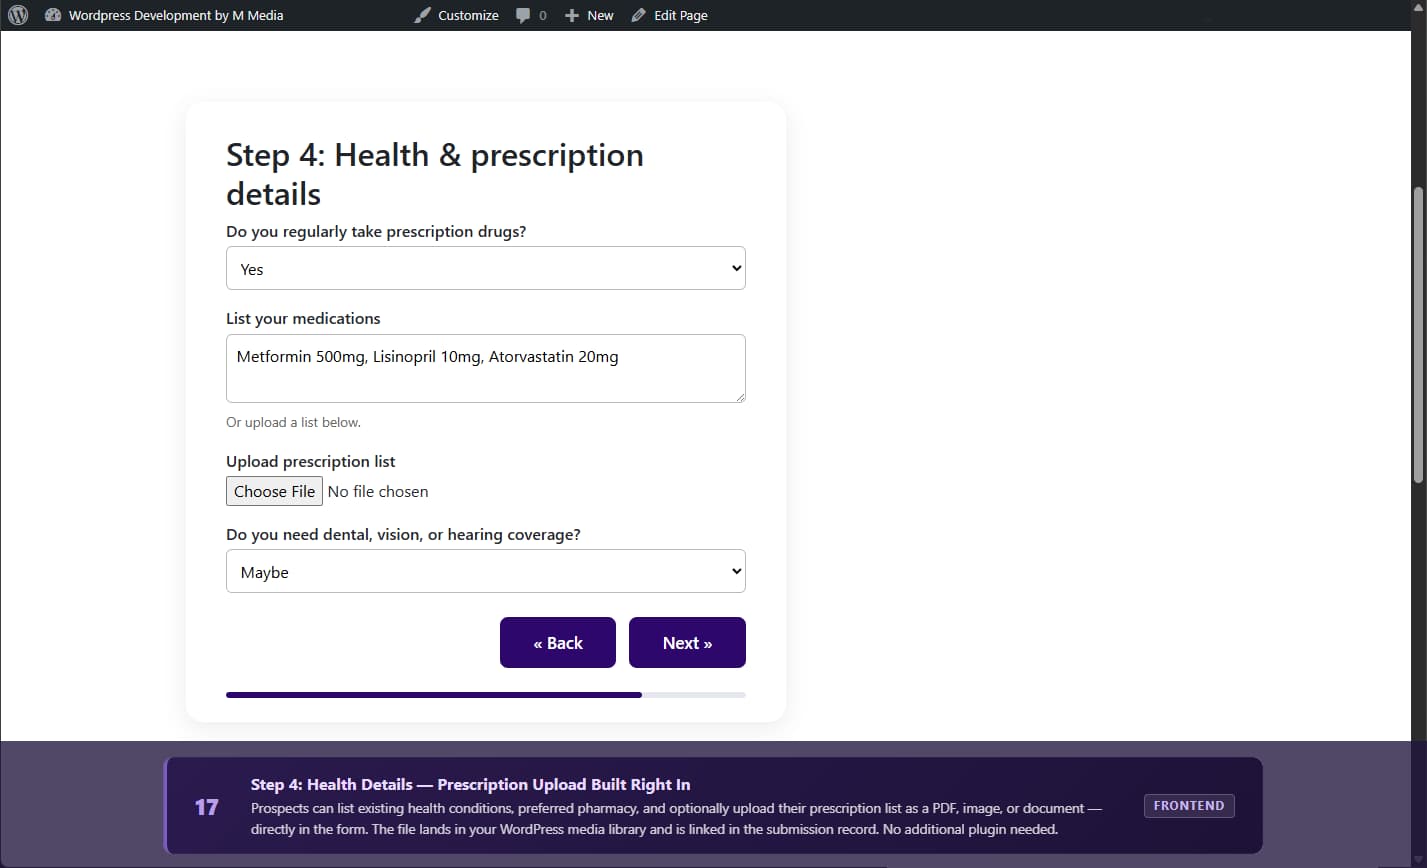
- Step 4: Health Details (Conditions, prescriptions, pharmacy preferences)
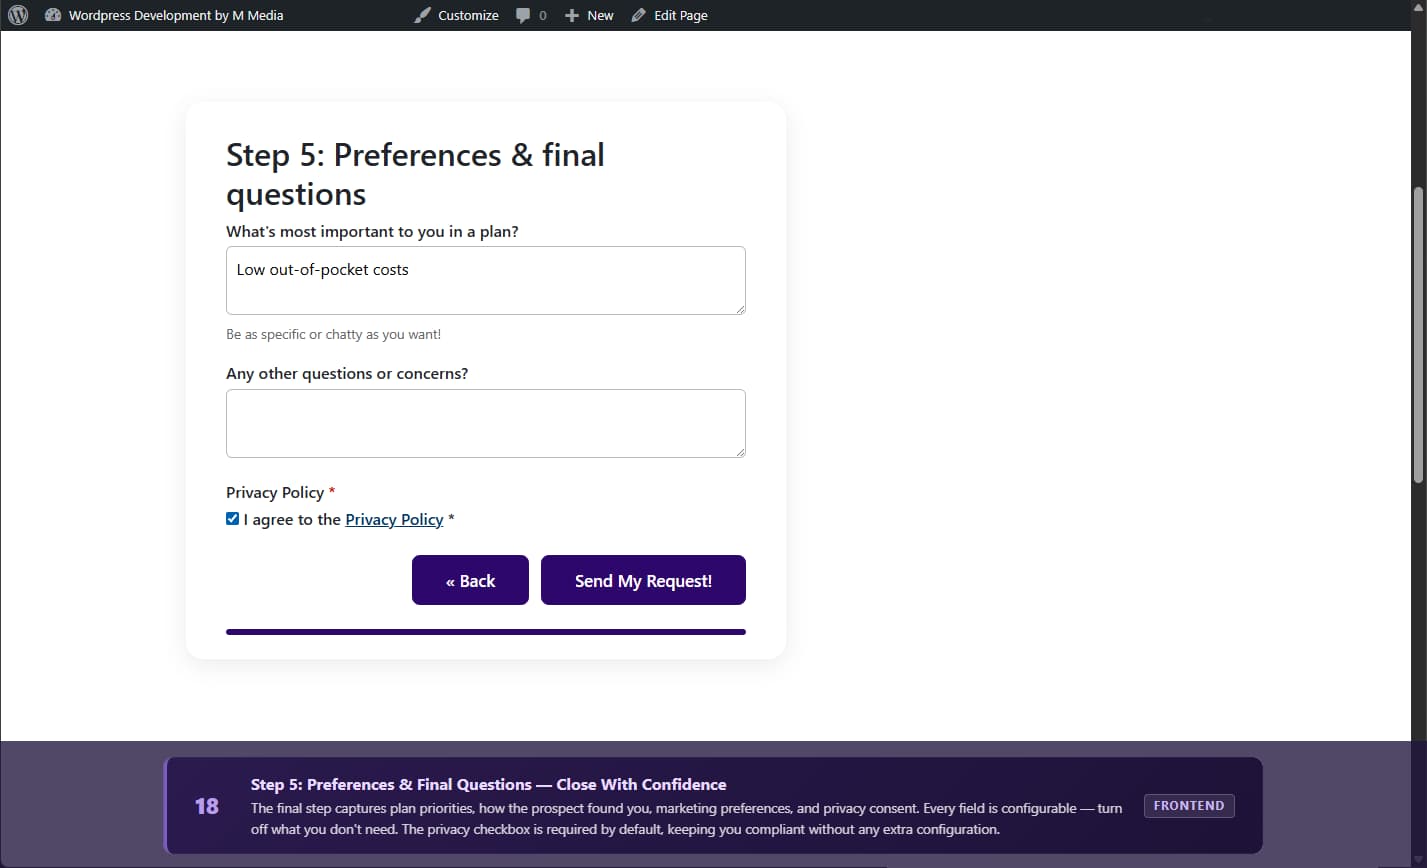
- Step 5: Preferences & Final Questions (Priorities, referral source, TCPA consent, privacy consent)
- Honeypot field catches bots automatically
- Time-based submission validation (minimum 7-second completion)
- WordPress nonce security on all submissions
- No CAPTCHA needed
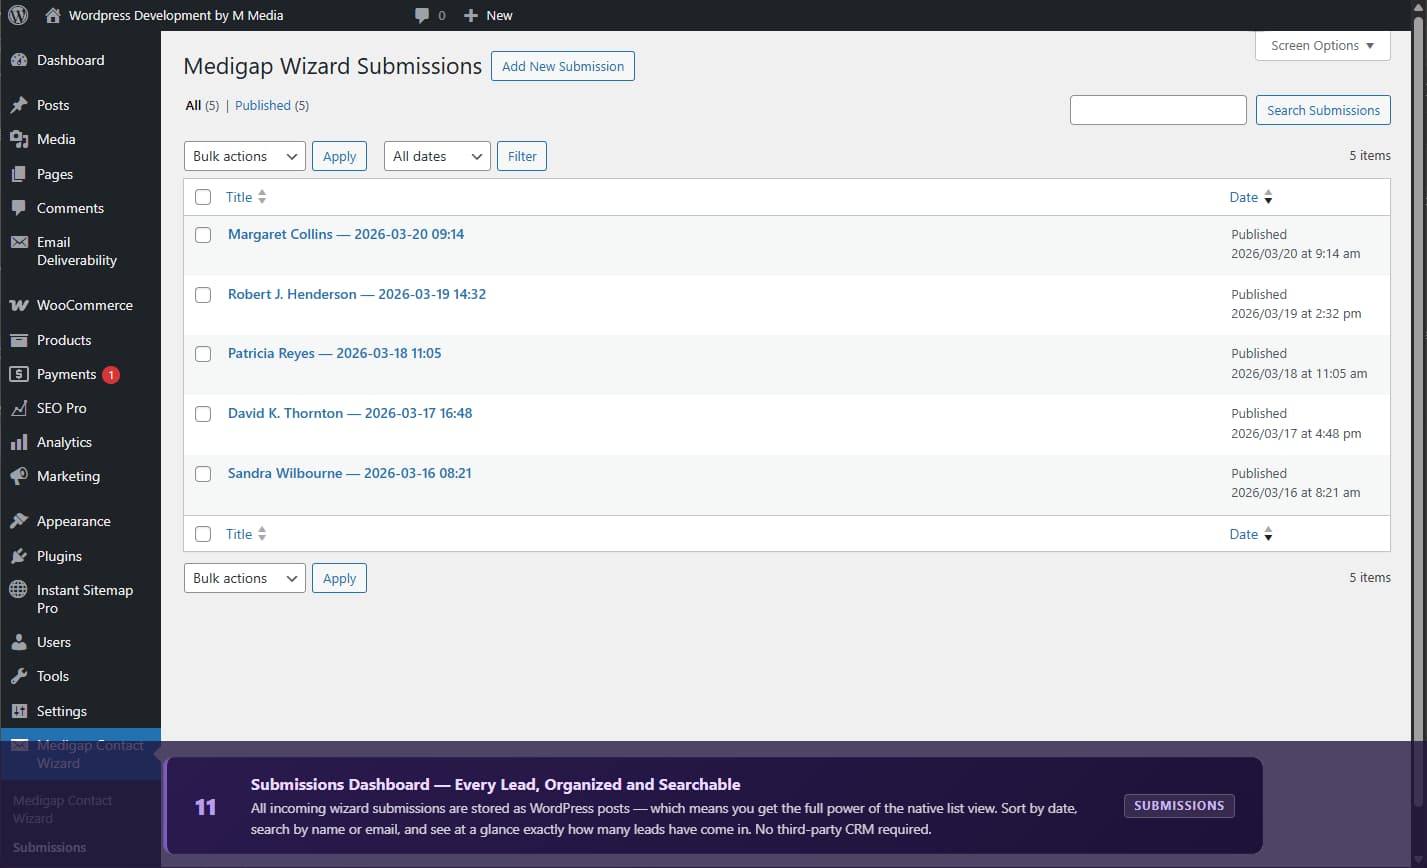
- All inquiries saved as a custom post type
- Easy-to-browse submissions dashboard in WordPress admin
- Full submission history with timestamps
- Gmail OAuth one-click connection, no passwords needed
- Email Provider Presets auto-configured for Gmail, Outlook, Yahoo
- WordPress Mail works with any existing SMTP plugin
- Server Mail uses the server's built-in mail() function
- Custom SMTP full manual configuration
- Configurable primary color for buttons, progress bar, and links
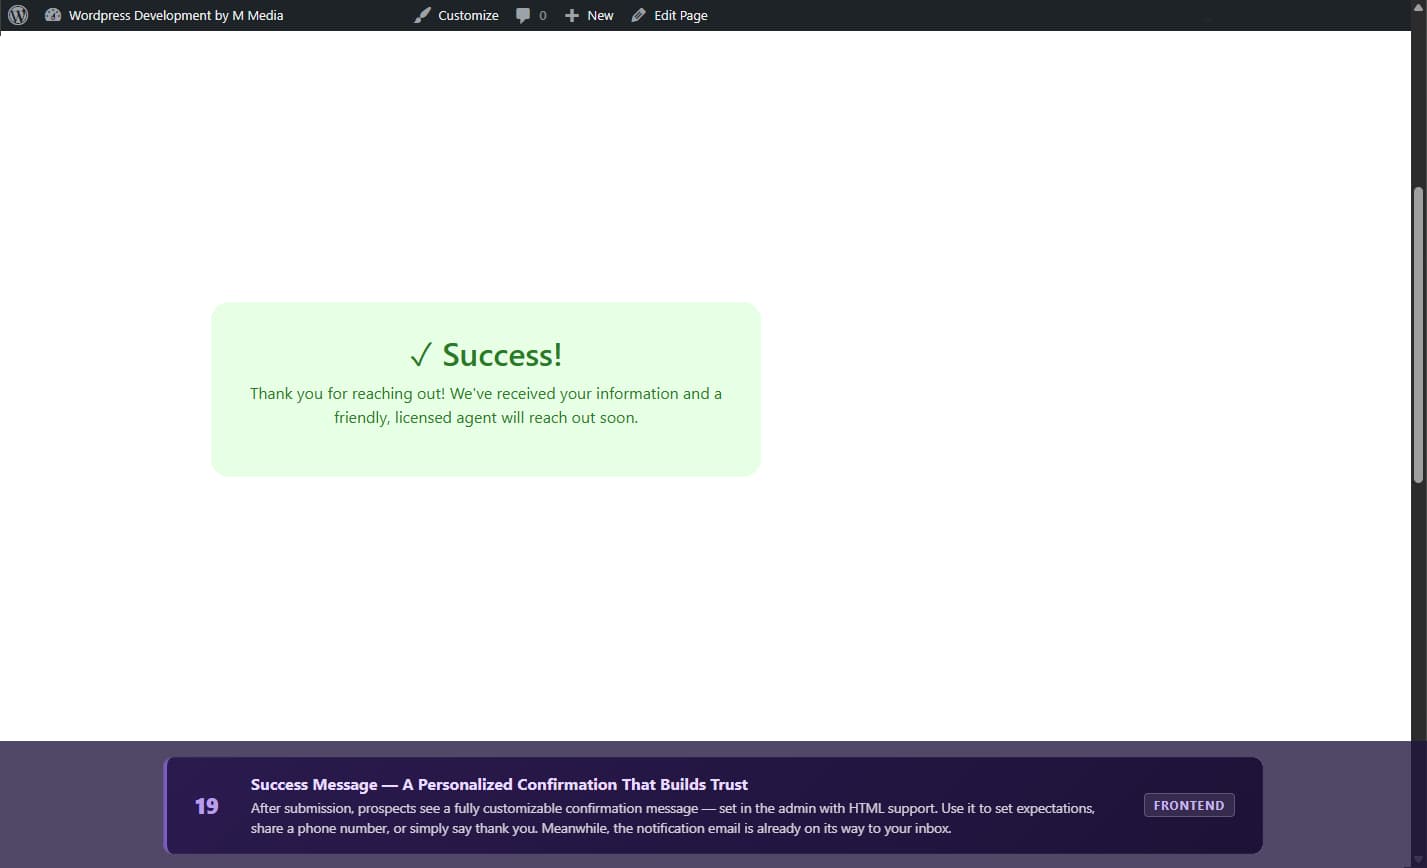
- Custom success message with HTML support
- Responsive design works on all devices
[mmcw_medigap_wizard]
Add this to any page, post, or widget area.
Perfect For
Medicare agents and brokers, Medigap specialists, insurance agencies, Medicare enrollment centers, and lead generation sites that need audit-ready TCPA documentation on every phone lead.
安装:
- Log in to your WordPress admin panel.
- Go to Plugins > Add New.
- Search for "M Media Medigap Contact Wizard".
- Click Install Now, then Activate.
- Download the plugin ZIP file.
- Go to Plugins > Add New > Upload Plugin.
- Choose the ZIP file and click Install Now.
- Activate the plugin.
- Go to Medigap Contact Wizard > Settings.
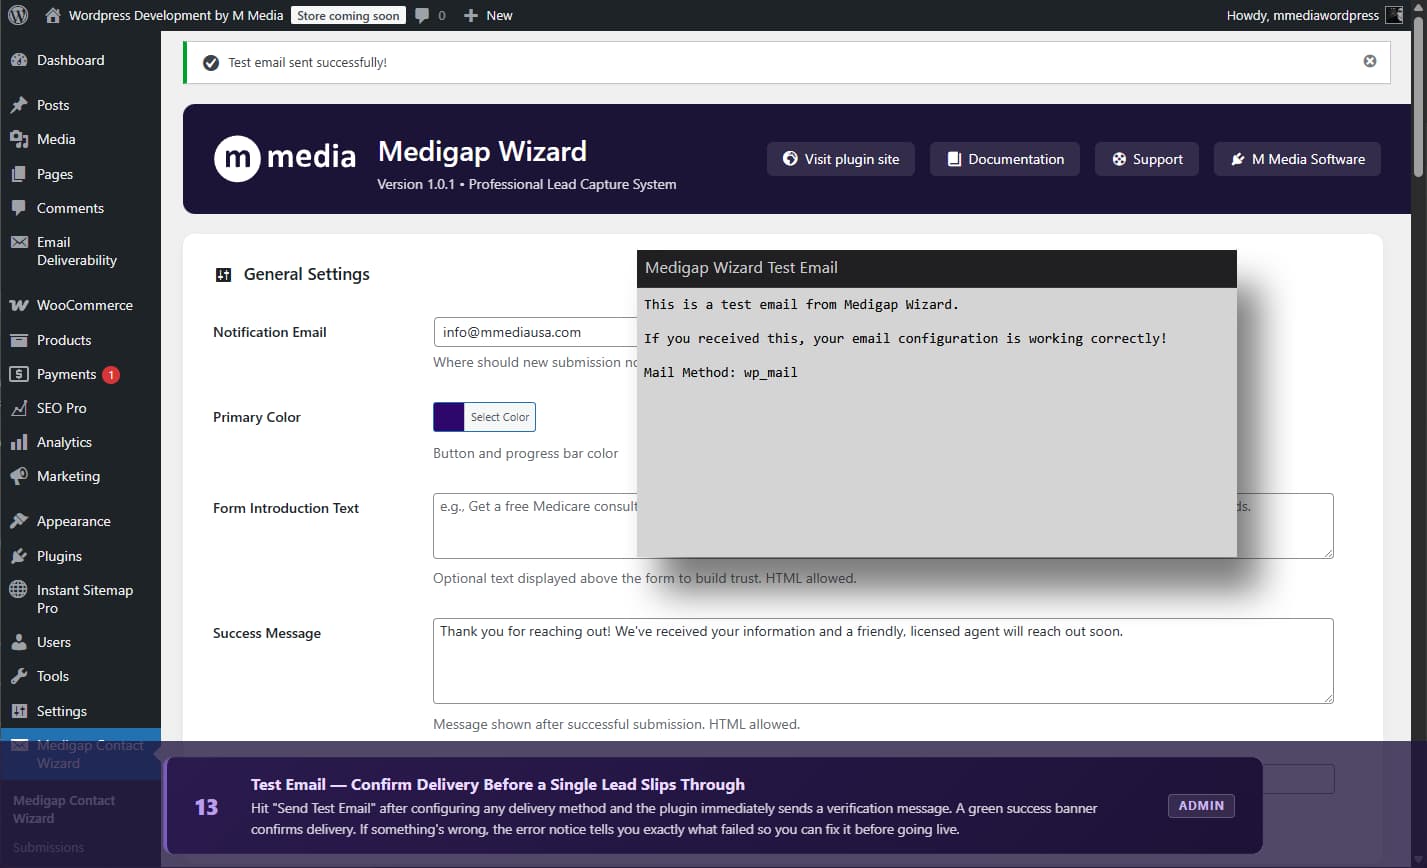
- Enter the notification email address where form submissions should be sent.
- Choose your email delivery method (see below).
- Pick a primary color to match your brand.
- Add the shortcode
[mmcw_medigap_wizard]to any page. - Click Send Test Email to confirm delivery is working.
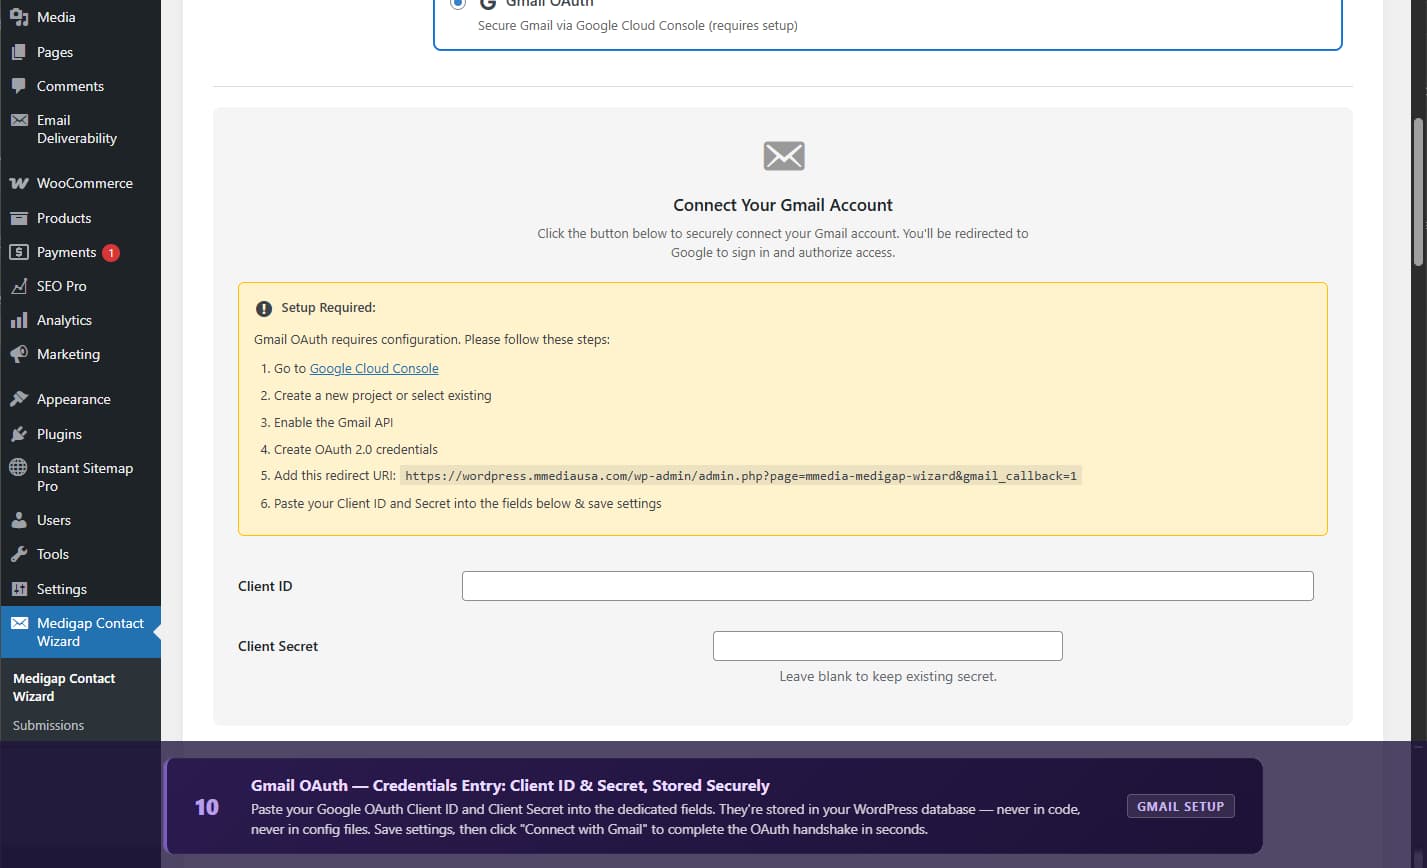
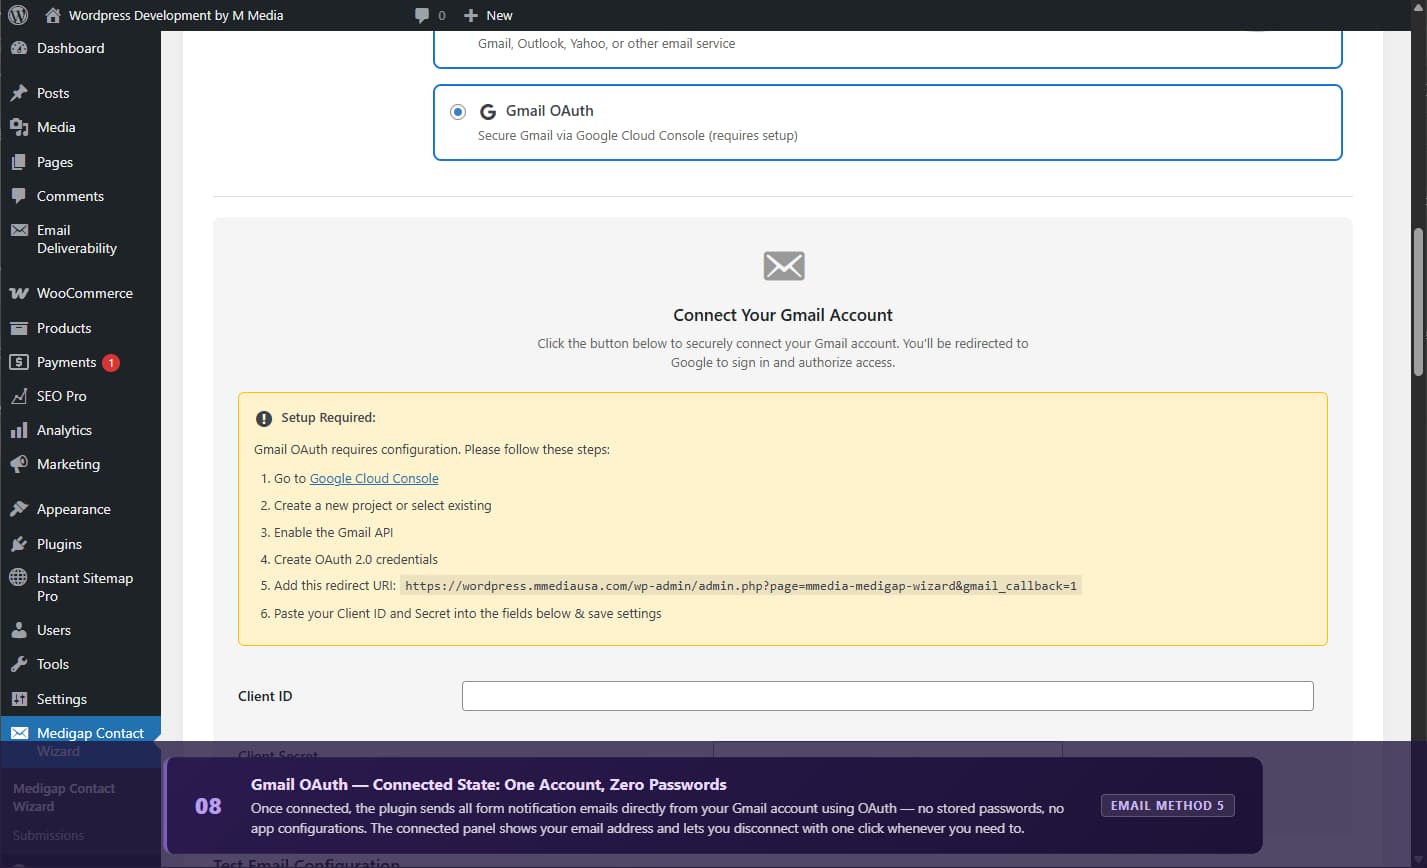
- Select "Gmail Account (OAuth)" in Settings.
- Click the "Connect with Gmail" button.
- Sign in to your Google account and click Allow.
- Done no passwords, no SMTP configuration required.
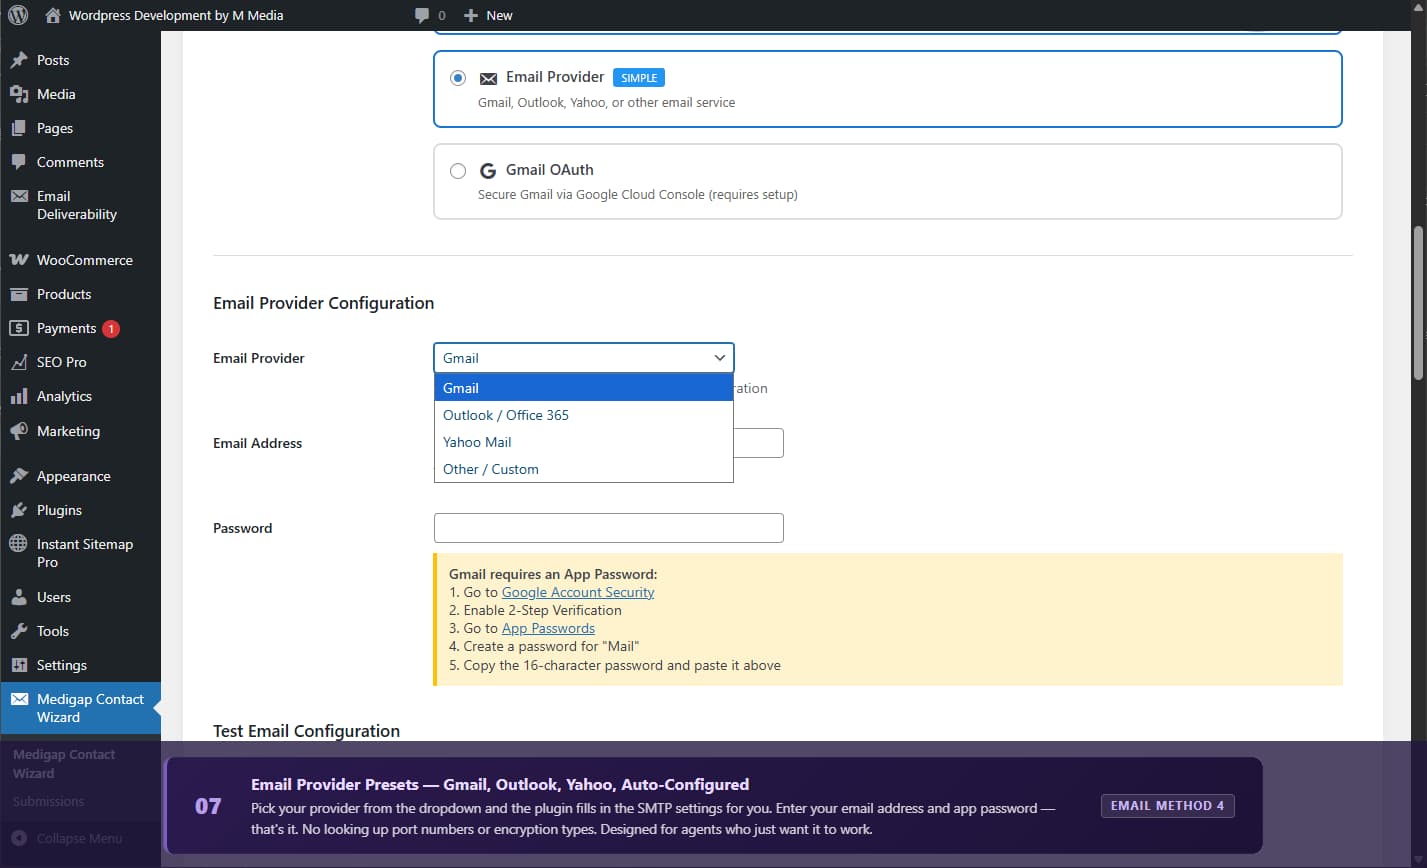
- Select "Email Provider" in Settings.
- Choose your provider (Gmail, Outlook, Yahoo, or Custom).
- Enter your email address.
- Generate an App Password from your provider and paste it in.
- Gmail: Google Account ? Security ? 2-Step Verification (enable) ? App Passwords ? Create for "Mail".
- Outlook: Microsoft Account ? Security ? Advanced Security ? App Passwords.
- Yahoo: Account Security ? Manage App Passwords ? Other app.
mail() function. Works on most shared hosting. Select "Server Mail" no further configuration needed. Not recommended if you are experiencing email delivery problems.
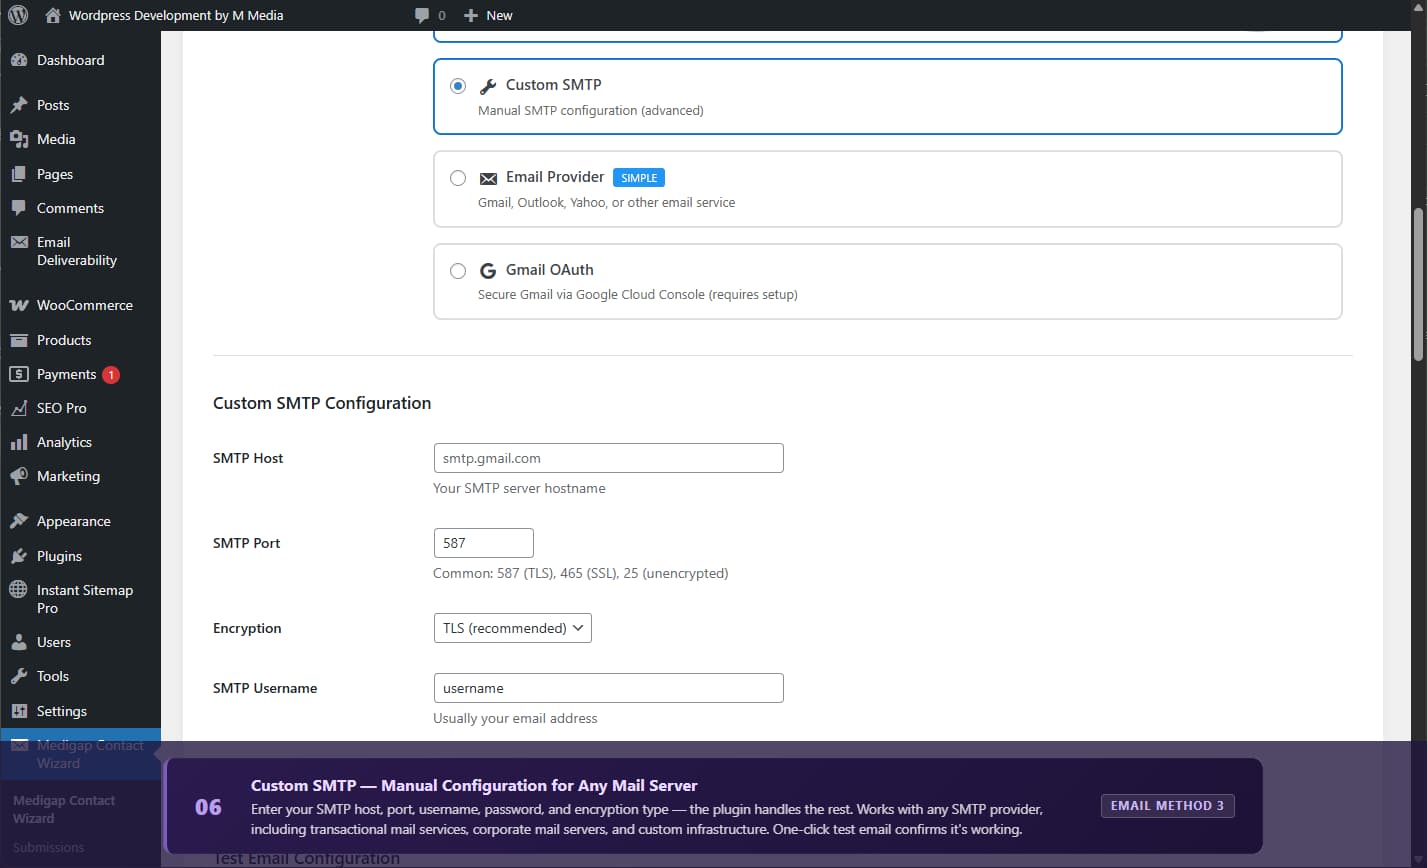
Method 5 Custom SMTP
Full manual configuration for any SMTP server (SendGrid, Mailgun, Amazon SES, etc.).
- Select "Custom SMTP" in Settings.
- Enter your SMTP Host, Port, Username, and Password.
- Choose your encryption (TLS is recommended).
- Click Send Test Email to verify.
- Port 587 + TLS (recommended for most providers)
- Port 465 + SSL
- Port 25 + None (local/internal servers only)
屏幕截图:


常见问题:
How do I add the form to my website?
Add the shortcode [mmcw_medigap_wizard] to any page, post, or widget. In the block editor, use a Shortcode block.
Which email method should I use?
For most users: Gmail OAuth if you have a Gmail account. If you already have an SMTP plugin installed, use WordPress Mail zero extra setup. If you need maximum reliability without Gmail, use Custom SMTP with a transactional email provider like SendGrid or Mailgun.
I connected Gmail OAuth but emails are not arriving. What do I check?
- Go to Medigap Contact Wizard > Settings and confirm the connected Gmail address is correct.
- Click Disconnect Gmail, then reconnect.
- If you set up the Google Cloud project yourself, confirm the OAuth consent screen is published (not in Testing mode).
My test email is not arriving. What should I do?
- Check your spam or junk folder.
- Confirm the notification address is correct in Settings.
- Try a different email method if WordPress Mail works but Custom SMTP does not, double-check your host, port, and credentials.
- Check your server's mail logs or contact your hosting provider.
Can I customize the form colors?
Yes. Go to Medigap Contact Wizard > Settings and use the color picker to set your primary color. This applies to buttons, the progress bar, and interactive elements.
Where are submissions stored?
All submissions are saved as a WordPress custom post type. View them at Medigap Contact Wizard > Submissions. They are also emailed to your configured notification address.
How does the anti-spam protection work?
Three layers of invisible protection no CAPTCHA required:
- Honeypot field bots fill it, humans never see it.
- Time validation submissions completed in under 7 seconds are rejected as bot activity.
- WordPress nonce CSRF protection on every submission.
What file types can prospects upload?
PDF, JPG, JPEG, PNG, DOC, DOCX, and TXT. Maximum file size is 2 MB. Files are stored in /wp-content/uploads/medicare_rx/ with a unique ID prefix for security.
Does the form work with page builders?
Yes Elementor, Divi, Beaver Builder, WPBakery, and all others that support shortcodes.
Is the form mobile-friendly?
Yes. The wizard is fully responsive and tested on iOS and Android browsers.
Is the form TCPA compliant?
Yes. Version 1.0.2 adds full TCPA compliance out of the box:
- A standalone consent checkbox with FCC-required disclosure language appears in Step 5, before the Privacy Policy.
- The phone field includes a note informing prospects they may be contacted by phone or text.
- Consent is never required as a condition of receiving a quote (FCC rule).
- Every submission saves a consent record to WordPress post meta:
_tcpa_consent_given,_tcpa_consent_timestamp,_tcpa_consent_ip, and_tcpa_consent_text(the exact language shown at submission time).
Is it GDPR compliant?
The plugin includes a required privacy policy consent checkbox and an optional "no marketing" checkbox. You are responsible for maintaining a privacy policy page on your site.
Can I export submissions?
Submissions are stored as standard WordPress posts, so any export plugin (e.g., WP All Export) will work. You can also copy data directly from individual submission records in the admin.
How do I change the success message?
Go to Medicare Wizard > Settings and edit the "Success Message" field. HTML is supported.
How do I get support?
Visit M Media Software Lab Support.
更新日志:
- Update: Marketing copy and plugin description refresh
- Add: TCPA-compliant consent checkbox on final wizard step
- Add: Phone field disclosure note referencing the consent
- Add: TCPA consent record-keeping (given flag, timestamp, IP, consent text) stored as post meta on each submission
- Fix: Lowercase custom post type slug to resolve "Invalid post type" error in WordPress admin
- Initial release
- 5-step wizard interface with progress tracking
- Anti-spam protection (honeypot + time-based validation)
- Custom post type submission management
- Email notifications with 5 delivery methods (Gmail OAuth, provider presets, WordPress Mail, Server Mail, Custom SMTP)
- File upload support for prescription lists
- Configurable primary color and success message
- Conditional field visibility
- Privacy policy consent and marketing opt-out
- Responsive design
- WordPress 6.9 compatible