
Ninja Footers
| 开发者 | samurai9design |
|---|---|
| 更新时间 | 2016年6月1日 13:46 |
| PHP版本: | 4.0 及以上 |
| WordPress版本: | 4.5.2 |
| 版权: | GPLv2 or later |
| 版权网址: | 版权信息 |
详情介绍:
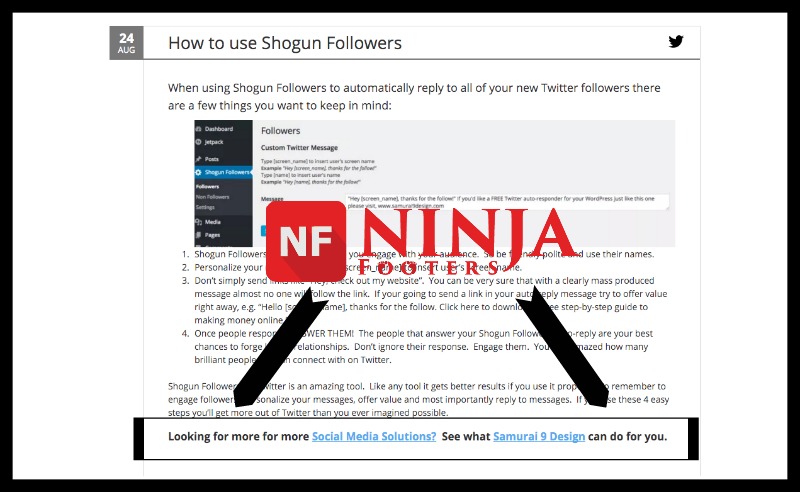
- Select which pages you'd like to display your Ninja Footers on. E.g: you may not want your Home page to contain a customized footer section.
- Control whether to display after post excerpts or not.
- Use the priority setting to troubleshoot conflicts with other plugins or themes.
- Works with shortcodes to create advance footers with slideshows, contact forms or whatever you desire.
安装:
- Go to Plugins > Add New.
- Type "Ninja Footers"・into the Search Plugins box.
- Once you see Ninja Footers by Samurai 9 Design.
- Click Details for more information about the Plugin and instructions you may wish to print or save to help setup the Plugin.
- Click Install Now to install the Ninja Footers Plugin.
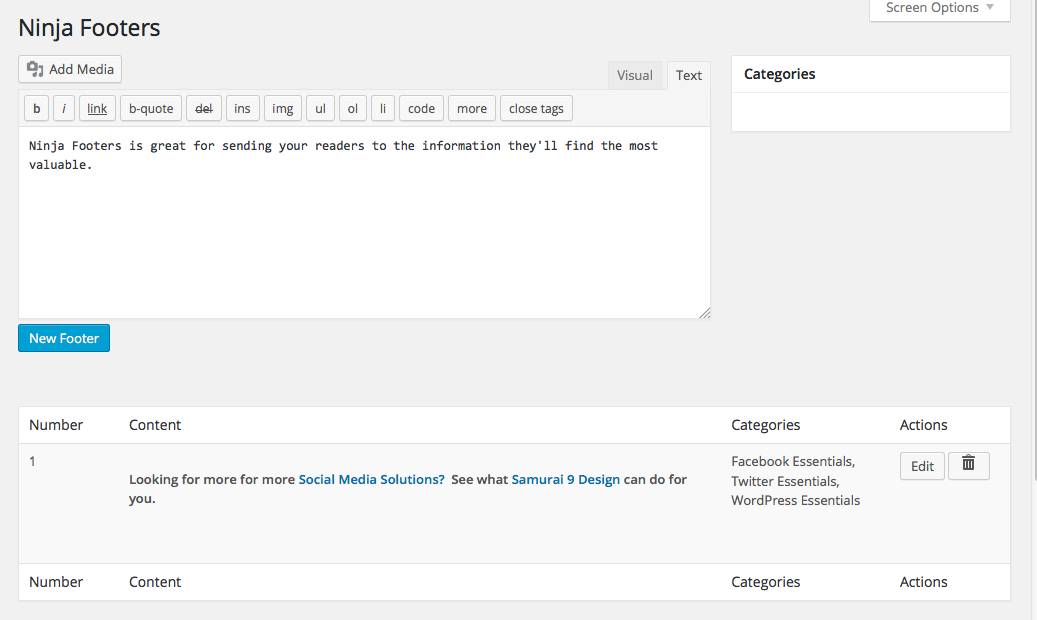
- Go to Dashboard > Posts > Ninja Footers.
- Choose the category of post you like the footer to show up on.
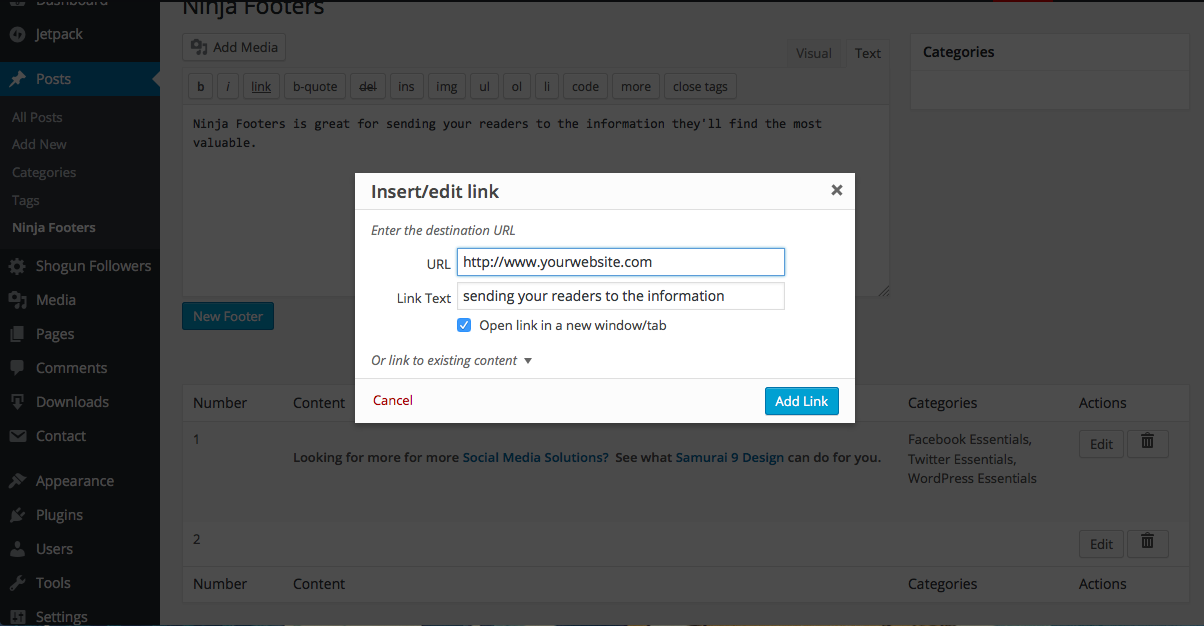
- Write your custom footer and add anchor text by using the link button.
- Click "Save Changes"・
- Repeat with other categories as required.
屏幕截图:
常见问题:
Do Ninja Footers work across all of the categories on my site?
Yes, they do. Simply click all of the desired post headings from our options screen and a footer will appear on all of the related posts.
Can I apply different footers for different categories?
Sorry, our current version does not support multiple footers.
Can I add links into my custom footer?
Yes you can. Ninja Footer gives you the ability to add page targeting and easier site navigation through our internal linking feature.
Can I use Ninja Footers for installing a Contact Form?
Absolutely, Ninja Footers can be used to display text, images, contact forms and almost anything else you can imagine.
Does Ninja Footers support Shortcodes?
Yes it does. With the use shortcodes you can turn your footer into a sales funnel, a conversion opportunity, call to action or almost anything you'd like.
In the settings, I unchecked everything that had to do with pages and I only want to use the plugin on posts but the footer still appears on all pages. What should I do?
This issue is normally caused by a combination of plugins and a site-builder. The issue can normally be cleared up by going to the settings section on the Ninja Footers plugin display. First, select "Display Certain Pages Only", don't select any pages and then save your new settings. If that doesn't work you could also add a dummy page to your site and only apply the footers to that unpublished dummy page.
更新日志:
- Enhancement: General: Disabled ability to add footer when a static page isn't assigned to the Front page or Blog page. This should make it more intuitive to use.
- Enhancement: General: Added a setting to control specifically whether the footer is added to the blog.
- Enhancement: General: Added a setting to control whether the footer is added to content called through a AJAX. == Changelog ==
- Bug Fix: Displays on all pages unless specific pages are selected.
- Enhancement: General: Added a setting to control the priority of the plugin. An advance feature to help avoid conflicting with other plugins or themes that filter the post content.
- Enhancement: General: Added a setting to control whether to display on archive pages or not.
- Enhancement: General: Can select from categories that have no posts.
- Bug Fix: No longer displays on manually created excerpts when excerpts box is unchecked.
- Enhancement: General: Can now change settings of what pages to display and whether to display on excerpts or not.
- Enhancement: General: Removed Lite from name.
- Bug Fix: Calling for unnecessary file.
- Bug Fix: Error when no categories are selected.
- Enhancement: General: Can now handle shortcodes
- Enhancement: General: Modified to prevent footers from showing up on home or front page.