
Payment Gateway for WooCommerce - Helcim
| 开发者 | Helcim |
|---|---|
| 更新时间 | 2017年4月28日 05:47 |
| PHP版本: | WooCommerce 2.3.1 及以上 |
| WordPress版本: | WooCommerce 3.0.4 |
标签
下载
详情介绍:
安装:
- Extract to: /wp-contents/plugins/ directory
- Activate the plugin through the "Plugins" menu in WordPress
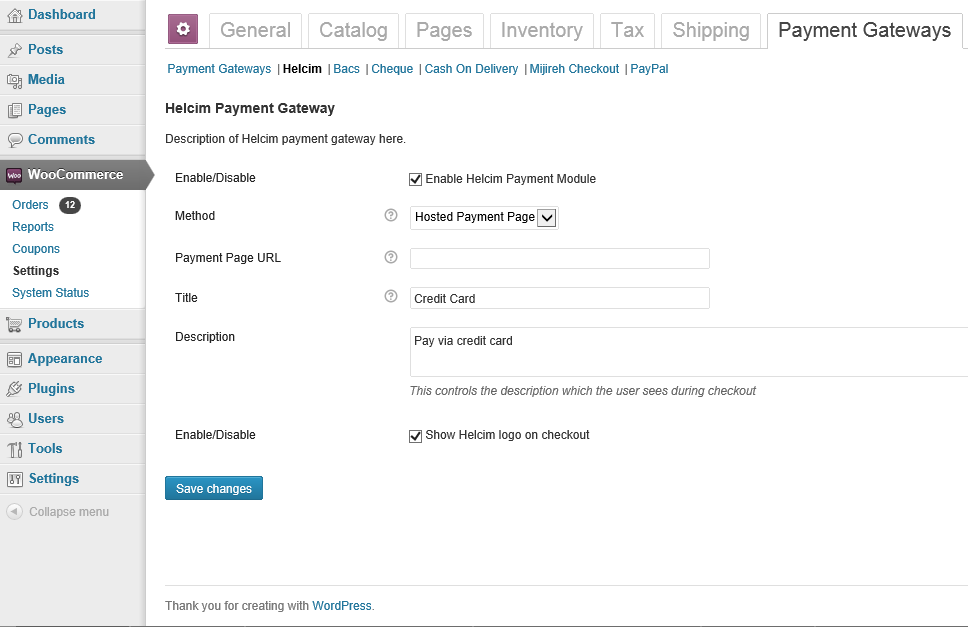
- Configure the module in WooCommerce->Settings->Checkout then click 'Helcim'
- Click the Enable/Disable box to enable this gateway
- Choose which method you would like to use:
- Hosted Payment Page (customers will be forwarded to a secure Helcim Payment Page)
- Direct Integration (for use with the Helcim Payment Gateway, customers stay on your site)
- Hit "Save Changes". More options will be available after choosing which method you would like to use.
- For the Hosted Payment Page method:
- Enter your payment page URL (generated in the Helcim Virtual Terminal)
- Update your Helcim payment page approval URL to: http://your-website.com/your-wordpress-dir/?wc-api=WC_Gateway_Helcim
- For the Direct Integration method:
- You will need a valid SSL certificate and PCI DSS validation
- Enter your Account ID and Token (from your welcome email and within the Helcim Virtual Terminal)
- Enter the payment URL. Use https://gateway.helcim.com/ for production and https://gatewaytest.helcim.com/ for development
- Choose whether you would like to require CVV or not (3 digits in the signature panel).
- Enter the title to display on the payment selection portion of the checkout page such as "Credit Card"
- Enter the description your customers will see on the checkout page for this payment option
- Choose whether or not you would like to show the Helcim logo on the checkout page
屏幕截图:

常见问题:
How can I get a Helcim account?
Please visit the Helcim Website for information on signing up for a Helcim account.
Where do I find my Payment Page URL?
You can find your Payment Page URL in your Helcim Virtual Terminal account under "Payment Pages". If this is a new account. You will need to create a new payment page. To do so, follow the directions at: https://www.helcim.com/support/?article=9
After processing the payment on the hosted payment page I am not re-directed back to my site.
You need to make sure you updated the "Approval URL" option in your payment page settings: 1. Login to your Helcim Virtual Terminal account. 1. Click "Payment Pages" and choose the payment page you created for your WooCommerce payments. 1. Update the "Approval URL" to your wordpress URL and add ?wc-api=WC_Gateway_Helcim. (For example, http://your-website.com/your-wordpress-dir/?wc-api=WC_Gateway_Helcim 1. Save Changes
Where can I find my token for the direct integration method?
You can find your gateway token in your Helcim Virtual Terminal account under "Settings". If this is a new account, you will need to generate a new token.
更新日志:
- Fixed plugin title
- Fixed plugin listing in WooCommerce Admin
- Tested for WooCommerce 2.6.14 / WordPress 4.7.3
- Improved error handling.
- Improved "Pay With Helcim" checkout graphics
- Removal depreciated PHP functions
- Fixed duplicate order ID's
- readme.txt instructions updated
- Changed response redirect: 'redirect' => $this->get_return_url( $order )
- Changed add_error function to new WooCommerce 2.1.2 notice functions
- Changed error_count function to new WooCommerce 2.1.2 notice functions
- Changed get_order_total() to new get_total()
- Changed get_shipping_total() to new get_total_shipping()
- Fixed AVS fields now sent for direct integration
- Fixed number formatting to proper #####.## for transaction amount
- Added description text to direct integration checkout.
- Added Credit card logos to direct integration checkout.
- Initial release.