PlanWise Floor Planner
| 开发者 | ClaimPro |
|---|---|
| 更新时间 | 2025年12月29日 00:43 |
| 捐献地址: | 去捐款 |
| PHP版本: | 7.4 及以上 |
| WordPress版本: | 6.9 |
| 版权: | GPLv2 or later |
| 版权网址: | 版权信息 |
详情介绍:
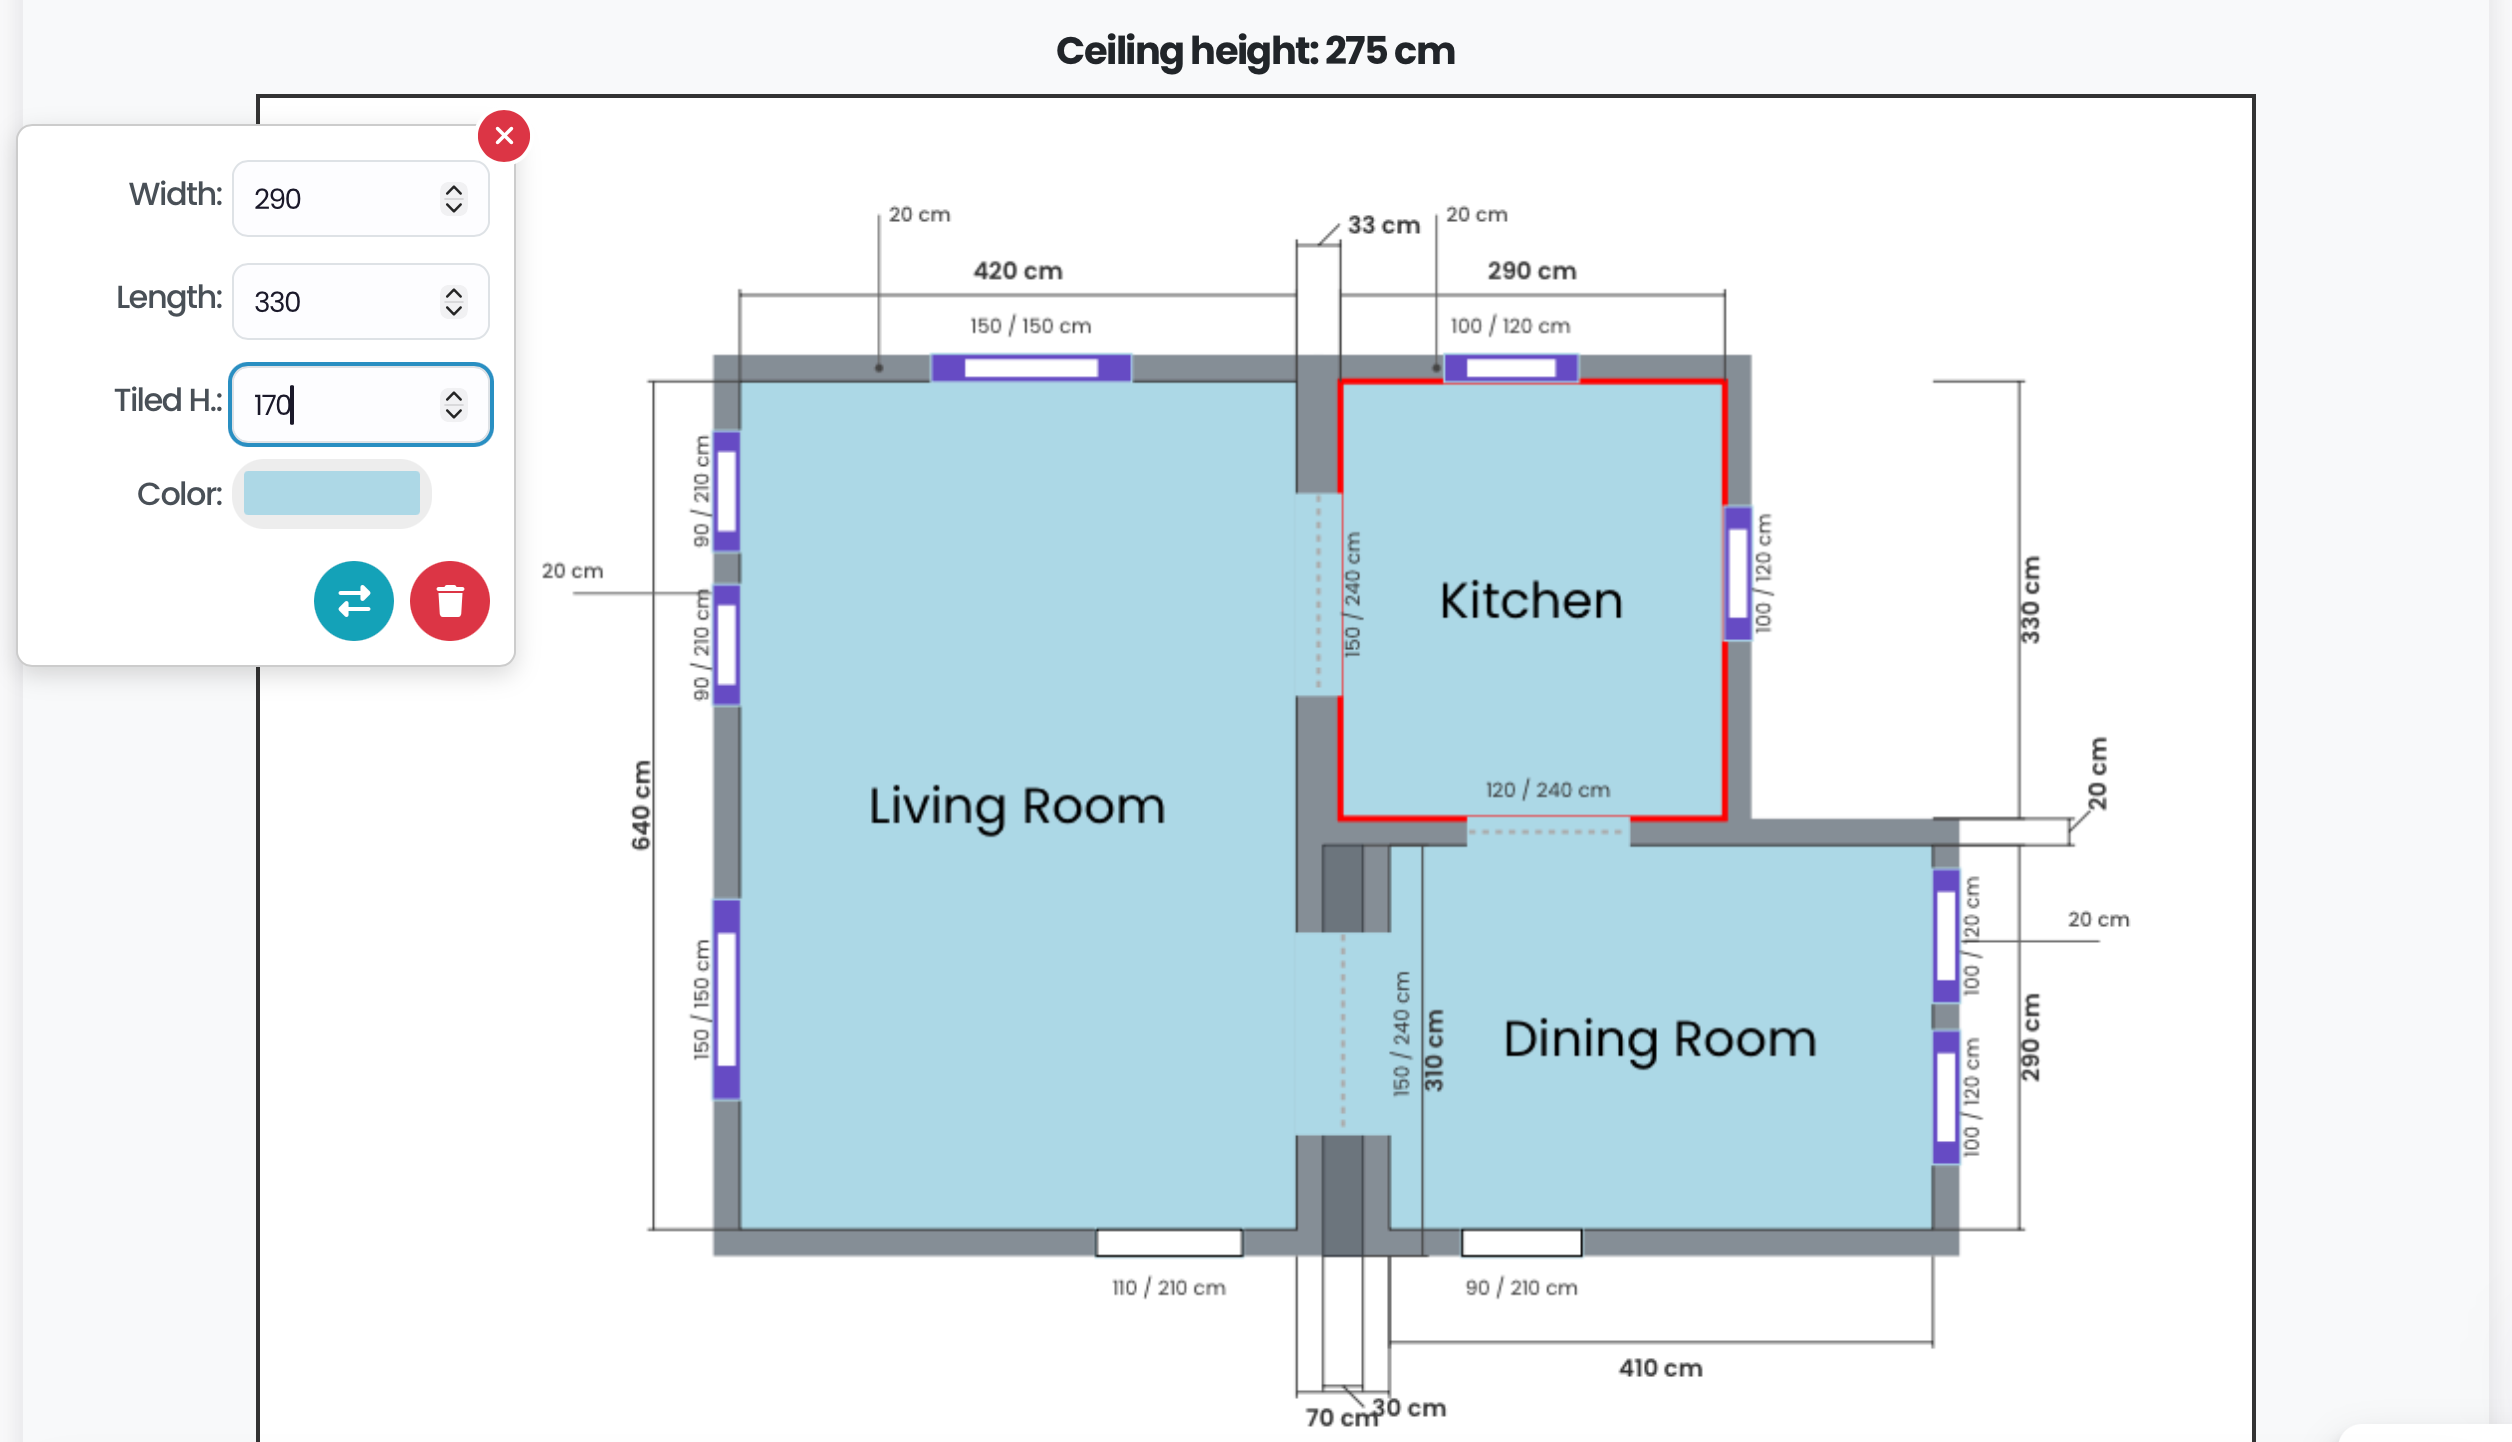
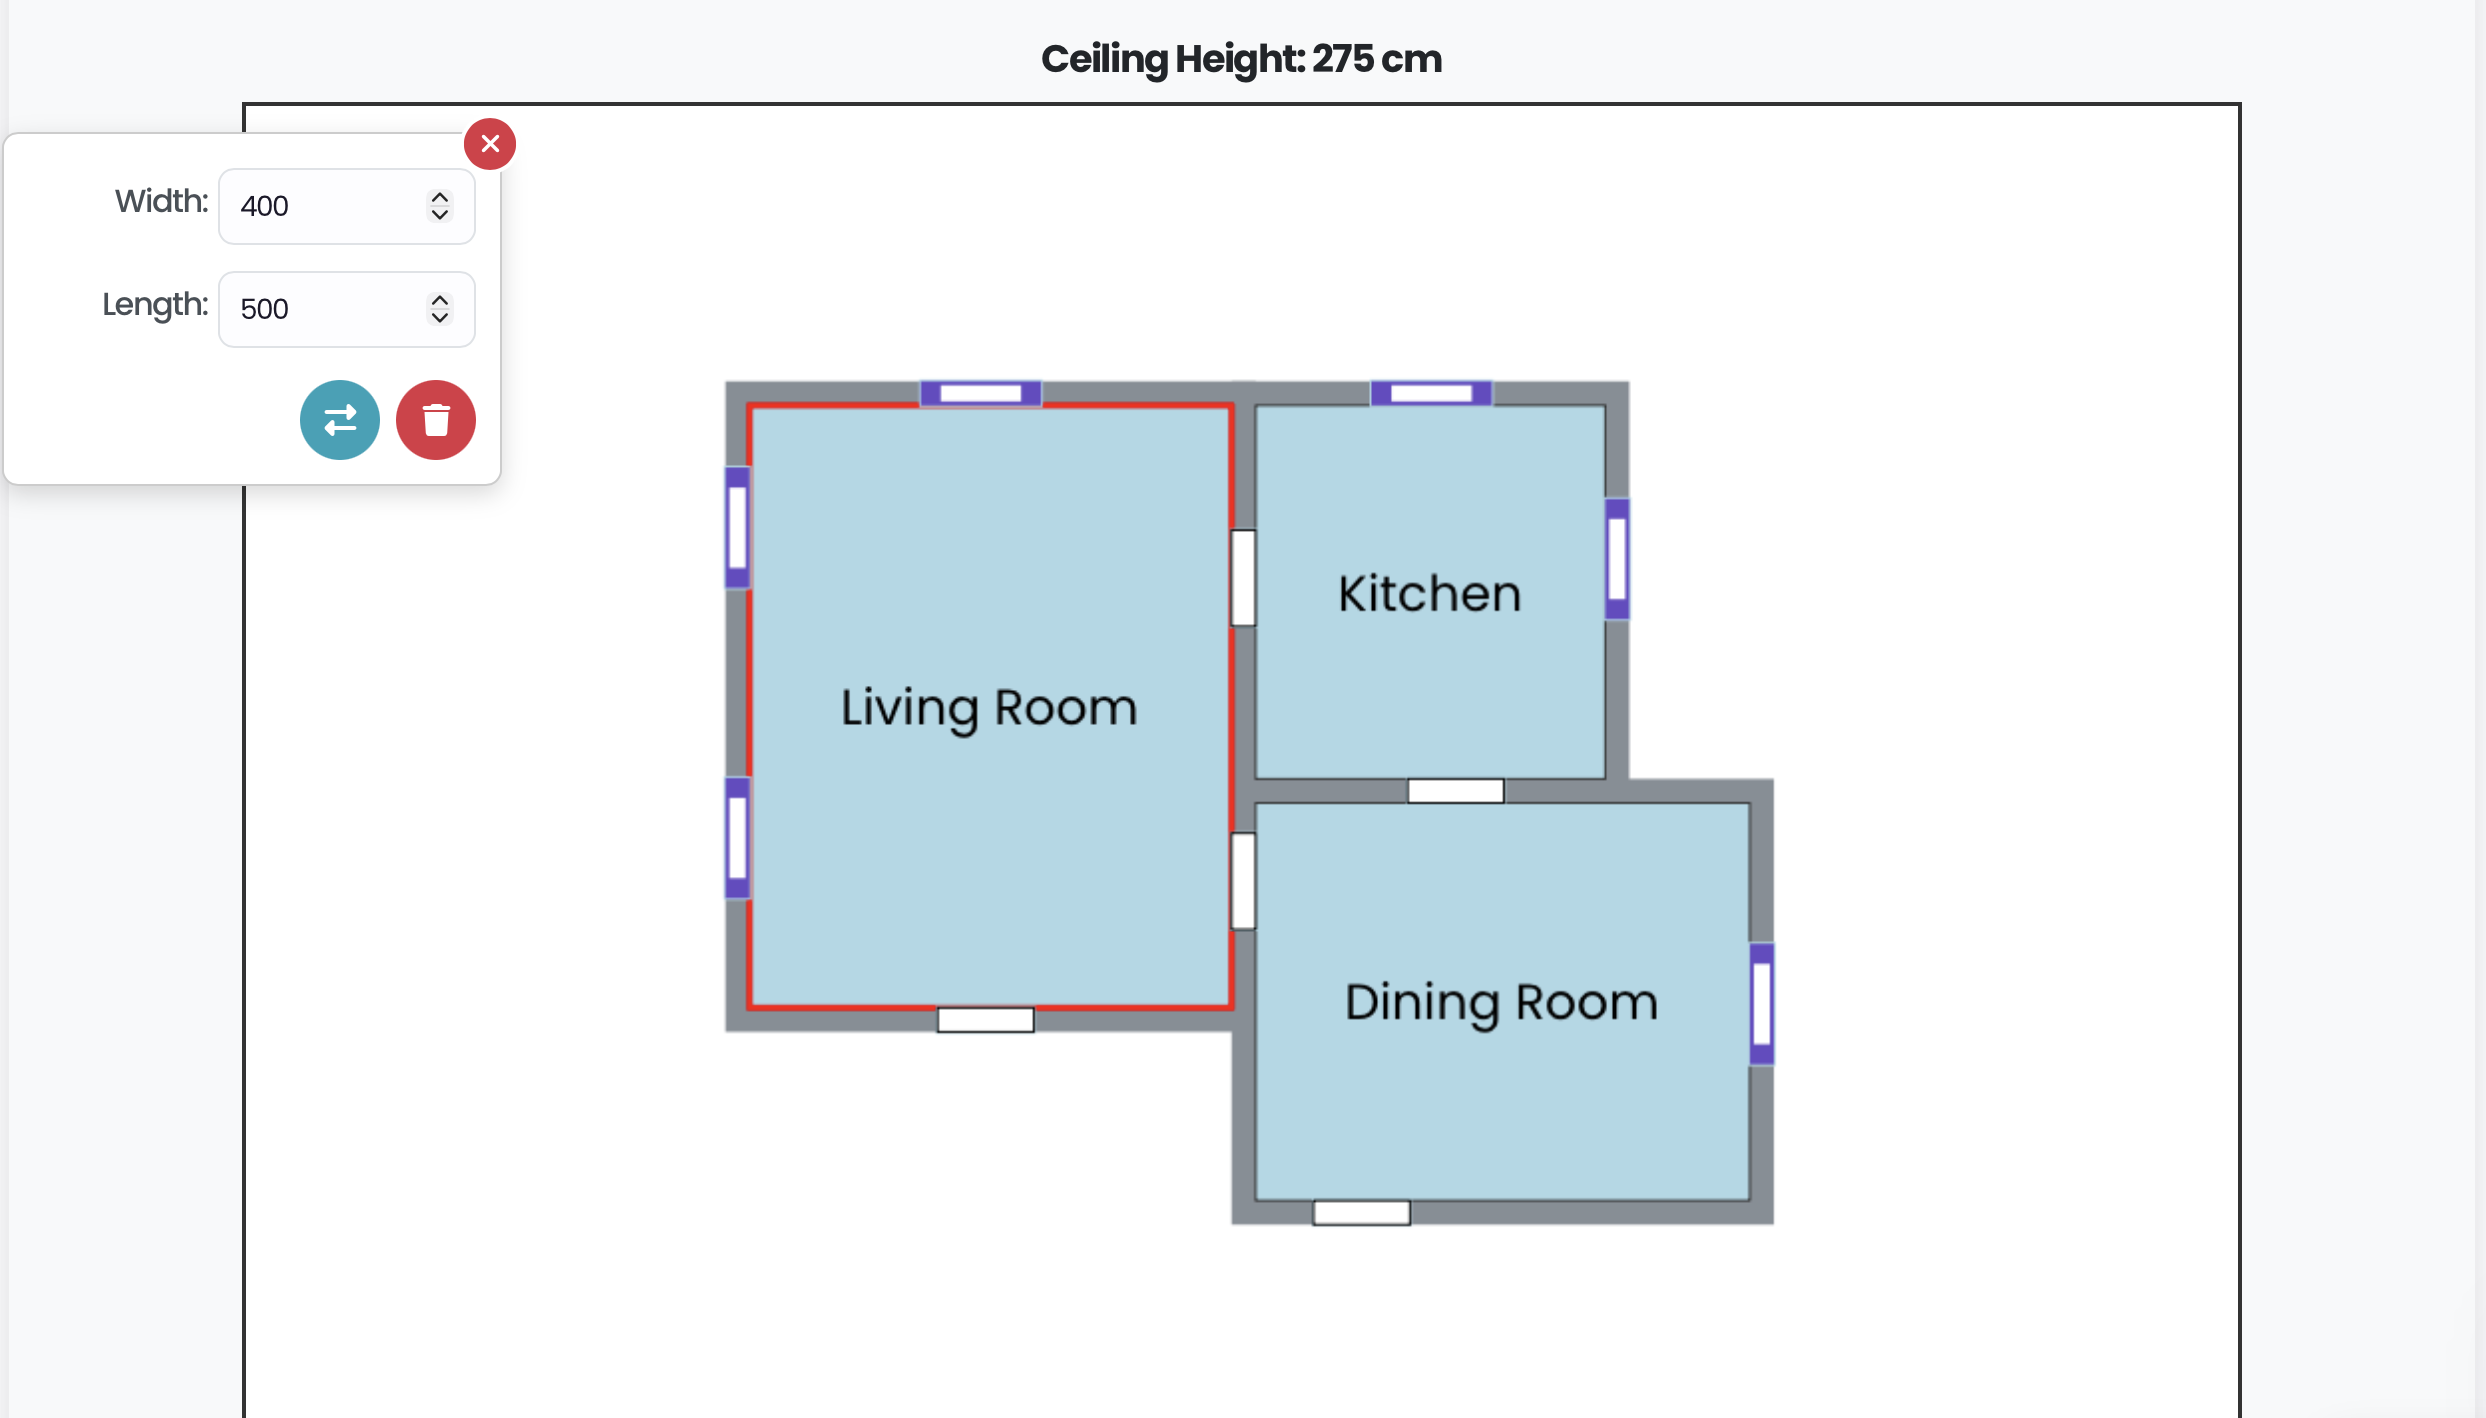
Stop wrestling with rulers and calculators! PlanWiseWP is a revolutionary, easy-to-use WordPress plugin that embeds a professional floor plan editor directly into your site with a simple shortcode
[planwisewp]. Allow your website visitors, clients, or agents to draw floor plans effortlessly in their browser. As they draw, PlanWiseWP automatically calculates all crucial measurements in real-time. It's the perfect B2B tool for real estate agencies, contractors, e-commerce stores (paint, flooring, furniture), and anyone who needs to provide accurate quotes or generate qualified leads.
From a simple utility to a powerful business and engineering engine
While the free version provides a powerful editor for your visitors, the PlanWiseWP PRO version transforms it into a complete professional asset. With PlanWiseWP PRO, your website can: * Handle Complex Geometries: Manage sophisticated architectural layouts with advanced Room Overlapping & Merging logic and intelligent snapping for non-standard shapes.
- Precision Dimensioning: Utilize Dynamic Guidelines and on-canvas dimension lines for millimeter-precise planning and professional-grade blueprints.
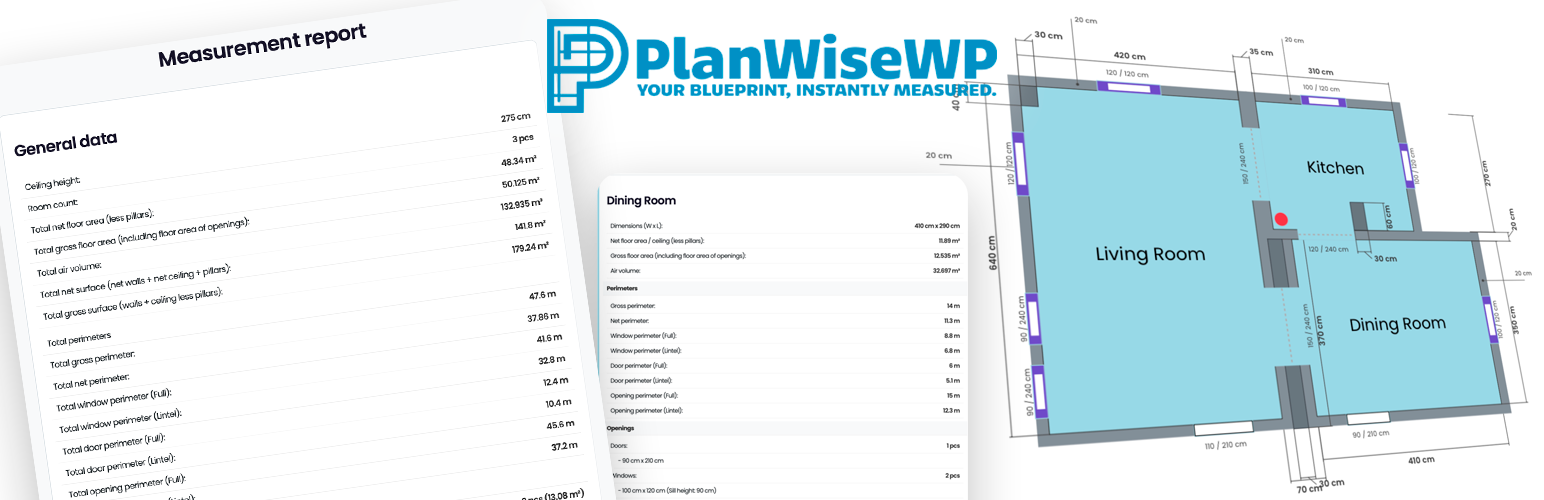
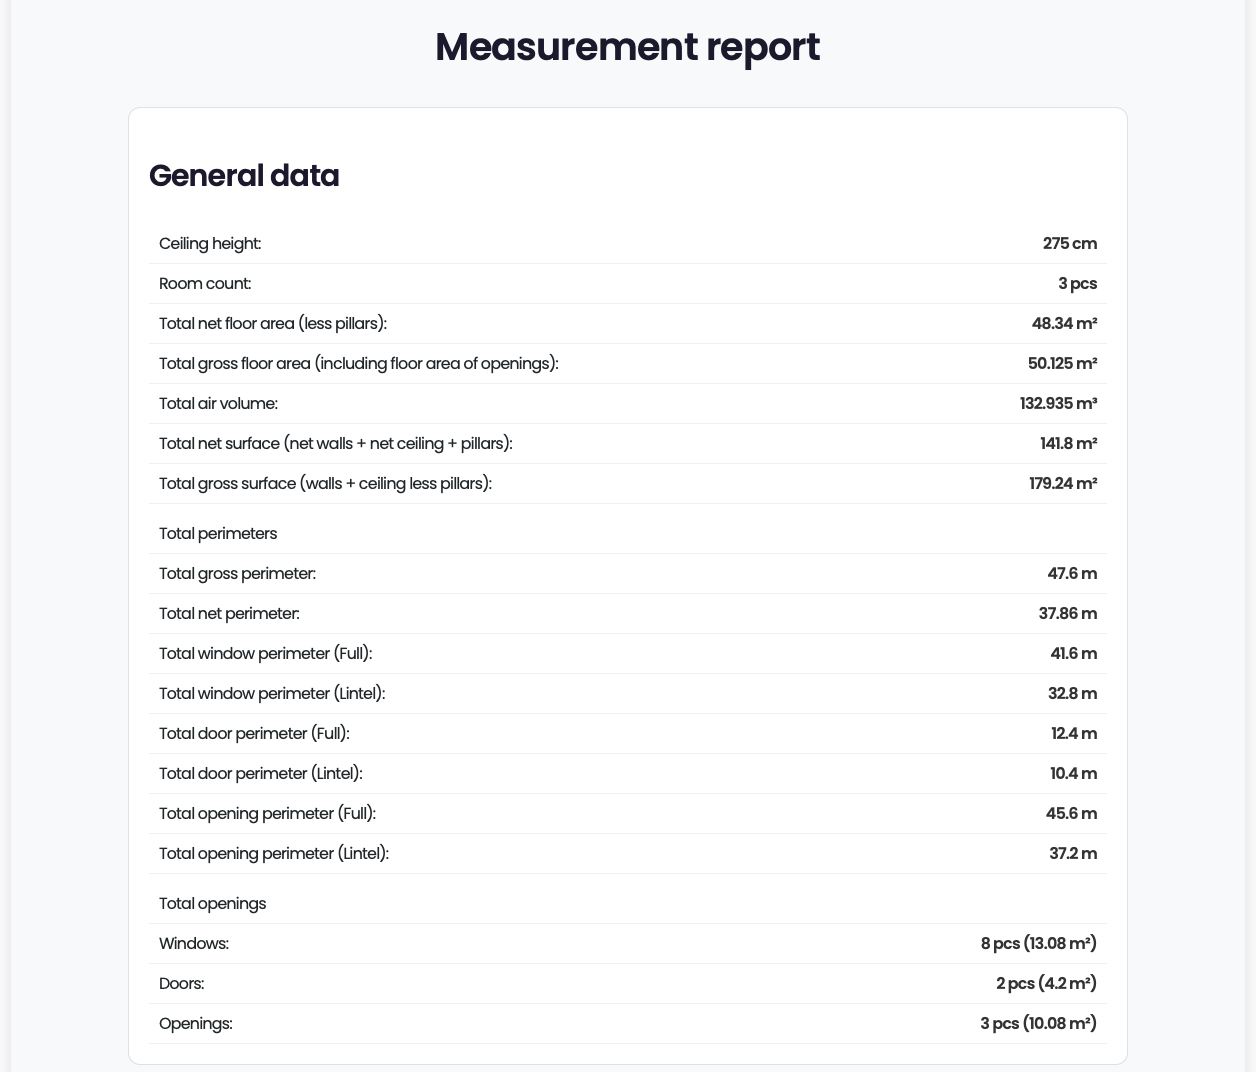
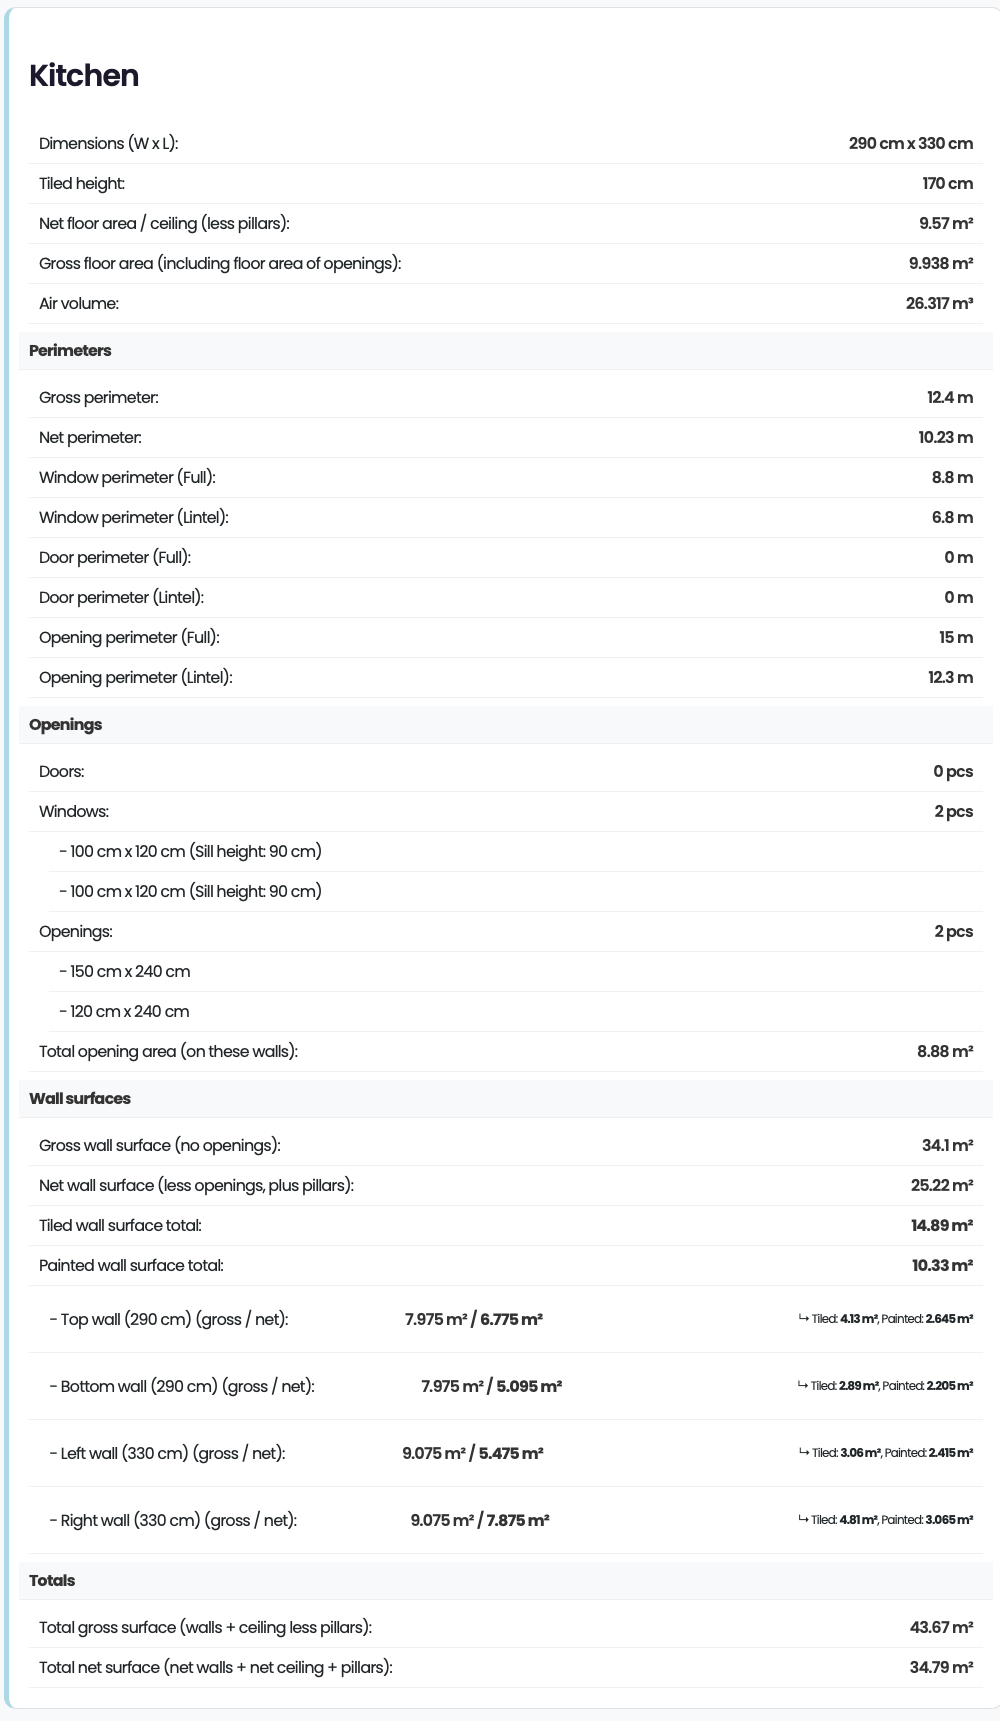
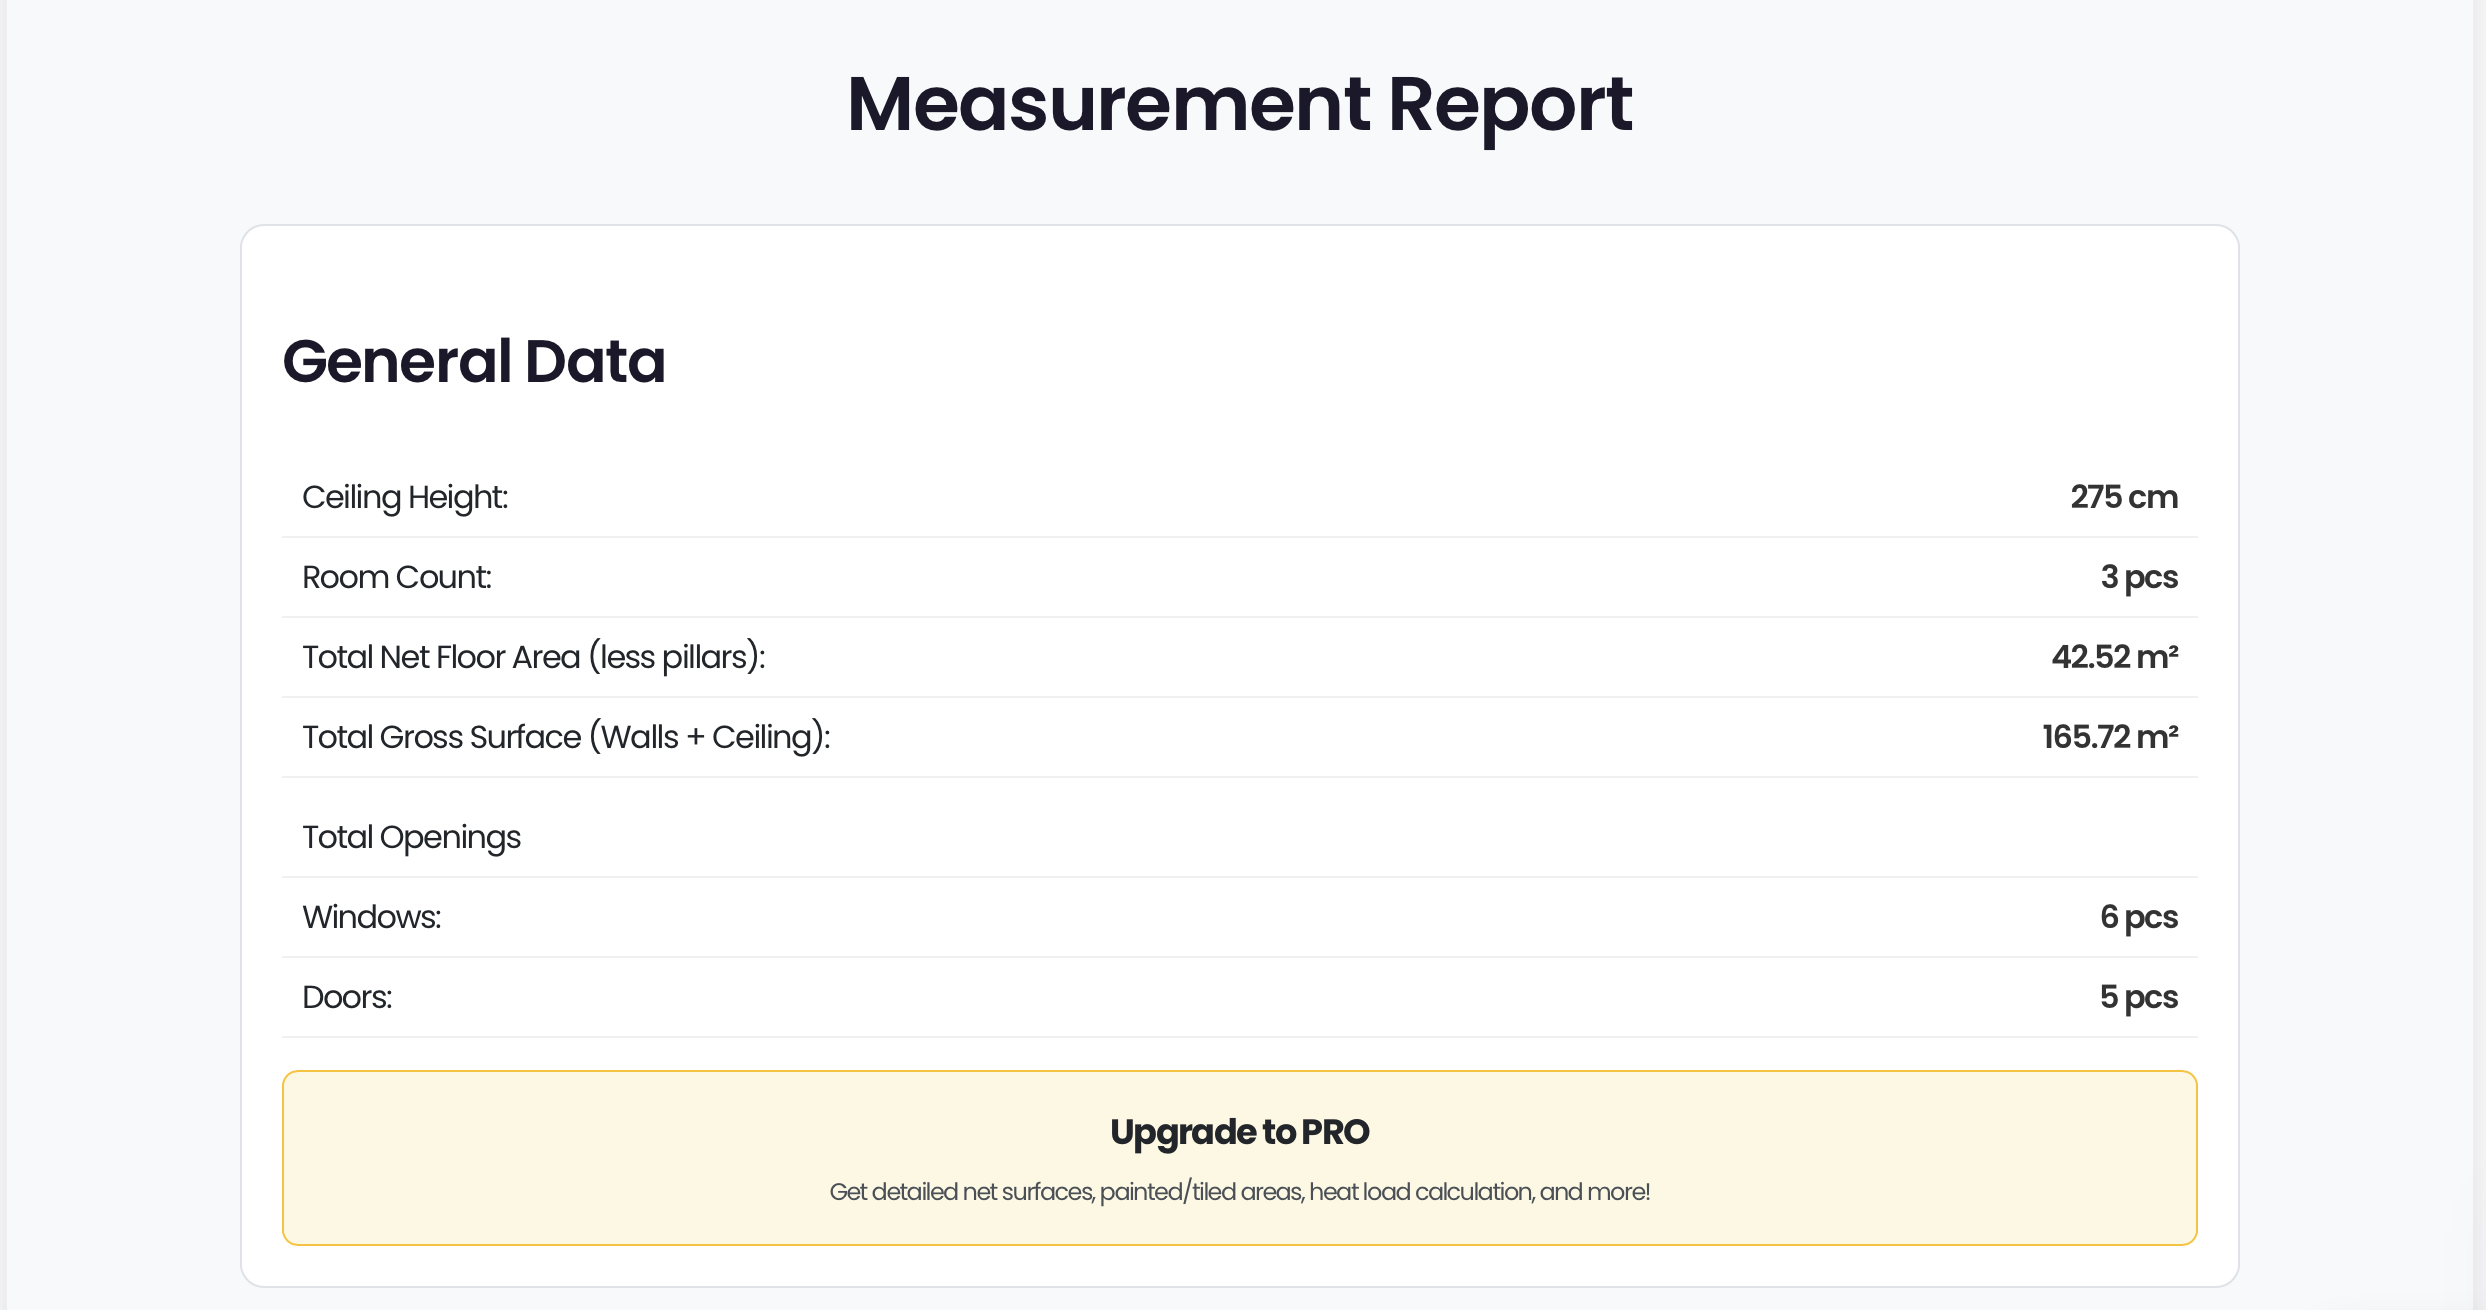
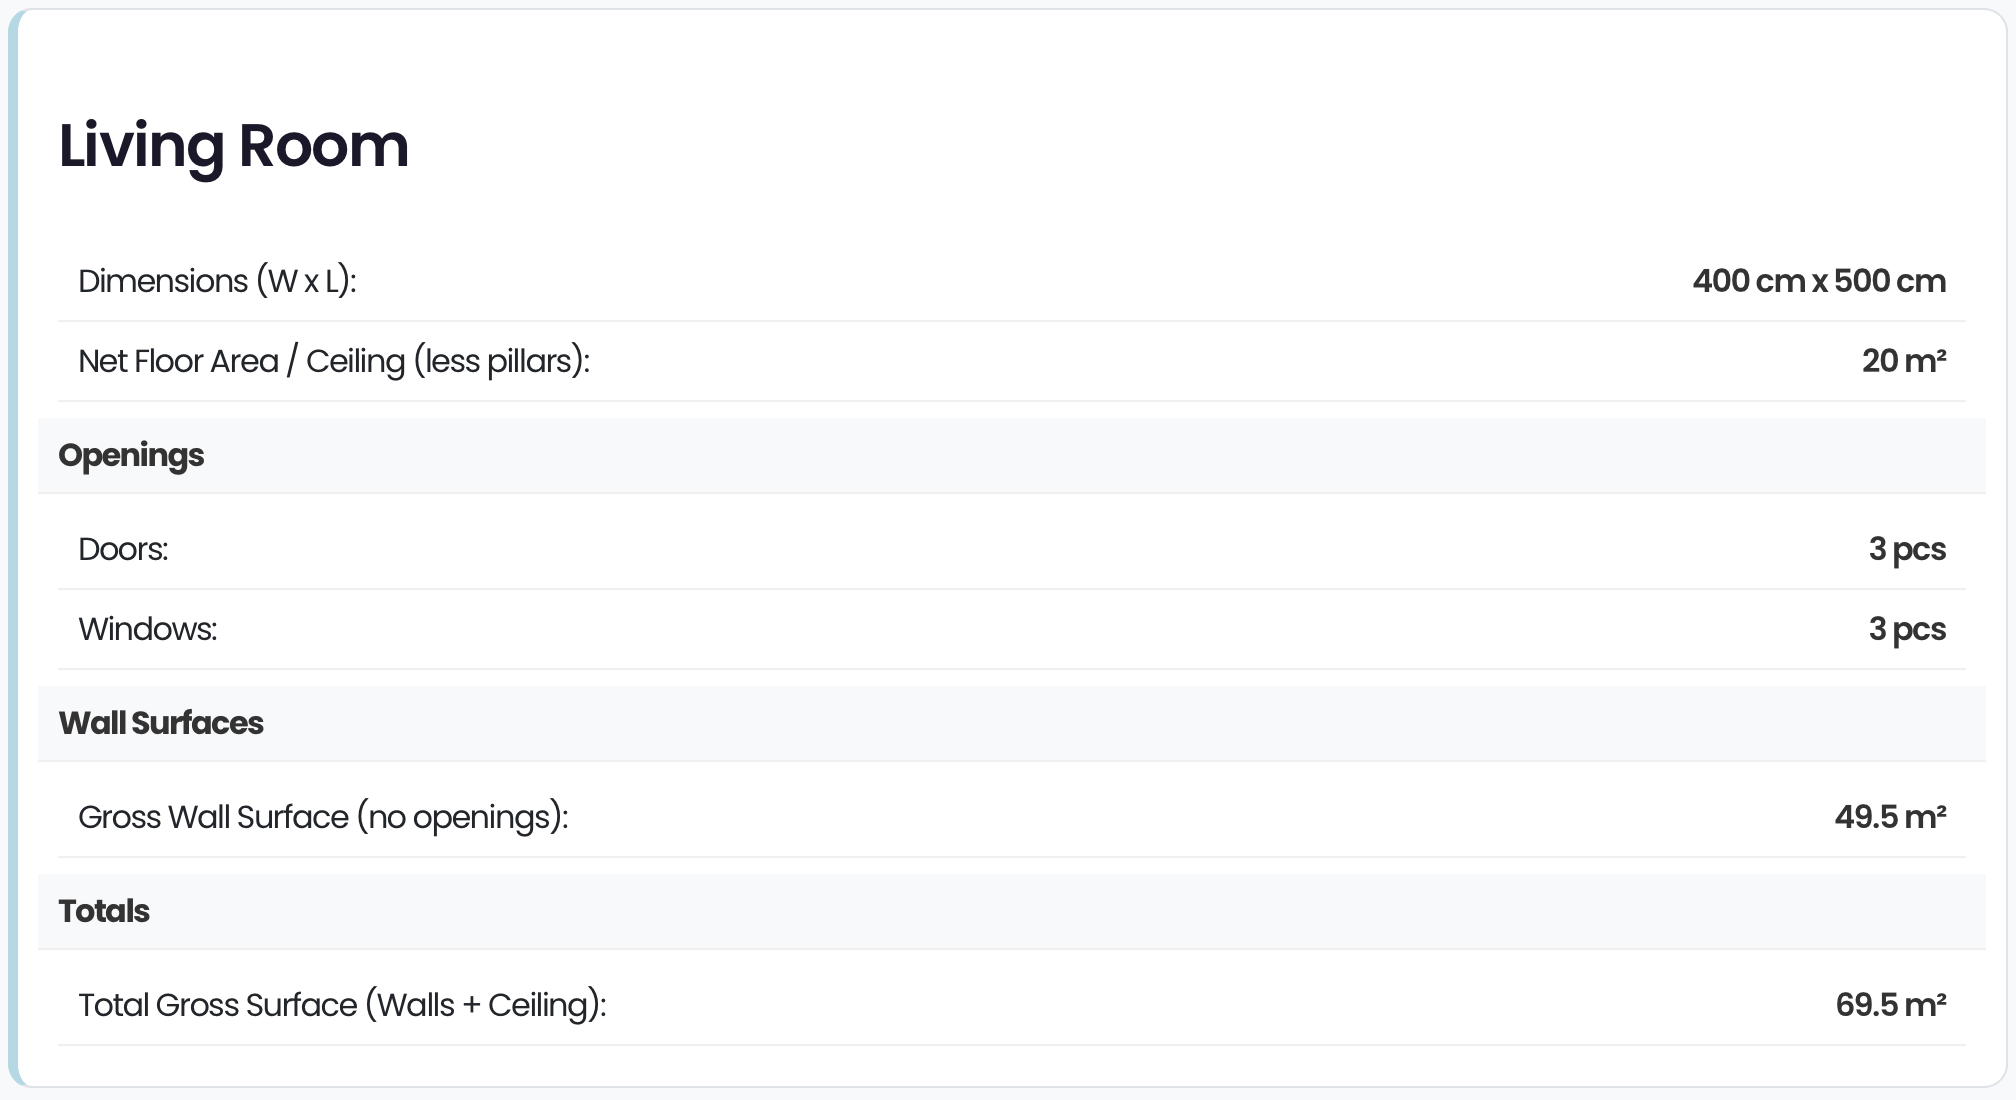
- Automate Engineering Quotes: Instantly calculate Net vs. Gross Floor Areas, Net Wall Surfaces (automatically subtracting all doors and windows), and Detailed Perimeters for accurate skirting or trim material estimation.
- Thermal & Volume Analysis: Automatically generate Air Volume data and estimated Heating Load requirements based on calculated surfaces and room volumes—perfect for HVAC and insulation contractors.
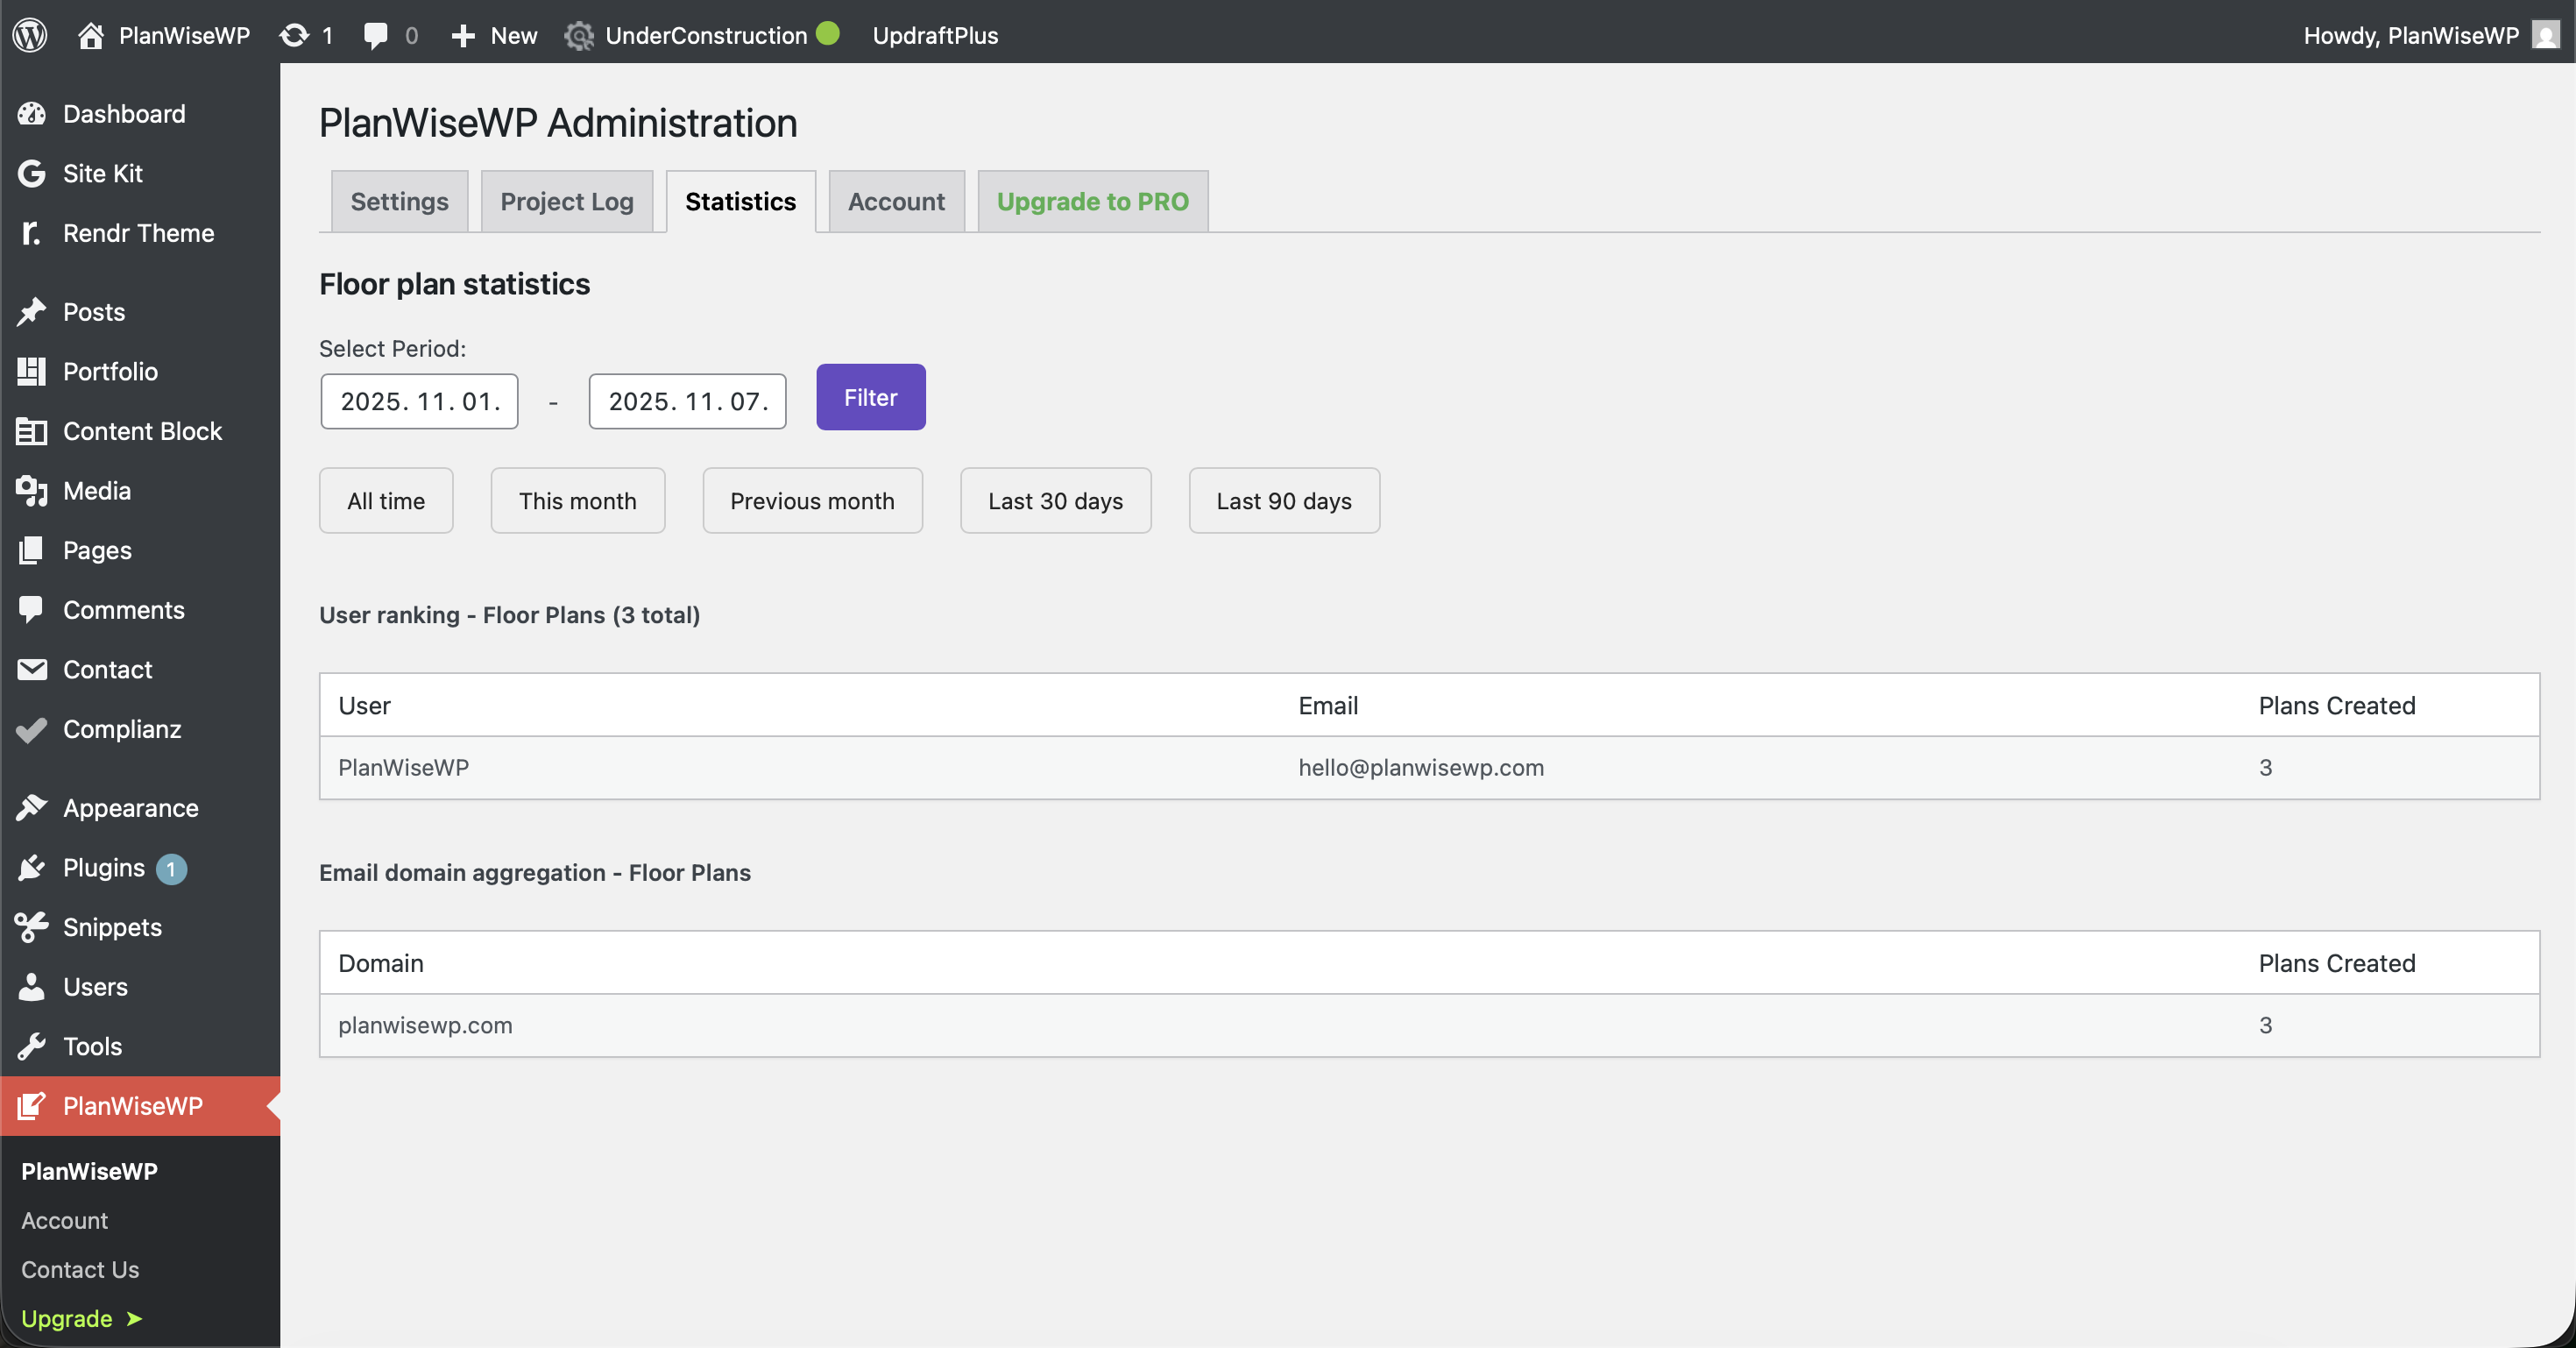
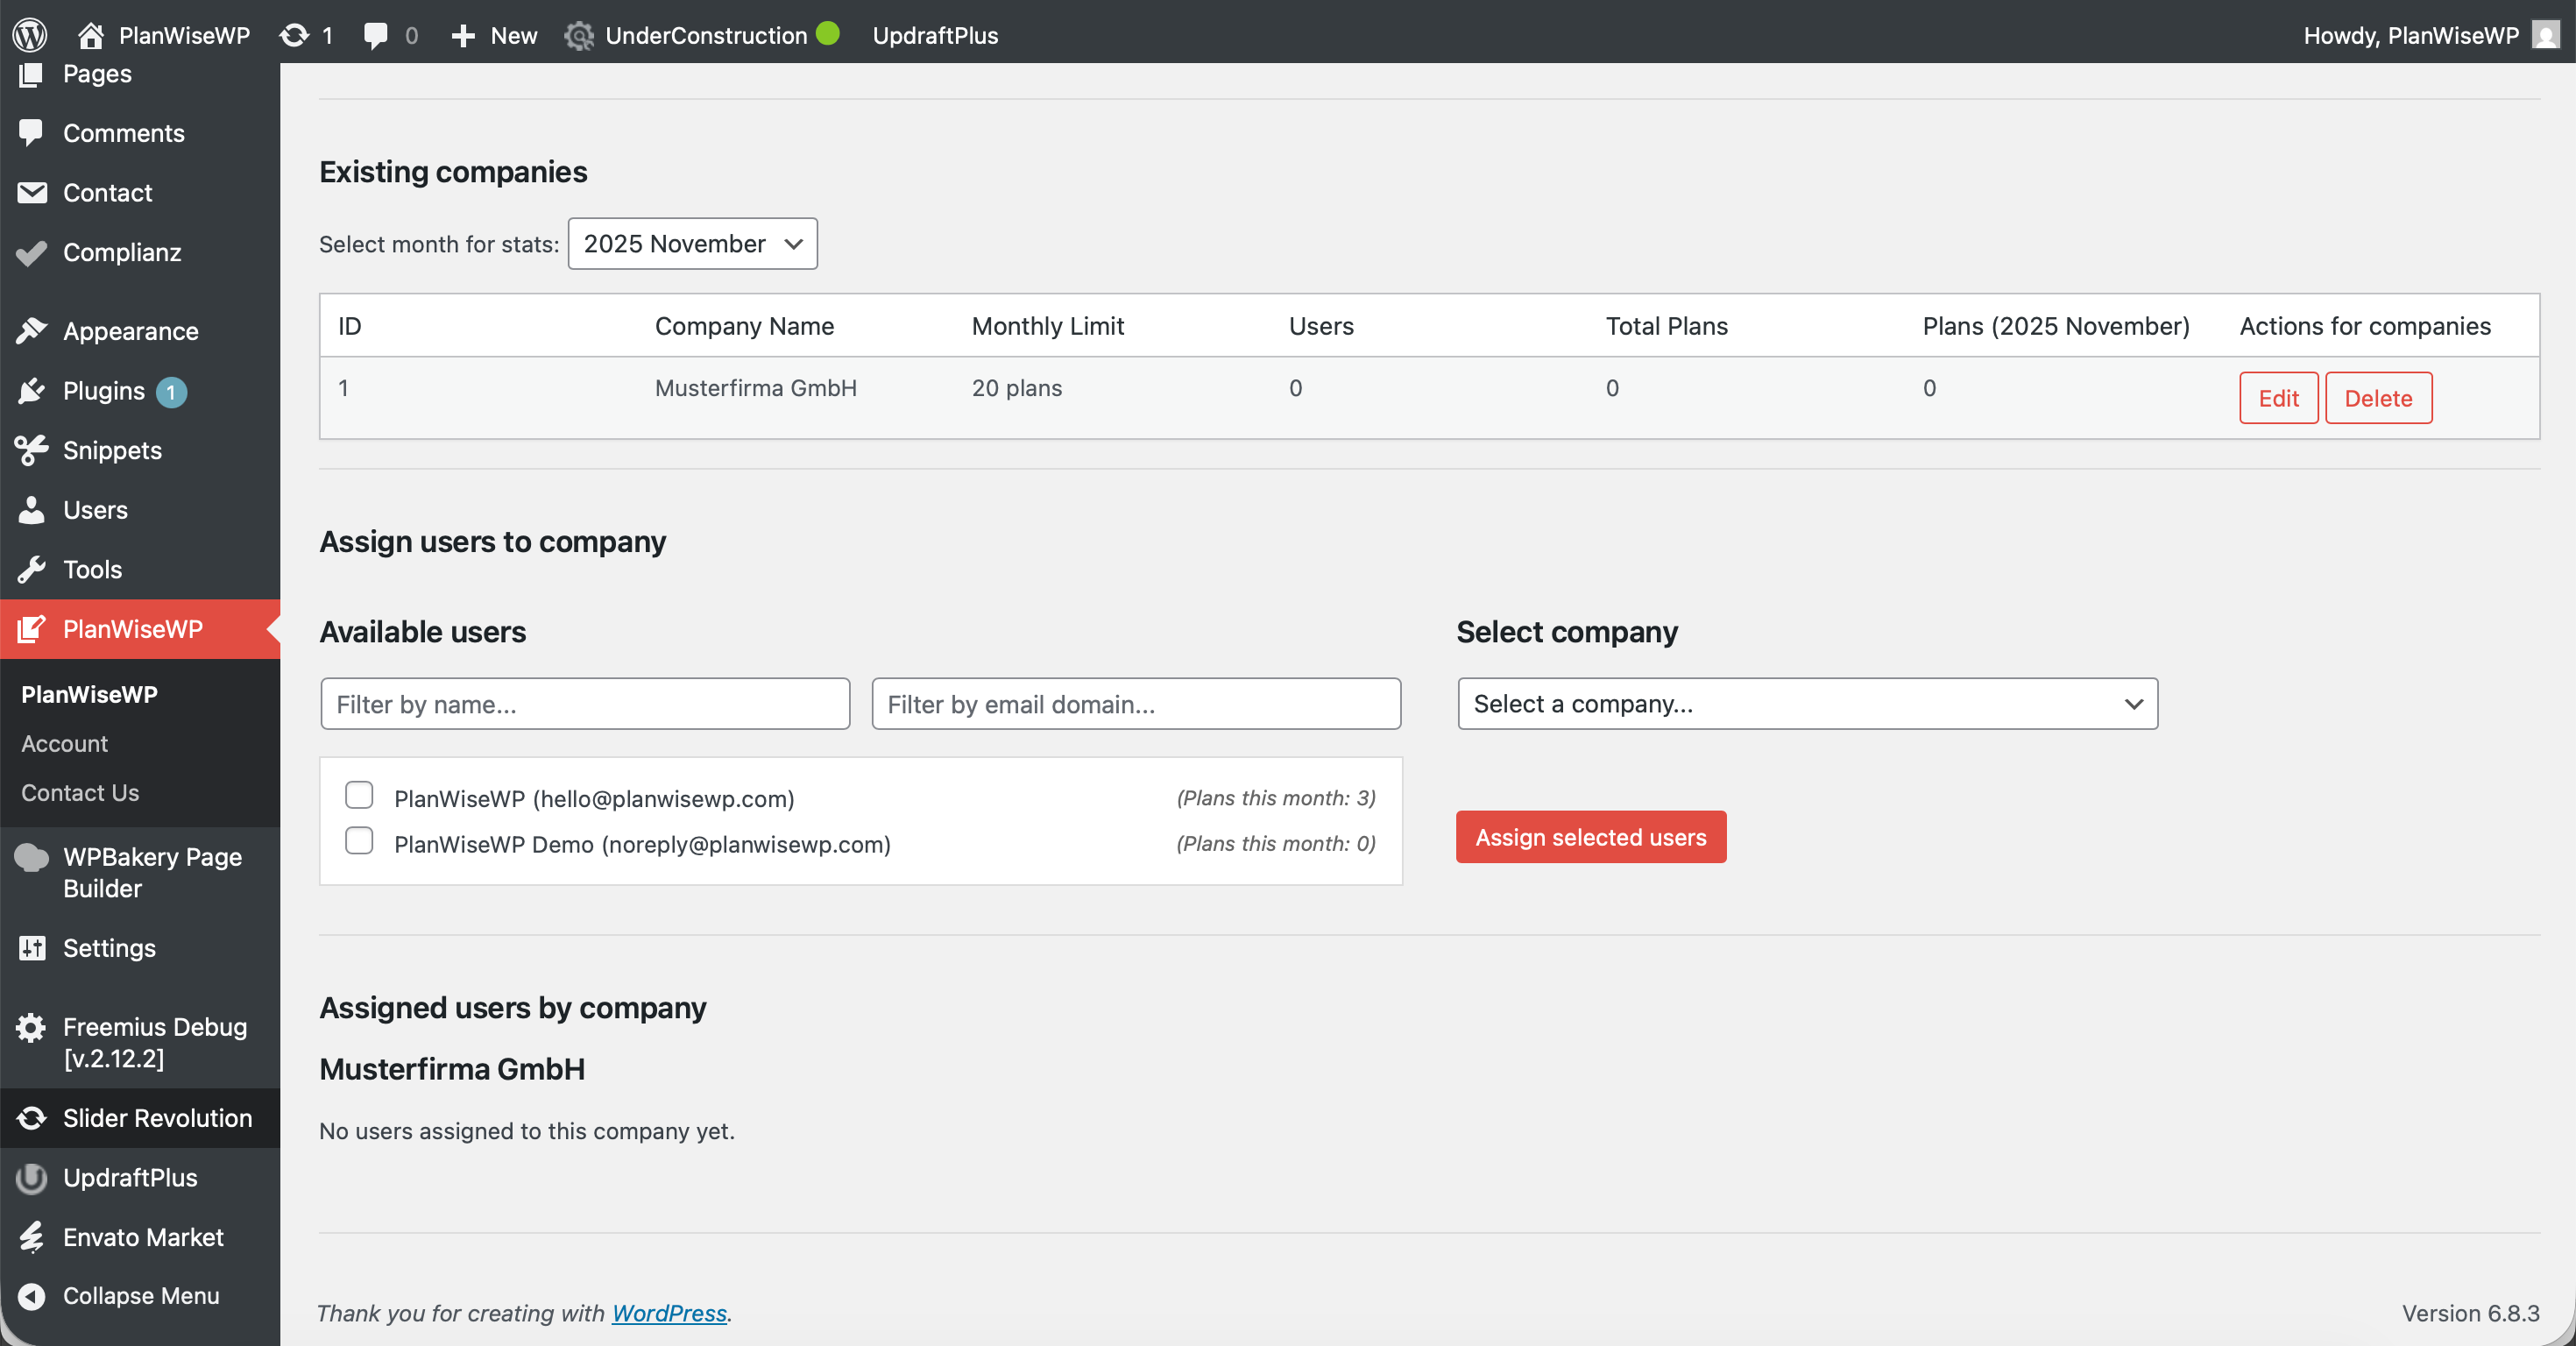
- Generate Qualified Leads: Allow users to Save & Load their plans, turning anonymous visitors into registered, contactable leads in your database.
- Strengthen Your Brand: Remove our watermark and add your own company logo to all exported high-resolution PNGs.
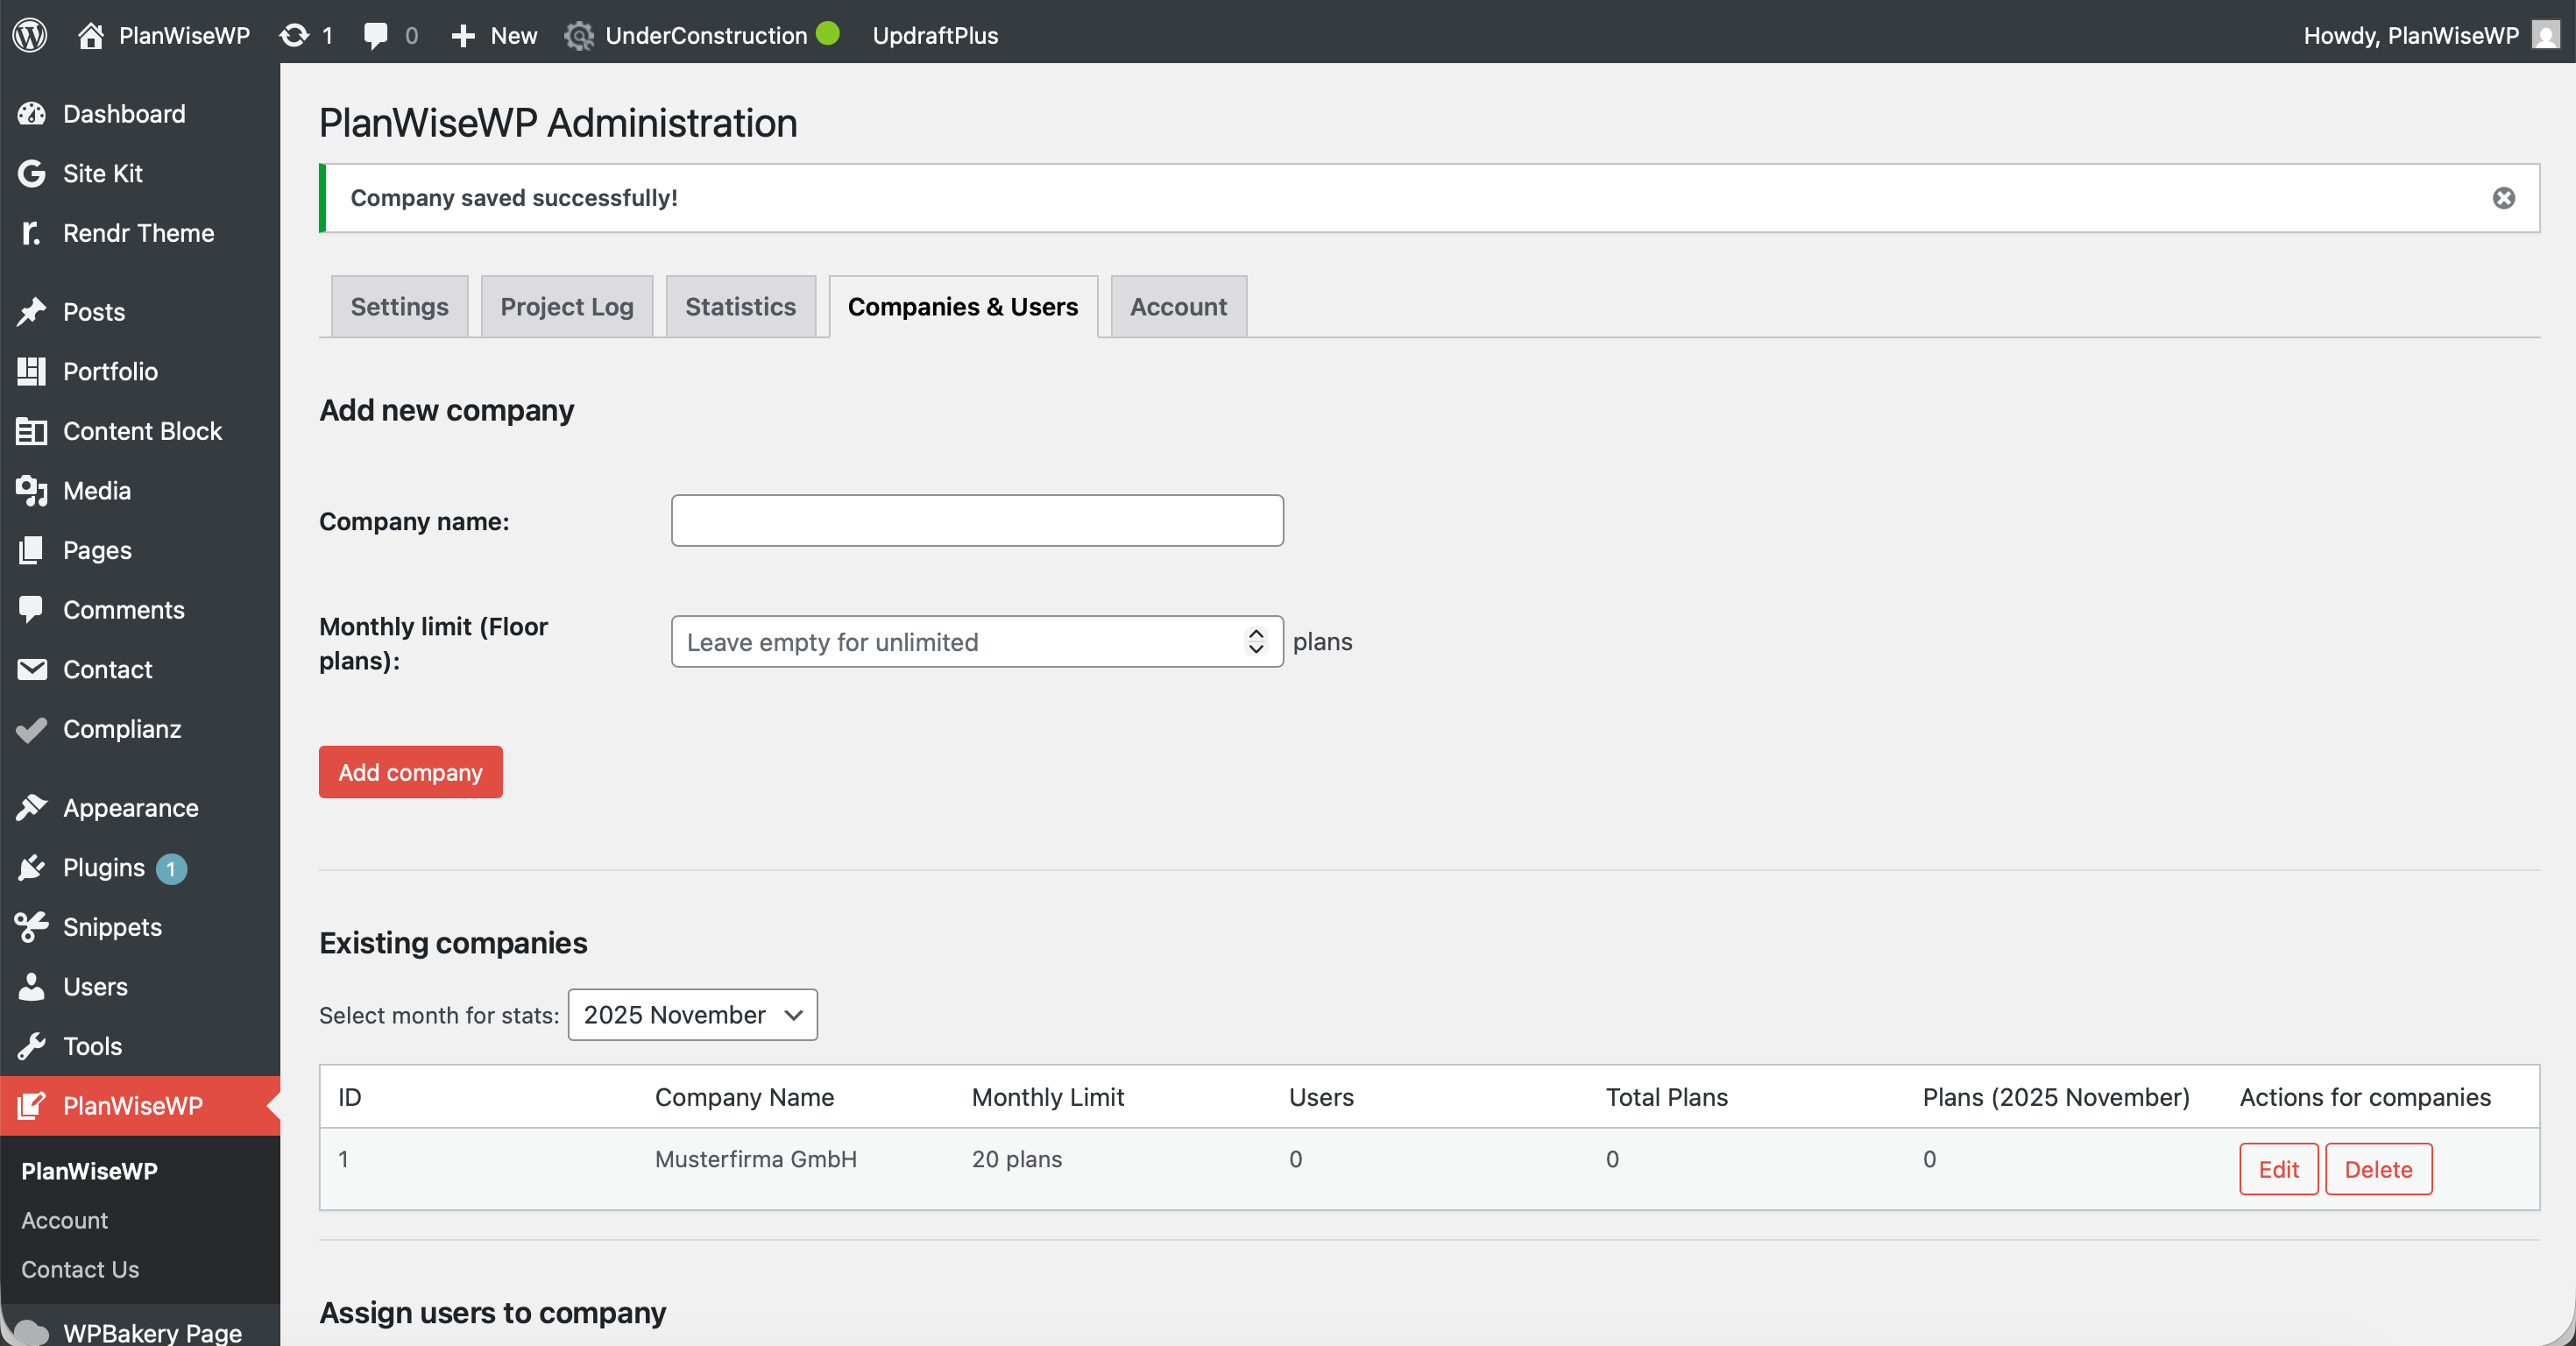
- Monetize Your Traffic: Use the Company Management panel to create premium, tiered access for your own B2B clients and partners.
- Full Data Portability: View user-saved plans (JSON) in the admin dashboard and unlock CSV & TXT export to sync data directly with your CRM or quoting software.
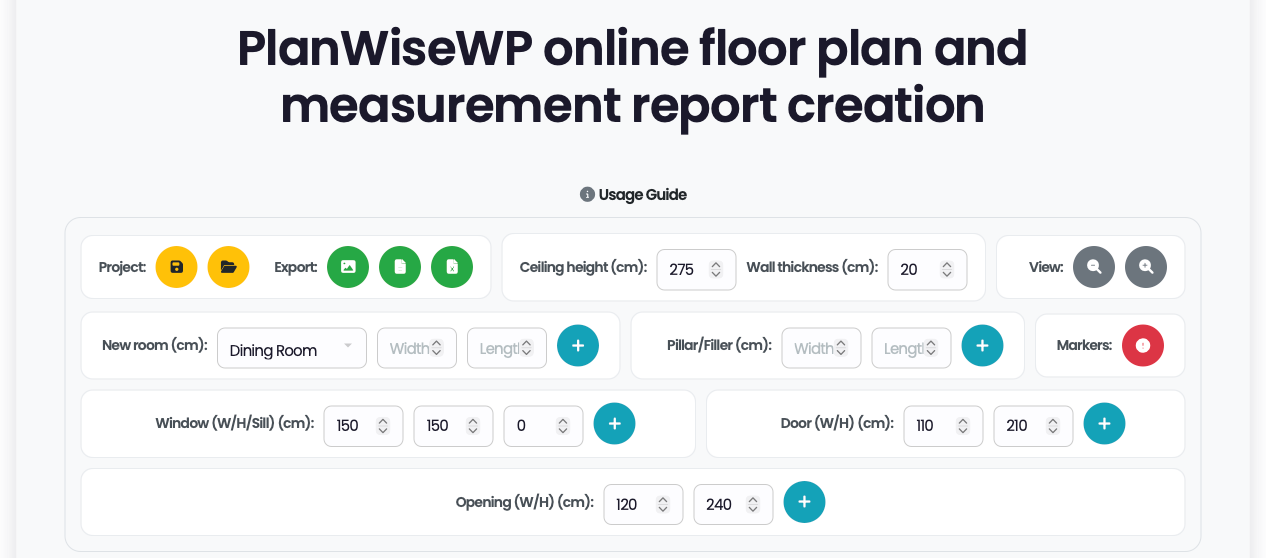
- Visual Snap-to-Grid editor: An intuitive drawing interface that's easy for anyone to use.
- Live basic calculations: Instantly calculates Gross Floor Area, Gross Wall Area, and item counts.
- Smart magnetic alignment: Rooms and elements automatically snap together for perfect alignment.
- Mobile & tablet ready: Fully responsive and touch-enabled.
- Metric & Imperial units: Works seamlessly in (cm/m) or (in/ft).
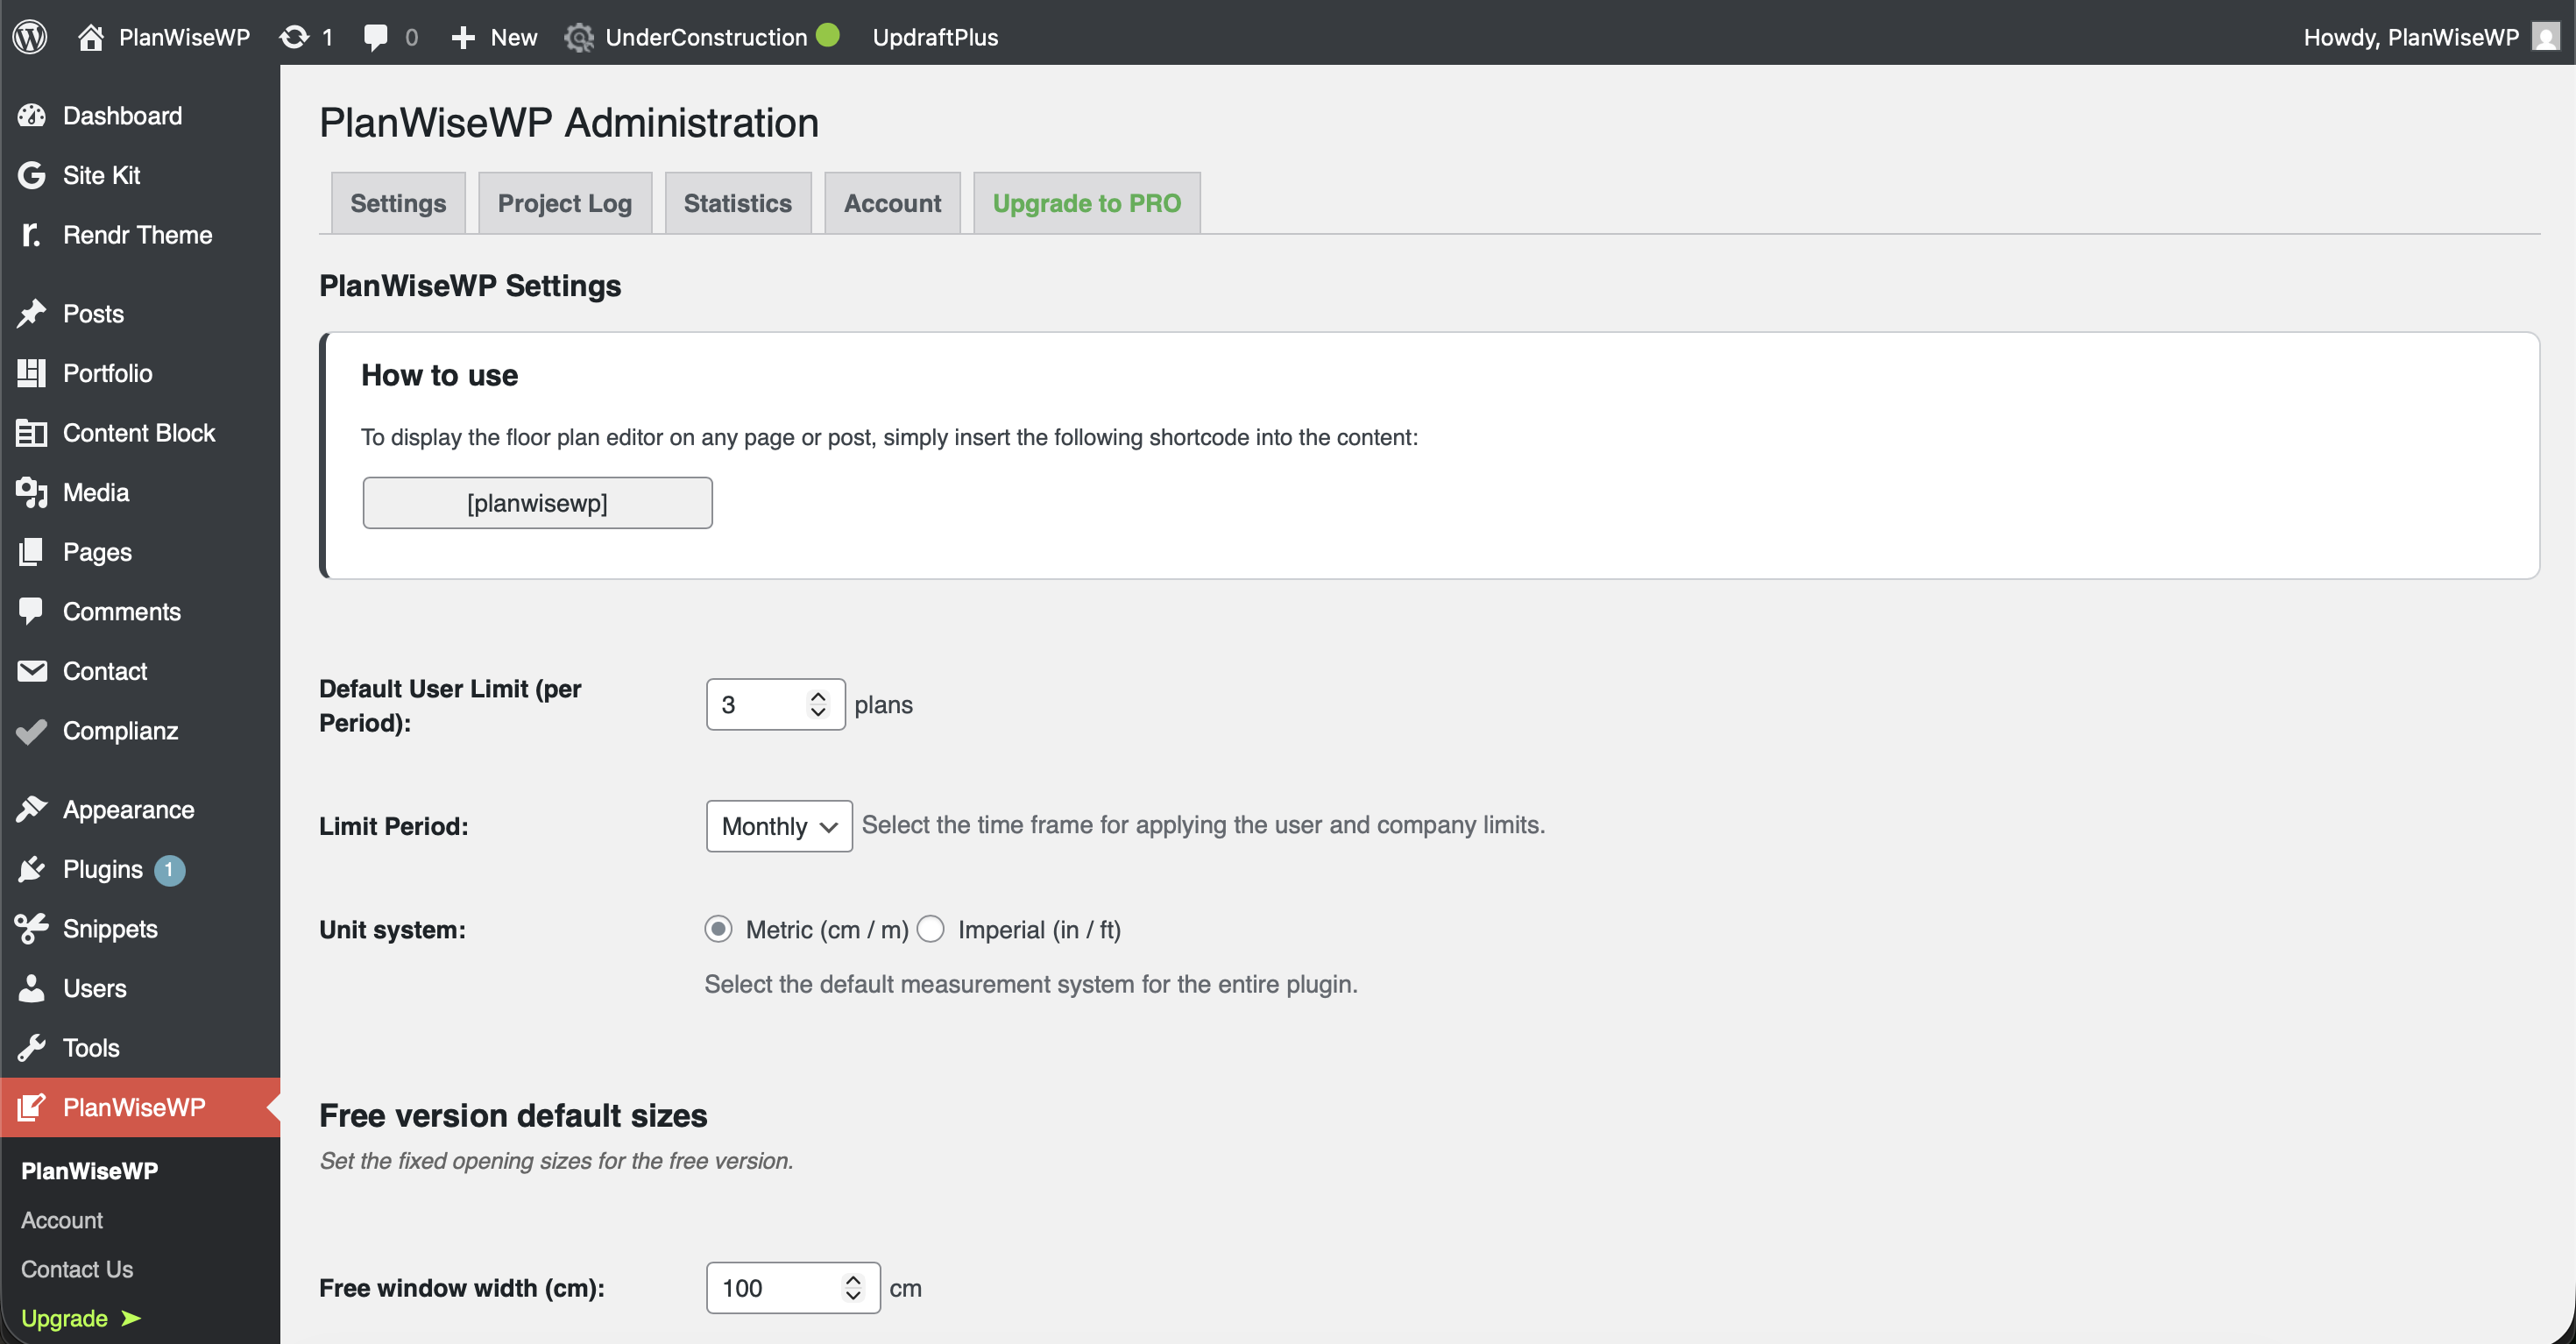
- Embed via shortcode: Place
[planwisewp]on any page or post. - PNG image export: Lets users download a PNG of their plan (with PlanWiseWP watermark).
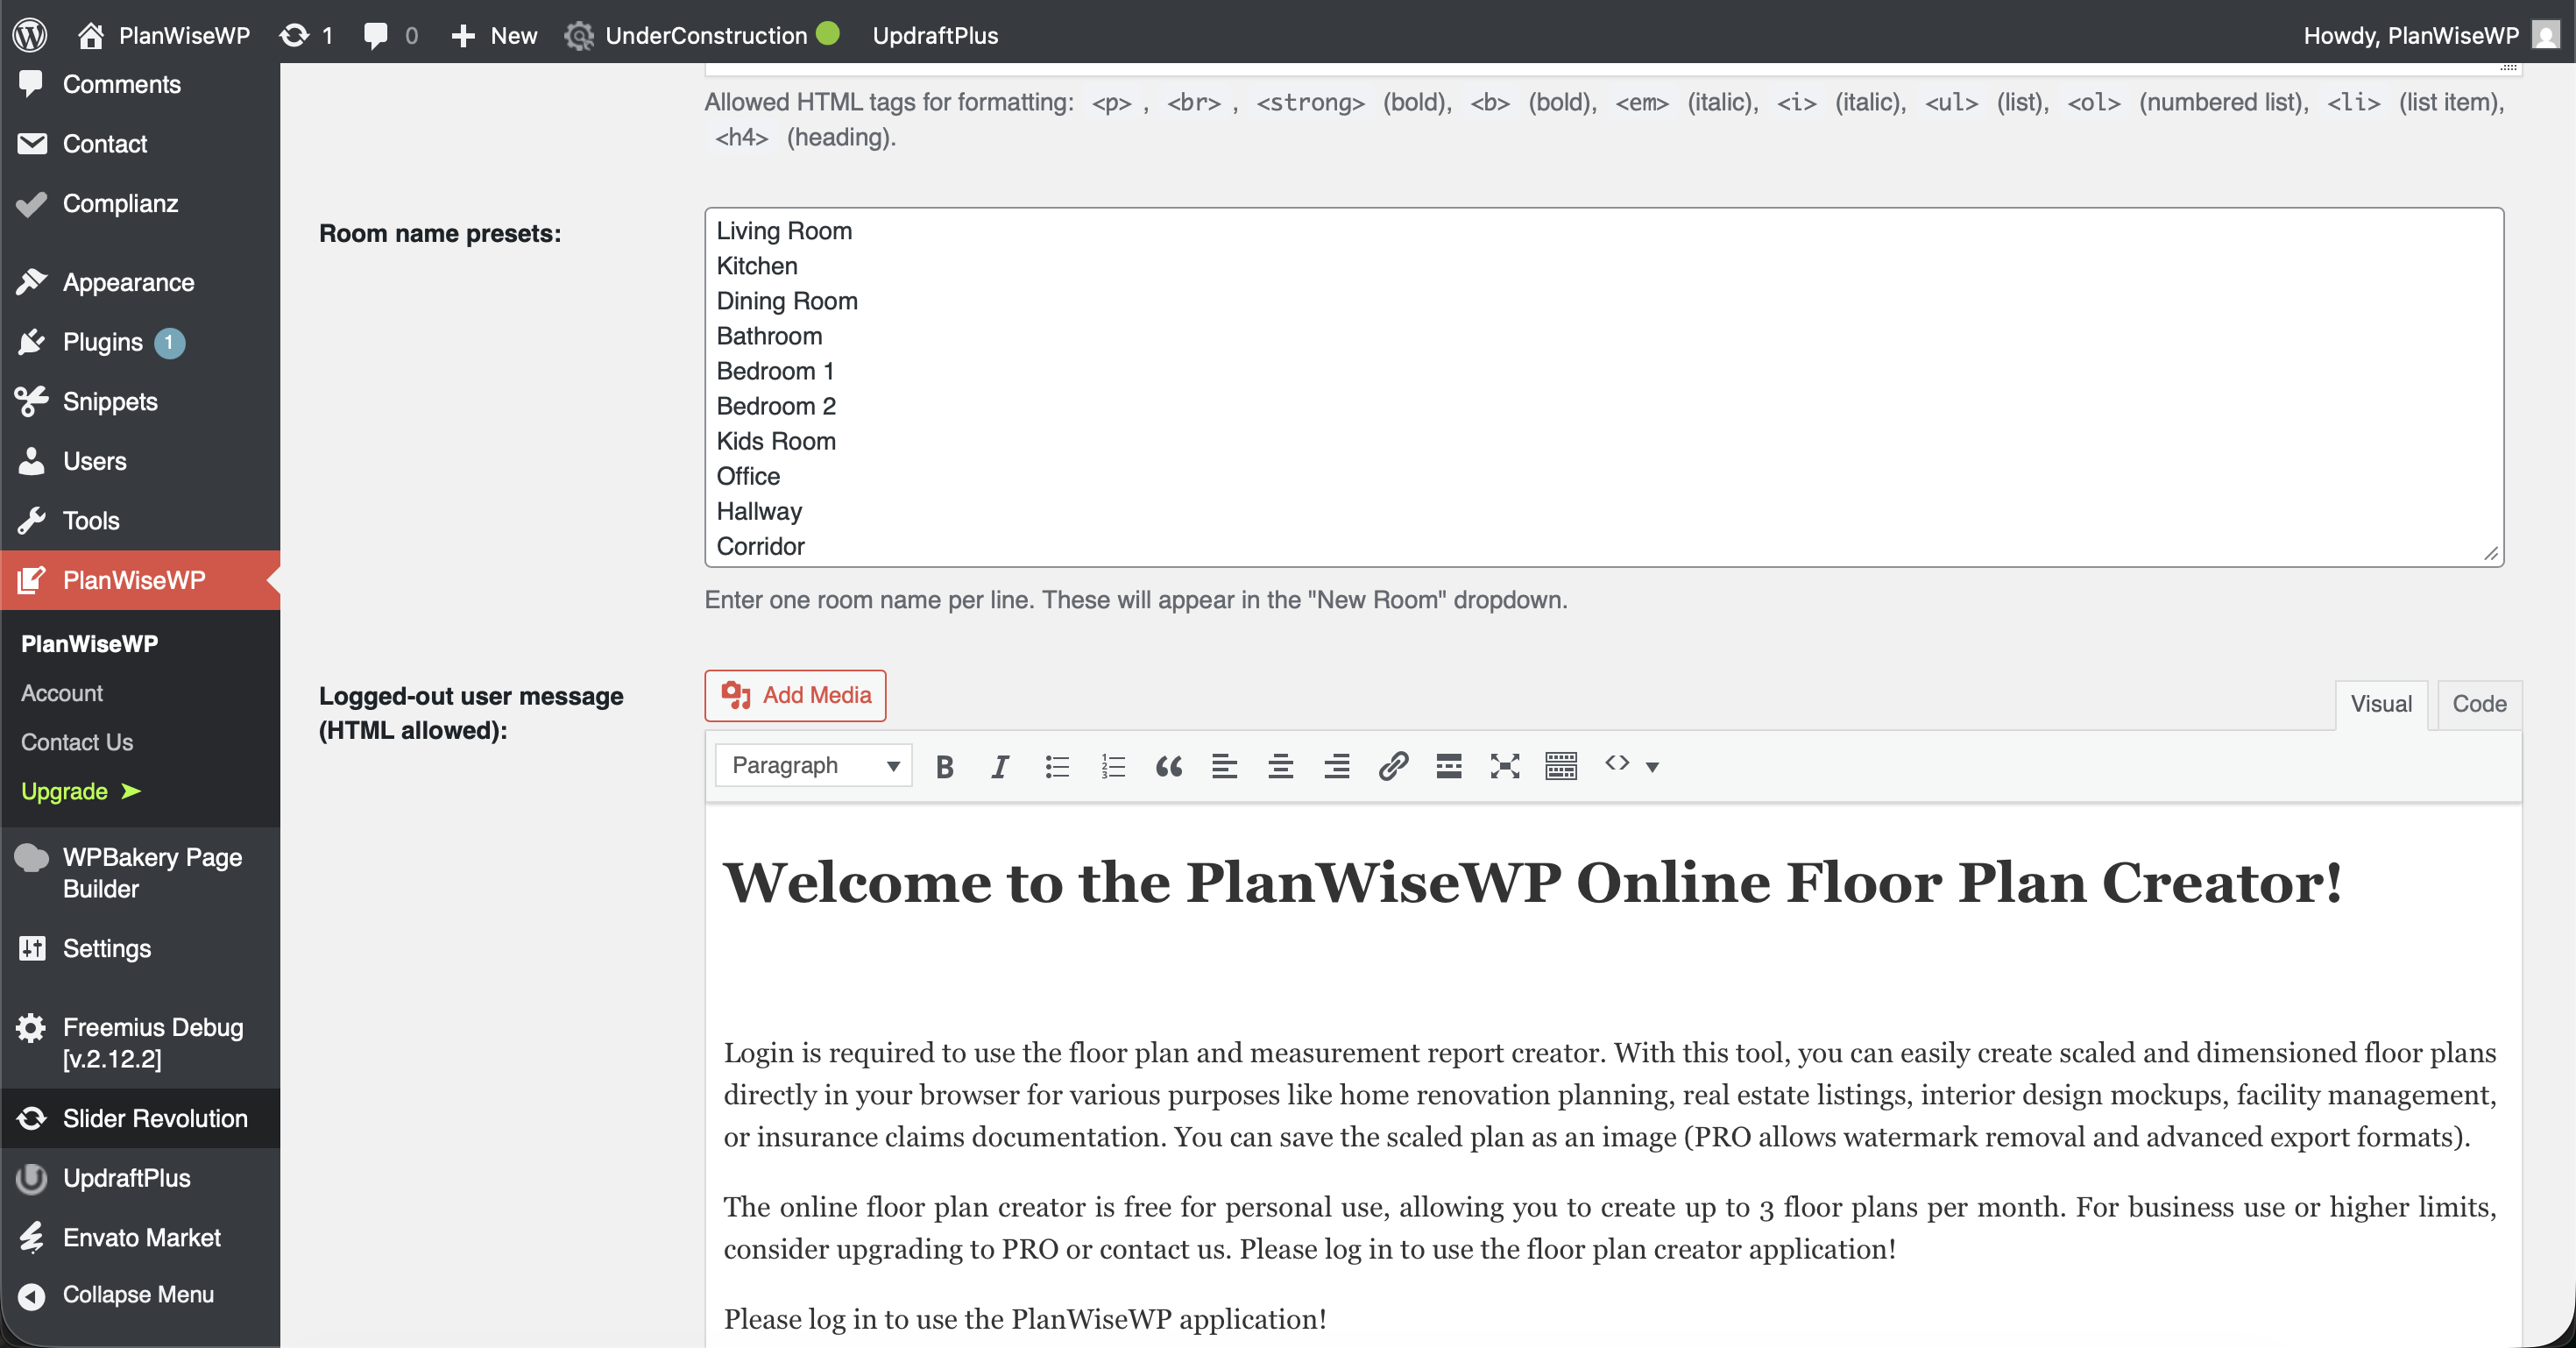
- Admin customization: Control editor button colors and the preset room name list.
- Translation ready: Fully translatable to your site's language.
安装:
Method 1: From your WordPress dashboard (Easiest)
- Navigate to 'Plugins' > 'Add New' in your WordPress admin dashboard.
- Search for "PlanWiseWP".
- Click 'Install Now', then click 'Activate'.
- After activation, go to the new 'PlanWiseWP' menu in your admin sidebar to configure the settings.
- Download the
planwisewp.zipfile from the WordPress.org plugin directory. - Navigate to 'Plugins' > 'Add New' in your WordPress admin.
- Click the 'Upload Plugin' button at the top of the page.
- Select the
planwisewp.zipfile you downloaded and click 'Install Now'. - Activate the plugin.
- Navigate to the new PlanWiseWP > Settings menu in your admin sidebar. This is where you configure all core options:
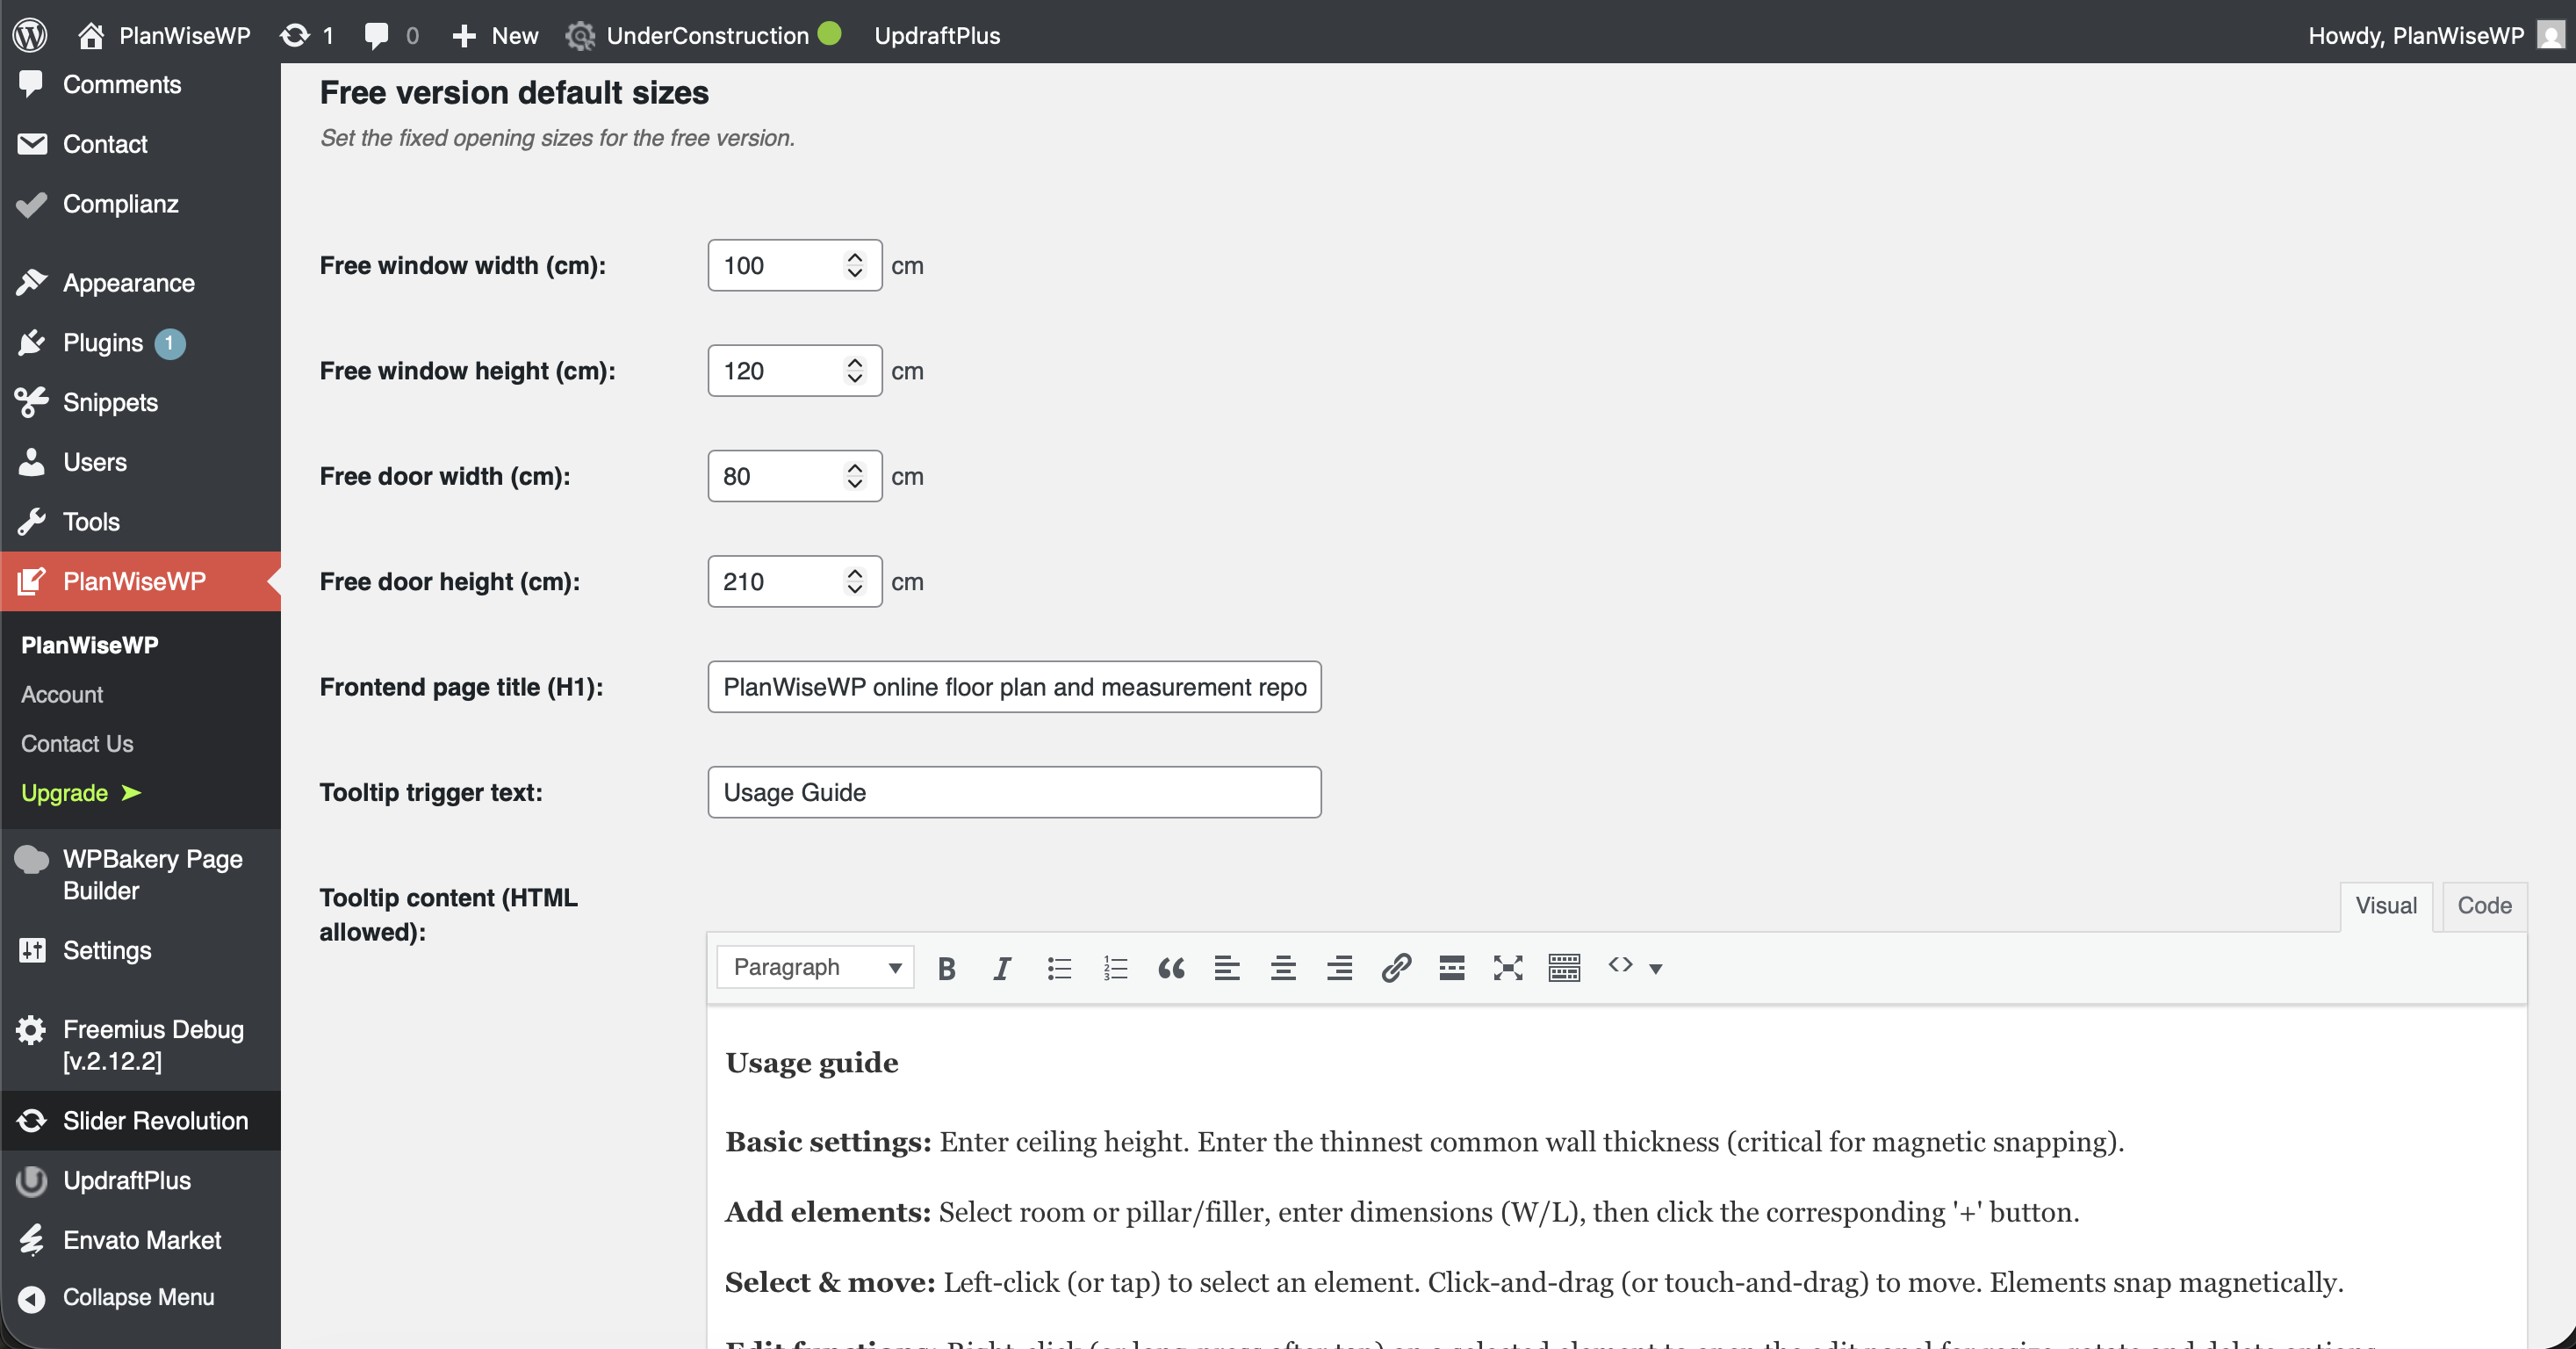
- Set the Unit System (Metric/Imperial).
- Set the Free version default sizes for doors and windows.
- Customize frontend Texts, Titles, and Tooltips.
- Place the
[planwisewp]shortcode on any page or post to display the editor.
屏幕截图:

更新日志:
= 1.0.0 =
- Initial public release.