
PrismSync Integration with QuickBooks for Gravity Forms
| 开发者 | wpprism |
|---|---|
| 更新时间 | 2026年10月4日 18:53 |
| PHP版本: | 7.4 及以上 |
| WordPress版本: | 7.1 |
| 版权: | GPLv2 or later |
| 版权网址: | 版权信息 |
详情介绍:
- Intelligent Form Detection — When creating a new QuickBooks feed, the plugin scans your form and automatically maps Customer fields (First Name, Last Name, Email, Phone, Billing Address), Line Items (Product name, quantity, unit price, total), Transaction Dates, Document Numbers, and Memos.
- One-Click Re-Map — Need to refresh field mappings after updating your form? Simply click the Auto-Map Fields button in feed settings to instantly re-analyze and populate matching fields.
- Instant Auto-Sync — Once configured, submissions are automatically synced in real time to QuickBooks Online upon submission, attaching transaction IDs and audit logs directly to your Gravity Forms entry notes.
- Entry Metadata Support — Seamlessly map standard Gravity Forms entry metadata like Entry Date (
date_created) and Entry ID (id) directly to transaction dates and document numbers.
- Up to 50 automated QuickBooks form submissions.
- All core transaction types: Invoices, Sales Receipts, Payments, and Customer records.
- Smart Automatic Field Mapping for lightning-fast feed setup.
- Customer auto-lookup (searches by email/name and auto-creates if missing).
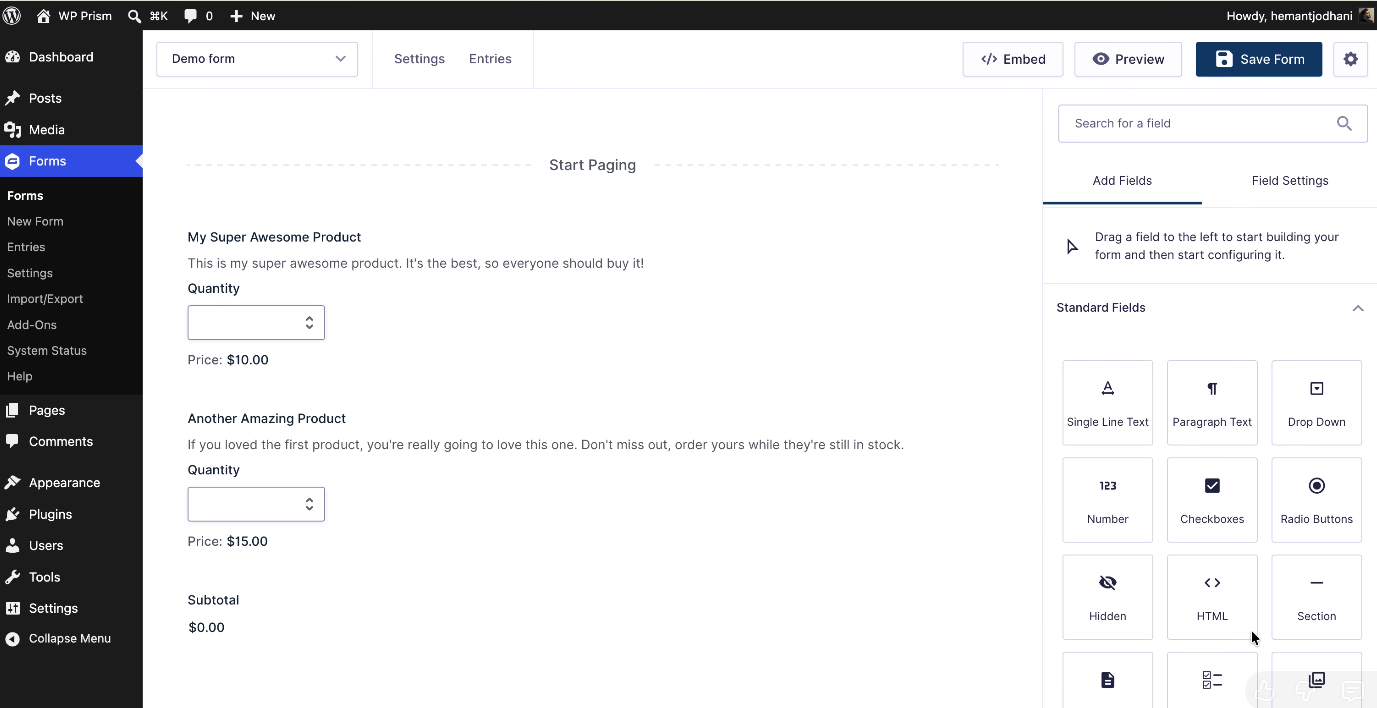
- Multi-line item support with quantities, unit prices, and descriptions.
- Gravity Forms entry metadata mapping (Entry Date & Entry ID).
- Conditional logic per feed.
- Sandbox and Production environment modes.
- Live submission counter and usage tracker. Premium Version Unlocks:
- Unlimited Submissions — No 50 submission cap; automate endless transactions for high-traffic stores and business workflows.
- Priority Support — Fast, dedicated email and ticket support directly from the WP Prism engineering team.
- Continuous Updates — Always up to date with the latest QuickBooks Online API and Gravity Forms releases.
- Instant Activation — Activate your license key in one click without re-configuring existing forms or feeds. 👉 Upgrade to PrismSync Premium on WP Prism
- OAuth 2.0 Authentication — Secure Intuit OAuth 2.0 connection with automatic token refresh.
- Sandbox & Production — Switch between QuickBooks Sandbox and Live environments.
- Smart Automatic Field Mapping — Effortlessly configure feeds with intelligent auto-mapping that pre-fills customer info, billing address, line items, quantities, transaction dates, and memos.
- Auto Customer Lookup & Creation — Automatically finds an existing QuickBooks Customer by email or name. If not found, creates one before creating the transaction.
- Invoice & Sales Receipt — Map form fields to QuickBooks invoices and sales receipts with full line item support.
- Payment Recording — Record customer payments from form submissions.
- Entry Meta Support — Map standard Gravity Forms entry metadata like Entry Date (
date_created) and Entry ID (id) directly to QuickBooks transaction dates and references. - Per-Form Feeds — Create one or more QuickBooks feeds per Gravity Form.
- Conditional Logic — Run feeds only when specified form field conditions are met.
- Entry Notes — Automatically adds success/error notes to Gravity Form entries with QuickBooks transaction IDs.
- Secure — All API credentials stored in WordPress options. Uses WordPress HTTP API for all requests.
- PHP 7.4 or higher
- WordPress 5.8 or higher
- Gravity Forms 2.5 or higher
- QuickBooks Online account (any plan)
安装:
- Upload the
prismsync-integration-with-quickbooks-for-gravity-formsfolder to/wp-content/plugins/. - Activate the plugin via Plugins → Installed Plugins.
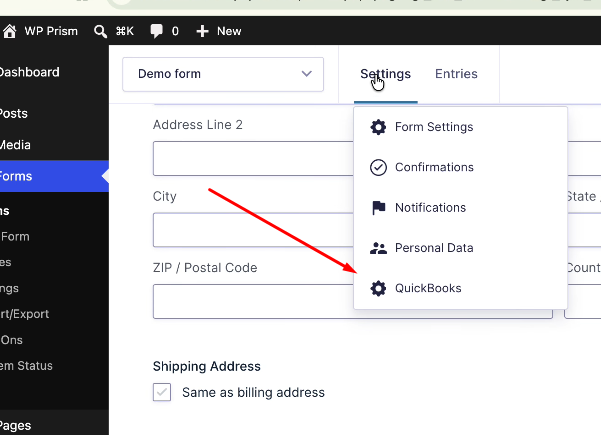
- Navigate to Forms → Settings → QuickBooks to configure.
- Go to Intuit Developer Portal.
- Create or open your App.
- Copy your Client ID and Client Secret.
- Add the Redirect URI (shown in plugin settings) to your App's allowed Redirect URIs.
- Go to Forms → Settings → QuickBooks.
- Select Environment (Sandbox for testing, Production for live).
- Enter your Client ID and Client Secret.
- Click Save Settings.
- Click Connect QuickBooks Online — an authorization popup will appear.
- Sign in to QuickBooks Online and grant access.
- You will be redirected back with a Connected status showing your company name.
- Edit any Gravity Form.
- Navigate to Form Settings → QuickBooks.
- Click Add New to create a feed.
- Select a QuickBooks Action: Create Invoice, Create Sales Receipt, or Create Payment.
- Form fields will be automatically detected and mapped wherever possible (Customer details, billing address, line items, transaction dates, and memos). You can adjust any mapping as needed.
- Enable Auto-Create Customer if needed.
- Optionally set Conditional Logic for the feed.
- Save the feed.
屏幕截图:


常见问题:
Does this plugin require Gravity Forms?
Yes. Gravity Forms 2.5 or higher is required. This plugin uses the Gravity Forms Feed Add-On Framework.
Does this plugin work with QuickBooks Desktop?
No. This plugin only supports QuickBooks Online (QBO) via the Intuit REST API.
What is the difference between the Free and Premium plans?
The Free version includes up to 50 automated QuickBooks submissions with all core actions (Invoices, Sales Receipts, Payments, and Customers), Smart Automatic Field Mapping, and Entry Meta support. The Premium version removes the 50-submission limit for unlimited automated synchronizations and includes priority support from the WP Prism engineering team.
Where can I purchase or upgrade to the Premium version?
You can upgrade to the Premium version directly on the official WP Prism website: https://wpprism.com/plugins/prismsync-integration-with-quickbooks-for-gravity-forms/
What happens when I reach the 50 free submission limit?
When your site reaches 50 submissions, automated syncing to QuickBooks will pause until you upgrade to Premium. All entries remain completely safe and stored in Gravity Forms. Once upgraded, syncing resumes immediately without any need to reconfigure your forms.
How does automatic field mapping work?
When creating a new QuickBooks feed, the plugin automatically inspects your form's fields and intelligently selects matching fields for Customer Info (names, email, phone, billing address), Line Items (Product name, quantity, price), Transaction Date (pre-mapped to Gravity Forms Entry Date or date field), Reference Numbers, and Memos. You can re-trigger auto-mapping anytime using the "Auto-Map Fields" button.
How does the Auto-Create Customer feature work?
When processing an Invoice, Sales Receipt, or Payment feed, the plugin:
- Checks entry meta for an existing QuickBooks Customer ID.
- If not found, searches QuickBooks by email.
- If still not found, searches by display name.
- If still not found, creates a new Customer in QuickBooks.
- Attaches the Customer ID to the transaction.
Can I use Sandbox mode for testing?
Yes. Select "Sandbox" in the environment setting and use your Intuit Sandbox app credentials. Switch to "Production" when you are ready to go live.
Where are OAuth tokens stored?
OAuth tokens are stored securely in the WordPress wp_options table. Tokens are automatically refreshed before they expire.
更新日志:
- Feature: Added intelligent automatic field mapping when creating new QuickBooks feeds (pre-maps customer details, line items, quantity, transaction dates, and memos).
- Feature: Added native support for Gravity Forms entry metadata (Entry Date
date_createdand Entry IDid) in field mapping dropdowns and feed processing. - Enhancement: Added one-click "Auto-Map Fields" button and visual highlight cues in feed configuration.
- Enhancement: Streamlined plan upgrade flow with direct landing page integration.
- Code Quality: Full WordPress Coding Standards (WPCS) compliance and optimizations.
- Initial beta release.
- OAuth 2.0 authorization flow with Intuit.
- Feed support: Invoice, Sales Receipt, Payment.
- Auto Customer lookup and creation.
- Entry notes and meta storage.
- Conditional logic support per feed.
- Sandbox and Production environment support.