Simplified Font Manager - Typekit and Google Fonts
| 开发者 | vedathemes |
|---|---|
| 更新时间 | 2019年11月25日 15:12 |
| PHP版本: | 5.6 及以上 |
| WordPress版本: | 5.3 |
| 版权: | GPLv2 or later |
| 版权网址: | 版权信息 |
详情介绍:
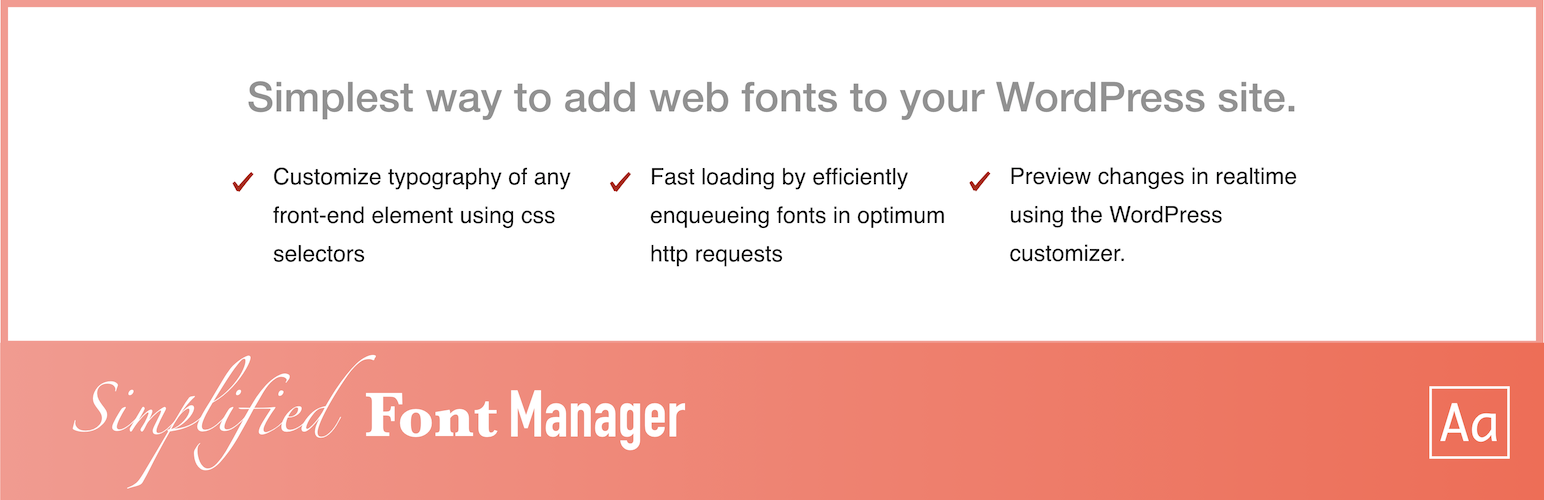
Don't just limit your google or typekit (Adobe Fonts) customization to body and heading elements. Apply web fonts to any element of your website using CSS selectors. If you know CSS selectors, this plugin offers you the simplest and most efficient method to use google or adobe (typekit) fonts for your website.
[youtube https://youtu.be/S1cFrILv75w]
What this plugin offers
- This plugin allows you to customize typography of any front-end element on your site.
- Apply google font to any element using css selectors (Content added by any theme or any plugin).
- Apply Adobe font (typekit) to any element using css selectors (Content added by any theme or any plugin).
- Create unlimited typography control in real time with just click of a button.
- Fast loading by efficiently enqueueing fonts using optimized http requests.
- Live preview of font changes on your website in realtime using the WordPress Customizer.
- Intutive UI makes it very simple to use google or typekit fonts.
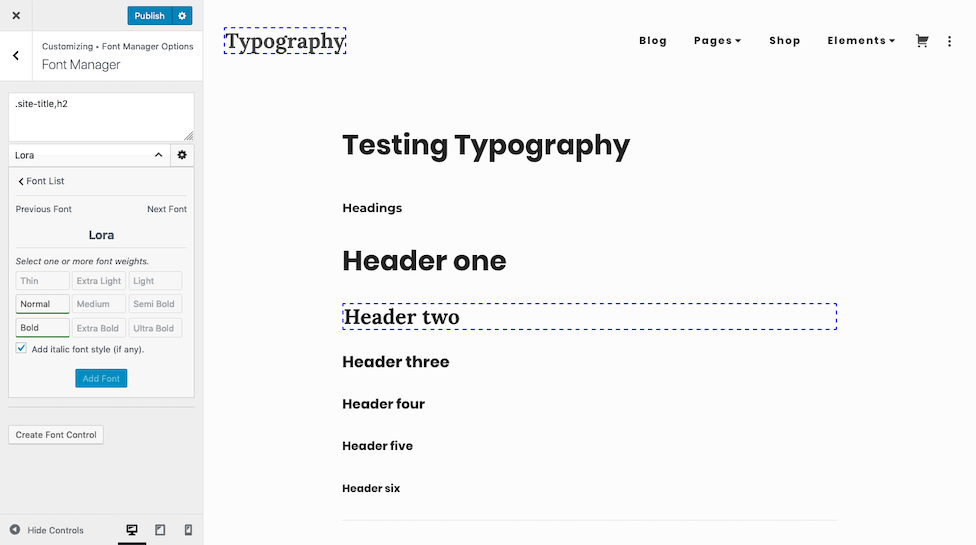
- After activating the plugin, visit Appearance > Customize in admin dashboard.
- Click on 'Font Manager' tab (probably at the bottom of all tabs).
- Click on "Create Font Control" button to create new control.
- Type comma separated css selectors of all target elements (elements you want to customize) in the textarea.
- Click on "Select a Font" button to find and select any google, typekit or websafe font.
- Search for a specific font or use filter button to filter the choices.
- Click on the selected font.
- If you chose a google font then you will be presented with an option to choose font weights.
- Choose required font weights (and italics variant) for your project and click "Add Font" button.
- Now you can see live implementation of your chosen font on your target elements.
- You can use "Next Font" or "Previous Font" button to change your choice.
- Click on the Gear button to customize other typography elements of your target elements.
- Check "Temporarily Highlight Elements" checkbox to make sure you have chosen correct elements.
- Implement your other font customizations and click [Publish] button.
- Sing-in or create an Adobe ID at Adobe Fonts.
- Search or Browse typekit or Adobe fonts. Click on '' icon to add fonts to your existing or new web project.
- Go to My Adobe Fonts > Web Project and find "Project ID", which can be found next to the Project name.
- Copy "Project ID".
- Go to the Plugin's WordPress customizer section, and click on "Plugin Advanced Options".
- Paste "Project ID" in the appropriate field and hit arrow icon.
- Now Adobe fonts (typekit) will be available for use immediately.
安装:
Installing “Simplified Font Manager” can be done either by searching for “Simplified Font Manager” via the “Plugins > Add New” screen in your WordPress dashboard, or by using the following steps:
- Download the plugin via WordPress.org
- Upload the ZIP file through the ‘Plugins > Add New > Upload’ in your WordPress dashboard
- Activate the plugin through the ‘Plugins’ menu in WordPress
屏幕截图:
更新日志:
1.5.0
- Error Fix: Add quotes around google font name to prevent borderline error.
- Modify: Google fonts update.
- Modify: Minor design updation.
- Modify: Simplify theme integration.
- Modify: Minor code improvements.
- Add: Helpful admin notice.
- Modify: Reset theme default fonts on theme switch.
- Modify: Font filter styling improvements.
- Modify: Simplify font selection process.
- Modify: Update google fonts datafile.
- Add: Theme support for default google fonts.
- Add: Option to add Adobe typekit fonts to your website.
- Error Fix: Re-indexing of saved options after deleting option array element.
- First version.