
StifLi Flex MCP - MCP Server with undo for ChatGPT, Claude & Gemini
| 开发者 | estebandezafra |
|---|---|
| 更新时间 | 2026年6月4日 22:19 |
详情介绍:
- MCP Server — Connect ChatGPT, Claude Desktop, or any MCP client directly to your site
- AI Copilot — A floating assistant inside the Gutenberg and Classic editors that writes, rewrites, and optimizes your content in real time
- AI Chat Agent — A full conversational interface to manage posts, WooCommerce, settings, and more
- ChatGPT — Connect through Apps & Connectors with OAuth 2.1 authentication
- Claude Desktop — Connect through Connectors with automatic OAuth flow
- LibreChat and other MCP clients — Use the same MCP endpoint and discovery flow
- Zero shared secrets — No custom API keys or passwords for external MCP clients
- Standards-based — Automatic discovery, registration, and authentication with OAuth 2.1, PKCE, RFC 9728, RFC 8414, and RFC 7591
- Rewrite, expand, or optimize content — Ask the Copilot to improve your text and it applies the changes directly into the editor
- One-click quick actions — "⚡ Optimize content", "🏷️ Generate tags", "📝 Write excerpt", "🖼️ Generate image" — one tap, instant results
- Real-time editing — The Copilot sets titles, excerpts, tags, slugs, and categories directly in the editor. No copy-pasting
- Content block operations — Insert, update, replace, or delete Gutenberg blocks through conversation
- Visual feedback — Changed fields and blocks are highlighted with a green border so you always see what the AI modified
- Keep or Undo — Every change shows a floating banner: keep it or undo with a single click. You stay in control
- Image generation — Ask the Copilot to generate an image and it sets it as the featured image or inserts it as a block, automatically
- Works with Gutenberg and Classic Editor — Full support for both editors
- Context-aware — The Copilot reads your current post content, blocks, metadata, and editor state to give relevant suggestions
- WooCommerce-aware — When editing a product, the Copilot sees prices, stock, SKU, attributes, and product type
- ✏️ "Rewrite the introduction to sound more professional and engaging"
- 📊 "Add a comparison table below the second paragraph with pros and cons"
- 🖼️ "Generate an image that illustrates the idea in paragraph four and insert it right above"
- 📝 "Write a compelling meta description and set it as the excerpt"
- 🛒 "Update the product short description to highlight free shipping and set the sale price to $19.99"
- Talk to your site — "Show me the last 5 orders", "Create a blog post about SEO tips", "What plugins are installed?"
- Multi-provider — Built-in OpenAI (GPT-5.4, GPT-5.3), Anthropic (Claude 4.6 Opus/Sonnet, Claude 4.5 Haiku), Google (Gemini 3.1 Pro, Gemini 3 Flash) + optional WordPress AI Client connectors (OpenRouter, Mistral)
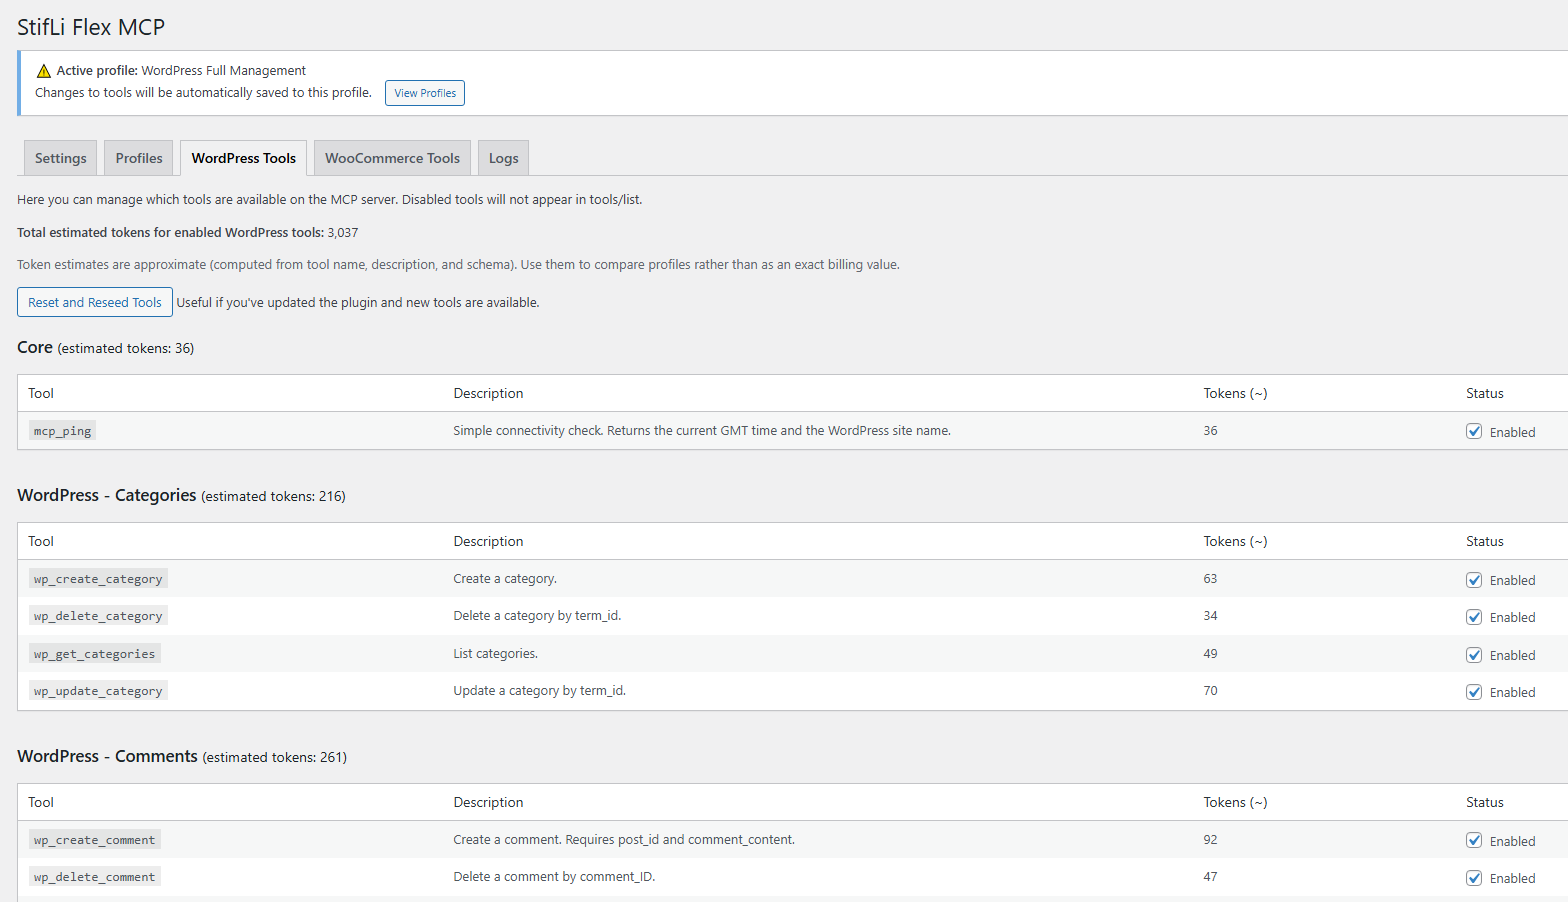
- 122+ MCP tools at its disposal — The AI agent can read posts, create content, manage WooCommerce products, check orders, inspect SEO data, update settings, and much more
- Smart suggestions — After each response, get contextual follow-up suggestions
- Conversation history — Auto-saved across sessions with multi-tab support
- Safe by design — Choose "Always Allow" or "Ask User" mode for tool execution confirmations
- Advanced tuning — Control temperature, max tokens, top_p, system prompts
- 📝 "Write a 500-word blog post about healthy eating and publish it as draft"
- 🛒 "Show me today's WooCommerce orders and their total revenue"
- 🔍 "What are the top 10 most commented posts on my site?"
- 📊 "List all products with stock below 5 units"
- 🎨 "Generate a hero image for my latest blog post about technology"
- Image Generation — "Generate a hero image for my blog post about AI" using OpenAI (GPT Image family + DALL·E 2/3) or Google Gemini (Gemini Image + Imagen 4)
- Image Search — "Find a real stock image for my post" with
wp_search_image(Unsplash, Pexels, Pixabay) including attribution metadata - Video Generation — "Create a 5-second product showcase video" using OpenAI Sora or Google Veo 2/3
- Add functionality instantly — "Add a PHP snippet that redirects users after login based on their role"
- Custom CSS on demand — "Create a CSS snippet that hides the sidebar on mobile devices"
- JavaScript injection — "Add a JS snippet that shows a sticky banner with a 10% discount code"
- Full lifecycle management — List, create, edit, activate, deactivate, and delete snippets from conversation
- Safe by design — PHP code is sanitized automatically, removing stray
<?phptags and markdown artifacts from AI-generated output
- Scheduled Tasks — Create daily, weekly, or monthly automated workflows
- Templates — Quick-start with pre-built templates (Daily Sales Report, Trending Article, Weekly Summary)
- Smart Scheduling — Flexible presets from "Every hour" to "Monthly" with custom times and timezones
- Detected Tools Mode — AI automatically identifies which tools are needed, saving tokens significantly
- Output Actions — Send results via email, webhook, draft post, or custom hooks
- Execution Logs — Full history with token usage, duration, and detailed results
- One-click Undo — Roll back any change from the Logs & Roll Back page in your admin panel
- Redo support — Changed your mind? Re-apply a rolled-back change just as easily
- Session rollback — Undo an entire AI conversation's changes at once, in the correct order
- Full audit trail — See exactly what was changed, when, by whom, and from which source
- Works across everything — Posts, pages, products, orders, options, menus, media, code snippets, and more
- AI-accessible — Your AI agent can also query and rollback changes through dedicated tools
- 🛒 "ChatGPT updated all my product prices but used the wrong currency — roll it back!"
- 📝 "Claude rewrote my About page and I prefer the original — undo!"
- ⚙️ "An automation changed my site settings at 3 AM — I can see exactly what happened and revert it"
- 🎨 "The AI-generated image doesn't match my brand — remove it and restore the previous one"
- 🔗 "I told the AI to delete a menu item by mistake — bring it back!"
- OAuth 2.1 with PKCE (S256) — The most modern and secure authentication standard, used by Google, Microsoft, and GitHub
- Dynamic Client Registration (RFC 7591) — AI clients register automatically, no manual setup needed
- Auto-discovery (RFC 9728 + RFC 8414) — Clients find your server's auth endpoints automatically
- Token auto-refresh — Sessions stay active for up to 90 days without re-authorization
- Application Passwords fallback — Still supported for advanced setups and legacy clients
- Per-tool capability checks linked to WordPress roles
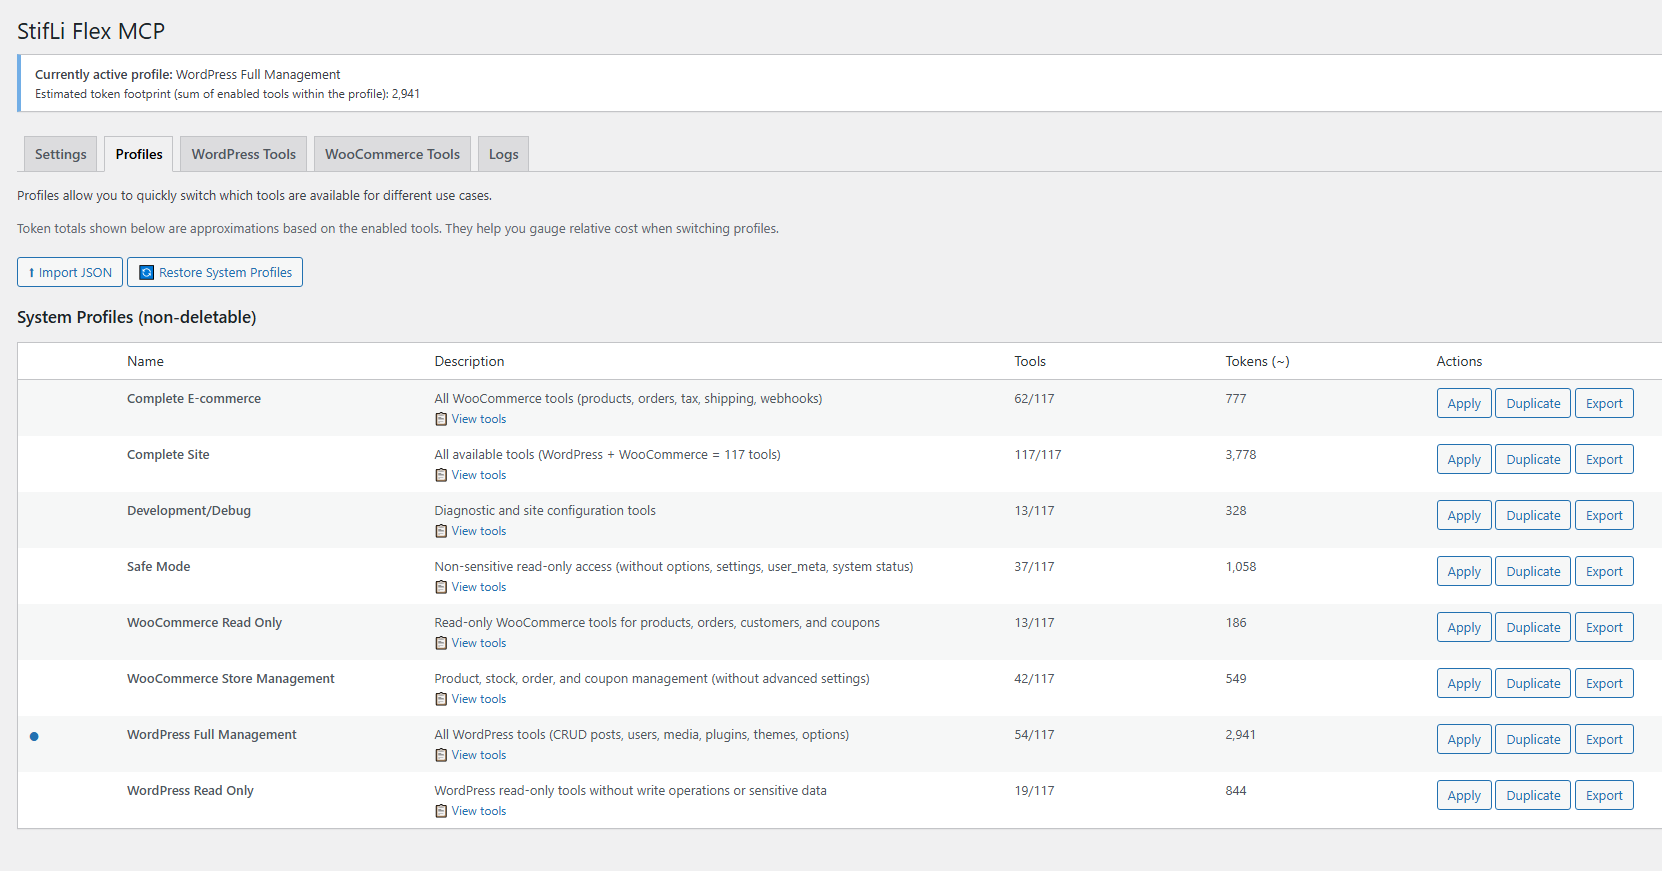
- Profile-based tool restrictions (8 predefined profiles + custom)
- Tool execution confirmations in AI Chat Agent
- WordPress Read Only — safe read-only access
- WordPress Full Management — complete CRUD operations
- WooCommerce Read Only — query store data
- WooCommerce Store Management — products, orders, coupons
- Complete E-commerce — all WooCommerce tools
- Complete Site — all 122+ tools enabled
- Safe Mode — non-sensitive reads only
- Development/Debug — diagnostic tools
- OpenAI — GPT-5.4, GPT-5.3, GPT-5.4 Mini
- Anthropic Claude — Opus, Sonnet, Haiku
- Google Gemini — Pro, Flash, Flash-Lite
- OpenRouter and Mistral — via WordPress AI Client connectors (when installed) MCP Server (External Clients via OAuth 2.1):
- Claude Desktop, ChatGPT, LibreChat, Cursor, Cline, Roo Code, Windsurf, Claude Code Cloud & Local Providers (via MCP clients):
- Groq, Azure OpenAI, AWS Bedrock
- Ollama, LM Studio, self-hosted solutions 📐 MCP Spec Compliance
安装:
- Upload the
stifli-flex-mcpfolder to/wp-content/plugins/or install from the WordPress plugin directory - Activate the plugin
- Go to StifLi Flex MCP → AI Copilot and make sure it’s enabled
- Go to StifLi Flex MCP → AI Chat Agent → Settings and enter your API key
- Open any post or page in the editor — the Copilot widget appears automatically
- Start writing with AI!
- Go to StifLi Flex MCP → AI Chat Agent
- Open the Settings tab and select your AI provider (OpenAI, Claude, Gemini, or installed WordPress AI Client connectors like OpenRouter/Mistral)
- Enter your API key
- Start chatting!
- Go to StifLi Flex MCP → MCP Server
- Copy the SSE URL shown on the Settings page
- Paste it in your AI client:
- Claude Desktop: Customize → Connectors → Add custom connector → Paste the URL
- ChatGPT: Settings → Apps & Connectors → Advanced settings → Enable Developer mode → Create app → Paste the URL → Choose OAuth
- A browser window will open — log in to WordPress and click "Authorize"
- Done! Your AI client can now manage your WordPress site
屏幕截图:


常见问题:
What is the AI Copilot?
The AI Copilot is a floating assistant that appears inside the WordPress editor (Gutenberg or Classic). It reads the context of what you’re editing and helps you write, rewrite, optimize, generate tags, create excerpts, and even generate images — all without leaving the editor. Every change can be undone with one click.
How is the Copilot different from the Chat Agent?
The Copilot lives inside the post/page editor and is focused on writing and content editing. It works directly with the editor fields (title, content blocks, excerpt, tags, etc.). The Chat Agent is a standalone admin page where you can manage your entire WordPress site through conversation — create posts, manage WooCommerce orders, check settings, install plugins, and more. Both use the same AI provider and API key.
How do I set up the AI Chat Agent?
- Go to StifLi Flex MCP → AI Chat Agent → Settings
- Choose your AI provider (OpenAI, Claude, Gemini, or installed WordPress AI Client connectors like OpenRouter/Mistral)
- Enter your API key (you get this from your AI provider's website)
- Go to the Chat tab and start talking!
Which AI provider should I use?
OpenAI, Claude, and Gemini all work great, and you can also use OpenRouter or Mistral via WordPress AI Client connectors. Here's a quick comparison:
- OpenAI (GPT-4o / GPT-4.5) — Best overall balance of speed and quality
- Claude (Opus / Sonnet) — Excellent at understanding complex instructions and writing
- Gemini (2.5 Pro / Flash) — Great value, fast responses
What can the AI agent do with my site?
The agent has access to 122+ tools covering:
- Content — Create, edit, delete posts, pages, and comments
- Media — Upload, list, and manage images and files
- AI Generation — Generate images (DALL·E, Imagen) and videos (Sora, Veo) with AI
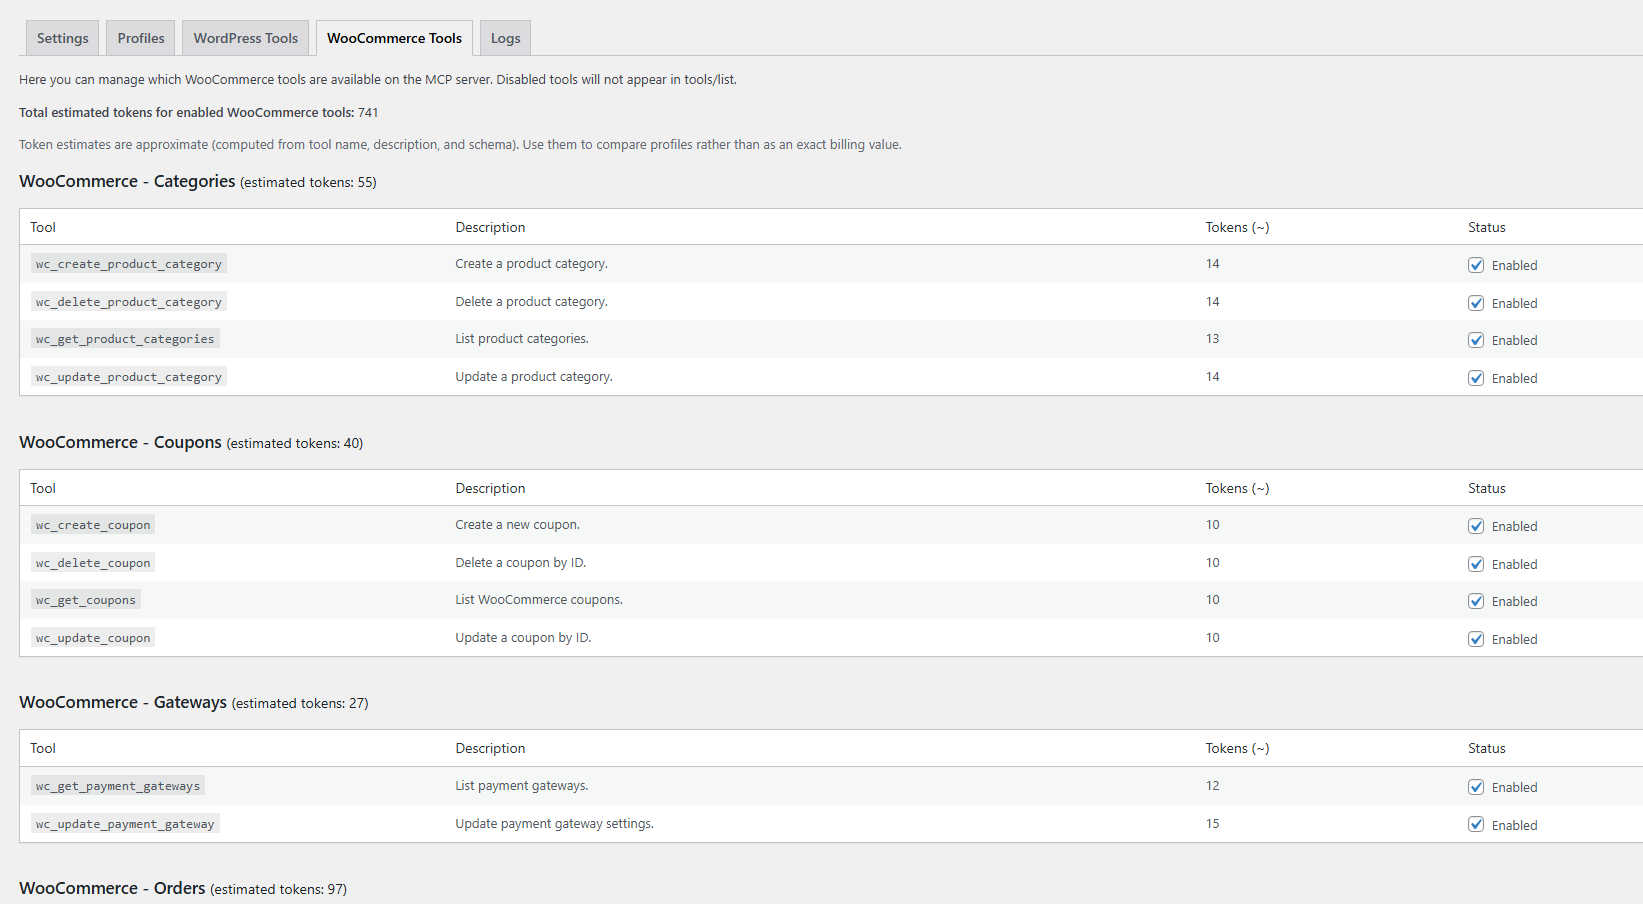
- WooCommerce — Products, orders, coupons, customers, shipping, taxes
- Taxonomies — Categories, tags, custom taxonomies
- Settings — Site options, menus, navigation
- System — Plugins, themes, site health
Is it safe to let AI manage my site?
Yes, with multiple layers of protection:
- OAuth 2.1 with PKCE — Industry-standard secure authentication for external AI clients, no shared passwords
- Tool confirmations — In "Ask User" mode, you approve every action before it executes
- Permission checks — Every tool verifies WordPress capabilities before running
- Profiles — Restrict which tools are available (e.g., "Read Only" profiles)
- Token management — Revoke access for any client instantly from the admin panel
What is MCP?
Model Context Protocol (MCP) is a standard for connecting AI agents to data sources and tools. This plugin implements an MCP server so external AI clients like ChatGPT or Claude Desktop can discover and use your WordPress tools. This is in addition to the built-in AI Chat Agent.
Does this work with WooCommerce?
Yes! The plugin includes 61 WooCommerce tools. They activate automatically when WooCommerce is installed. Ask your AI agent "Show me today's orders" and it just works.
Can I create my own tools?
Absolutely! Go to MCP Server → Custom Tools and create PHP-powered tools that expose any plugin's functionality to your AI agent. Built-in examples included.
What happens if the AI makes a mistake?
No worries — StifLi Flex MCP is the only MCP server with a built-in Roll Back system. Every change made by any AI (ChatGPT, Claude, the Chat Agent, Copilot, or automations) is tracked with a full before/after snapshot. Go to Logs & Roll Back in your admin panel and undo any change with one click. You can even roll back an entire session at once.
Can the AI generate images?
Yes! The wp_generate_image tool supports multiple providers:
- OpenAI — gpt-image-1 (default), gpt-image-1.5, gpt-image-2, gpt-image-1-mini, DALL·E 3, DALL·E 2
- Google Gemini — gemini-2.5-flash-image (default), gemini-3.1-flash-image-preview, gemini-3-pro-image-preview, Imagen 4
Can the AI search stock images too?
Yes! The optional wp_search_image tool can search Unsplash, Pexels, and Pixabay and return one image with rich attribution metadata.
The tool response includes both text JSON and structured output with fields such as:
url,thumbnail_url,caption,alt_textauthor,author_url,source_url- image dimensions, license/metadata fields, and provider-specific fields like Unsplash
download_location
- Global enable/disable toggle for
wp_search_image - Per-provider enable + API keys (Unsplash, Pexels, Pixabay)
- Preferred Image Bank (specific provider or random)
- Image Selection mode:
most_relevant,random_top10,random_top20 - Extra parameters: orientation, safe search, Pixabay language, Pexels locale, and timeout
Can the AI generate videos?
Yes! The wp_generate_video tool supports:
- OpenAI Sora — Text-to-video and image-to-video generation
- Google Veo — Veo 2 and Veo 3 models
Where do I configure API keys for image/video generation?
Go to StifLi Flex MCP → Multimedia Settings. API keys are shared between the Images and Videos tabs — enter your OpenAI or Gemini key once and it works for both.
What are WordPress Abilities?
WordPress 6.9 introduced the Abilities API, letting plugins register standardized capabilities. If you have plugins that support Abilities, StifLi Flex MCP can auto-discover and import them from MCP Server → Abilities tab.
How do I connect ChatGPT or Claude Desktop?
It takes less than a minute:
- Go to StifLi Flex MCP → MCP Server and copy the SSE URL
- Paste it in your AI client:
- Claude Desktop: Customize → Connectors → Add custom connector
- ChatGPT: Settings → Apps & Connectors → Advanced settings → Enable Developer mode → Create app → Paste the URL → Choose OAuth
- Authorize when the browser window opens (you only need to do this once)
OAuth works but Claude/ChatGPT says "Authorization failed"
This is usually caused by Cloudflare's "Block AI Bots" setting (enabled by default on new domains) or similar WAF rules from Sucuri, Wordfence, SiteGround, WP Engine, etc. What happens: The OAuth consent screen works fine (it runs in your browser), but after the token exchange, the AI backend servers (Anthropic, OpenAI) try to reach your MCP endpoint — and the firewall blocks them as bot traffic, returning a 403 before the request ever reaches WordPress. How to confirm: Check your firewall logs. You'll see the OAuth/token requests succeed but subsequent MCP requests from Anthropic or OpenAI IPs are blocked. Option 1 — Disable AI bot blocking:
- Cloudflare: Dashboard → Security → Settings → turn off "Block AI Bots". Note: this is all-or-nothing — you cannot allow only Anthropic/OpenAI while blocking others.
- Sucuri / Wordfence / other WAFs: Whitelist the AI provider's IP ranges or user agents (e.g.,
python-httpxfor Anthropic,ChatGPT-Userfor OpenAI).
- Go to Users → Your Profile in WordPress admin
- Scroll to Application Passwords section
- Enter a name (e.g., "Claude Desktop") and click Add New Application Password
- Copy the generated password (shown only once)
- In
claude_desktop_config.json, configure the MCP server with your username and the application password as HTTP Basic Auth headers
更新日志:
- New: Added
wp_css_get_globaltool to read active theme Additional CSS (Customizer) with hash and optional metadata/statistics output. - New: Added
wp_css_set_globalandwp_css_set_scopedtools to manage global and scoped CSS with validation, optimistic concurrency (expected_hash), and dry-run mode (validate_only). - Improvement: Integrated
wp_css_set_globalandwp_css_set_scopedwith ChangeTracker so they appear in Logs (sflmcp-logs) with rollback/redo support.
- New: Added optional
wp_search_imagemodule (class-search-image.php) with lazy loading from the model only when enabled insflmcp_tools, protected byupload_filescapability. - New:
wp_search_imagenow returns MCP-friendly output in both text JSON andstructuredContent, including URL, thumbnail URL, caption, alt text, author, author URL, source URL, dimensions, license/metadata, and provider-specific fields such as Unsplashdownload_location. - New: Added a dedicated Search Image tab in Multimedia Settings with tool toggle, provider toggles + API keys (Unsplash/Pexels/Pixabay), preferred bank, image selection mode (
most_relevant,random_top10,random_top20), and extra search parameters (orientation, safe search, language/locale, timeout).
- New: Added SEO optimization tools for GSC-backed post context, title/meta suggestions, and safe Yoast/Rank Math metadata updates with rollback support.
- New: Added MCP resources for site info, post types, recent posts, and SEO summary through resources/list and resources/read.
- Improvement: SEO and Google Search Console modules now load lazily only when enabled, connected, or opened in the SEO admin page.
- New: Added Google Search Console support under a new SEO admin page, with Google OAuth connection, encrypted tokens, connection testing, cache controls, tool toggles, and 5 read-only SEO data tools.
- Improvement: Google Search Console performance queries now return compact summaries with capped row output to prevent excessive MCP token usage.
- New: Added Elementor compatibility as a plugin integration with 7 dedicated tools for cloning pages, replacing text/images/links, reading page outlines, listing local templates, and importing templates.
- Improvement: Various reliability and compatibility improvements across WordPress content handling, WooCommerce order tools, OAuth discovery, and plugin integrations.
- Improvement: Various improvements and content updates in the plugin documentation and onboarding resources.
- Improvement: Upgraded the Abilities admin table with sortable columns, row selection, and bulk actions (enable, disable, remove).
- Improvement: Upgraded Discover Abilities with category filtering and bulk import actions for selected or visible abilities.
- Improvement: Added a dedicated bulk abilities backend action and reused shared import/category normalization logic.
- Fix: Moved the OAuth global reset action to the visible Connected Clients area in MCP Server Settings and removed duplicate placement.
- Fix: Hardened
wp_update_nav_menu_itemupdates with a safer merge flow that preserves existing values unless explicitly changed.
- Fixed:
wp_create_postandwp_update_postnow correctly applypost_categoryandtax_input(includingpost_tag) when creating or updating posts.
- Improvement: Enhanced "Alternative: Application Passwords" with in-page generation from MCP Server Settings (no navigation to profile required).
- New: Compatibility with The Events Calendar plugin, including integrated event tools for listing, reading, creating/updating, and trashing events and related entities.
- Improvement: Updated image generation model catalog in Multimedia Settings. Added new OpenAI and Gemini image models while keeping previous models available for user selection.
- Improvement: Set default image models to cost-effective options (
gpt-image-1andgemini-2.5-flash-image) and refreshed pricing guidance in the UI. - New tools:
wc_get_variation,wc_batch_update_variations,wc_get_product_attributes,wc_get_attribute_terms,wc_create_product_attribute,wc_set_product_attributes,wc_get_coupon,wc_get_coupon_count,wc_empty_coupon_trash. - Tool improvements:
wp_get_taxonomies(slug/name/label output),wp_get_term_meta(structured payload with secret redaction),wc_get_product_variations(normalized variation rows),wc_update_product_variation(ownership validation),wc_delete_product_variation(ownership validation),wc_get_coupons(status filtering, including trash),wc_delete_coupon(clear trash vs permanent outcome),wc_get_coupon_count(status-based counting, including trash).
- Improvement: Official compatibility update for WordPress 7.0 with WordPress AI Client integration in AI Chat Agent.
- Improvement: Improved compatibility with external AI Client connectors such as OpenRouter and Mistral (plus any installed AI Client provider).
- Improvement: Updated MCP protocol reference and compatibility to the 2025-11-25 specification.
- Improvement: Improved
wp_generate_imagereliability with async task handling plus safer media persistence/post-processing. - Improvement: Improved
wp_generate_videoreliability with async task handling, atomic file save, and background metadata processing.
- New: Expanded
mcp_pingwith optional diagnostics (diagnostics,timeout_sec) to surface site URL, REST endpoint, HTTPS state, DNS resolution, and lightweight reachability checks without forcing remote calls by default. - New: Upgraded
wp_get_posts,wp_get_post,wp_get_comments,wp_get_users,search,wc_get_products, andwc_get_orderswith richer optional outputs and standardizedinclude_paginationmetadata wrappers. - New: Added opt-in enrichment flags for common read tools, including author, featured media, taxonomy context, avatar/registration data, product images/categories/attributes, and order item or totals summaries.
- New: Improved
searchandfetchwith broader filters, query-param support, custom request/response headers, and targeted remote inspection controls (head_only,include_headers,extract_text,max_bytes,timeout_sec).
- New: The AI Chat Agent token usage panel now shows three separate bars for billable input tokens, cached tokens, and output tokens.
- Improvement: Normalized token accounting across OpenAI, Claude, and Gemini providers so the three bars reflect provider-specific cache semantics more truthfully.
- New: Upgraded
wp_get_site_healthinto a richer site audit tool with selectable depth levels (0basic,1medium,2deep) to balance diagnostic detail and timeout risk.
- New: Added
wp_get_plugin_settingsto inspect plugin-relatedwp_optionsbyplugin_slug/prefixes with prepared SQL + limit controls and strict recursive redaction of secrets/tokens/passwords. - New: Generalized term tools - added
wp_update_termand extendedwp_create_term/wp_delete_termwith optional slug/parent/description plus per-taxonomy capability checks (existingwp_*_categoryandwp_*_tagtools kept as aliases).
- New: Generalized term tools — added
wp_update_termand extendedwp_create_term/wp_delete_termwith optional slug/parent/description plus per-taxonomy capability checks (existingwp_*_categoryandwp_*_tagtools kept as aliases). - New: Term meta tools
wp_get_term_meta(with secret redaction),wp_update_term_meta,wp_delete_term_meta. - New:
wp_reorder_menu_itemstool to batch-updatemenu_order/parentfor navigation menu items in one call (with one-click rollback). - Security:
wp_create_post/wp_update_postnow validatepost_typeexists and is public/show_ui, enforce post-type-aware capabilities, and requireedit_others_postscap when assigning a differentpost_author. - Infrastructure: New DB migration seeds the new tools into existing installs and attaches them to the "WordPress Full Management" profile.
- Security: Added centralized recursive secret redaction for MCP outputs.
- Security: Applied redaction to sensitive reads (
wp_get_option,wp_get_settings,wp_get_post_meta,wp_get_user_meta) and masked email/IP fields inwp_get_comments. - Security: Hardened
wp_update_optionandwp_update_settingswith hard denylist, sensitive-pattern blocking, and optional allowlist viasflmcp_writable_options. - Security: Removed
wp_delete_optiontool (destructive operation without reliable undo), including migration cleanup for existing installs. - Security: Hardened
wp_upload_image_from_urlwith SSRF protection (private/reserved IP blocking), HTTPS requirement, 20MB limit (filterable), MIME allowlist, and image validation. - New: Added
wp_set_featured_imagetool and support forfeatured_mediainwp_create_postandwp_update_post. - OAuth: Dynamic client registration now returns HTTP 500 on DB insert failures, logs internal DB errors, and avoids exposing SQL internals.
- Infrastructure: Added
sflmcp_db_versionupgrade flow for versioned DB migrations.
- fix bug
- 🗂️ Tools UI overhaul — Tools are now organized into collapsible category groups with expand/collapse controls, read/write mode badges, and token count per category for easier management
- 🧩 New "Plugins" tab — Dedicated integrations hub with 12 pre-loaded plugin integrations ready to connect:
- All Sources Images — Find stock images and generate AI images; set featured or inline images in posts (Recommended)
- AiPatch Security Scanner — AI-powered security auditing and vulnerability scanning (Recommended)
- Notification for Telegram — Send Telegram notifications from MCP tools
- WPCode — Manage code snippets (insert headers/footers) via AI
- Code Snippets — Create, activate, and manage PHP/CSS/JS snippets via AI
- Woody Snippets — Alternative snippet provider with full snippet_* tool support
- Advanced Custom Fields (ACF) — Read and update ACF fields and field groups
- Yoast SEO — Read and update Yoast metadata; trigger reindexing
- Rank Math — Manage Rank Math SEO metadata and head output
- WPForms — List forms and read form entries
- Gravity Forms — List forms, read entries, and update submissions
- Forminator — List forms and read form entries
- Fixed: OAuth re-authorization crash when reconnecting previously authorized clients (ChatGPT, Claude Desktop)
- 🌐 WebMCP — Browser AI (Beta) — Use Chrome's built-in Gemini Nano to edit posts directly, no API key needed!
- Note: Beta feature — Gemini Nano is a compact on-device model with limited reasoning; works best for simple editing tasks
- Fixed: Minor bug fixes and stability improvements
- ⏪ Roll Back — Undo Any AI Change Instantly!
- New: Full change tracking — every modification by ChatGPT, Claude, AI Chat Agent, Copilot, or automations is recorded
- New: One-click rollback — undo any change from the Logs & Roll Back admin page
- New: Redo support — re-apply a rolled-back change if you change your mind
- New: Session rollback — undo all changes from an entire AI conversation at once (LIFO order)
- New: Before/after snapshots — see exactly what changed with full state comparison
- New: Source tracking — every change shows where it came from (MCP Connection, Chat Agent, Copilot, Automation, Event, WP Admin)
- New: 5 MCP tools —
mcp_get_changelog,mcp_get_change_detail,mcp_rollback_change,mcp_redo_change,mcp_rollback_session - New: Changelog admin page with filters, search, detail modal, CSV export, and automatic purge
- New: Works across 60+ mutating tools — posts, pages, products, orders, options, menus, media, snippets, and more
- New: File backup & restore — even deleted media files can be recovered
- Improved: The only MCP server for WordPress with built-in undo capabilities
- Compatibility: Tested with WordPress 7.0 RC
- 🔐 OAuth 2.1 Authentication — Connect ChatGPT, Claude Desktop, and any MCP client with one click!
- New: Full OAuth 2.1 implementation with PKCE (S256) — the most secure authentication standard
- New: Dynamic Client Registration (RFC 7591) — AI clients register automatically, zero manual setup
- New: Auto-discovery via RFC 9728 (Protected Resource Metadata) and RFC 8414 (Authorization Server Metadata)
- New: Automatic token refresh — sessions stay active for up to 90 days without re-authorization
- New: Auto-approve for returning clients — authorize once, connect instantly on future sessions
- New: Simplified Settings page — just copy the URL and paste it in your AI client
- New: "View More Details" panel with connected clients, active tokens, and troubleshooting
- New: One-click client deletion and token revocation from the admin panel
- Improved: No more API keys or passwords needed for external AI clients
- Improved: Full compatibility with Claude Desktop Connectors and ChatGPT Apps & Connectors
- Improved: Standards-compliant OpenID Connect discovery fallback for maximum client compatibility
- Security: PKCE S256 challenge on every authorization flow
- Security: Short-lived authorization codes (10 min) with single-use enforcement
- Security: Access tokens expire in 24 hours, refresh tokens in 90 days
- Security: Application Passwords still supported as fallback for advanced setups
- Fixed: MCP Server connection with Claude Desktop and other SSE-based clients now works correctly
- Fixed: Scheduled automation tasks running more frequently than configured and producing intermittent errors
- 🧩 Code Snippets Management — 7 new MCP tools for managing code snippets directly from AI agents!
- New: snippet_list, snippet_get, snippet_create, snippet_update, snippet_delete, snippet_activate, snippet_deactivate tools
- New: Multi-provider support — compatible with WPCode, Code Snippets (v2/v3), and Woody Code Snippets plugins
- New: Automatic provider detection — seamlessly works with whichever snippet plugin is installed
- New: LLM-friendly input normalization — maps common AI output variants for code_type, location, and scope parameters
- New: PHP code sanitization — automatically strips
<?php,?>tags and markdown code fences from AI-generated code - New: Code Snippets v3.x full namespace support — resolves namespaced functions and classes automatically
- New: Woody Code Snippets scope mapping — translates locations to Woody's dual scope/location system
- Security: Rate limiting (30 requests/minute per IP) on MCP endpoints to prevent abuse
- Security: SSRF protection on fetch tool — blocks requests to private/reserved IP ranges (127.x, 10.x, 172.16.x, 192.168.x)
- Improved: Snippet tools added to WordPress Full Management profile (auto-migrated for existing installs)
- ✍️ AI Copilot — New floating writing assistant for the WordPress editor!
- New: AI Copilot widget available inside the Gutenberg and Classic editors
- New: Quick action chips — Optimize content, Generate tags, Write excerpt, Generate image
- New: Direct editing — the Copilot sets titles, excerpts, tags, categories, and slugs in the editor
- New: Block operations — insert, update, replace, and delete Gutenberg blocks through conversation
- New: Visual feedback — green highlight on changed fields and blocks with auto-dismiss
- New: Keep/Undo banner on every AI change for full user control
- New: Image generation workflow — generate an image and set it as featured or insert as block
- New: AI Copilot settings page with enable/disable toggle and tools mode selection
- New: Full context awareness — reads post content, blocks, metadata, and WooCommerce product fields
- 📊 Token Usage Bars — Real-time speedometer-style token bars in the AI Chat Agent showing input, output, and cached tokens per interaction.
- 🤖 Updated AI Models for All Providers — Refreshed the full model catalog across OpenAI, Anthropic (Claude), and Google Gemini.
- New: OpenAI GPT-5.4 series — GPT-5.4 Pro, GPT-5.4, GPT-5.4 Mini, GPT-5.4 Nano (1M context, Computer Use support)
- New: OpenAI GPT-5.3 and GPT-5.3 Mini added as stable production models
- New: Anthropic Claude Sonnet 4.6 and Claude Opus 4.6 (1M context, 128K output, Extended Thinking)
- New: Anthropic Claude Sonnet 4.5, Claude Opus 4.5, and Claude Haiku 4.5
- New: Google Gemini 3.1 Pro, Gemini 3 Flash, and Gemini 3.1 Flash-Lite (latest generation)
- Updated: Google Gemini 2.5 Pro, Flash, and Flash-Lite remain as stable production models
- Updated: Default models changed — GPT-5.4 (OpenAI), Claude Sonnet 4.6 (Claude), Gemini 3 Flash (Gemini)
- Removed: Deprecated models — GPT-5 Nano, Gemini 2.0 Flash/Flash-Lite, older Claude 3.x aliases
- 🆕 AI Image Generation — Generate images directly from your AI agent using
wp_generate_image! - 🆕 AI Video Generation — Generate videos with
wp_generate_videousing cutting-edge AI models! - New: wp_generate_image tool with multi-provider support (OpenAI gpt-image-1, DALL·E 2/3, Google Gemini Imagen 4)
- New: wp_generate_video tool with multi-provider support (OpenAI Sora, Google Veo 2/3)
- New: Multimedia Settings admin page with dedicated Images and Videos tabs
- New: Post-processing options — auto-save generated media to Media Library, auto-insert into posts
- New: Configurable default providers, models, image sizes, and quality settings
- 🆕 Automation Tasks — Schedule AI tasks to run automatically on a recurring basis!
- 🆕 Event Automations — Trigger AI workflows when WordPress events occur (new post, new user, etc.)
- New: Automation Tasks admin with create, edit, duplicate, delete, and run-now functionality
- New: 4 schedule presets (hourly, daily, weekly, monthly) with custom time and timezone support
- New: Pre-built automation templates (Daily Sales Report, Trending Article, Weekly Summary, and more)
- New: "Detected Tools" mode — AI identifies required tools during test, saves tokens significantly
- New: Output actions — Email, Webhook, Draft Post, or Custom Hook
- New: Execution Logs tab with full history, token usage, and detailed results
- New: Event Automations with WordPress triggers (post published, user registered, comment posted)
- New: Conditional logic for event triggers (post type, status, category filters)
- New: Dynamic placeholders in prompts (
{{post.title}},{{user.email}}, etc.) - New: Rate limiting per automation to prevent runaway executions
- New: Test mode for event automations — preview AI response with real trigger data
- New: Tools count display in AI Chat Agent header with quick configure link
- Improved: Cron tasks now execute with proper user permissions (task creator or admin fallback)
- Improved: Complete log entry format fixes for database consistency
- Improved: Database migration for automation logs table columns
- Technical: New tables
wp_sflmcp_automation_tasks,wp_sflmcp_automation_logs,wp_sflmcp_event_automations,wp_sflmcp_event_logs,wp_sflmcp_event_triggers
- ** Encrypted API Keys** - API keys are now stored encrypted (AES-256-CBC) in the database for improved security
- ** Prompt Caching (Claude)** - Enabled Anthropic prompt caching on system prompt and tools, reducing token usage and latency on repeated requests
- ** Provider Usage Logging** - Real-time logging of input/output/cached tokens for Claude, OpenAI, and Gemini
- ** Rate Limit Awareness** - Captures and logs rate limit headers from all three providers for better diagnostics on 429 errors
- New: Conversation history trimming with configurable "Max Tool Cycles in History" setting to control payload size
- New: Smart trim algorithm with safe cut points — never orphans tool_result references
- New: API key visibility toggle (eye icon) in chat settings
- New: Token estimation utilities (
estimateTokensFromString,estimateTokensFromJson) - Improved: Auto-save on all chat settings (removed manual "Save Settings" button)
- Improved: Compact request logging — summaries instead of full body dumps, reducing log noise
- Improved: HTTP request layer now returns headers and status code alongside body (
make_request_with_meta) - Improved: JSON encoding with
JSON_UNESCAPED_SLASHES | JSON_UNESCAPED_UNICODEfor cleaner payloads
- 🆕 WordPress Abilities Integration (WordPress 6.9+) - Auto-discover and import abilities from other plugins!
- New: Abilities tab in admin (appears only on WordPress 6.9+)
- New: Discover button to scan all registered abilities from themes/plugins
- New: Import, enable/disable, and delete individual abilities
- New: Abilities exposed as MCP tools (ability_* prefix) for AI agents
- New: Database table wp_sflmcp_abilities for persistent ability storage
- Improved: Plugin description updated to reflect 117+ tools
- Improved: Admin menu reordered — AI Chat Agent first, MCP Server second
- Improved: Renamed "AI Chat" to "AI Chat Agent" across the UI
- Technical: Uses wp_get_abilities(), wp_get_ability(), $ability->execute() APIs
- 🆕 Built-in AI Chat Client - Chat with AI directly from your WordPress admin panel!
- New: Multi-provider support - OpenAI, Claude (Anthropic), and Google Gemini
- New: Support for latest models including GPT-4.5, Claude 4 Opus/Sonnet, Gemini 2.5 Pro/Flash
- New: Smart suggestion chips that appear after AI responses
- New: Conversation history auto-saved per user (7-day retention)
- New: Stop button to cancel AI responses mid-generation
- New: Tool permission modes - "Always Allow" or "Ask User" for confirmations
- New: Advanced settings tab with temperature, max tokens, top_p, frequency/presence penalty
- New: Customizable system prompt for AI behavior
- New: Tool display options (Full details, Compact, or Hidden)
- New: Multilingual suggestions - AI responds in the same language you use
- Improved: Sequential tool execution for better reliability across all providers
- Improved: Claude 4.5 model compatibility (temperature/top_p handling)
- Improved: Gemini API message format conversion
- Fixed: Claude multiple tool_use error handling
- Fixed: Gemini "content" vs "parts" API format issue
- New: Custom Tools - Turn any WordPress plugin into an AI tool! Copy-paste examples included, no coding expertise required.
- New: Custom Tools management tab with code editor, enable/disable toggle, and built-in examples
- New: Pre-built Custom Tool examples (WooCommerce product lookup, CF7 forms, Yoast SEO, WP Super Cache)
- New: Custom Tools support input schemas for structured AI interactions
- Improved: All admin styles externalized for WordPress.org compliance
- Fix: Resolved object persistence issue in PHP 8.1+ causing 404 errors on API endpoints
- Fix: Deferred WooCommerce detection to ensure tools load correctly regardless of plugin load order
- Fix: WooCommerce module dispatch now correctly handles tool routing
- New: Debug logging system with dedicated log file (wp-content/uploads/sflmcp-logs/)
- New: Logs tab in admin UI to enable/disable logging and view debug logs
- New: Clear logs and refresh functionality from admin panel
- New: "WordPress Full Management" profile now active by default on fresh installs
- Security: Log directory protected with .htaccess and index.php
- Security: Replaced custom token authentication with WordPress Application Passwords
- Security: Removed wp_set_current_user calls for compliance with WordPress.org guidelines
- Removed: User management tools (wp_create_user, wp_update_user, wp_delete_user)
- Removed: Customer management tools (wc_get_customers, wc_create_customer, wc_update_customer, wc_delete_customer)
- Updated: Settings page now guides users to create Application Passwords
- Improved: Authentication uses native WordPress security features
- Initial public release
- 55 WordPress management tools (posts, pages, comments, media, taxonomies, options)
- 61 WooCommerce tools (products, orders, coupons, shipping, taxes, webhooks)
- Profile-based tool management with 8 predefined profiles
- WordPress Application Passwords authentication
- JSON-RPC 2.0 compliant REST API endpoint
- Server-Sent Events (SSE) support for real-time streaming
- Full internationalization support (i18n/l10n ready)
- Granular permission control per tool
- Profile import/export functionality
- Compatible with ChatGPT Custom Connectors, Claude Desktop, LibreChat