Uix Products
| 开发者 | uiuxlab |
|---|---|
| 更新时间 | 2025年1月13日 09:55 |
| 捐献地址: | 去捐款 |
| PHP版本: | 5.6 及以上 |
| WordPress版本: | 6.7.1 |
| 版权: | GPLv2 or later |
| 版权网址: | 版权信息 |
标签
下载
详情介绍:
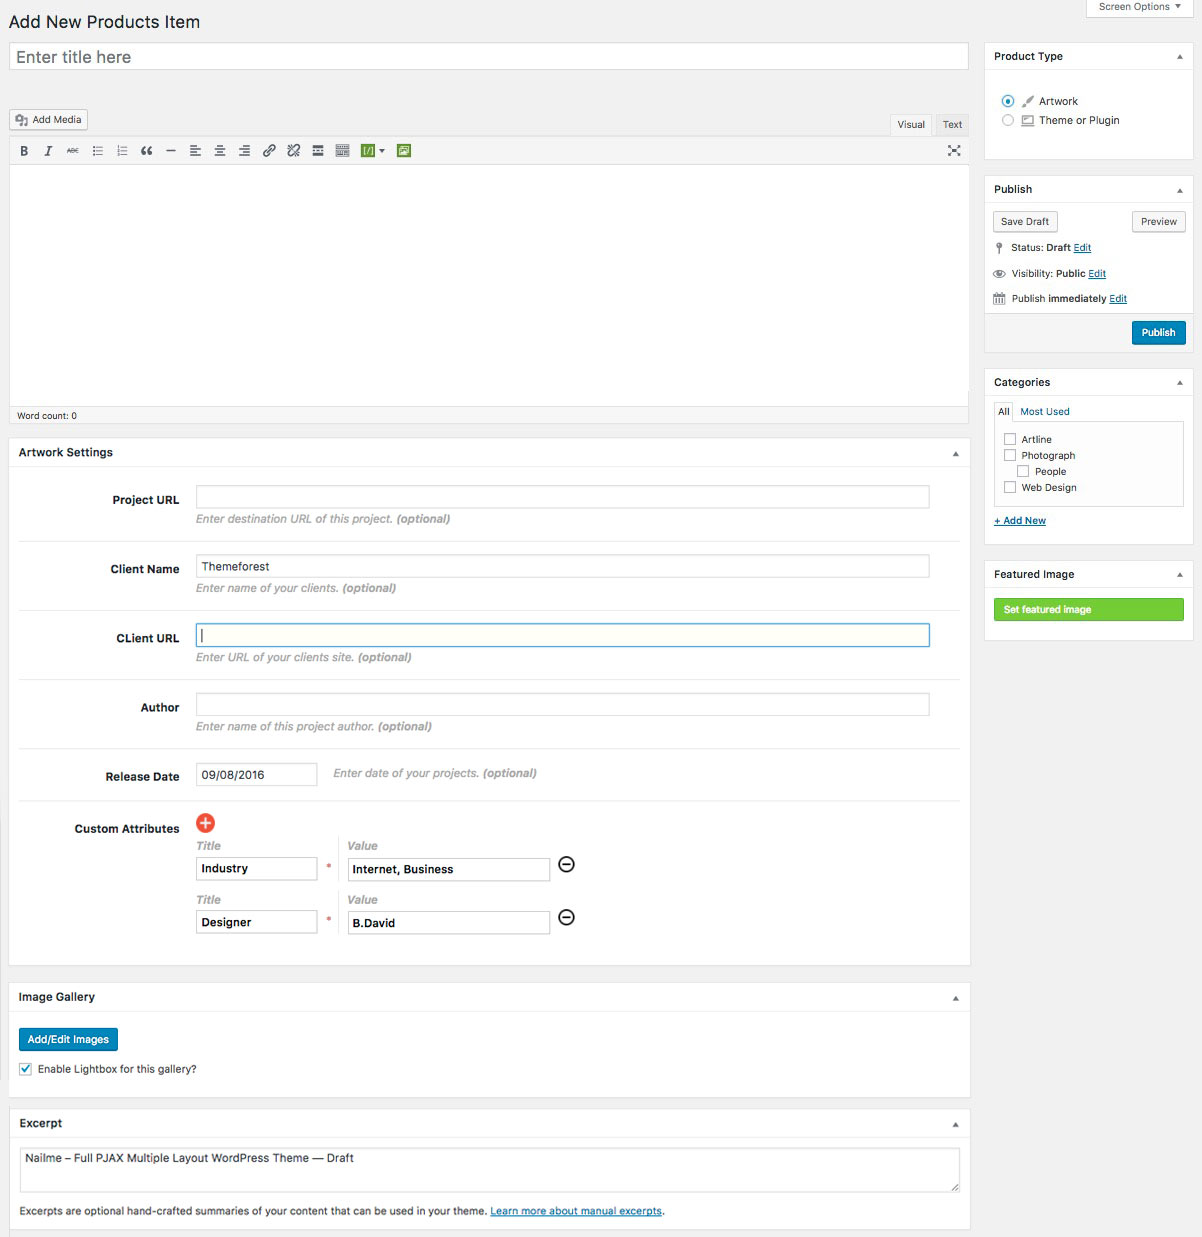
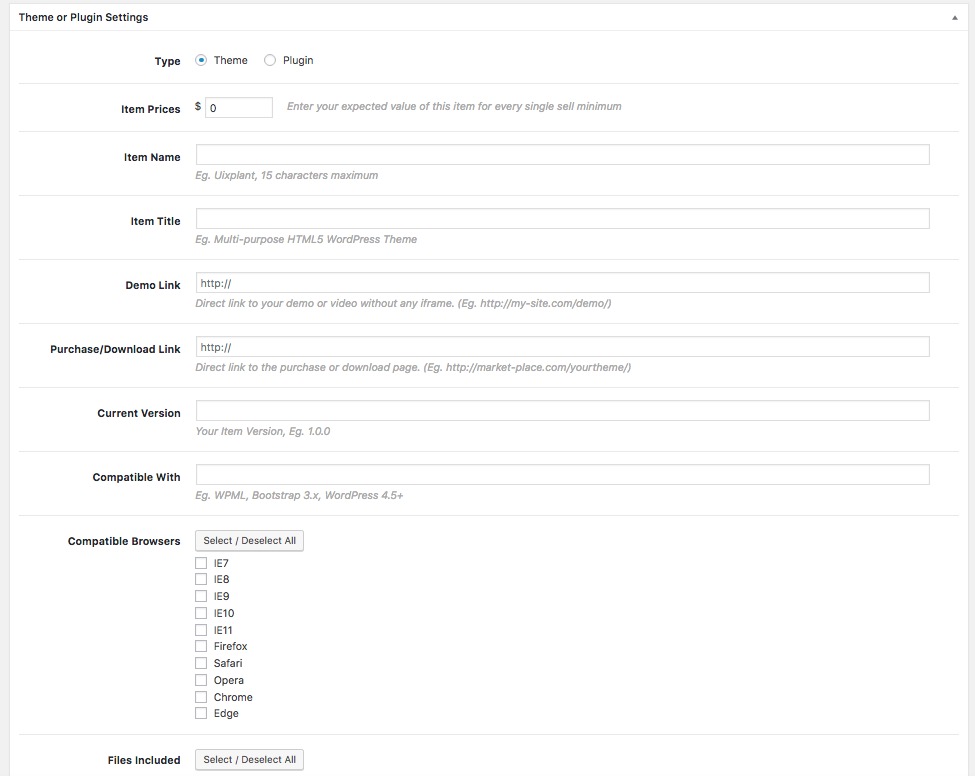
- 3 Product types for choice
- List of retina-ready
- Full responsive design
- Using template files to customize your theme & display all product items
- Regenerate thumbnails after changing their size.
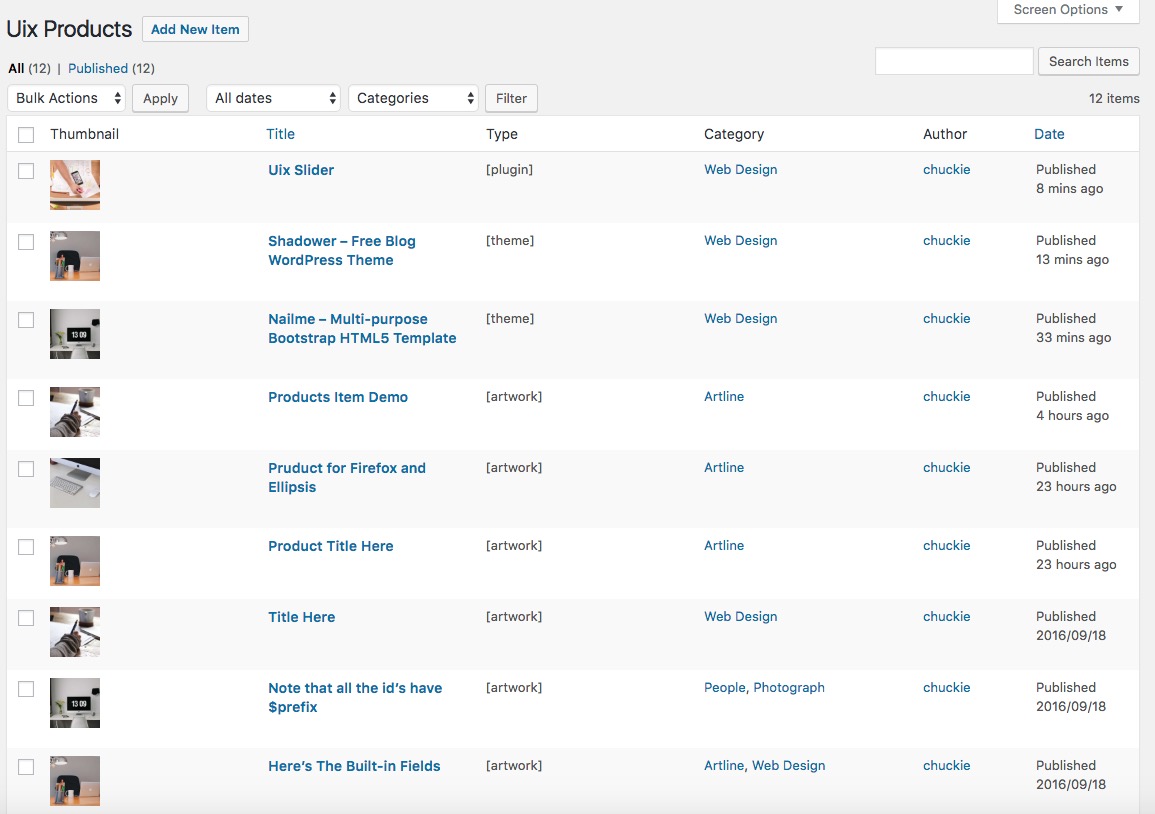
- Adding categories support to a custom post type in WordPress
- Support gallery
- There are some simple options to the theme customizer
- Filterable to display product items to your site
- Masonry grid style support
- Support widgets to the spot you wish it to appear
There is a second way, make a new Cascading Style Sheet (CSS) document which name to "uix-products-custom.css" to your templates directory ( "/wp-content/themes/{your-theme}/" or "/wp-content/themes/{your-theme}/assets/css/" ). You can connect to your site via an FTP client, make the changes and then upload the file back to the server. Once you have created an existing CSS file, Uix Products will use it as a default style sheet to your WordPress Theme. Of course, Uix Products's function of "Custom CSS" is still valid. Note: Making a new javascrpt (.js) document which name to "uix-products-custom.js" to your templates directory ( "/wp-content/themes/{your-theme}/" or "/wp-content/themes/{your-theme}/assets/js/" ). Once you have created an existing JS file, Uix Products will use it as a default script to your WordPress Theme.Custom Uix Products Metaboxes Occasionally you may wish to edit one of the meta boxes that come with Uix Products. Instead of editing the templates right in the plugin you should move them to your theme, so that your changes aren't lost when you update the Uix Products plugin. This document will show you how to safely custom meta boxes to your theme. You could Go to "Uix Products -> Settings -> For Theme Developer" to check out.
安装:
- After activating your theme, you can see a prompt pointed out as absolutely critical. Go to "Appearance -> Install Plugins". Or, upload the plugin to wordpress, Activate it. (Access the path (/wp-content/plugins/) And upload files there.)
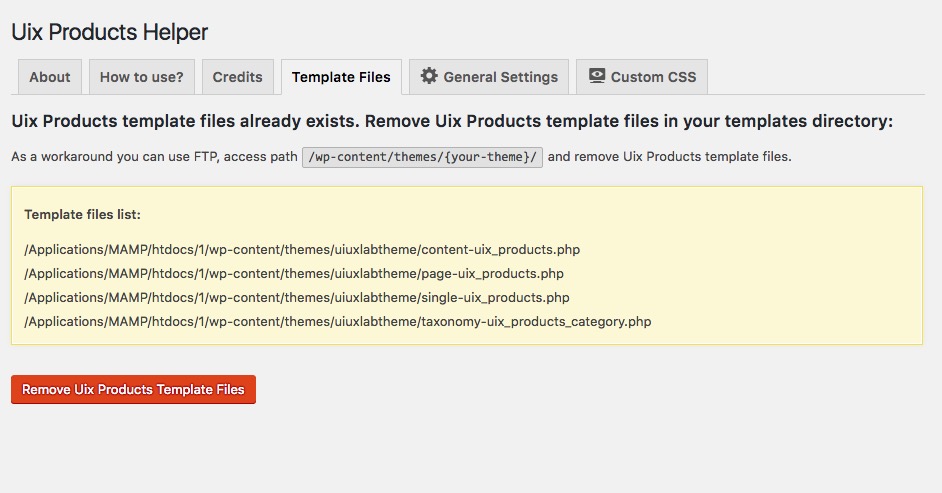
- You need to create Uix Products template files in your templates directory. You can create the files on the WordPress admin panel. As a workaround you can use FTP, access the Uix Products template files path (/wp-content/plugins/uix-products/theme_templates/) and upload files to your theme templates directory (/wp-content/themes/{your-theme}/).
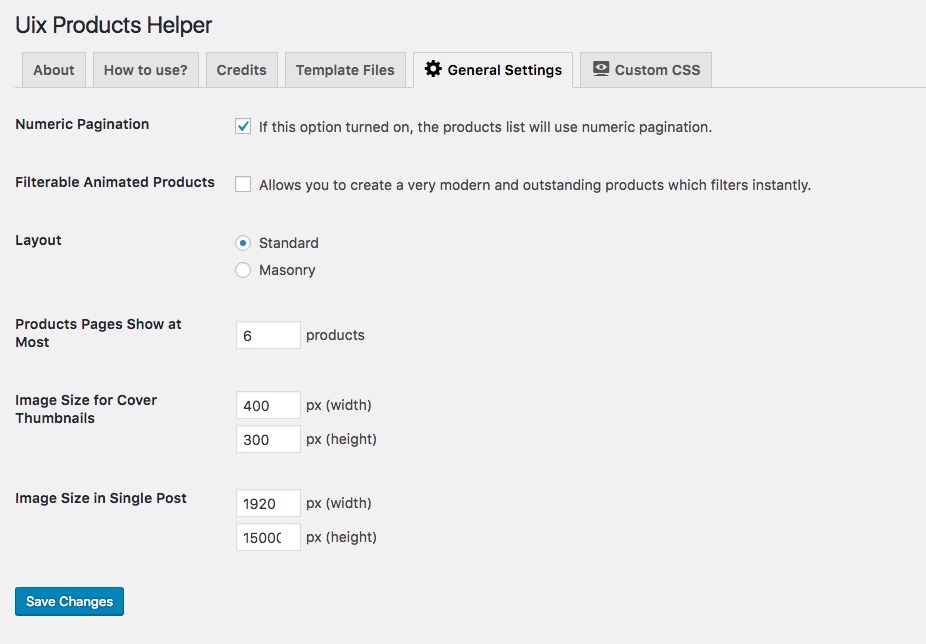
- The Uix Products plugin allows users to easily enable a "Customizer Page" to themes. Go to "Uix Products -> Settings -> General Settings".
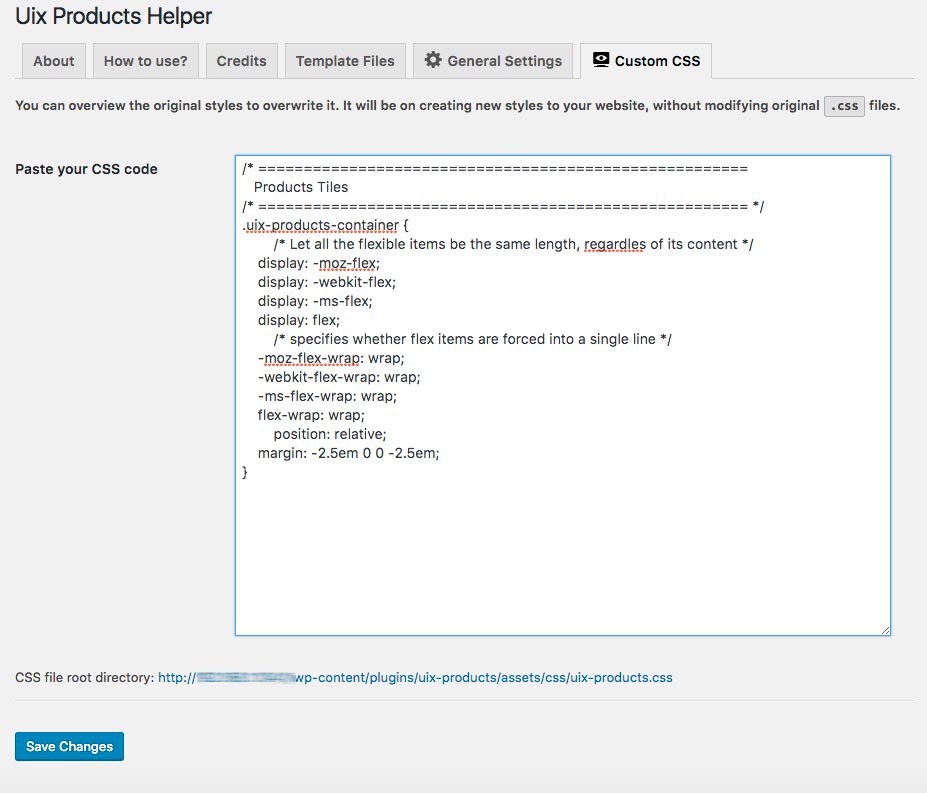
- You can overview the original styles to overwrite it. It will be on creating new styles to your website, without modifying original ".css" files. Go to "Uix Products -> Settings -> Custom CSS".
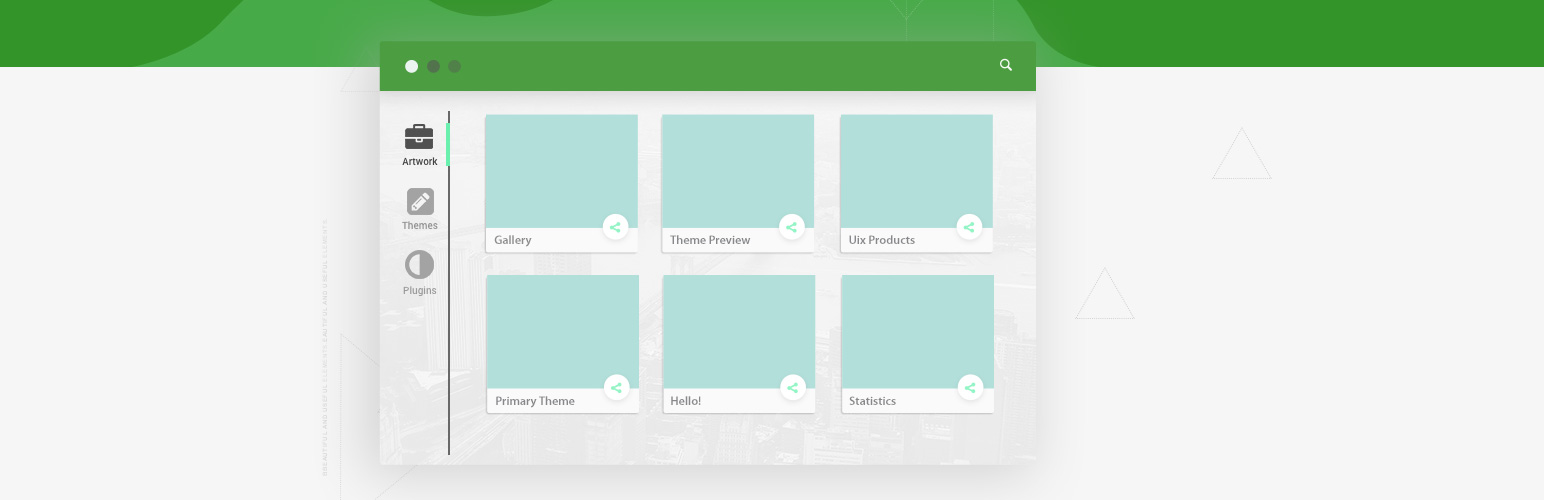
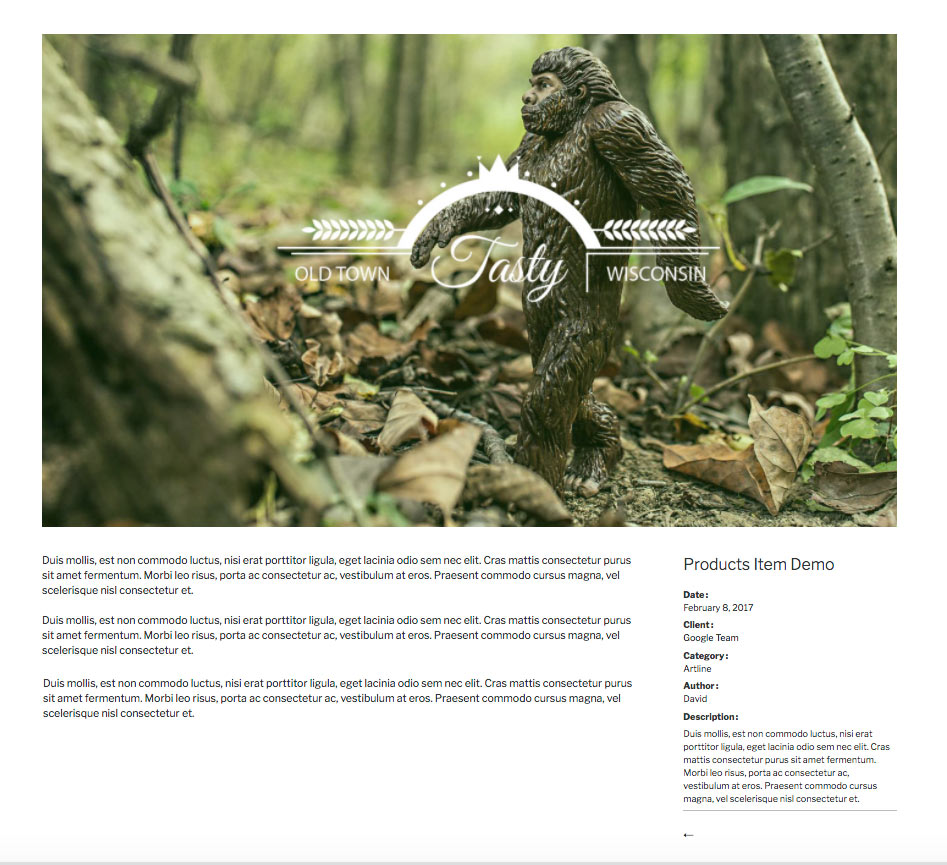
屏幕截图:
常见问题:
FAQ 1: How to customize the Uix Products templates by your theme location?
Occasionally you may wish to edit one of the templates that come with Uix Products. Instead of editing the templates right in the plugin you should move them to your theme, so that your changes aren\'t lost when you update the Uix Products plugin. As a workaround you can use FTP, access the Uix Products template files path (/wp-content/plugins/uix-products/theme_templates/) and upload files to your theme templates directory (/wp-content/themes/{your-theme}/).
FAQ 2: How to customize page options and stylesheets?
Go to "Uix Products -> Settings -> General Settings" or "Uix Products -> Settings -> Custom CSS"
FAQ 3: Custom meta boxes of Uix Products to your theme.
Occasionally you may wish to edit one of the meta boxes that come with Uix Products. Instead of editing the templates right in the plugin you should move them to your theme, so that your changes aren't lost when you update the Uix Products plugin. This document will show you how to safely custom meta boxes to your theme. Go to "Uix Products -> Settings -> For Theme Developer".
更新日志:
- Tweak: Enhance the functionality of the uix custom metabox.
- New: Added Types filter to admin panel.
- Tweak: Optimized the categories filter of the admin panel.
- Tweak: Language update.
- Tweak: Compatible with version 5.9.x.
- Tweak: Performance optimization of dynamic forms (use virtual tree to update dom) for Custom Meta Boxes.
- Tweak: Optimized the escape compatibility issue of the editor control for Custom Meta Boxes.
- Tweak: Upgraded the uploading control.
- Tweak: update demo config for options.
- Tweak: Optimized the output of categories in each column in the admin panel.
- Tweak: Modified API tutorial document.
- Fix: Fixed an issue where the title of the custom post type was empty and could not be published when publishing.
- New: Add taxonomy filters to the products admin page.
- Fix: Fixed the column problem of categories display in the admin panel.
- Tweak: Refactored the trigger script for custom metabox switching.
- Fix: Optimized the color transparency control, compatible with WP 5.5.0 and above.
- Tweak: Expand and optimize Uix Custom Meta Boxes.
- New: Use
Muuriplug-in to make filtering and masonry effects. - Remove: Remove Flexslider plugin.
- Remove: Remove shuffle.js and modernizr.js.
- Tweak: Optimized the language support and media insertion of the editor for Uix Custom Meta Boxes.
- Tweak: Compatible with WP 5.5.*.
- Fix: Modified the style display of the module.
- Fix: Fixed undefined index of post_type in version 5.4.
- New: Custom column sorting and filtering for custom post type in admin panel.
- New: Added Custom Meta Boxes API documentation to admin menu.
- New: Added support for video formats.
- New: Added zh_CN language support.
- Fix: Correct the path error of Setting after the corresponding theme.
- New: Add drag sorting for Uix Custom Metaboxes' Image Gallery.
- Fix: Fixed Type display of item list in admin panel.
- Tweak: Optimized category switching script.
- Fix: Fixed button trigger event for uploading image control.
- Dev: New loop fields control for richer release types.
- Remove: Remove the gallery metabox and replace it with uix custom metaboxes.
- Tweak: Optimized scalability for components such as uploads.
- Dev: Added filter
add_filter( 'uix_products_custom_metaboxes_vars', 'mytheme_modify_vars' );for current Custom Metaboxes.
- Tweak: Enhance the functionality of the uix custom metabox.
- Tweak: MCEEditor upgrade in form component.
- New: Add live demo page to this plugin. (/live-demo)
- Fix: Fixed a bug for plugin.
- Fix: Fixed a bug for create_function() is deprecated in PHP 7.2.
- Fix: Fixed some style compatibility issues with the Flexslider plugin.
- Fix: Fixed an issue when your theme uses more meta boxes.
- Fix: Fixed issue where color picker does not display.
- Fix: Fixed a bug with custom styles and child themes that if site uses a child theme when you create a custom css/js file in child theme folder, the plugin tries to connect style with path located in the parent theme folder.
- Tweak: Updated some third-party plugins to the latest version.
- Optimized the directory and file structure, delete the unnecessary files and codes.
- Improve the Uix Products assistant(helper) experience in admin panel.
- Resolved the possible permissions issues to create a template files.
- Optimize the default paging function.
- Optimize the default front end style.
- Optimize the default page templates.
- Remove the "CMB" classes and files.
- Using "Uix_Products_Uix_Custom_Metaboxes" class instead of "CMB" class. (More fast, simple and compatible).
- Remove the "CMB" classes and files.
- Rebuild part of the background file directory.
- Rename the page templates so that they do not start with "page-".
- Optimized core stylesheets for front-end.
- Optimized admin panel of Custom CSS.
- Compatible with low version PHP (5.3+)
- Fixed some minor errors in the low version of PHP.
- Optimized front-end style.
- Add dynamic form fields, meet the needs of custom fields.
- Enhanced API compatibility for themes.
- Fixed an online preview error.
- Add a responsive preview component.
- Optimized binding theme picker.
- Optimized gallery selector.
- WordPress 4.7 compatible.
- Enhanced scalability structure.
- Enhanced the user experience of templates admin panel.
- Supports custom Uix Products core stylesheet and script based on "/wp-content/themes/{your-theme}/" and "/wp-content/themes/{your-theme}/" directories for your theme.
- Supports custom Uix Products core stylesheet and script based on "/wp-content/themes/{your-theme}/assets/css/" and "/wp-content/themes/{your-theme}/assets/js/" directories for your theme.
- Optimized enqueue scripts for front-end.
- Fixed some bugs.
- Fixed some bugs.
- Optimized for tablet display.
- Improved event binding from the plugin main JavaScript file.
- Improved the main CSS file.
- First release.