UpiCRM - Lead Management and Contact Form DB for all forms.
| 开发者 |
UpiCRM.Com
upi |
|---|---|
| 更新时间 | 2026年11月12日 19:10 |
| 捐献地址: | 去捐款 |
| PHP版本: | 7.4 及以上 |
| WordPress版本: | 7.1 |
| 版权: | GPLv2 or later |
| 版权网址: | 版权信息 |
详情介绍:
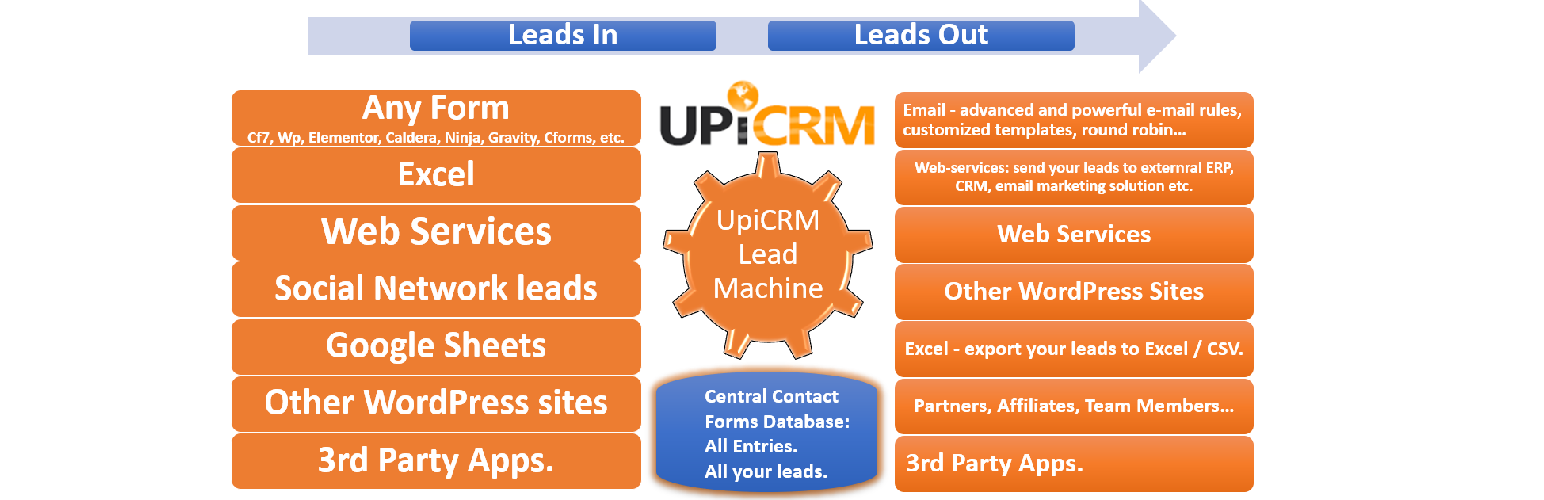
- WordPress contact forms: Contact Form 7, Elementor Forms, WPForms, Caldera Forms, Ninja Forms, CForms, Gravity Forms
- Web services (incoming)
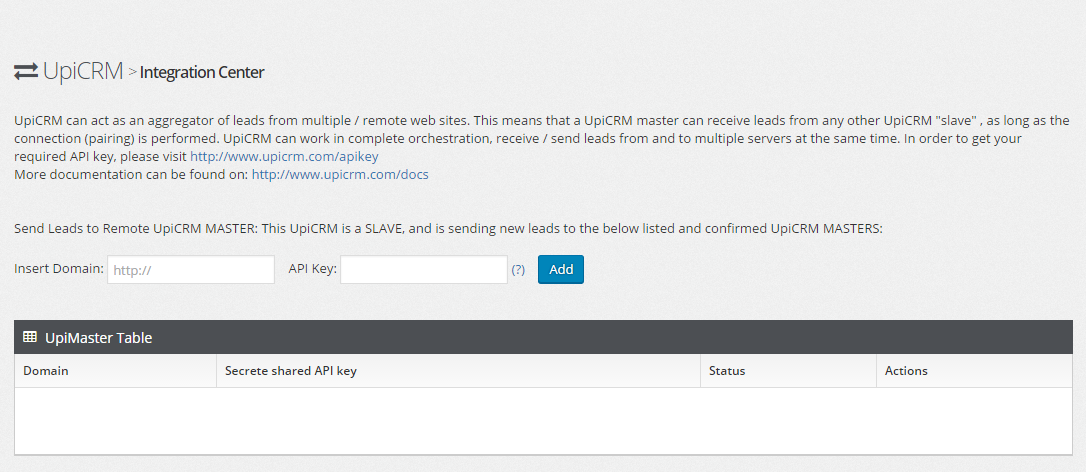
- Other UpiCRM installations: collect the leads of several websites on one UpiCRM server
- Excel / CSV import
- Assign it to a team member, automatically (round robin or routing rules) or by hand.
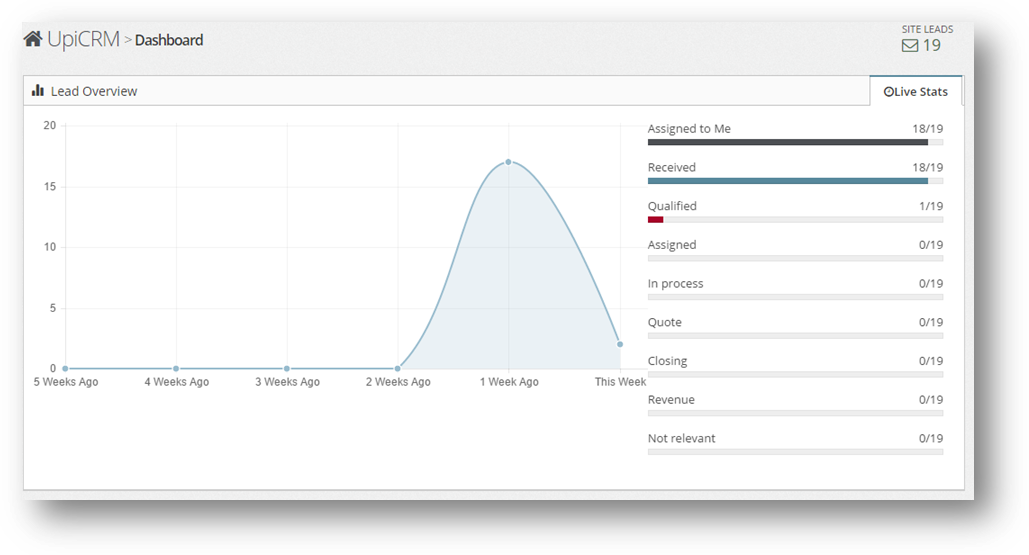
- Follow its status from the first contact to the end of the process.
- Send email notifications and customized email templates to your team or to the visitor.
- Send it to a remote web service (ERP, CRM, email marketing...) or to another UpiCRM server.
- Export your leads to Excel / CSV.
安装:
upicrm.zip to the /wp-content/plugins/ directory and extract all files.
Activate the plugin through the 'Plugins' menu in WordPress
note: you can always download UpiCRM form our web site: www.upicrm.com/download
Automatic installation:
While on "Add New" screen on "Plugins" page from your WordPress dashboard / management screen - simply search for UpiCRM, and click the "install now" link.
Be sure to activate UpiCRM plugin after installation!
First time configuration:
After installing the plugin from upicrm.com website, or from "plugins" page on your WordPress site, you will need to perform the following actions before you can enjoy the capabilities of UpiCRM:
First Step: Set up users and roles.
UpiCRM has two built in user roles:
UpiCRM Admin: Can configure all options, grant access rights, view and edit all leads, access UpiCRM dashboard, and perform any additional task UpiCRM allows.
UpiCRM User: Can view & manage leads assigned to him only.
Simply create a WordPress user using the default "Users" menu provided by your WordPress management interface, or edit existing WordPress users, by navigating to the lower end of the page, and assigning the new user with the desired UpiCRM role:
Note: remember that you can simply assign UpiCRM user roles using the native users management screens of WordPress.
UpiCRM General Settings:
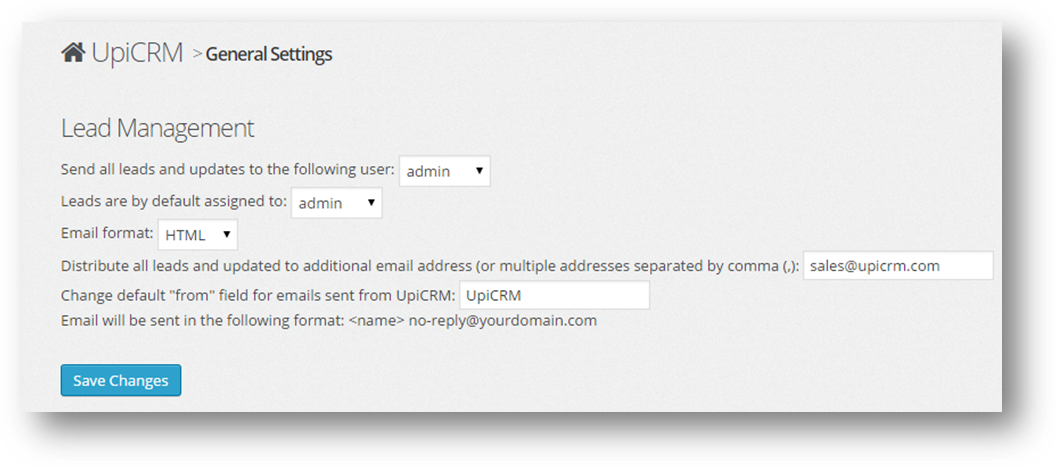
"Send all leads and updates to the following user": you may choose to distribute new leads by mail to any external eMail address, or to a list of multiple comma separated (",") eMail addresses.
"By default, Leads are assigned to" : use this option in order to determine who will be assigned to deal with all new leads.
"Email format": you can choose to send mail notifications as plain text or HTML. As some external systems (SalesForce, ZohoCRM etc.) require plain text in order to parse new leads, you may choose to change default format to plain text.
Change default "from" field for emails sent from UpiCRM: use this option in order to set the "from" name used on email that will be sent by UpiCRM.
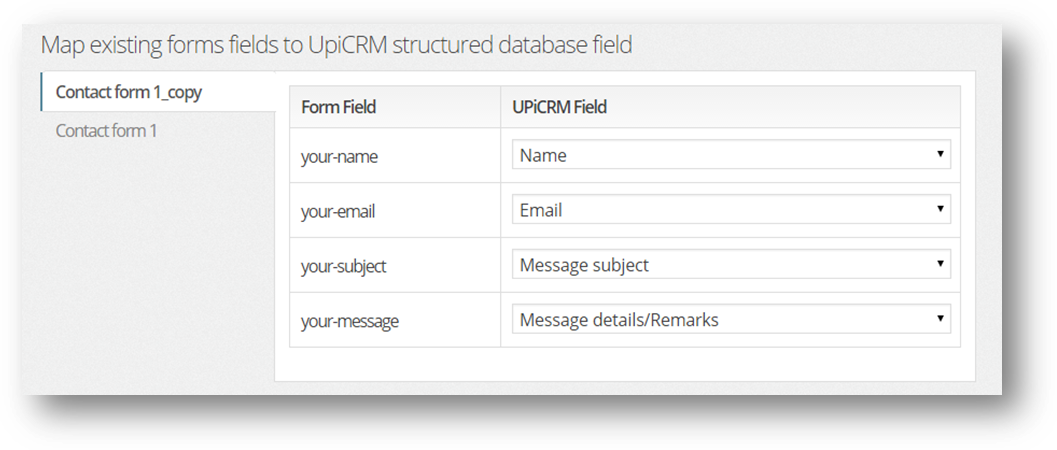
Step 2: map all your existing forms and fields onto UpiCRM's structured database
UpiCRM needs to import all your old data and map all your current forms and fields onto its superset of structured database.
In order to perform this task, navigate to the "General Settings" screen on the UpiCRM sub-menu.
Please remember to perform this task again if you're adding more new forms to your site in the future!
Use the drop-down menus on this screen in order to map ALL your current forms fields onto the UpiCRM structured database.
Tip: if you are using an additional field that does not appear on the UpiCRM predefined fields list, you can always add it to the UpiCRM database using the "Add additional fields and datatypes to UpiCRM" option.
Note: this procedure needs to be performed only once per every form on your website.
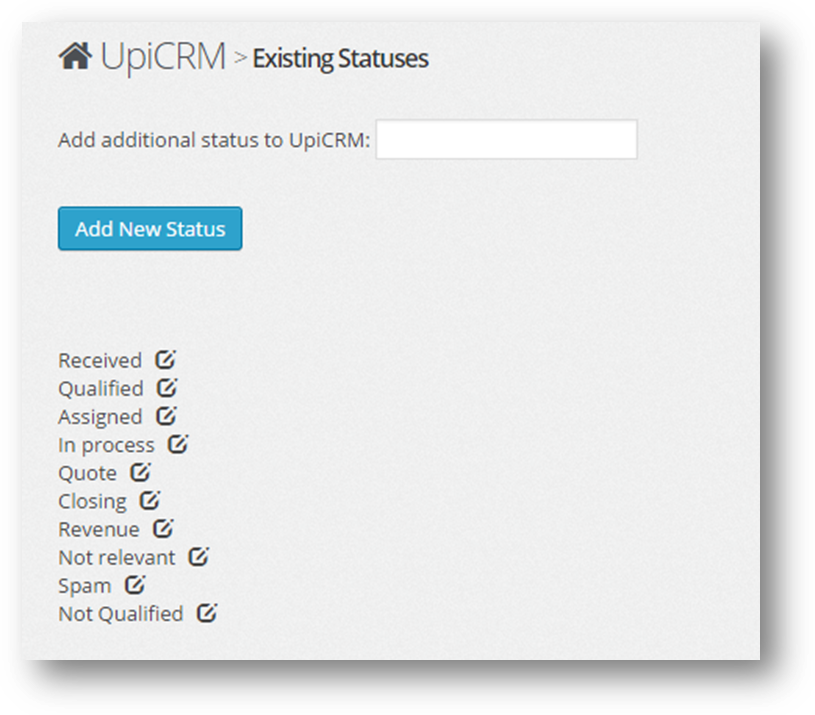
UpiCRM Lead status: Use this screen in order to add or change a status.
Step 3: Edit eMail notifications
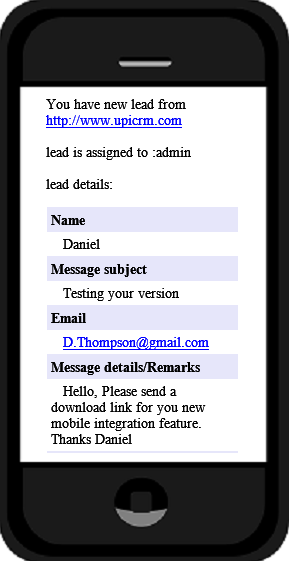
UpiCRM will consistently inform you and your team about any reception/edition/modification of any lead.
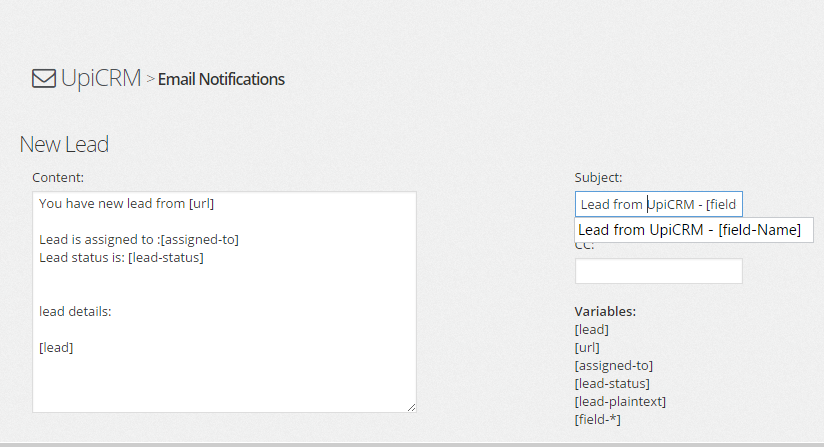
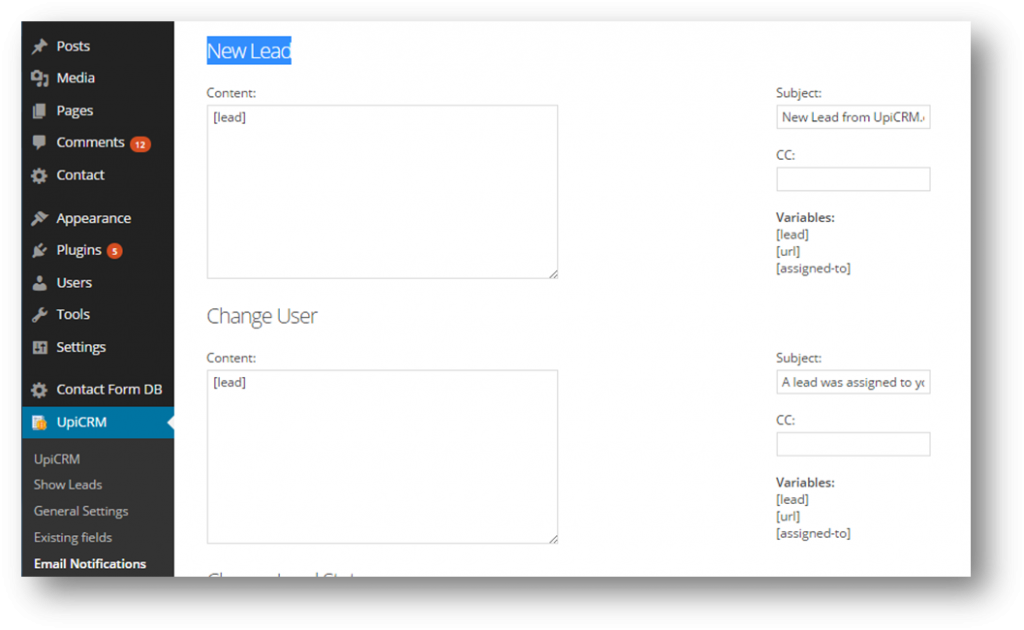
Take a couple of minutes in order to personalize the messages you wish to distribute, by editing the eMail templates on the "eMail Notifications" screen:
Tip: use the variable [lead], [url] and [assign-to] in order to embed information with the notifications you send.
In the future, UpiCRM will provide even more optional variables.
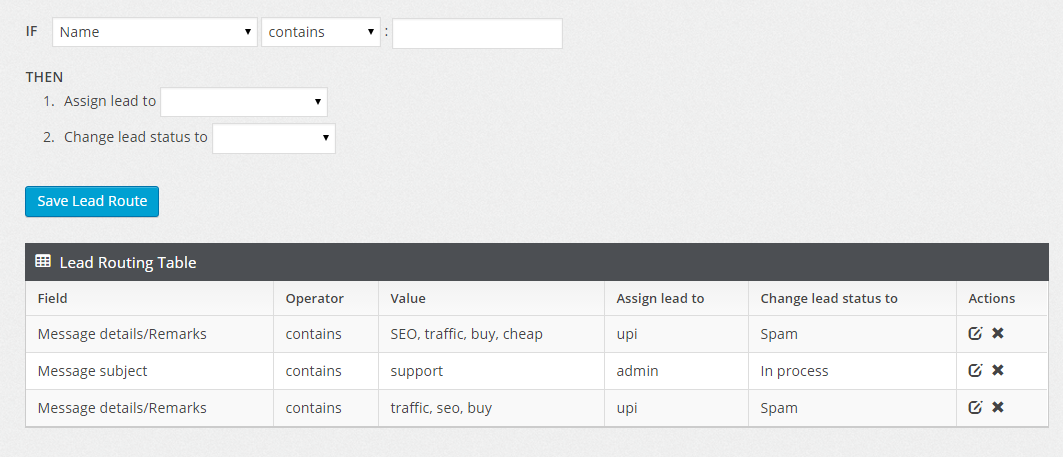
Step 4: Optional - define rules and conditions automatically route leads to designated personnel or to change lead status.屏幕截图:
常见问题:
Can I manage leads from Claude, ChatGPT or Gemini?
Yes, for assistants that support MCP (Claude Desktop, Gemini CLI, Cursor and others). You need WordPress 6.9 or newer, the free MCP Adapter plugin, and an Application Password for a user who may use UpiCRM. Then open UpiCRM > AI / MCP, switch on "Expose UpiCRM to AI agents" and choose what agents may do - reading is on by default once enabled; writing (status, assignment, notes, new leads) is off until you turn it on. The same screen shows the address to add to your AI client, and an audit log of every call. Nothing can be deleted through it. With the AI Site Manager gateway plugin you can also connect claude.ai connectors using its OAuth sign-in, and WordPress 6.9 is not required. ChatGPT custom connectors need OAuth sign-in, which the MCP Adapter route does not provide. Remember that lead data you retrieve is sent to the AI provider you use - see your privacy policy.
what does UpiCRM do?
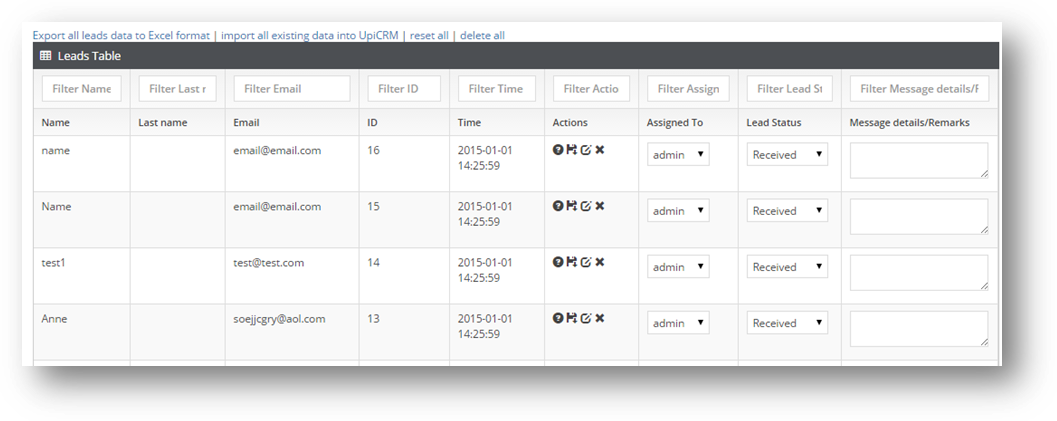
UpiCRM is a WordPress Lead Magement solution. It collects all forms entries into a central Form Database / Table that enables you to manage your leads throughout the complete life cycle of the “leads to customers” process. With many advanced features as automated / smart lead assignment to team members, advanced email notifications, GDPR features, and much much more...!
CRM solutions are known to be very hard to implement… how easy is UpiCRM, starting with installation, set-up and work cycle?
UpiCrm installation should take about 20 Minutes. Try... and visit our website in order to see the demo vidoe!
with which forms plugins does UpiCRM work currently?
currently we support WP-Forms, Contact form 7, Elemenor forms, Gravity forms, Ninja Forms, Caldara Forms, Cforms and more. If you are using another solution, please contact us on www.upicrm.com/contact, and we'll be happy to promptly respond to your and the community's needs.
is UpiCRM free?
Yes. Please read the license file on the installation ZIP.
How can I track lead source in UpiCRM ?
UpiCRM provides 3 ways of tracking a lead source: 1) Form name – which form was filled? 2) traffic source – Referral – from which site/URL did the user arrive from? 2) UTM URL Tagging : add UTM tags to all campaigns and traffic sources for your site, UpiCRM will parse and attached this information to every new lead.
Can I automatically change lead status or route lead to specific people, based on lead's contents?
Yes! UpiCRM has advanced automated rules to allow leads distibution based on lead's content. Send leads to your team, to partners, use advacned email temaplates and more.
Does UpiCRM set cookies on my visitors?
Yes, one: a first-party cookie named "upicrm_utm". It remembers the UTM parameters of the page a visitor landed on (source, medium, campaign, term, content) and the first external website they came from, so the lead can be attributed to a campaign when a form is submitted later. It contains no name, e-mail or other personal details and is read only when a form is submitted. It is kept for 30 days by default; in UpiCRM > GDPR you can change that (until the browser is closed, 7, 30, 90 or 180 days) or turn it off, and developers can disable it with add_filter( 'upicrm_enable_utm_cookie', '__return_false' ). If your site shows a cookie consent banner, list it as a marketing / analytics cookie. A suggested privacy-policy text is added to Settings > Privacy > Policy Guide.
更新日志:
- Security: old-format Lead Aggregation API keys (a code made of the two site addresses) are no longer accepted at all, and the "Accept legacy API keys" setting is gone. When both sites run 3.15.5, they replace the old key with a new random secret by themselves: each site confirms the exchange by calling the https address stored for the other one. Leads that were refused meanwhile are sent again afterwards. UpiCRM > Lead Aggregation explains what to do and has a "Replace the old keys now" button.
- Security: UpiCRM access is now given on purpose. A WordPress user has no UpiCRM access until an administrator gives it (profile screen or UpiCRM > Users Center); administrators are UpiCRM admins. Before, every logged-in user without a setting counted as a "UpiCRM User" and new users got that role by default. On update, users who have leads assigned or a place in the Users Center keep their access, and the "default role for new users" setting changes from "UpiCRM User" to "Not a UpiCRM User" (you can change it back in Users Center).
- Security: a user's UpiCRM permission can only be changed by a WordPress administrator in the profile screen (before, any user could raise their own), "Not a UpiCRM User" really blocks access, and every admin action checks the user's UpiCRM permission in addition to the nonce. A user limited to own leads can no longer open or change other leads.
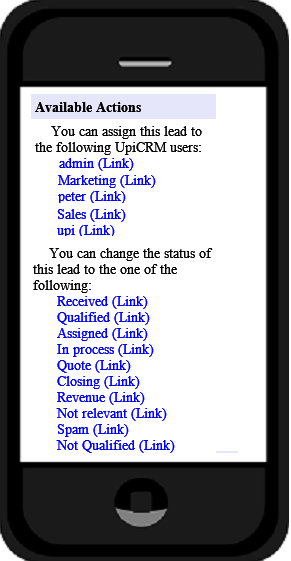
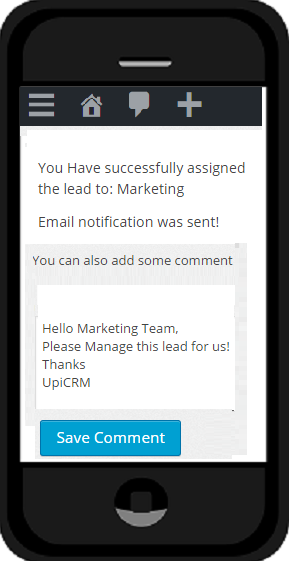
- The quick links in notification e-mails (change status / assign) now open a confirmation page instead of changing the lead at once.
- The plugin no longer changes PHP's include path and no longer uses $_SESSION. The lead's referrer is the first external website (from the campaign cookie) or, when unknown, the page the form was sent from.
- Fixed: saving an edited lead (Edit lead screen) did not find the lead.
- Fixed: Lead Management could stop with a PHP error ("strpos(): Argument #3 ($offset) must be contained in argument #1 ($haystack)") on PHP 8 when a lead that was received from another site had an empty or very short content. The form name of such leads is now read safely; names that contain a comma, quotes or non-English letters are shown correctly, and the same reader is used by the exports.
- Fixed: UTM / campaign data and the referring website were almost never saved with new leads (they were kept in a PHP session that the plugin never started). They are now remembered in a small first-party cookie, "upicrm_utm", set by JavaScript so it also works with page caching: the UTM parameters of the landing page and the first external referrer (first touch wins).
- New: UpiCRM > GDPR "Campaign cookie" setting - off, until the browser is closed, 7, 30 (default), 90 or 180 days - with a suggested privacy-policy text. Can also be disabled with add_filter( 'upicrm_enable_utm_cookie', '__return_false' ).
- Saving the GDPR settings now requires a UpiCRM administrator.
- Fixed: UpiCRM > Data Types & Fields ended with "There has been a critical error" on sites running Ninja Forms 3. Ninja Forms 3 forms, fields and the "import existing data" step now work (Ninja Forms 2 is still supported).
- New: "import all existing forms plugins data" (UpiCRM > Import) also imports past Elementor Pro submissions with their original date, IP, browser and referer. No e-mails are sent and it can be repeated without creating duplicates.
- Fixed: Lead Management no longer freezes on "All Time" or other large date ranges. The table loads one page of leads at a time (search, filters, sorting and paging are done by the server), shows a loading indicator and an error message if a page cannot be loaded.
- Fixed: "Delete Selected leads" deleted nothing; the column filter boxes stopped working after a column was hidden and shown again; the selected date range is now remembered.
- Security: Lead Aggregation now uses a secret random API key per integration (new "Generate" button). Keys are compared in constant time, saving a lead needs a POST request, unknown actions are rejected, and a status check with a wrong key changes nothing.
- Security: removed the public "upicrm_on_load" AJAX action and the unused footer script; the request that sends pending notifications carries a signed token; TLS certificates are verified between sites (filter 'upicrm_integration_sslverify').
- Fixed: activation and updates create every table with dbDelta() (including web-service header columns that were never created); re-activating no longer replaces edited fields, statuses and e-mail templates; no PHP notices or database errors with WP_DEBUG on; the "Custom Export" link now needs a login and a short-lived key.
- DataTables updated to 2.3.8.