
Warranty Cart
| 开发者 | mralaminahamed |
|---|---|
| 更新时间 | 2026年5月11日 09:30 |
| PHP版本: | 7.4 及以上 |
| WordPress版本: | 6.8 |
| 版权: | GPLv2 or later |
| 版权网址: | 版权信息 |
详情介绍:
wp-content/plugins/warranty-cart/resources/docs/ for offline reading.
Key Features:
- Shortcode Display:
[warranty_cart]shortcode with grid or list layout - Bundle Management: Create main warranties and associated additional services with dynamic pricing
- One-Click Cart Addition: Seamless integration with WooCommerce cart and checkout
- External Payment Integration: Integrates with WooCommerce PayPal Payments and WooCommerce Gateway Stripe plugins
- Advanced Admin Dashboard: Modern React-based interface with Shadcn UI components for comprehensive warranty management
- Bulk Import: CSV-based bulk import functionality for efficient product setup
- Analytics & Reporting: Comprehensive sales reports with interactive charts and key performance metrics
- PDF Certificates: Automatic generation and email attachment of professional warranty certificates
- Email Notifications: Automated notifications for order completion, reminders, and expiration alerts
- Custom Checkout Fields: Additional warranty-specific fields during checkout process
- Order Management: Complete warranty order tracking and management system
- Integration Architecture: Extensible system for integrating with external payment plugins
- Security First: Input sanitization, nonce verification, PCI DSS compliance, and secure file handling
- HPOS Compatible: Full compatibility with WooCommerce High Performance Order Storage
- Modern UI/UX: Smooth animations and responsive design with Framer Motion Requirements:
- WordPress 6.0+
- WooCommerce 8.0+
- PHP 7.4+
- MySQL 5.6+ Required Payment Plugins (choose at least one):
- WooCommerce PayPal Payments (v2.0.0+)
- WooCommerce Gateway Stripe (v7.0.0+)
安装:
- Upload the plugin files to the
/wp-content/plugins/warranty-cartdirectory, or install the plugin through the WordPress plugins screen directly. - Activate the plugin through the 'Plugins' screen in WordPress.
- Install and activate WooCommerce (8.0+) if not already installed.
- Install and activate at least one required payment plugin:
- WooCommerce PayPal Payments (recommended v2.0.0+)
- WooCommerce Gateway Stripe (recommended v7.0.0+)
- Use the
[warranty_cart]shortcode to display warranty products on any page. - Configure payment gateways in WooCommerce > Settings > Payments.
- Access the warranty management dashboard at the top-level Warranty Cart menu in the WordPress admin sidebar.
- Set up warranty products via the Warranty tab on each WooCommerce product, then configure email templates and checkout fields under Settings.
- Dashboard: Overview of warranty sales, analytics, and key metrics
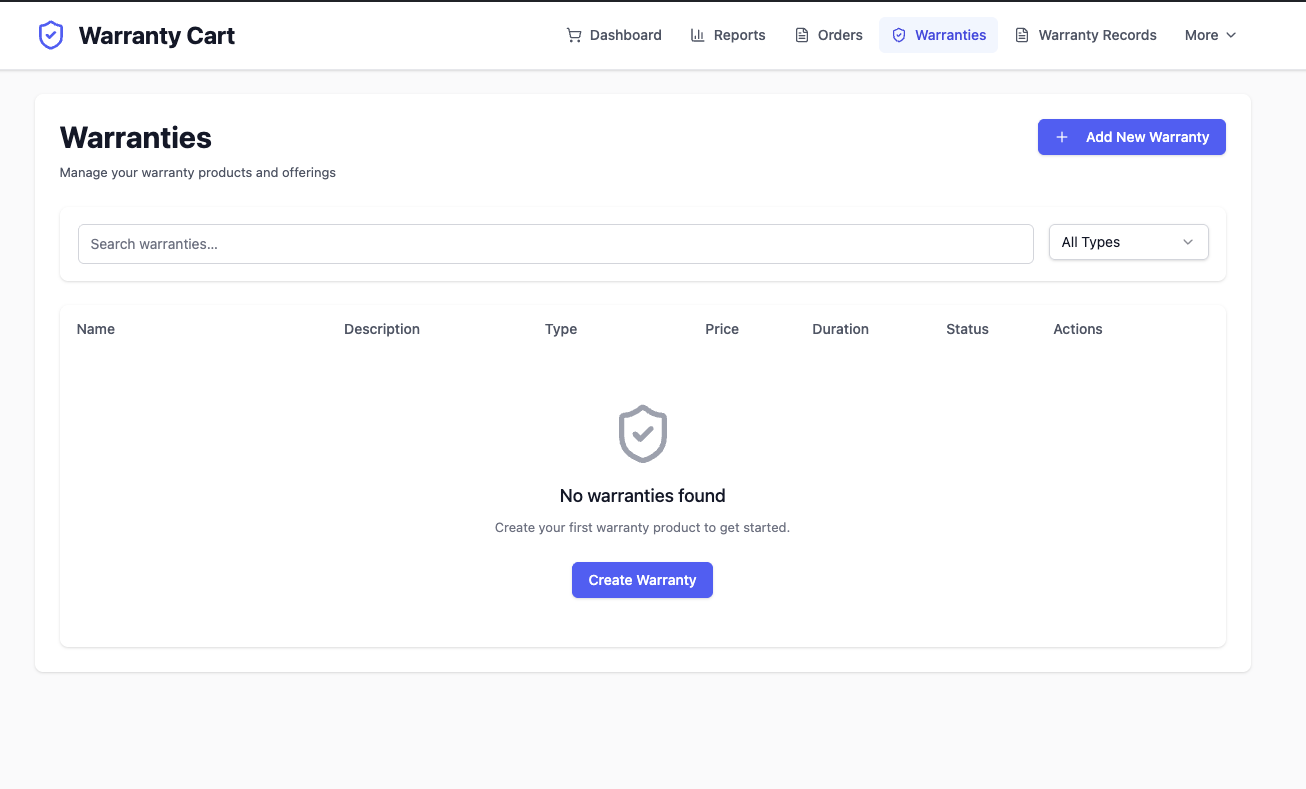
- Warranties: Manage warranty products, bundles, and pricing
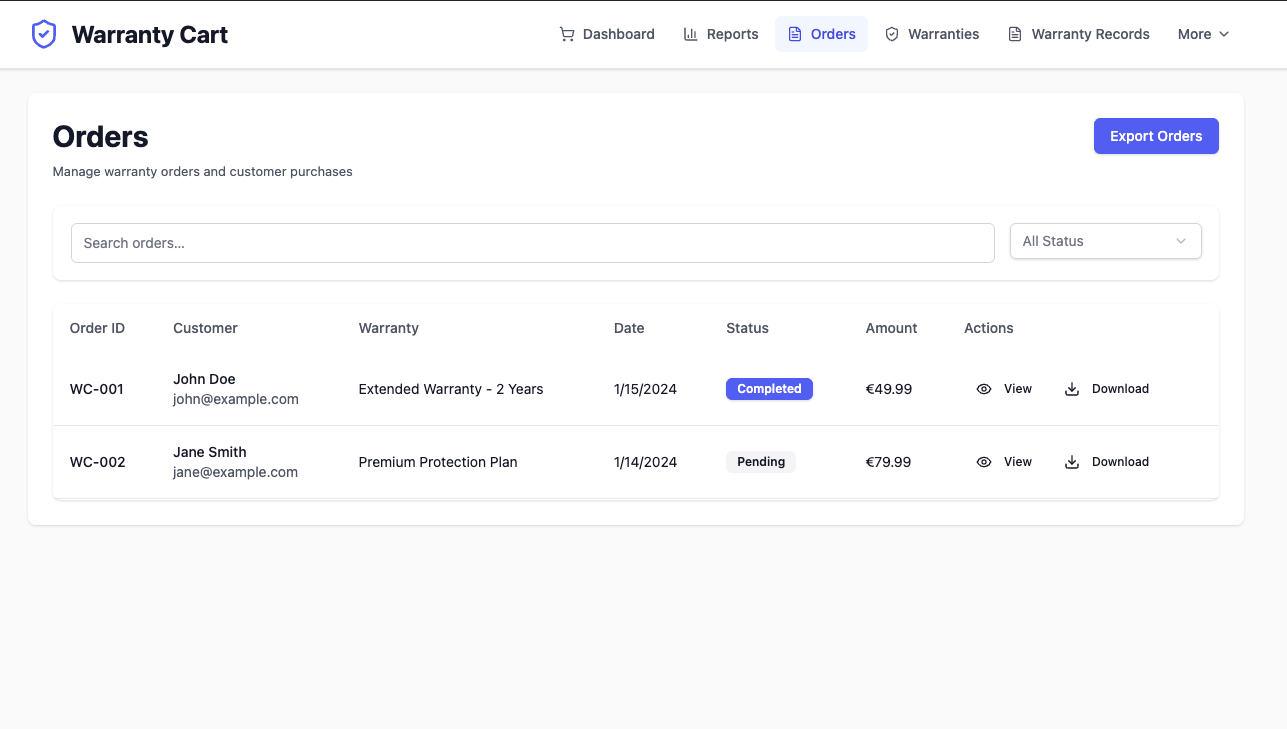
- Orders: Track warranty orders and customer information
- Reports: Detailed analytics with charts and performance data
- Settings: Configure plugin options, email templates, and checkout fields
- Tools: System maintenance, data import/export, and diagnostics
屏幕截图:

常见问题:
How do I set up my first warranty product?
- Open Products → Add New (regular WooCommerce product).
- Title, description, and price in EUR. Tick Virtual so the order auto-completes.
- Click the Warranty tab in the Product data box.
- Set Status: Enabled, Type: Main warranty, Duration: 1, Duration unit: years, and fill in Coverage details.
- Publish.
- Create one or more Additional service products the same way, but set Type: Additional service and pick the main warranty under Associated warranty.
- Drop
[warranty_cart]onto any page. Done.
How do I display warranty products?
Use the [warranty_cart] shortcode on any page or post. The shortcode accepts one attribute, layout:
[warranty_cart layout="grid"] or [warranty_cart layout="list"]
To scope which products show (category, custom meta, etc.) use the warranty_cart_shortcode_products_query filter. See the shortcode reference.
What payment methods are supported?
The plugin integrates with external WooCommerce payment plugins:
- WooCommerce PayPal Payments (v2.0.0+)
- WooCommerce Gateway Stripe (v7.0.0+) The plugin does not handle payment processing directly - it only tracks warranty purchases made through these external plugins.
How do I configure payment gateways?
- Install and activate at least one supported payment plugin
- Go to WooCommerce > Settings > Payments
- Configure the payment plugin(s) with your API credentials
- The warranty plugin will automatically detect and integrate with active payment plugins
Why does the plugin require external payment plugins?
This approach provides several benefits:
- Uses official, well-maintained payment plugins
- Leverages existing payment infrastructure
- Reduces security risks by not handling payment data
- Allows stores to use their preferred payment setup
- Easier maintenance and updates
Can I add more payment methods?
Yes! The plugin uses an integration architecture. Support for additional payment plugins can be added by creating new integration classes that extend the AbstractIntegration class.
How do I access the admin dashboard?
After installation, click the top-level Warranty Cart menu in your WordPress admin sidebar (shield icon). This provides access to all warranty management features: dashboard, warranty product catalog, warranty records, orders, reports, settings, and tools. See the admin dashboard reference for a full tour.
What are the different admin sections for?
- Dashboard: Overview with sales metrics, recent orders, and popular warranties
- Warranties: Create and manage warranty products and bundles
- Orders: View and manage warranty orders with customer details
- Reports: Analytics with charts showing sales performance and trends
- Settings: Configure email templates, checkout fields, and plugin options
- Tools: Import/export data, system diagnostics, and maintenance tools
How do warranty certificates work?
The plugin automatically generates PDF certificates for purchased warranties using DomPDF. They are attached to the order completion email and can be re-downloaded from Warranty Cart → Orders. PDFs are stored under wp-content/uploads/warranties/. Toggle the feature on or off under Warranty Cart → Settings → Enable PDF certificates.
When are warranty records created?
When a WooCommerce order containing one or more warranty products reaches the Completed status. The plugin listens for completion events from WooCommerce, the WooCommerce PayPal Payments plugin, and the WooCommerce Gateway Stripe plugin. Each warranty product in the order produces a row in wp_warranty_cart_warranties with status active and an expiration_date calculated from the duration.
How are the reminder and expiration emails scheduled?
Two daily WP-Cron events handle the lifecycle:
warranty_cart_check_expirations— marks active warranties asexpiredon or after theirexpiration_dateand sends the Warranty Expired email.warranty_cart_send_reminders— emails customers N days before expiration (default 30, filterable via thewarranty_cart_reminder_daysfilter).
wp-cron.php) and add define('DISABLE_WP_CRON', true); to wp-config.php.
How do I import warranty products in bulk?
Go to Warranty Cart → Tools, download the sample CSV, fill it in, and upload via the Import CSV card. Each row creates a WooCommerce product with the Warranty tab pre-filled.
I activated the plugin but emails or PDFs aren't sending — what now?
Common fixes:
- Make sure Warranty Cart → Settings → Enable email notifications and Enable PDF certificates are on.
wp_mail()is unreliable on default WordPress installs. Install an SMTP plugin (WP Mail SMTP, FluentSMTP) and connect a real transactional provider.- DomPDF needs the PHP
gdorimagickextension and ~128 MB memory. - Ensure
wp-content/uploads/warranties/exists and is writable by your web server user.
Is the plugin secure?
Yes, security is a top priority:
- All inputs are sanitized and validated
- AJAX requests use WordPress nonces
- Integrates with secure, official payment plugins
- Sensitive data is never logged or stored
- No direct payment processing reduces security surface
- File uploads are validated and restricted to safe types
更新日志:
- Add public CSV validation helpers and create_product_from_csv() on Import class
- Expose cart_has_warranty_products() as public on CheckoutFields
- Fix PHP unit test suite: DB credentials, Brain\Monkey migration, deprecated assertions
- Admin UI: dark mode and navbar improvements
- Admin UI redesign: horizontal navbar, dark mode toggle, Shadcn slate palette
- Build tooling: flat ESLint config, TypeScript strict checks, Stylelint
- CI/CD: fix SVN deploy workflow action versions
- Initial release with comprehensive warranty cart functionality
- Shortcode-based product display with dynamic pricing and responsive layouts
- Modular payment architecture with Stripe & PayPal integration
- Advanced admin dashboard with modern React interface and Shadcn UI components
- Comprehensive warranty management system with order tracking
- Custom checkout fields for warranty-specific information
- Bulk CSV import functionality for efficient product setup
- Analytics & reporting dashboard with interactive charts and key metrics
- PDF warranty certificate generation and automated email attachment
- Email notification system for order completion, reminders, and expiration
- Bundle management for main warranties and additional services
- Security hardening with input sanitization and nonce verification
- HPOS compatibility with WooCommerce High Performance Order Storage
- Modern UI/UX with Framer Motion animations and smooth transitions
- Comprehensive testing framework with PHP and E2E tests
- Code quality improvements and PHPCS compliance