
Yabi einvoice for WooCommerce
| 开发者 | kakaroto84 |
|---|---|
| 更新时间 | 2026年4月24日 05:11 |
| 捐献地址: | 去捐款 |
| PHP版本: | 8.0 及以上 |
| WordPress版本: | 6.9 |
| 版权: | GPLv3 or later |
| 版权网址: | 版权信息 |
详情介绍:
Yabi Electronic Invoicing allows your WordPress site to generate DIAN-compliant invoices automatically.\
It integrates with external systems and WooCommerce (if present), and adds features such as credit notes, invoice cancellation, DIAN resolution synchronization, personalized invoice data, and extended debugging tools.
Main Features:
- Generate DIAN-compliant electronic invoices automatically.
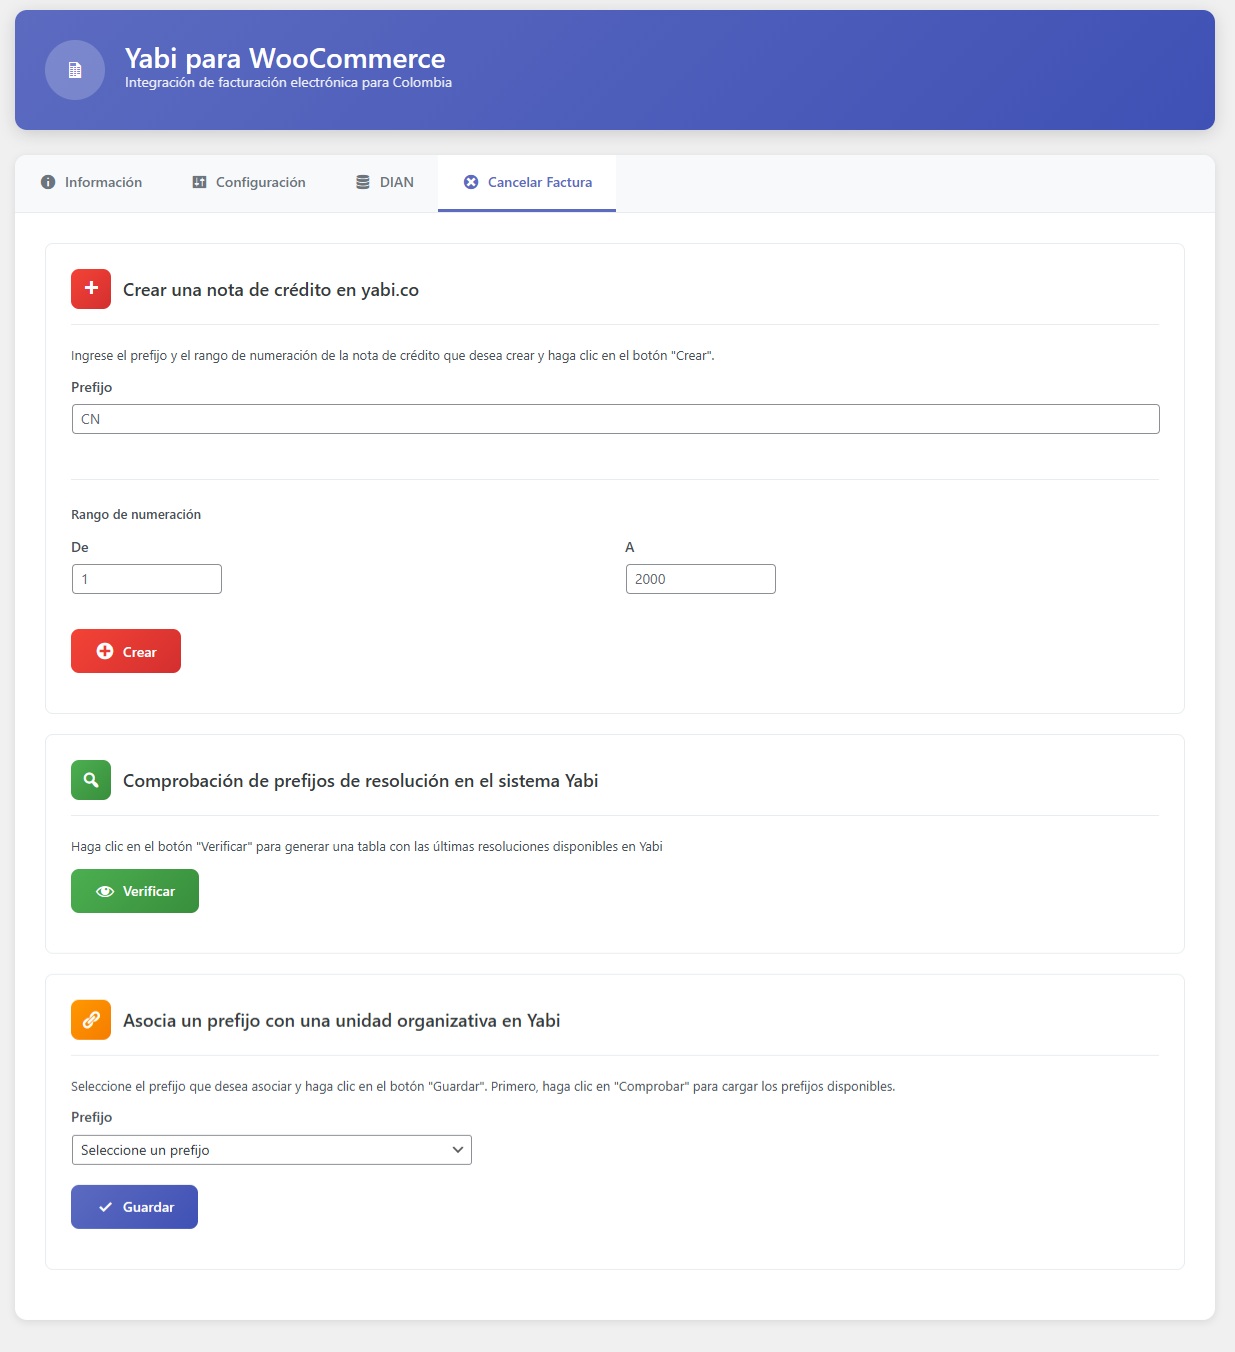
- Create and manage credit notes directly from WordPress.
- Cancel invoices through the Yabi platform.
- Sync DIAN resolutions with Yabi.co.
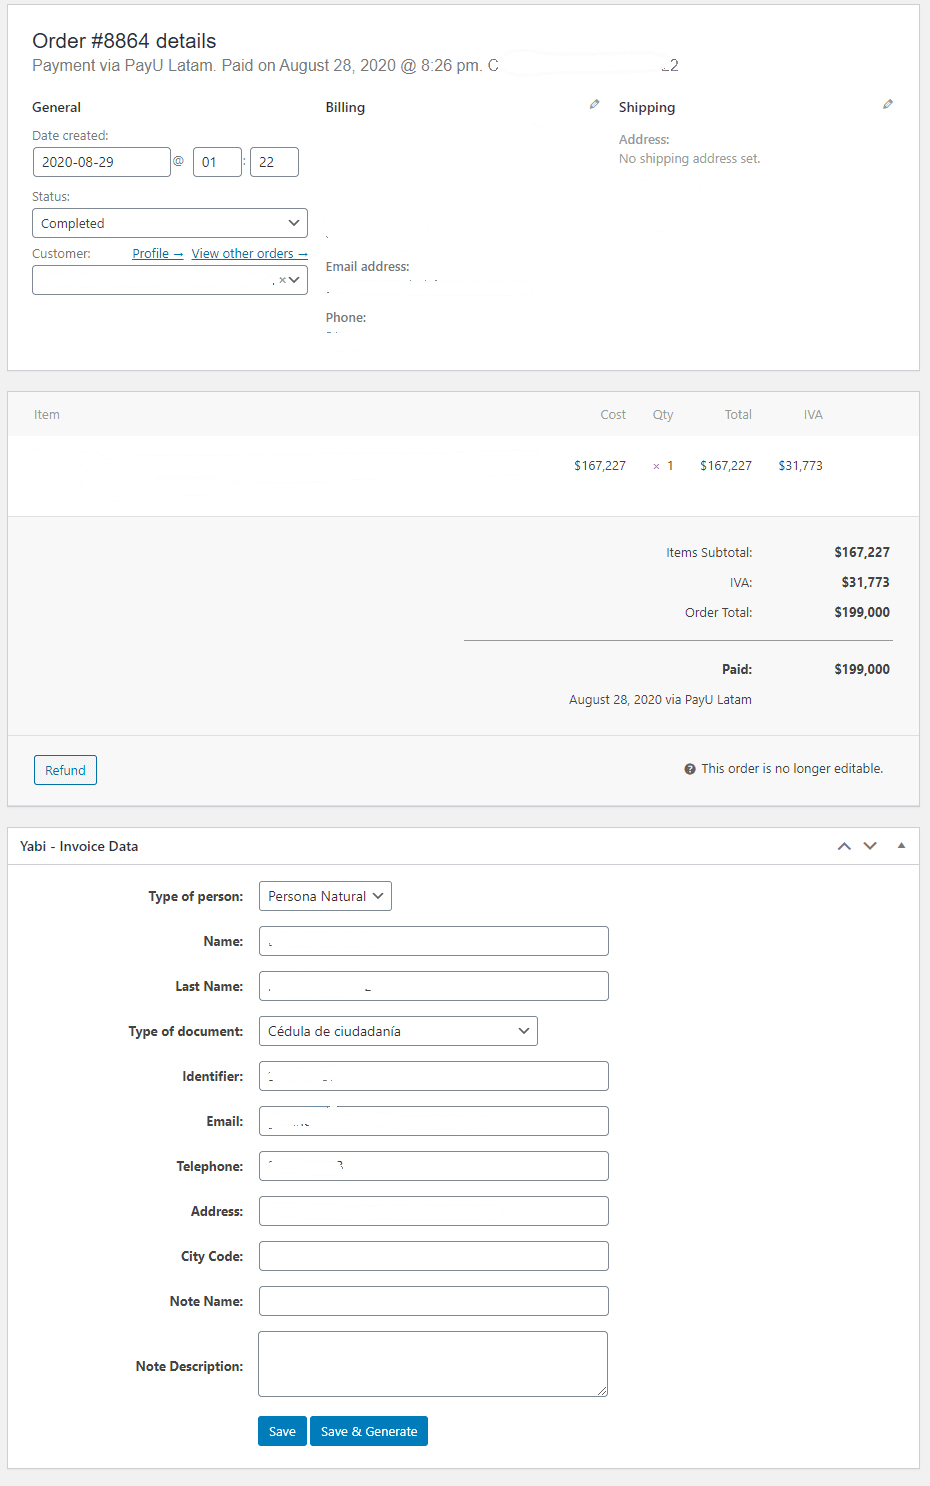
- Configure customer type (natural person or company).
- Add invoice notes and shipping fees.
- Debugging options and detailed error logs.
- Compatible with WooCommerce checkout fields.
- Field validation to avoid formatting errors.
- Fully supports the latest versions of WordPress and PHP.
安装:
- Upload the plugin folder to
/wp-content/plugins/\ OR install it directly from the WordPress dashboard. - Activate the plugin from Plugins > Installed Plugins.
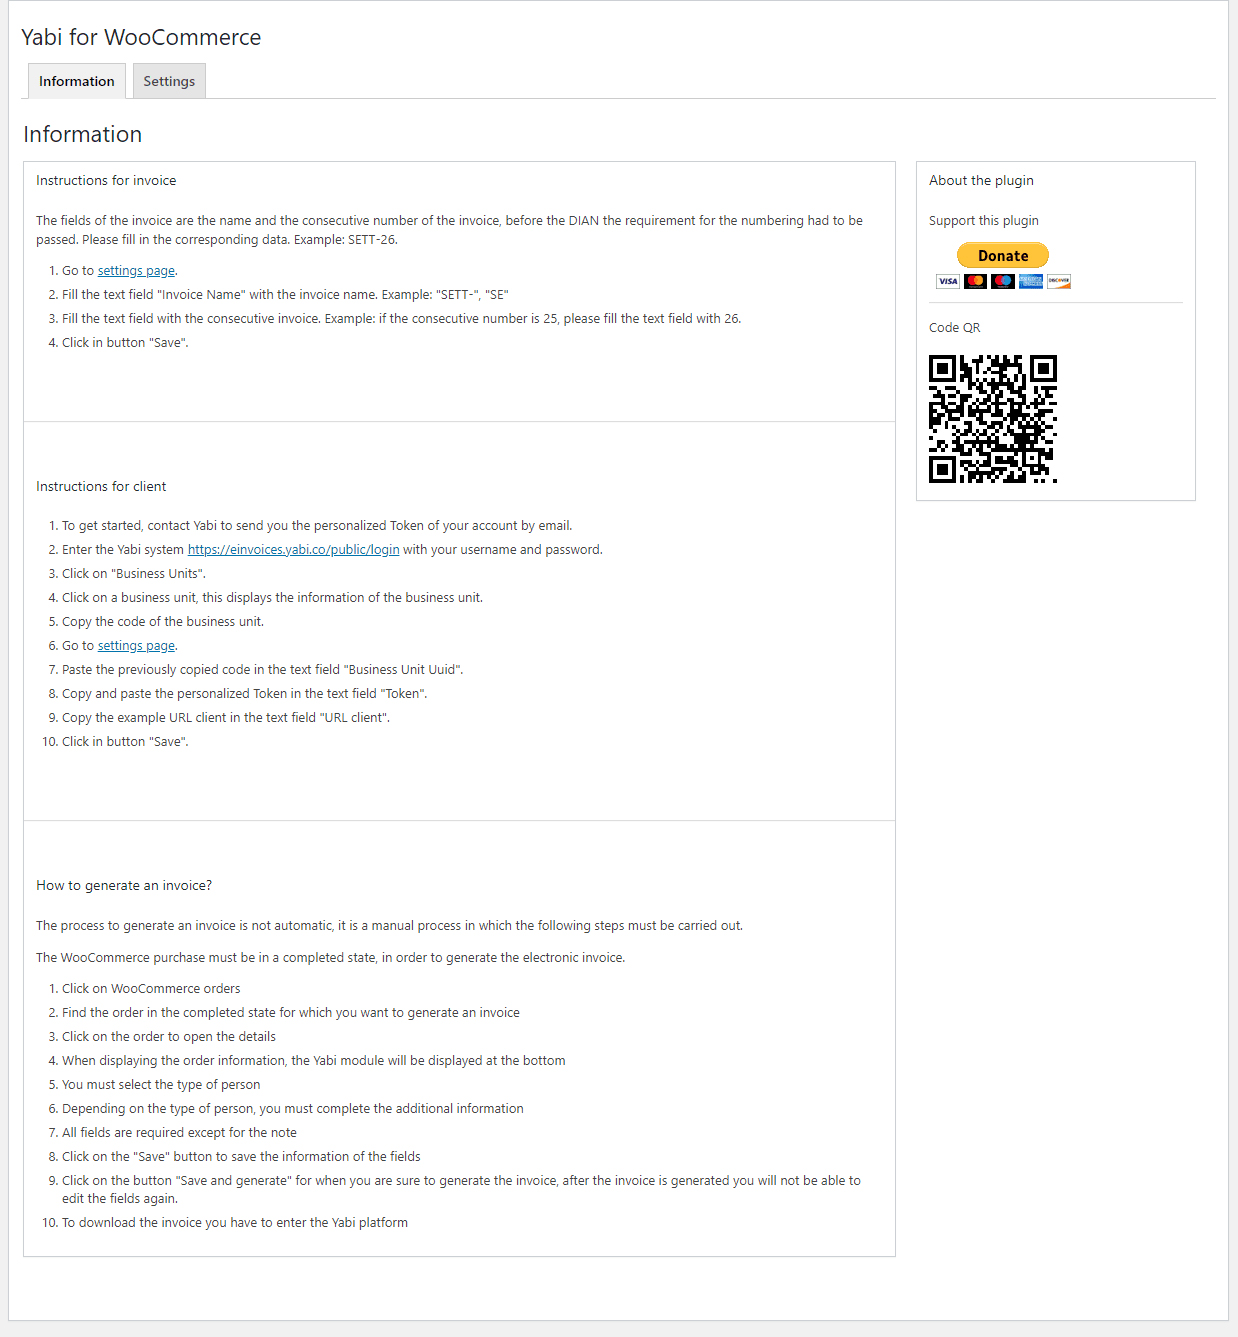
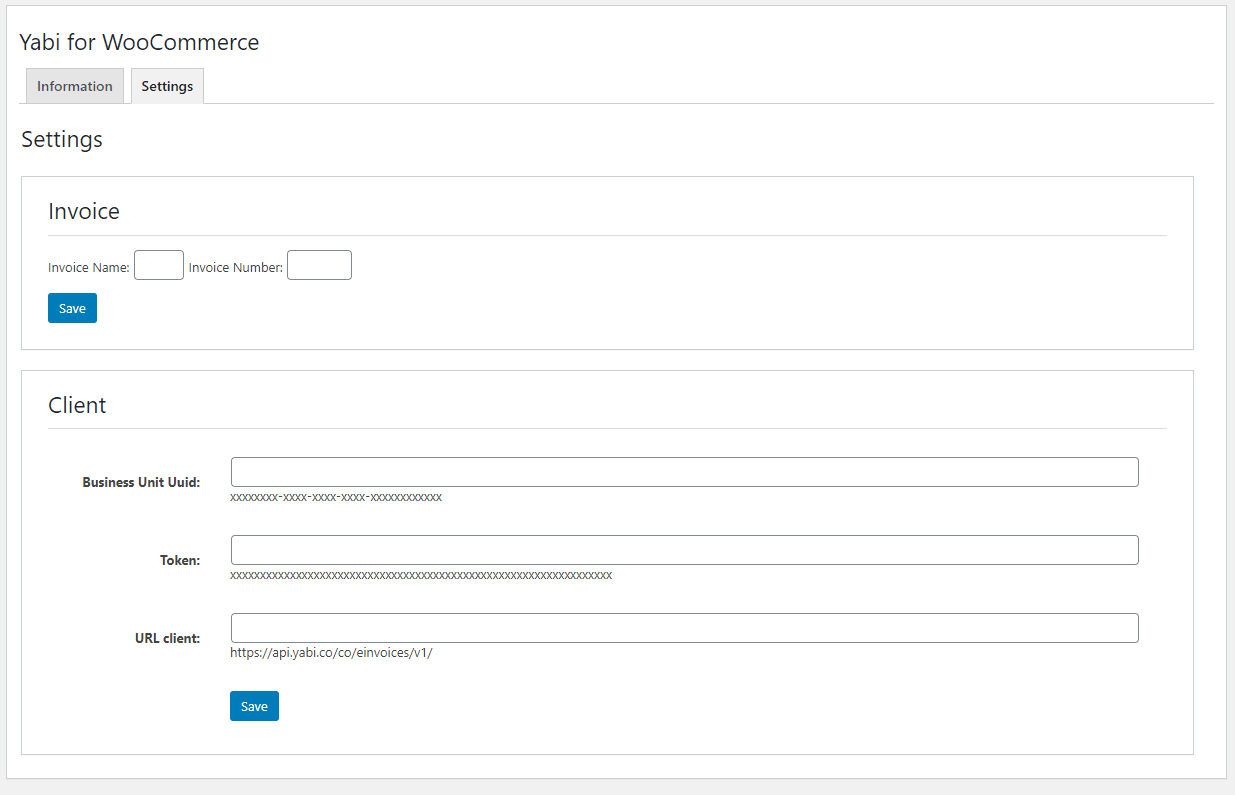
- Go to Settings > Yabi Invoicing to configure:
- API keys
- Company information
- DIAN resolution
- Optional: credit note settings
- (Optional) Connect WooCommerce fields for automatic invoice generation.
屏幕截图:
常见问题:
What is Yabi?
Yabi is an electronic invoicing platform certified by DIAN (Colombia).\ This plugin allows WordPress to generate DIAN-compliant invoices using your Yabi account.
Does it work without WooCommerce?
Yes. The plugin can work independently or integrated with WooCommerce.
Can I generate credit notes?
Yes. Credit notes can be created, reviewed, and associated with the original invoice.
Does it create invoices automatically?
If WooCommerce is installed, invoices can be generated automatically after checkout.\ You can also create them manually.
Does it support DIAN resolution updates?
Yes. The plugin synchronizes DIAN resolutions through the Yabi API.
Is debugging available?
Yes. You can enable extended logging to diagnose communication issues with Yabi.
更新日志:
4.0.2
- Tested and confirmed compatible with WordPress 6.9.
- Added YABI_VERSION constant; replaced hardcoded version strings in asset enqueues.
- Applied sanitize_key() to $_GET['tab'] input (WP Coding Standards).
- Applied esc_html__() and wp_kses_post() in admin notices for proper output escaping.
- Fixed name and surname duplication issue in invoices.
- Improved handling of first and second names/surnames when WooCommerce fields contain multiple words.
- Names and surnames are now properly split to avoid sending duplicate data to the Yabi API.
- New module to void invoices.
- Added tools to obtain data for integration with other systems.
- New credit note module: create, review, and link with the company.
- Tested and confirmed compatible with WordPress 6.9.
- Code review for WP 6.9 compatibility.
- Tested with latest version of WordPress.
- Added synchronization of DIAN resolutions for Yabi.co.
- Added option to associate a prefix with an organizational unit.
- Added option to resend email to the registered address or the new one entered on the document.
- Added validation to the identifier field: it must contain a positive number with at least 5 digits.
- Fixed display of older versions.
- Updated required PHP version.
- Fixed PHP notice about undefined array key when installing for the first time.
- Fixed undefined array key PHP notice.
- Fixed field positions and names in the interface.
- Major reimplementation of the plugin; now includes credit note handling and structural improvements.
- Enabled the field to write the connection URL for Yabi.
- Updated to Yabi version 2.0.
- Tested with the latest version of WordPress.
- Improved error reporting and database saving changes for debugging.
- Tested with the latest version of WordPress.
- Shipping price is now considered in the invoice.
- Tested with the latest version of WordPress.
- Added option to configure the account as a natural person or a company; invoices are generated accordingly.
- Fixed decimal handling issue in discount coupons.
- Added invoice notes.
- Discount coupon validation.
- Removed
taxschemefield; it is no longer required.
- Added dropdown to select city code.
- Changed default tax level code for natural persons.
- Updated to Yabi version 1.8.
- Changed numeric variables to strings to avoid formatting issues.
- Increased timeout due to delays on Yabi servers.
- Fixed decimal number issue when purchasing more than one item.
- Initial release.