Wise Chat
| 开发者 | marcin.lawrowski |
|---|---|
| 更新时间 | 2025年6月4日 04:12 |
| 捐献地址: | 去捐款 |
| PHP版本: | 5.2.0 及以上 |
| WordPress版本: | 6.7.1 |
| 版权: | LGPLv2 |
| 版权网址: | 版权信息 |
标签
下载
详情介绍:
- Easy setup and configuration
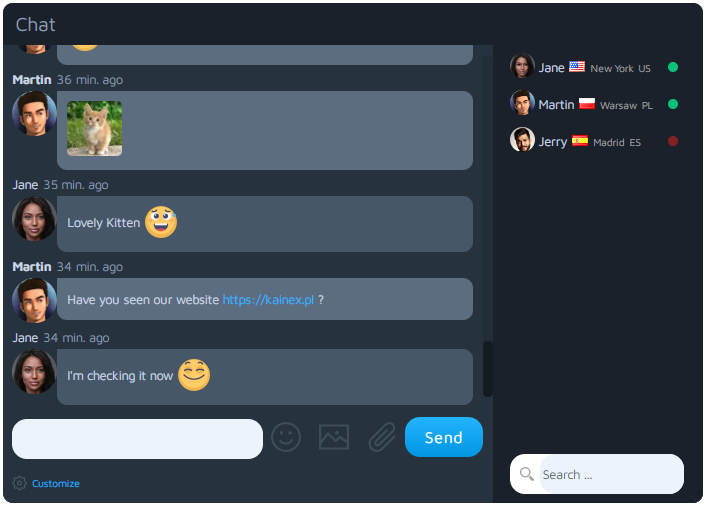
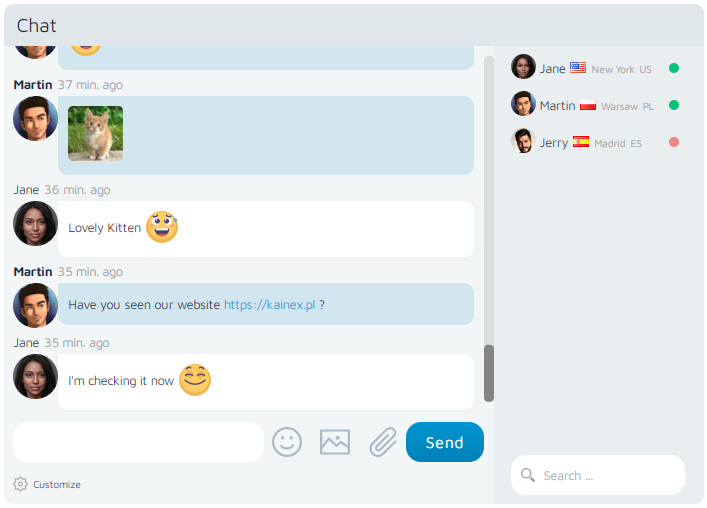
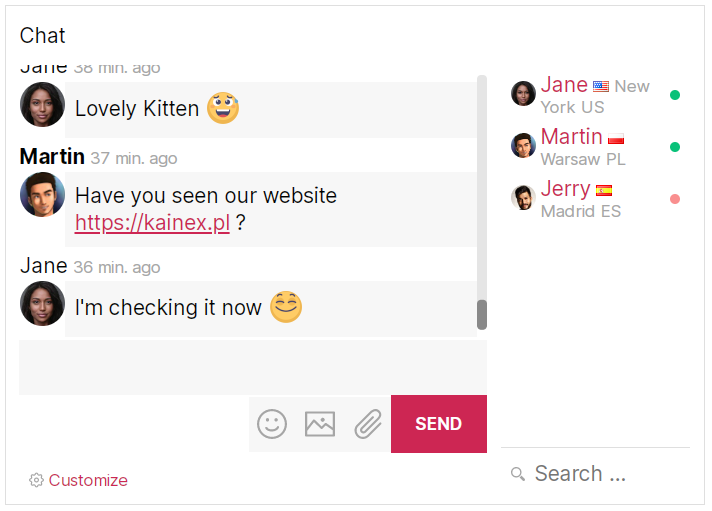
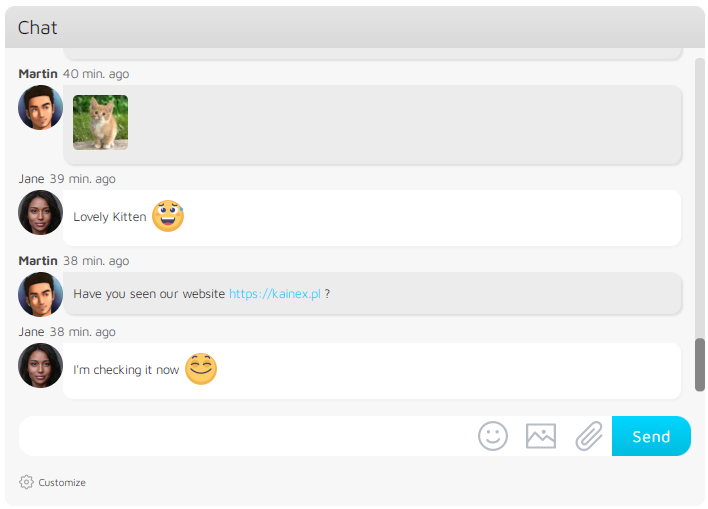
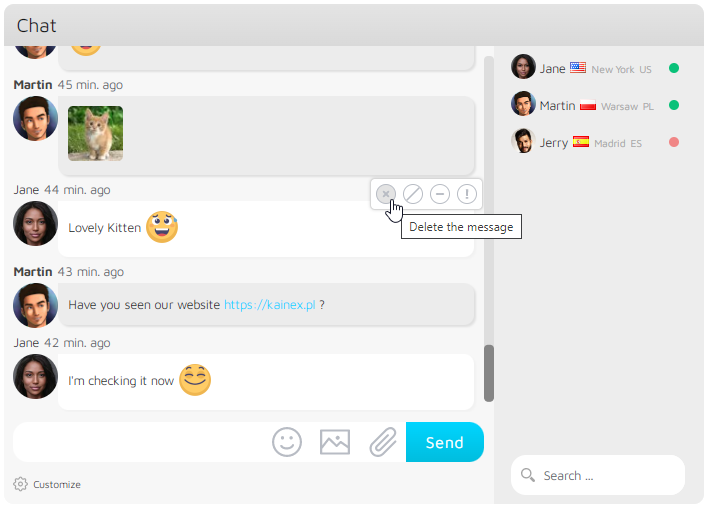
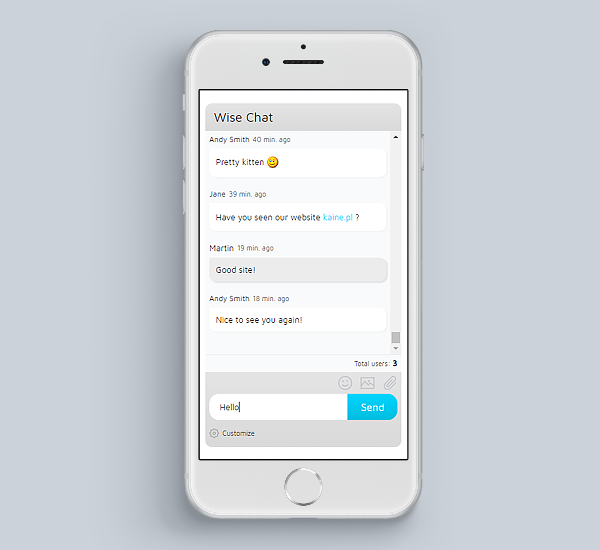
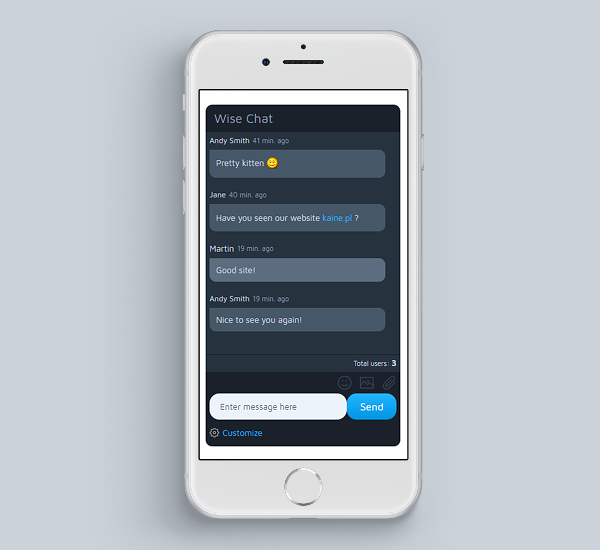
- Themes, appearance adjustments, mobile friendly
- No external server required
- Elementor and Gutenberg integration
- Unlimited number of channels and users, password-protected channels
- WordPress users, anonymous users, single sign-on
- Read-only mode, access control, moderation, opening hours
- Banning and muting users
- Flood Control, bad words filter, spam reporting
- Posting links, images, camera pictures, files, emoticons, YT videos
- Localization and backups
- OpenAI Integration
- GPT Assistants
- AI Chat Bots
- All features of Wise Chat Pro
- Premium support and free updates for 6/12/18 months (depending on the option) Check Wise Chat PRO:
- Private one-to-one chats
- Facebook/Twitter/G+ login
- Video calls
- Voice messages
- Avatars
- Tenor GIFs
- Reactions (liking chat messages)
- Facebook-like sidebar mode
- Pro themes
- Custom emoticons and 3 use pre-defined sets
- E-mail notifications
- Pending messages (full moderation)
- Multisite support
- BuddyPress/Gutenberg/Elementor integration
- Edit and reply to messages
- Hooks
- Premium support and free updates for 6/12/18 months (depending on the option) Check Wise Chat LIVE:
- Customizable live chat widget
- Incoming chats management page
- Multiple operators
- All features of Wise Chat Pro
- Premium support and free updates for 6/12/18 months (depending on the option) Buy once, use forever, no subscription, no recurring payments!
- Easy installation: Install the chat using a shortcode, widget or PHP function.
- Mobile ready: Fully responsive design.
- Themes: Use one of 4 nice themes.
- No external server required: There is no need to set up, maintain or pay for a server. Regular hosting is sufficient.
- Unlimited Chat Channels: Let people post messages in dedicated chat rooms (called channels). Run multiple channels either simultaneously on the same page or on separate pages.
- Private Chat Channels: Make individual chat channels private by protecting them with a password. Only users that know the password could access the channel.
- Channels management: Remove all messages from the single channel or delete the channel completely.
- Anonymous Users: Unregistered or anonymous users can be allowed to participate in the chat. Auto-generated name (configurable) is assigned to such user.
- Anonymous Users with custom name: Let users to choose their name when they visit the chat for the first time.
- Registered Users: Registered and logged-in users are properly recognized by the plugin.
- Single sign-on: No separate login to the chat is required. If an user is logged-in to your website, then the chat automatically logs her / him in.
- Read-only mode: Make the chat read-only for anonymous users. Encourage your users to register in order to post messages.
- Users limit in channels: Limit the amount of users allowed to participate in a channel.
- Channels limit for an user: Limit the amount of channels that an user can participate simultaneously.
- User settings: Chat users have options to change their name, color of their messages or mute sounds generated by the chat.
- Restrict access: Option to permit access for registered and logged-in users only.
- Flood Control: Detect spammers and block them from posting messages in the chat.
- Posting links and images: Option to allow clickable links and images. Posted images are downloaded into Media Library.
- Pictures from camera: On mobile devices users can take a picture directly and post it with a message.
- YouTube movies: Display links to YouTube movies as a video player with adjustable width and height.
- File attachments: Attach files directly to the messages using convenient uploader.
- Multiline messages: Let your users post long messages in multiple lines. Keyboard shortcut Shift+Enter can be used to send such messages.
- Notifications: Signal new messages, new users, absent users or mentioned users. It can be a sound or a counter in browser's title.
- 24 sounds: Use any of 24 ready-to-use notification sounds.
- Messages auto cleanup: Auto cleanup messages older than defined amount of time.
- Localization: Translate the chat to your language.
- Appearance adjustments: Adjust visual appearance on the settings page.
- Chat Moderation: Protect your chat by enabling abusive words control using built-in bad words filter. It supports English, Polish and German languages.
- Messages filtering: Create rules that detect and replace specific words / patterns in posted messages.
- Chat Opening Hours / Days: Define days and range of hours when the chat is open for users.
- Spam Reporting: Chat participants can report spam messages.
- Bans: Administrator can ban (IP based) users who do not follow rules of the chat.
- Muting: Administrator can mute (IP based) users who do not follow rules of the chat.
- Automatic bans: An option that automatically blocks an user if he / she exceeds the defined number of bad words.
- Moderation: Administrators (or other specified user roles) can delete single messages or ban users that violate chat rules.
- Emoticons: See nice smiles in messages by enabling emoticons support. Emoticons can be inserted either using shortcuts or the list.
- Custom CSS: Custom CSS styles can be applied for each element of the chat.
- Channels statistics: Observe various statistics of channels, including amount of posted messages or users online.
- Detailed configuration page: All features can be configured on the settings page (see the screenshots). You can control messages posting, appearance, channels statistics, filters, bans and localization.
- Twitter hash tags: Detecting Twitter hash tags and converting them into links.
- List of current users: Show the list of online users and their national flag / country / city of origin in the sidebar of the chat. Display amount of online users.
- Backups: Backup all messages from given channel by downloading them as a single CSV file.
Settings -> Wise Chat Settings page.
List of PRO features:
- Private one-to-one messages: Let your users talk to each other in private conversations. Each user has also an option to ignore messages from unwanted users.
- Private messages to offline users: Send private messages to offline users.
- Video calls: Video one-to-one calls.
- Voice chats: Publish voice messages.
- Messages reactions: Liking messages.
- Facebook-like mode: Display the chat attached to the right side of the browser.
- Avatars: Display avatars both in the chat window and in the users list.
- BuddyPress integration: Integrate Wise Chat Pro with BuddyPress friends and groups. Give moderator rights to delete messages or ban users.
- Custom emoticons: Compose your own set of emoticons.
- Facebook / Twitter / Google+ authentication: Increase range of potential users by allowing them to log in using their accounts on social networking sites like Facebook, Twitter or Google+
- Multisite support: Wise Chat Pro supports WordPress multisite environment.
- E-mail notifications: Configure notifications sent to admin or chat participants.
- Pro themes: Use one of 3 extra modern looking Pro themes.
- Hooks: Add your own code to the main points of the chat’s logic.
- Pending messages: Set up full moderation which allows to publish approved messages only.
- Users list search option: Search users list.
- Reply or edit posted messages: Modify or reply to posted messages.
- One-time payment: Pay once and use it forever.
- 6 / 12 / 18 - month upgrade: Update your Wise Chat Pro to the new version for free during 6 / 12 / 18 - month period after the purchase. Check Wise Chat Pro ! Move customer engagement to the higher level!
安装:
- PHP >= 5.3.0
- openssl module for PHP (in most cases it is already installed)
- dom module for PHP (in most cases it is already installed)
- jQuery JS library (available in most themes)
- Exif PHP extension (in order to run auto-rotate feature for posted images)
- mbstring PHP extension (in order to use all features of the bad words filter)
- Lightbox 2 library (for showing images in the nice looking popup)
- Upload the entire wise-chat folder to the plugins directory (usually
/wp-content/plugins/) of WordPress instance. - 通过 WordPress 的“插件”菜单激活插件。
- Place a shortcode
[wise-chat]in your posts or pages. See below for details. - Alternatively install it in your templates via
<?php if (function_exists('wise_chat')) { wise_chat(); } ?>code. - Alternatively install it using dedicated widget in
Appearance -> Widgets, it's calledWise Chat Window. See below for details.
- After installation go to Settings -> Wise Chat Settings page, select Localization tab and translate all the messages into your language.
- Posting pictures from camera / local storage is limited to the specific range of Web browsers. See FAQ for details.
Appearance -> Widgets and add Wise Chat Window widget to the sidebar. In the widget's settings you can specify:
- Channel: It is the name of the channel to open in the chat window. Channel is created on first use.
- Shortcode options: It is a space-separated list of options that configures Wise Chat. All shortcode attributes could be used here, type for example
theme="colddark" show_users="0"in order to choose Cold Dark theme and disable list of users.
[wise-chat]
It will open chat window on the default channel called "global". If you would like to open the chat on custom channel called "My Room" try this:
[wise-chat channel="My Room"]
The shortcode can be configured with the list of attributes, for example – in order to enable Cold Dark theme and to show list of users you can type:
[wise-chat theme="colddark" show_users="1"]
Almost all settings available on plugin's settings page are also available in shortcode. For full documentation of the shortcode visit the website:
Shortcode documentation屏幕截图:
常见问题:
How to create a channel and open it?
Place the following short code in your page or post:
[wise-chat channel="My Chat Room"]
or add this PHP snippet in a template file:
<?php if (function_exists('wise_chat')) { wise_chat('My Chat Room'); } ?>
or put "Wise Chat Window" widget on the desired sidebar and set the desired channel name in Channel field.
The channel will be created during the first usage and it will be added to the list of channels on Wise Chat Settings page in the Channels tab.
I see "Loading the chat ..." and the chat does not show up. What is wrong?
It means that the chat cannot start due to some errors. First, please try to check JS Console (in Chrome of Firefox) in search for any error message. Then please try to fix them. If an error comes from Wise Chat then please let us know it. We will do our best to help you. Otherwise please contact the support of other plugins / themes that you suspect are causing issues. After fixing all errors in the JS Console the chat should start properly. If you do not see any errors in the console then please try to disable any security plugin you use. They may be blocking the connection between the chat and your server. After finding a plugin that is blocking the chat try to add an exception to it. Basically, security plugins should avoid this particular URL: https://yourdomain/wp-content/plugins/wise-chat/src/endpoints You may also read this doc. = I have iThemes Security plugin and Wise Chat does not work. How to fix it? Short answer: WP Dashboard > Security > Settings > Advanced > System Tweaks and uncheck "Disable PHP in Plugins". Then click Save button. Advanced answer: Edit .htaccess file and locate "#Disable PHP in Plugins - Security > Settings > System Tweaks > PHP in Plugins" line. Then add a line of code: RewriteCond %{REQUEST_URI} !/wp-content/plugins/wise-chat/.*$ [NC] RewriteRule ^wp-content/plugins/.*.(?:php[1-7]?|pht|phtml?|phps).?$ - [NC,F,L] Less recommended approach: WP Dashboard -> Settings -> Wise Chat Settings -> AJAX Engine and set to Default. This solution is less efficient. Explanation: Wise Chat executes PHP files directly in /wp-content/plugins/wise-chat/src/endpoints/ultra directory. It is done strictly for performance because the standard admin-ajax.php endpoint is too slow.
How to give access to Wise Chat Settings page to other user roles?
Please add 'manage_wise_chat_option' capability to any user role you wish to grant access to Wise Chat Settings page to. By default only administrators have access to this page.
My messages are not visible until I refresh the page. What is going on?
In order to get new messages the chat is requesting the following URL: https://yourdomain/wp-content/plugins/wise-chat/src/endpoints It is very likely the URL is is forbidden in your setup (403 error). It may be caused by a security plugin or theme. A specific configuration of HTTP server (.htaccess file or server settings) may be the reason too. Please ask your server administrator to make the URL accessible. You may also read this doc.
How to create a password-protected private channel?
First, create a regular channel (see the previous question) and then go to Settings -> Wise Chat Settings page, select Channels tab. In the right to the chosen channel click "Password" link and a form will appear below. Specify the password and confirm it by clicking "Set Password" button. From now the channel is secured and only users that enter valid password are allowed to join.
How to convert a password-protected channel into an open channel?
Go to Settings -> Wise Chat Settings page, select Channels tab. In the right to the chosen channel click "Password" link and a form will appear below. Click "Delete Password" button.
How to install the chat using a widget?
Go to Appearance -> Widgets page, drag and drop "Wise Chat Window" widget on the desired sidebar. The name of the channel can be specified as well.
I can't see translation for my language. How to localize the chat for end-user?
You can do it by yourself. Go to Settings -> Wise Chat Settings page, select Localization tab and translate texts in each field into your own language. These are all texts that are exposed to end-users.
What about the support for mobile devices and responsiveness?
Wise Chat plugin works on any mobile device that supports Javascript and cookies. The interface is responsive, but you should enable submit button in order an user could send a message. Go to Settings -> Wise Chat Settings page, select Appearance tab and select checkbox "Show Submit Button".
The chat generates anonymous names for every new user. How to force every user to choose their name on first use?
You can enable a form that appears every time a new user tries to enter the chat. The form displays username field and allows to enter the chat only if the user type his/her name. Settings -> Wise Chat Settings page, select General tab and select option "Force Username Selection".
How does the bad words filter work?
The plugin has its own implementation of bad words filtering mechanism. Currently it supports three languages: English, Polish and German. It is turned on by default. It detects not only simple words but also variations of words like: "H.a.c_ki.n_g" (assuming that "hacking" is a bad word).
How to mute user? It prevents users from posting messages
Log in as an administrator and go to Settings -> Wise Chat Settings page, select Moderation tab. Enable "Mute Action" option next to the user role you want to add a permission to mute users to. Go to the chat page. When you move the cursor over a message you will see mute button. This will mute the user who posted the message for 1 day. Alternatively, you can go to Settings -> Wise Chat Settings page, select Muted Users tab. In "Mute IP" row specify: IP address, duration and finally click "Mute IP" button.
How to get the list of muted users?
Go to Settings -> Wise Chat Settings page and select Muted Users tab.
How to stop muting user?
Go to Settings -> Wise Chat Settings page, select Muted Users tab and then delete the desired user from the list.
How to ban users? It prevents users from accessing the chat
Log in as an administrator and go to Settings -> Wise Chat Settings page, select Moderation tab. Enable "Ban Action" option next to the user role you want to add a permission to ban users to. Go to the chat page. When you move the cursor over a message you will see ban button. This will ban the user who posted the message. Alternatively, you can go to Settings -> Wise Chat Settings page and select Banned Users tab. In "Ban IP" row specify the IP address and click "Ban IP" button.
How to get the list of banned users?
Log in as an administrator, go to Settings -> Wise Chat Settings page and select Banned Users tab.
How to remove a banned IP address?
Log in as an administrator, go to Settings -> Wise Chat Settings page, select Banned Users tab and then delete the desired IP address from the list.
How to get some information (e.g. IP address) about an user?
Log in as an administrator and type the command:
/whois [UserName]
where "UserName" is the chosen user's name.
How to prevent from accessing the chat by anonymous users?
Go to Settings -> Wise Chat Settings page, select General tab and check "Disable Anonymous Users" option. From now a visitor has to be logged in as a regular WordPress user in order to access the chat.
How does auto-mute feature work?
There is a counter for each user. Every time an user types a bad word in a message the counter is increased. If it reaches the threshold (by default set to 3) the user is muted for 1 day (the duration is configurable).
How to delete a single message from the channel?
Log in as an administrator. Go to Settings -> Wise Chat Settings, select Moderation tab and enable "Delete Action" option next to the user role you want to add a permission to delete messages to. Go to the chat page. When you move the cursor over a message you will see delete button. This will delete the message. Alternatively: add "wise_chat_delete_message" capability to a role you want to have that permission. It could be either standard WordPress role or a custom role.
How does "Enable Images" option actually work?
If you enable "Enable Images" option every link posted in the chat which points to an image will be converted into image. The image will be downloaded into Media Library and then displayed on the chat window. Those downloaded images will be removed from Media Library together with the related chat messages (either when removing all messages or a single one). If an image cannot be downloaded the regular link is displayed instead.
Option "Enable Images" does not work. I see regular hyperlinks instead of images. What is wrong?
The option requires a few prerequisites in order to operate correctly: GD and Curl extensions must be installed, Media Library must operate correctly, posted image link must have a valid extension (jpg, jpeg, gif or png), HTTP status code of the response must be equal 200, image cannot be larger than 3MB (the default limit that can be adjusted in settings). Try to read PHP logs in case of any problems.
What if I would like the images to be opened in a popup layer using Lightbox?
By default all images open using Lightbox 2 library but only if the library is installed within current theme or a dedicated plugin. Without Lightbox 2 each image opens in the new tab / window. = I have installed a plugin containing Lightbox library and newly added messages are not displayed on the Lightbox layer. What is wrong? If you installed a plugin that incorporates Lightbox library and it still doesn't work make sure that the plugin uses original Lightbox 2 Javascript library. The chat is compatible only with the original Lightbox 2 library.
Image uploader does not work. What is wrong?
Uploading of images is supported in the following Web browsers: IE 10+, Firefox 31+, Chrome 31+, Safari 7+, Opera 27+, iOS Safari 7.1+, Android Browser 4.1+, Chrome For Android 41+.
How to replace specific phrase in every message posted by users?
You can use filters feature. Go to Settings -> Wise Chat Settings, select Filters tab and add new filter. From now each occurrence of the phrase will be replaced by the defined text in every message that is posted to any chat channel.
Wise Chat plugin is making a lot of HTTP requests. How to improve the performance?
Every few seconds the plugin checks for new messages using AJAX requests. Please check this article for details.
How to customize CSS styles using "Custom CSS Styles" setting?
All CSS classes related to the chat begins with "wc" prefix. Go to Settings -> Wise Chat Settings, select Appearance tab, go to Advanced Customization section. Use "Custom CSS Styles" field to specifiy your own definitions of Wise Chat CSS classes. Valid CSS syntax is required.
How to backup messages posted in a channel? I would like to save all messages for offline reading.
Go to Settings -> Wise Chat Settings, select Channels tab and click "Backup" link next to the desired channel. All messages from the selected channel will be downloaded as a CSV file. You can open it using MS Excel, OpenOffice or any other editor that supports CSV format.
Are old messages being deleted from the chat window?
By default - no, however, you can enable auto-cleaning messages feature. Go to Settings -> Wise Chat Settings, select Channels tab. In the field "Auto-remove Messages" type number of minutes. Messages older than given amount of minutes will be auto-deleted.
How to limit the amount of users that are allowed to enter a channel?
Go to Settings -> Wise Chat Settings, select Channels tab. In the field "Users Limit" type number of users that allow to participate in a channel.
How to reset username prefix (a number that is added to anonymous users name) anonymous users?
Go to Settings -> Wise Chat Settings, select Advanced tab and click "Reset Username Prefix" button.
When I upload an animated GIF the thumbnail is not animated. What is wrong?
WordPress has no support for resizing animated GIFs.
Why I can change the background color of the chat window, but I cannot change the background color of the input field, buttons or borders?
It is impossible to provide options to customize every aspect of user interface. Please use CSS styles to adjust styles to your needs.
I have uploaded a picture with incorrect orientation and the plugin did not corrected it. What is wrong?
Plugin detects EXIF data in images. If an image doesn't have this data then nothing will happen. If EXIF data indicates that the orientation is correct then also nothing will happen.
I am experiencing errors like "Fatal error: Call to undefined function openssl_pkey_get_public() (...)". What is wrong?
Make sure that openssl extension for your PHP installation is loaded and works correctly. In most cases these errors are caused by missing openssl module.
How to send messages using just keyboard in multiline mode?
After you type a message use the key combination: Shift + ENTER
更新日志:
- Security improvements
- Security: prevent listing directories with uploaded images or attachments (improvement)
- Security: prevent listing directories with uploaded images or attachments
- Fixed: breaking the site with Elementor installed
- Fixed: no channel open message
- Private messages
- Multiple public channels (up to 3)
- Multisite support
- Added Gold engine (auto-activated on new setups)
- Added engines diagnostics
- Added option to output the chat in full screen
- Improvements to engines
- Managing the chat's settings by any user role with 'manage_wise_chat_option' capability, admins have this capability by default
- Fixed: issue with setting height to YT videos
- Fixed: issues with inserting Chinese characters on mobile devices (like iPhone)
- Fixed: chat stopped working after WordPress 6.3.2 upgrade
- Added option to choose images viewer
- Added option to output video attachments (mp4 and webm) as video players and sound attachments (mp3 and wav) as sound players
- JS files cleanup
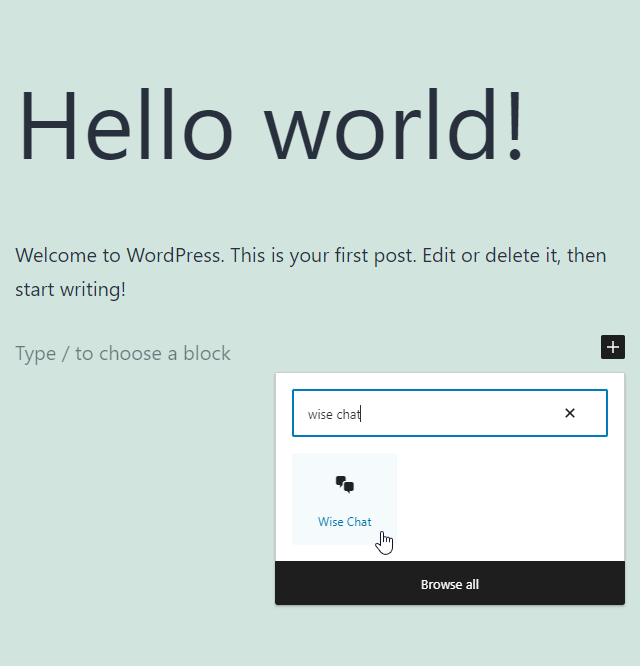
- Added "Wise Chat" block to easy add chats to pages using WordPress Gutenberg editor
- Fixed: CSRF on the settings page
- Moved Google fonts to local assets
- Option to mute the sounds by default
- Fixed: auto-scroll issues
- Fixed: the chat disappears when posting utf8 characters in links
- Fixed: 'Missing required fields' error when inserting an emoji
- Fixed: PHP 8.1 errors and warnings
- Fixed: Warning: Undefined array key "show_avatars"
- Fixed: DOMDocument::loadHTML(): Argument #1 ($source) must not be empty
- Fixed: PHP Warning: Undefined array key "channel"
- Fixed: no new message sound
- Loading past messages when scrolled to the end
- Chat opening hours - switched to WordPress timezone
- Elementor integration
- Added option to hide tabs in the mobile version
- Fixed: removed "Channel" text from the title in mobile mode
- Plugin re-implemented to new code
- New mobile version
- Refreshed all themes
- Full support of caching / proxy plugins and servers
- 100% height support
- Deleting own messages option
- Renamed bans to muted, kicks to bans
- Custom scrollbars
- Online / offline users
- Avatars
- Emoticons visible while typing
- New set of emoticons
- Emoticons sizes
- Fixed: error "Function openssl_free_key() is deprecated"
- Tested on WordPress 6.0
- Fixed: username duplication error despite disabled checking
- PHP8 updates
- Removed duplicated emoticons
- Tests on the latest WordPress
- Added German bad words dictionary
- Fixed: jQuery error in some WordPress setups
- Fixed: 403 error when saving the settings (this was caused by Imunify360 rule #77142267)
- Fixed: Notice: Undefined index: SERVER_ADDR
- Fixed: 403 error when saving the settings
- Fixed: Notice: Trying to access array offset on value of type int in /wp-content/plugins/wise-chat/src/WiseChatOptions.php
- Fixed: PHP Warning: Cannot modify header information - headers already sent in /wp-content/plugins/wise-chat/src/dao/user/WiseChatUserSettingsDAO.php
- Fixed: added missing translation files
- Added WordPress translations support
- Fixed: sending wcUserSettings cookie only if necessary
- Fixed: restored deleted AJAX Engine option in Advanced settings
- Switched user session handling to cookies (remembering users for a long time)
- Performance optimization: removed PHP session usage
- Fixed: Error: cURL error 28: Operation timed out after 10001 milliseconds with 0 bytes received
- Fixed: auto-scroll issue
- Fixed: PHP Deprecated: session.php error
- Fixed: CSV Injection
- Fixed: > / < characters issues in the users list
- Fixed: {% if allowToReceiveMessages %} errors caused by template processing class
- Fixed: no message when posting emojis (messages table converted from utf8 to utf8mb4)
- Fixed: links errors in multiline messages
- Fixed: images uploading error: Call to undefined function filter_block_content
- Fixed: stopped /wp-content/plugins hard-coding
- Fixed: stopped /tmp directory hard-coding
- Tested on WordPress 5.3
- Major update of all 4 themes
- Improved: Moved Javascript code to the footer
- Spam report button
- Improved: W3C issues
- Improved: admin action buttons without direct img elements
- Fixed: security issue with the external links
- Option to adjust date and time format in messages
- Option to adjust lock time of user names
- Fixed: error in WiseChatRenderer
- Option to disable user names duplication check
- Removed ad footer
- Source files tags update
- Kicking users
- Changed default settings to reflect richer interface
- Option to reset all settings to default
- Fixed: text color by roles when username is linked
- A new theme: "Air Flow"
- "Wise Chat Channel Users" widget for displaying current users
- Option to set username color for each user role separately
- Option to set limit to the length of user names
- Reloading page after sending valid POST forms on Force Username and Channel Password screens
- Settings page improvement - preserving current tab after saving settings
- Fixed: choosing text color issues
- Fixed: text input width on Force Username and Channel Password screens
- Fixed: image uploader preview issue on Chrome
- New engine "Ultra Lightweight AJAX" which consumes 5 times less CPU
- Less frequent maintenance actions which means less CPU usage
- Option to display message and username in the same line
- Better displaying emoticons panel on mobile devices
- Option to enable / disable displaying errors to chat users
- Fixed: issue with broken menu on Wise Chat Pro settings page, this blocked navigation between settings sections
- Fixed: issues with setting background colors
- Option to pass more complex configuration in shortcode, for example: [wise-chat opening_hours="{opening: 8:30, openingMode: AM, closing: 8:32, closingMode: AM }" enable_opening_control="1" opening_days="{ Monday,Tuesday}"]
- Option to select which parts of a message are effected when user changes text color
- Option to exclude anonymous users from the counter calculation
- Set validity time on AJAX internal requests (preventing indexation by Web crawlers)
- Option to verify "X-Requested-With" header in AJAX requests
- Fixed: valid content type (application/json) for content returned for AJAX requests
- Fixed: unclickable image upload button on some themes
- Fixed: error with uploading images on WordPress 4.7
- Fixed: switched to JSON content type for AJAX requests (this may prevent from indexing raw data by Google)
- Fixed: error with uploading PNG files when EXIF extension is available
- Fixed: invalid encoding of UTF-8 characters in localized texts
- Fixed: the plugin cannot be deleted in WordPress 4.6 and above
- Fixed: bug in emoticons posting
- Option to pass simple arrays in shortcode, array format: {element1,element2,...,elementN}
- Option to generate a sound when user is mentioned using @UserName notation
- Added 20 new sounds to use in notifications
- Option to enable a sound notification when user joins or leaves the channel
- "User has joined/left the channel" notifications
- Shift+ENTER moves the cursor to the new line in multiline mode, ENTER sends the message
- Fixed: unwanted emoticons displayed after double quote
- Fixed: errors with sending images when there is no Exif PHP module installed
- Fixed: jQuery up to version 3.1 is now supported
- Fixed: bug in "Powered by" feature
- Emoticons layer expands to the top
- Three new emoticon sets
- Debug mode option (easier to report errors)
- Option to select which user roles have to be hidden in the users list
- Allow to use extended range of letters (Unicode characters) in username
- Shift+ENTER moves to the new line in message input field (when multiline mode is not enabled)
- Fixed: anonymous users are sometimes on the users list when "WP users only" option is selected
- Fixed: logged in user becomes anonymous after some inactivity time (especially on mobile devices)
- Fixed: no scrollbar on users list
- Fixed: /whois command does not accept usernames with spaces, now such names can be typed in double quotes
- Clickable usernames on the users list
- Additional filter that allows to filter outgoing links
- Hiding anonymous users on the users list
- Option to give access to the chat for specific user roles only
- Option to make the chat read-only for selected user roles
- Option to give ban and/or delete permissions to each user role separately
- Option to auto-hide users list on the narrow screens
- Messages timestamp split to two spans - date and time
- Disabled horizontal scrollbar on users list
- Improved safety during deletion of images uploaded by the chat
- Fixed: word wrapping of the long messages
- Fixed: users list moves to the bottom on narrow screens
- Read-only mode for anonymous users
- Option to delete a channel on the channels list
- Option to show errors log (for support usage only)
- Option to display country flag, city and country code of users on the list
- Option allowing to mention someone - after username is clicked "@UserName:" text is inserted into message input field
- Auto-scroll on start-up
- Support for links in "youtu.be" format
- Added animation during auto-scroll
- Fixed: bugs after upgrade to WordPress 4.4
- Fixed: problem with auto-scroll when padding is set on .wcMessages div
- Fixed: error messages in case of connection problems
- Fixed: bug that caused lack of the text coloring in some cases
- Fixed bug with rendering chat shortcode
- most of the code has been rewritten, database structure has been changed significantly
- performance optimizations (on average 20-50%), less CPU usage
- option to force users to enter their name on first visit
- option to show a button that enables to insert an emoticon into message
- added options to set font size, font color and background color on various elements of the chat
- option for users to change text color (in Customize box)
- option to choose which user role can delete messages or ban users
- links to YouTube videos displayed as the video player
- images auto-correction of orientation (when EXIF data is available)
- progress bar when selecting an image (or taking a picture) to upload
- options to adjust images size limit, resizing dimensions, thumbnails dimensions
- option to adjust attachments size limit
- option to adjust width of the users list
- shift + enter sends message in multiline mode
- ban button next to delete message button
- option to set duration of the automatic bans
- option to set duration of the bans in flood control
- ability to pass all shortcode options to the widget
- added new shortcuts to few emoticons
- option to configure text to use as a replacement word in bad words filter
- improved mechanism of WPuser-message connection, link to WP users stays valid even if the display name has been changed
- completely new settings page
- technical improvements (switched to DI container)
- Lightweight AJAX engine is now the default (in fresh installation)
- fixed: auto-changing user name in all messages when WordPress user logs out
- fixed: scrolling on iPhone (Safari)
- private chat rooms (secured by password)
- channels limit for an user
- shortcode "wise-chat-channel-stats" displaying channel statistics
- option to hide time on messages
- option to display elapsed time in messages
- progress bar when sending messages with attachments or images
- attachments uploader
- usability enhancements
- new mechanism of assigning users to channels
- showing user name also for logged in users (a label above the input field)
- option to reset the counter used to generate anonymous username
- fixed: issues with custom configuration when using shortcodes
- fixed: auto-cleaning per channel (using shortcode only)
- fixed: issues with ping internal messages
- fixed: changing name of an user now refreshes it in all messages
- fixed: issues with opening hours control
- fixed: duplicated messages in some rare cases
- Custom CSS styles setting
- Checking for new messages right after sending a message (the delay eliminated)
- Messages backup feature (for each channel)
- Messages auto-clean after defined time
- /whois command for getting details of users
- Option to choose location of the input controls (input field, submit button, customizations panel): bottom or top
- Option to choose messages order: newest on the top or on the bottom
- More intelligent auto-scrolling of messages (scrolls only if scrollbar is on the bottom)
- New messages notification in browser's title when window is hidden
- New messages notification by playing a sound
- Flood control feature
- Additional "displayname" variable in user name link templates, "username" fixed to truly show user's name
- Chat opening hours / days
- Counter of current users
- Limit of users per channel
- Three themes
- Twitter hash tags support
- Custom filters (filtering texts, hyperlinks, e-mails and phrases that match a regular expressions)
- Chat window title
- Advanced configuration (AJAX engine and refresh time)
- Lightweight AJAX engine
- Posting images (stored in Media Library)
- Images uploader - posting pictures from camera (in case of mobile devices) or from local storage (in case of desktop)
- List of users in the side bar
- Flexible messages list on small devices
- Option to moderate channels by removing single messages
- Configurable width and height of the chat window
- Channels statistics on settings page, including message and active users counters
- User name to link conversion template
- Emoticons support
- Auto-ban feature
- Multiline messages support
- Messages history (using arrow keys) in input field
- Posting links in chat messages
- Linking WP user name to the author page
- Fixed bug with duplicated messages in chat window
- Message submit button
- Rearrangements of the settings page
- Language localization of end-user messages and texts
- Timezones support
- Access only for logged in WP users
- Wise Chat widget
- Option to allow unlogged user change his/her name
- Option to show user's name
- Bans control on settings page
- Changing text color of a logged in user
- Minor rearrangements of the settings panel
- Initial version
