WP Datepicker
| 开发者 |
fahadmahmood
invoicepress |
|---|---|
| 更新时间 | 2024年12月24日 03:04 |
| PHP版本: | 7.0 及以上 |
| WordPress版本: | 6.6 |
| 版权: | GPL2 |
| 版权网址: | 版权信息 |
标签
下载
详情介绍:
- Author: Fahad Mahmood
- Project URI: http://androidbubble.com/blog/wordpress/plugins/wp-datepicker
- Demo URI: http://demo.androidbubble.com/wp-datepicker WP Datepicker is a free WordPress plugin to display date field on WordPress post, page, contact and event forms. You can enter multiple CSS selectors as CSV to display date field on desired forms or pages. You can enable date field for backend which means datepicker will be implemented in wp-admin as well. It is possible to make datepicker field editable or readonly. There is an option to enable weekends so, Saturdays and Sundays will be removed from datepicker as some service businesses do not offer weekend service. You can set months to full or short form and can edit date format or default date. It saves changes automatically.
- GuavaPattern
- Genesis
- Thesis
- WooThemes
- Gantry
- Carrington Core
- Hybrid Core
- Options Framework
- Redux Framework
- SMOF
- UPThemes
- Vafpress
- Codestar
- Change close text, current text, min-date, max-date
- Inline position will display calendar beneath the field
- Change year, month, first day, year range
- Use custom colors and font selection
- Multi instances can be added
- Various datepicker styles and skins
- Show button panel
安装:
- Go to your wordpress admin "yoursite.com/wp-admin"
- Login and then access "yoursite.com/wp-admin/plugin-install.php?tab=upload
- Upload and activate this plugin
- Now go to admin menu -> settings -> WP Datepicker
- Download the WP Datepicker installation package and extract the files on
WP Datepicker in the wp-content/plugins directory of your WordPress installation. Use an FTP or SFTP client to upload the contents of your WP Datepicker archive to the new directory that you just created on your web host.
3. Log in to the WordPress Dashboard and activate the WP Datepicker plugin.
4. Once the plugin is activated, a new WP Datepicker sub-menu will appear in your Wordpress admin -> settings menu.屏幕截图:
常见问题:
How date range works?
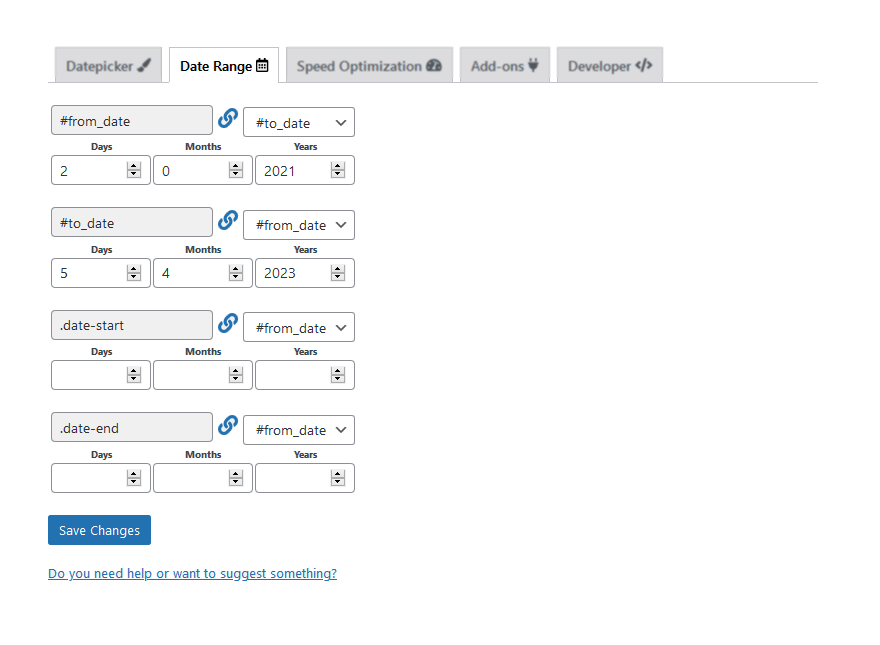
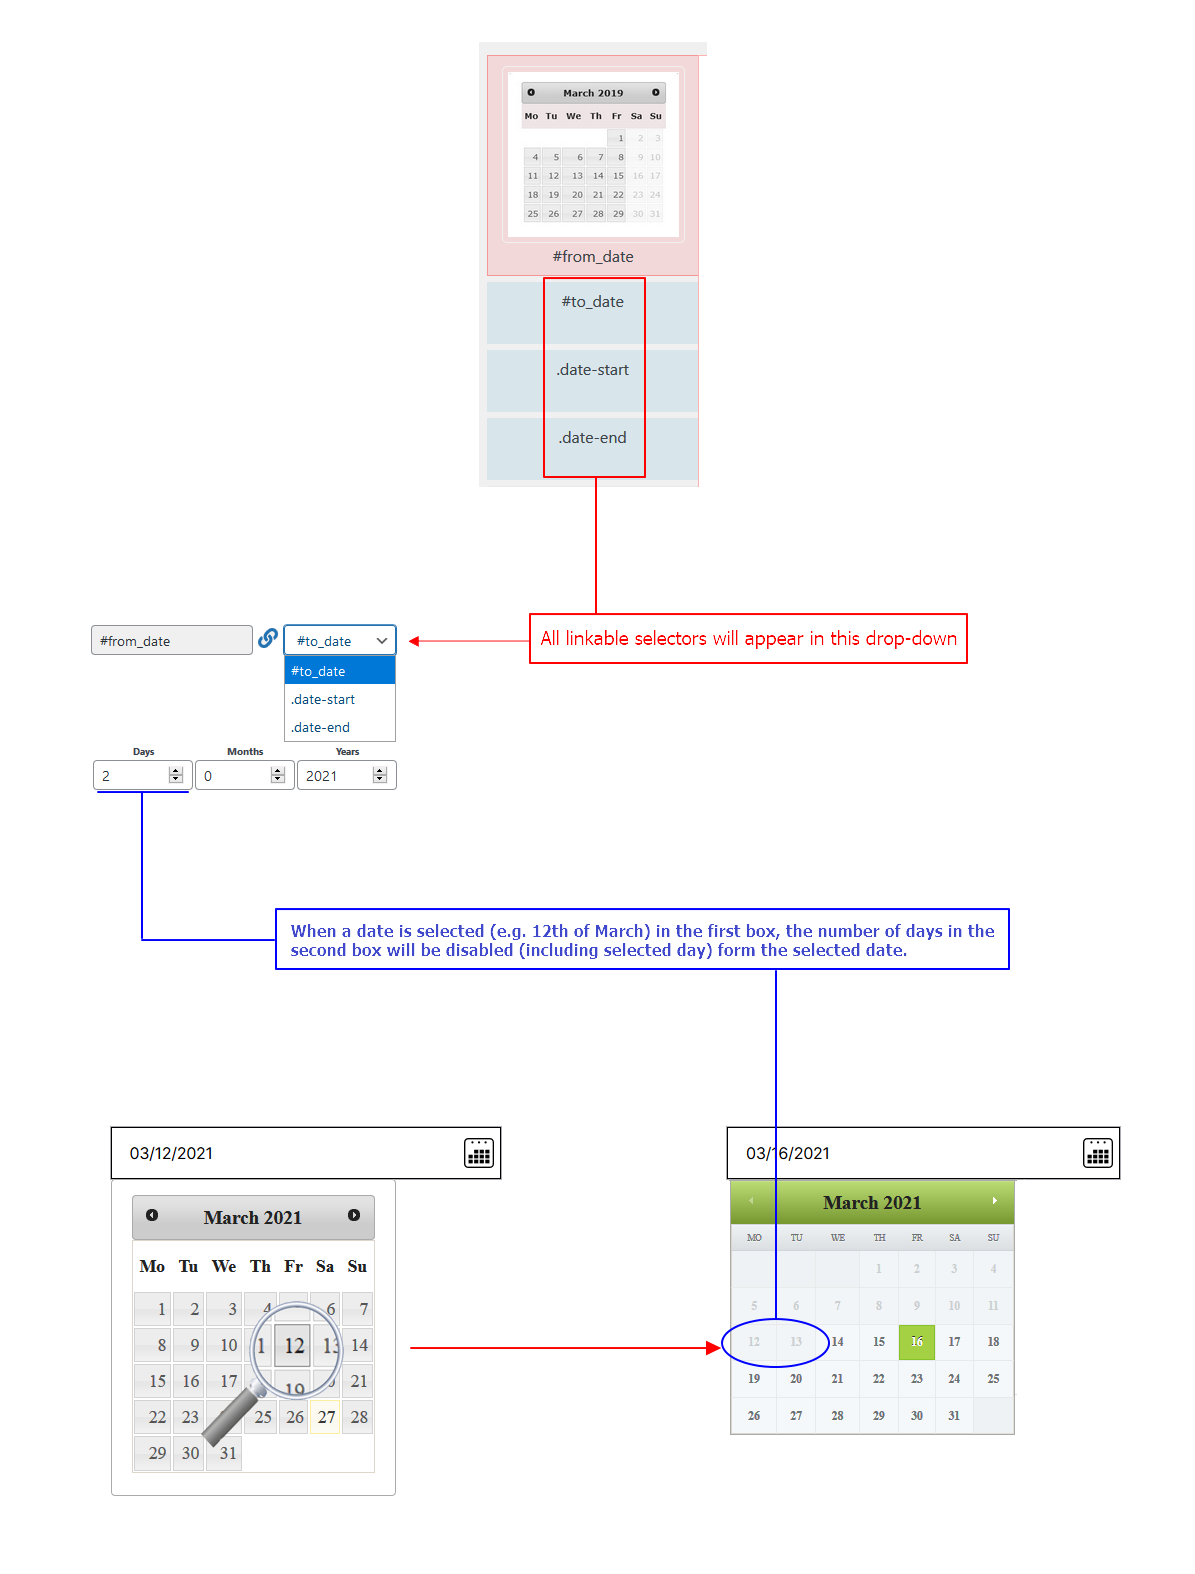
When a date is selected in the first box, the number of days in this box will be disabled (including selected day) form the selected date. For example, if 10th March is selected in first field and in the backend, you have added 3 days so, in the second field day 10, 11 & 12 will be disabled. It will happen same when you add Months or Years in the backend.
Is this plugin speed optimized?
Yes, this plugin is using independent CSS and JavaScript files instead of inserting scripts in web page source-code.
Are all scripts in relevant files or rendered as HTML/CSS/JS tags?
All scripts are well managed in relevant files.
Are styles and files will be generated one time or every-time when you save settings?
Yes, it will generate the required files whenever you will modify something on settings page and that version will keep serving your visitors everytime with zero delay.
Does it support multiple instances?
Yes, in advanced version you can create multiple instaces so each field can have different settings.
Is this compatible with all WordPress themes?
Yes, it is compatible with all WordPress themes which are developed according to the WordPress theme development standards.
Is everything ready in this plugin for final deployment?
Every theme will have different global styles so a few stylesheet properties will be required to be added and/or modified.
Is it possible to disable specific days and dates?
Yes, a code snippet is available to disable specific days and dates under custom scripts section.
How to install WP Datepicker and Configure
- Go to plugin section (wp-admin) click on add new and then write wp datepicker in search bar
- Click on install button wp datepicker and then click on activate respectively
- Settings Menu > WP Datepicker > Settings Page
How to install WP Datepicker and configure it with Contact Form 7
[youtube http://www.youtube.com/watch?v=c2afBhUPp4w] Go to Contact Menu (wp-admin) after installation of contactform7 plugin, click on Contact forms and here we have a contact form 1 by default, click on it. You will see something like this: Your Name (required) [text your-name] Your Email (required) [email your-email] Date 2 [date date-134 class:dp] Subject [text your-subject] Your Message [textarea your-message] [submit "Send"] Create a new field with an id "#Calendar" Like: Date [date date-726 id:calendar] Create second field with a class ".dp" Like: Date 2 [date date-134 class:dp] Create second field with a class ".dp" like: Date 3 [date date-499] having no id and class I) Now go to the options panel in the input field write id of the first input field with hash sight #calendar and click on save then refresh page, here first input field have a calendar and other two fields do not have this calendar. II) Now we configure with second option write second input field's class here with dot sign by separating with comma like #calendar, .bday then refresh your page and here the second field also has this calendar. III) Now configure with input field's name, write it by separating comma like #calendar, .bday, input [name="datepicker"] and refresh your page. Click on the third field to try, this field will also have this calendar option. Finally: The first "Date" field is configured with id, second "Date 2" with input field's class and third "Date 3" with input field's name.
How can I report an issue to the plugin author?
It's better to post on support forum but if you need it be fixed on urgent basis then you can reach me through my blog too. You can find my blog link above.
更新日志:
- Fix: WordPress sanitization and/or escaping functions before saving user input data to the database and when displaying it on output. [12/11/2024][Thanks to Tiffany T. Customer Support Engineer / wordfence.com | defiant.com + vgo0]
- Fix: Cross Site Scripting (XSS) vulnerability and Broken Access Control vulnerability. [21/08/2024][Thanks to Mika & Darius Sveikauskas | patchstack.com]
- Fix: Missing Authorization to Authenticated (Subscriber+) Arbitrary Options Update. [19/04/2024][Thanks to Chloe Chamberland | Wordfence Support]
- Fix: Missing Authorization to Authenticated (Subscriber+) Arbitrary Options Update. [18/04/2024][Thanks to Chloe Chamberland | Wordfence Support]
- Fix: Missing Authorization to Authenticated (Subscriber+) Arbitrary Options Update. [17/04/2024][Thanks to Lucio Sá | Wordfence Support]
- Fix: Speed Optimization feature related improvement. [02/10/2023][Thanks to Cristiano Fava]
- Fix: Google Fonts implementation refined. [12/06/2023][Thanks to Kitty Bakker / TexelSites]
- Fix: Fatal error: Uncaught TypeError: extract(): Argument #1 ($array) must be of type array, string given in. [25/05/2023][Thanks to FeralReason]
- WP-CLI error: Undefined array key "HTTP_HOST", fixed. [09/03/2023][Thanks to gmariani405]
- WPML compatibility revised. [04/12/2022][Thanks to Richard Praschil]
- Date range selection enabled/disable functionality improved. [03/12/2022][Thanks to Richard Praschil]
- Datepicker date-range section will work with CSV CSS selector values as well. [07/10/2022][Thanks to Matthew / Vitaliy]
- Datepicker date-range section will work with CSV CSS selector values as well. This was a free feature but was not working with multiple selectors before. [07/10/2022][Thanks to Matthew / Vitaliy]
- Datepicker settings page instances, box height set to min-height instead of fixed. [03/04/2022][Thanks to Matej Fanco]
- Newly added function to disable days from November 24 to Dec 25 has been improved. [Thanks to shovonboshak]
- New function added to disable days from November 24 to Dec 25. [Thanks to shovonboshak & Abu Usman]
- Datepicker date range related improvements. [Thanks to Petar Jovović / Softech Solutions]
- Datepicker CSS interferes with Divi Theme in Admin. Global settings introduced. [Thanks to zamartz]
- Alive scripts toggle function provided for on fly HTML elements cloning of datepicker fields. [Thanks to Edwin Makenzi]
- Missing JS concatenation operator causes error. Fixed. [Thanks to thaikolja]
- WPML compatibility revised.
- Improved UX introduced. [Thanks to Team AndroidBubbles]
- Default date value attributed revised. [Thanks to Joshua Eberly]
- Assets updated.
- Updated with auto JS and auto CSS files. [Thanks to Makenzi Edwin]
- Date Range functionality introduced as beta. [Thanks to Sebastian]
- Default date current date related fix. [Thanks to Howard Blythe from hwbdesign]
- Developer mode improved. [Thanks to Team Ibulb Work]
- JS and CSS files will be generated on plugin activation automatically. [Thanks to Edmund Wallner]
- Language files updated.
- WP Hamburger added on settings page.
- Tags updated and settings page improved.
- Version update for WordPress.
- Performance optimization added, scripts combined and enqueued in auto generated files. [Thanks to Ryan Ouellette & Team Ibulb Work]
- Android App released. [Thanks to Team Ibulb Work]
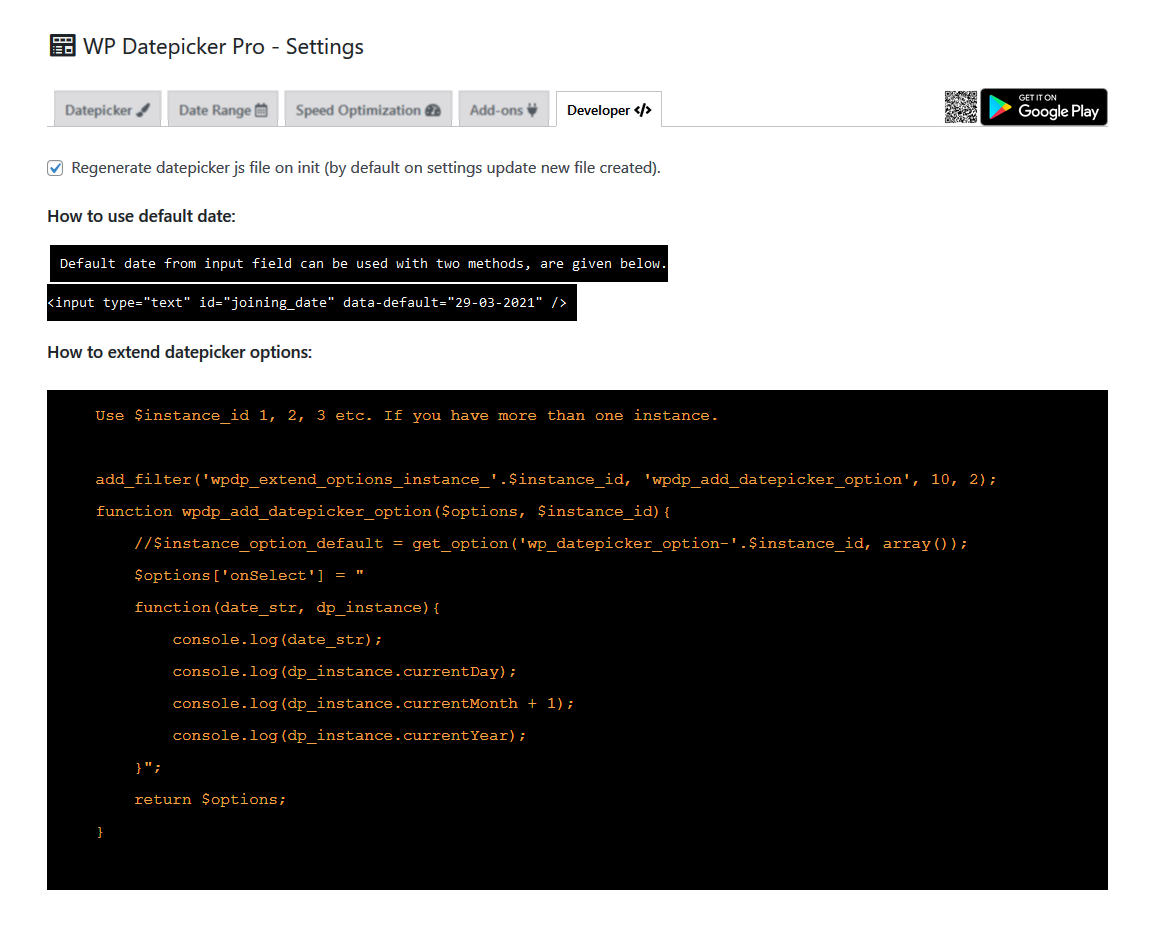
- data-default added and tested again. [Thanks to @feralreason]
- Invalid argument supplied for foreach(), fixed. [Thanks to @threechatons3]
- data-default date added. [Thanks to @feralreason]
- Disable specific set of dates, another custom script added. [Thanks to Howard Blythe]
- Custom scripts managed with a dropdown.
- A few important fixes regarding multiple instances. [Thanks to Rais Sufyan]
- Video tutorials added for JavaScript custom functions. [Thanks to Rais Sufyan]
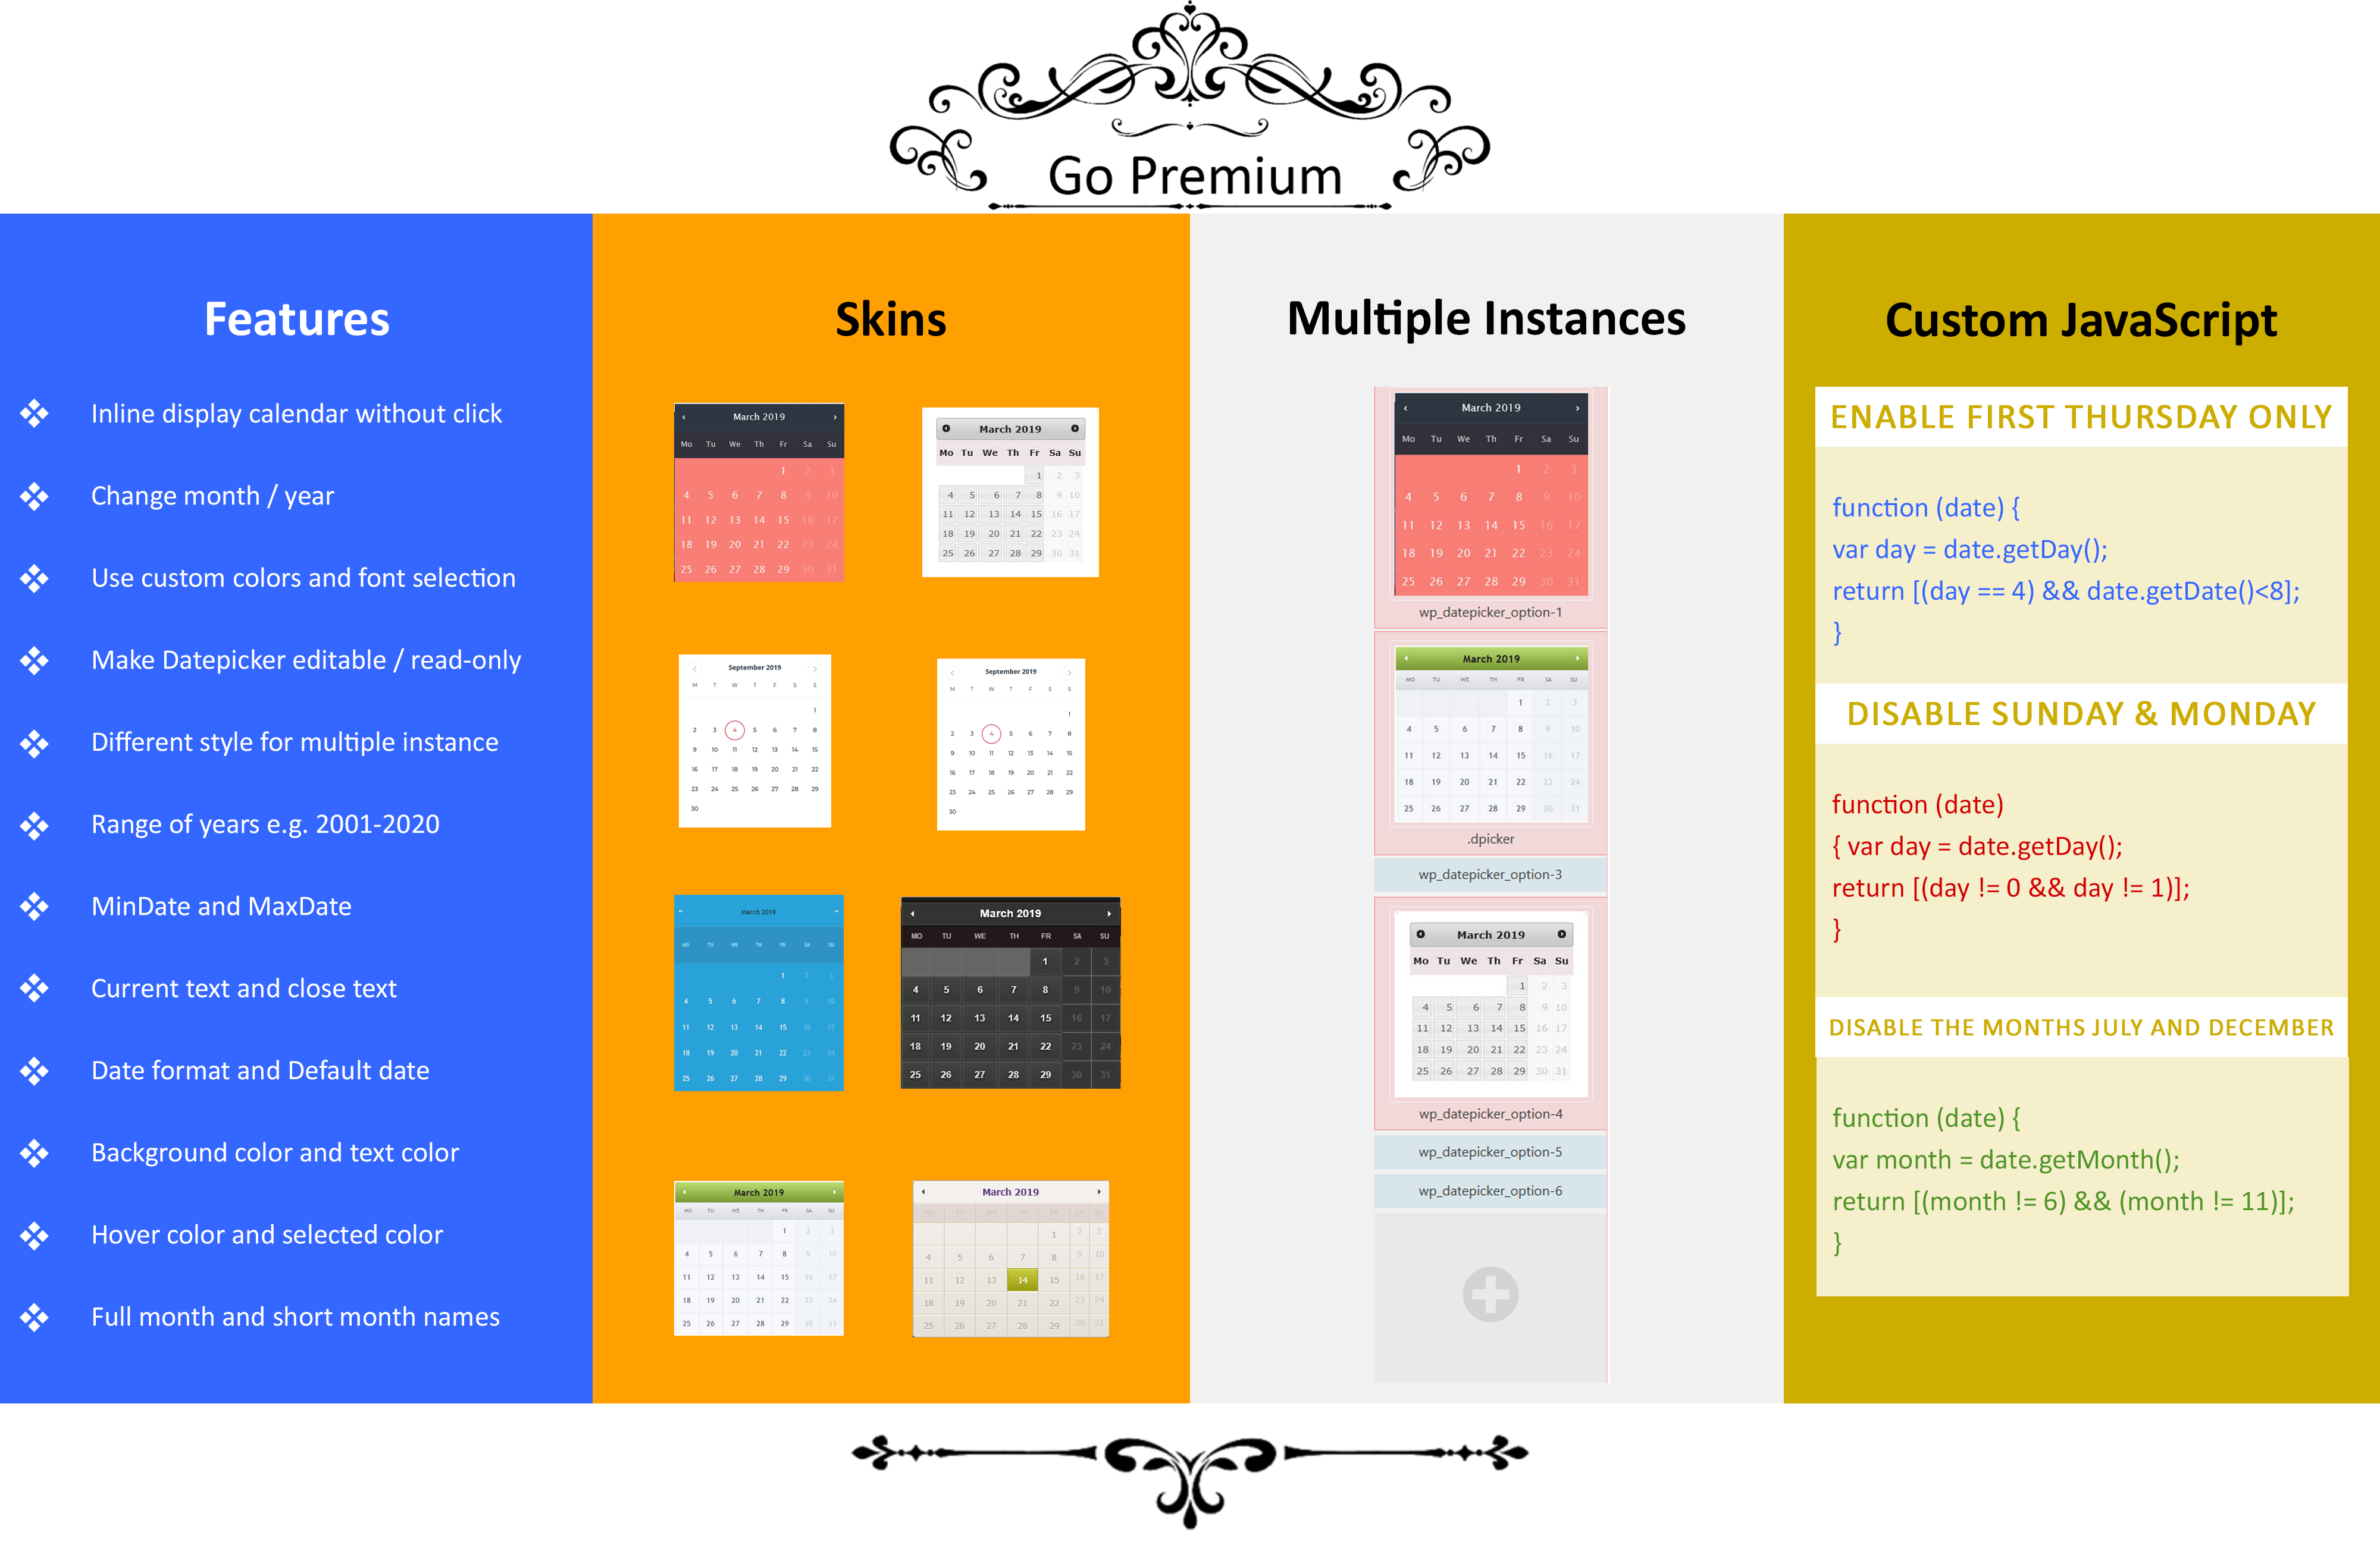
- Go Premium image added. [Thanks to Rais Sufyan]
- Multi-instance functionality introduced. [Thanks to Ibulb Work Team]
- Updated demo URI. [Thanks to Norke88]
- Another example script added to disable certain months. [Thanks to Largo WInzclav]
- jQuery for mobile issue resolved. [Thanks to Pieter Grobler]
- Faizan-e-Madina premium style added. [Thanks to Bolekula]
- Google Fonts will not load until you will select one of those. [Thanks to Justin Chalfant]
- Calendar icon to the datepicker fields. [Thanks to pansuriya123]
- Readonly field value saving issue on settings page fixed. [Thanks to Paul Singh]
- Default date option added in free version. [Thanks to princebhalani143]
- Custom style screenshots fixed. [Thanks to Rais Sufyan]
- Custom style issue fixed.
- Settings page revised.
- Font selection reviewed. [Thanks to Rafa / X2CREATIVOS]
- Inline position feature restricted with an extra condition.
- Inline position feature added. [Thanks to Benji McKinney / Moxa Media]
- More languages added. [Thanks to Abu Usman]
- Contact form 7 video tutorial added on settings page. [Thanks to Trish Parr]
- Contact form 7 video tutorial added. [Thanks to Paul Scollon]
- Read-only and editable option added through settings page. [Thanks to bjoern76]
- Each selector should have a separate default value. [Thanks to Raul Pinto]
- Autocomplete OFF. [Thanks to Michael Ellis]
- Update regional settings with dateFormat overridden possibility. [Thanks to Jmashweb]
- Added a textarea field for beforeShowDay. [Thanks to William V. Hughes]
- Added extra checks for front end scripts. [Thanks to Ricardo Orozco Vergara]
- Added a check for admin side scripts. [Thanks to rabidin]
- JS interval based errors are stopped. [Thanks to Arnold S]
- Custom colors are improved. [Thanks to Dalia Herceg]
- Weekends can be turned off now. [Thanks to Tem Balanco]
- Language selection refined and today button functionality added. [Thanks to Richard Rowley]
- Default value issue reported and fixed. [Thanks to Guy Hagen]
- Capabilities and roles related bug fixed. [Thanks to Paul Munro]
- Sanitized input and fixed direct file access issues.
- Multilingual months can be in short and full. These are now capitialize as well. [Thanks to Jose Braña]
- Change year related option refined. [Thanks to Makenzi Edwin]
- Repeater fields compatibility refined
- Repeater fields compatibility added
- Datepicker dateFormat option provided.
- Translated in German language.
- Datepicker options refined.
- Datepicker with 74 languages.
- jQuery live to on [Thanks to nickylew]
- minDate & maxDate added in Pro version.
- Fixed: Stopping google translate from translating datepicker.
- A few minor fixes.
- FAQ's are added.
- Code Generator Added.
- An important fix related to mobile responsive layout.
- An important fix.
- A few important tweaks.
- A javascript file excluded.
- More styles are added.
- Options & ColorPicker added for Pro Users.
- Initial Commit

