
WP Show Site by IP
| 开发者 | d79 |
|---|---|
| 更新时间 | 2026年6月19日 00:50 |
| 捐献地址: | 去捐款 |
| PHP版本: | 3.0.1 及以上 |
| WordPress版本: | 7.0 |
| 版权: | GPLv2 or later |
| 版权网址: | 版权信息 |
详情介绍:
Hide your Wordpress website to everyone but easily allow to whoever you want to see it.
Why it's useful
Sometimes you need to work directly on your online Wordpress installation, like when you are developing or refining a theme for your site, and you don't want others to see your work in progress, but at the same time you need to be able to see it from whatever place you find yourself!!!
What it does
This plugin allows you very easily to load a temporary HTML page for your website visitors, but it filters the IP of your connection and let you see your website and work on it.
When the filter is enabled, unauthorized visitors see the temporary page on the public site and on
/wp-admin/; authorize your IP before opening the WordPress admin area.
Even better you don't have to find out your IP and then save it on some sort of whitelist, you can simply add the string wpok to you url to automatically obtain the permission to see your website, without even knowing your IP!!!
That makes it easier to work on your website from many different places (e.g. if you work on it with other people from different locations) or if you have an internet connection with dynamic IP (everytime it changes you can easily add the new one).
How it works
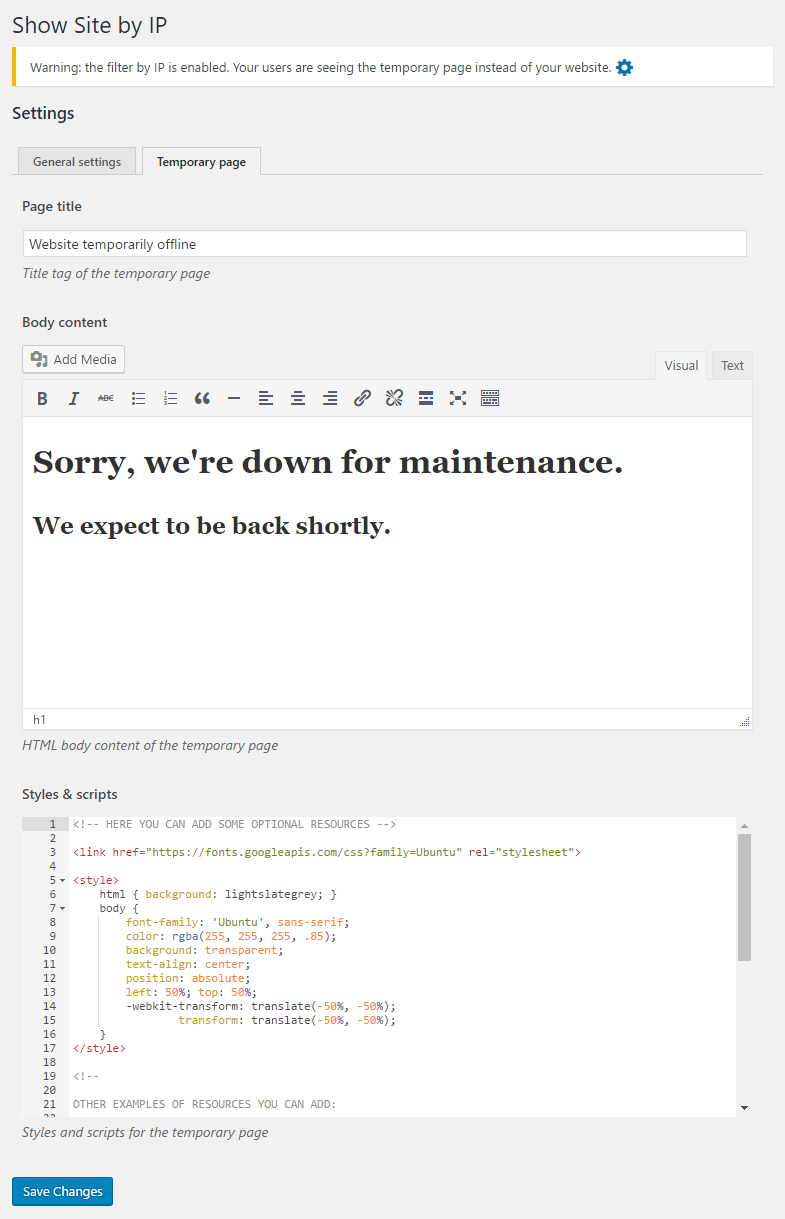
After installed this plugin, you'll find the submenu Show Site by IP on your website Dashboard, under the Tools menu.
That link open the plugin configuration page, where you can upload the full HTML of your temporary page and, when you are good to go, enable the IP filter.
The temporary page fields can contain custom HTML, CSS and JavaScript, so they should be edited only by trusted administrators.
Your IP will be automatically added to the whitelist in order for you to continue to use your website.
The whitelist accepts one rule per line and supports IPv4, IPv6 and full-segment wildcards such as 123.123.123.* or 2001:db8:*:*:*:*:*:*.
Loopback addresses such as 127.0.0.1 and ::1 are valid whitelist entries too.
In the IP whitelist, comments can start a line or follow a rule after #, for example # office or 123.123.123.* # office LAN.
For security, the plugin currently checks only REMOTE_ADDR and does not automatically trust proxy or CDN headers such as X-Forwarded-For.
You can also configure a URL whitelist made of one string per line: when the current request URL contains one of those strings, the website is shown for that request only, without saving the visitor IP.
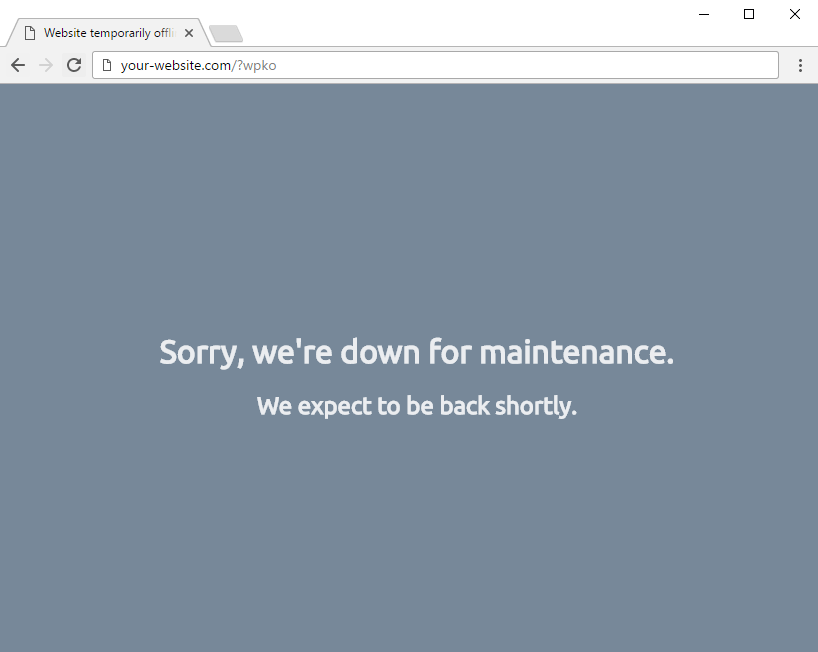
To allow the access to your website from your internet connection add the string ?wpok to the website URL, like this:
The default wpok string is convenient but predictable. For better privacy, customize it in the plugin settings.
Wildcard rules must be edited manually. To remove your exact IP from the whitelist afterwards (and then go back to see the temporary page instead of your website) add the string ?wpko to the website URL, like this:
That's it. =)
安装:
Automatic installation
Automatic installation is the easiest option as WordPress handles the file transfers itself and you don’t need to leave your web browser. To do an automatic install of this plugin, log in to your WordPress dashboard, navigate to the Plugins menu and click Add New.
In the search field type the title of this plugin and click Search Plugins. Once you’ve found it you can view details about it such as the the point release, rating and description. Most importantly of course, you can install it by simply clicking “Install Now”.
Manual installation
The manual installation method involves downloading the plugin and uploading it to your webserver via your favourite FTP application. The WordPress codex contains [instructions on how to do this here] (http://codex.wordpress.org/Managing_Plugins#Manual_Plugin_Installation).
Activation
Once it's installed, you can activate the plugin clicking “Activate Now”
屏幕截图:
更新日志:
2.5.0 - 18.06.2026
- Added IPv6 and loopback support for authorized IPs
- Added URL whitelist for request-level bypasses
- Added inline comments in the IP whitelist
- Improved settings validation, escaping and Ajax security
- Added filterable technical bypasses for WordPress and WooCommerce compatibility
- Updated Ace editor, Prism assets and Italian translations
- Added project documentation and manual test checklist
- Tested on WordPress 7.0
- Added support for IP addresses with wildcards
- Refactoring
- Tested on WordPress 6.4.3
- Minor fix
- Bug fix: allow WP Cron to work even with the filter enabled
- Fixed translation loading
- Added possibility to manually edit the list of authorized IPs
- Tested on WordPress 6.1.1
- Fixed plugin header
- Tested on WordPress 6.0
- Fixed minor bugs on italian translation
- Made the plugin translation ready
- Added italian translation
- Improved editor for the temporary page
- Customizable strings to gain and lose access
- Added warning to notice when the filter is enabled
- Added help screens
- Some design changes
- Fixed bug on textarea field
- Added field for HTTP status customization
- Fixed minor bug on textarea field
- Added HTTP 503 status for maintenance mode
- Added link to the plugin settings
- Added warning with instructions
- Plugin file created