Zag Warranty Manager
| 开发者 | fahimahmednafis |
|---|---|
| 更新时间 | 2025年11月19日 18:11 |
| PHP版本: | 7.4 及以上 |
| WordPress版本: | 6.8 |
| 版权: | GPLv2 or later |
| 版权网址: | 版权信息 |
详情介绍:
安装:
- Upload
zag-warranty-managerto/wp-content/plugins/. - Activate via Plugins → Installed Plugins.
- Edit a product → set warranty period in days.
- After order completion, warranty activates automatically.
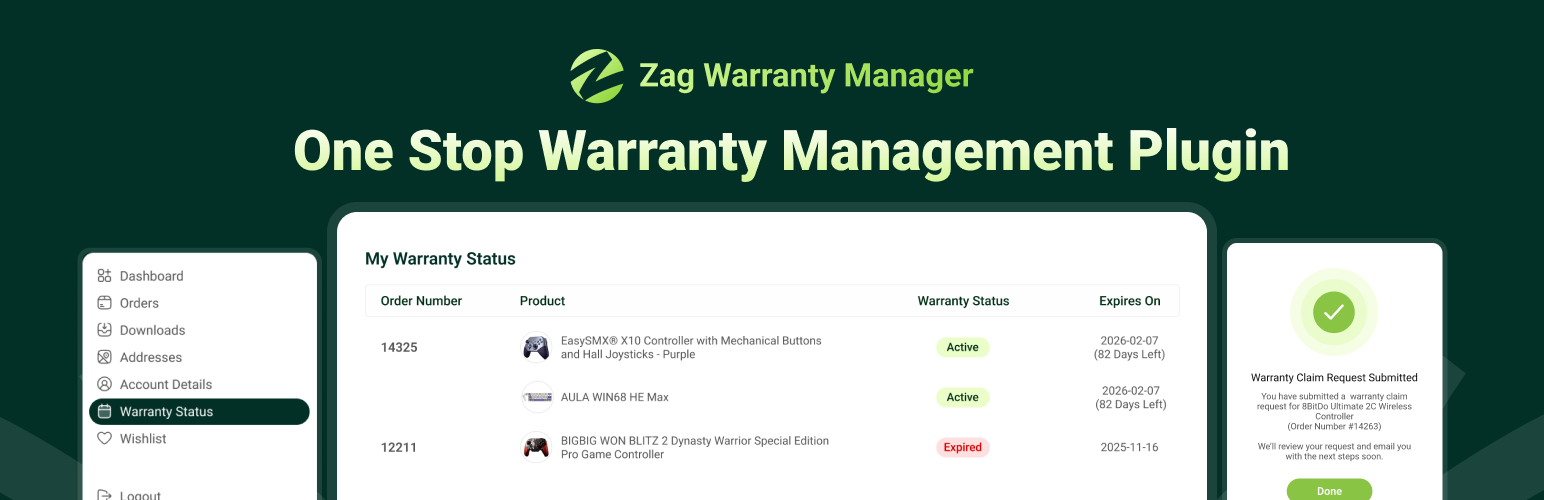
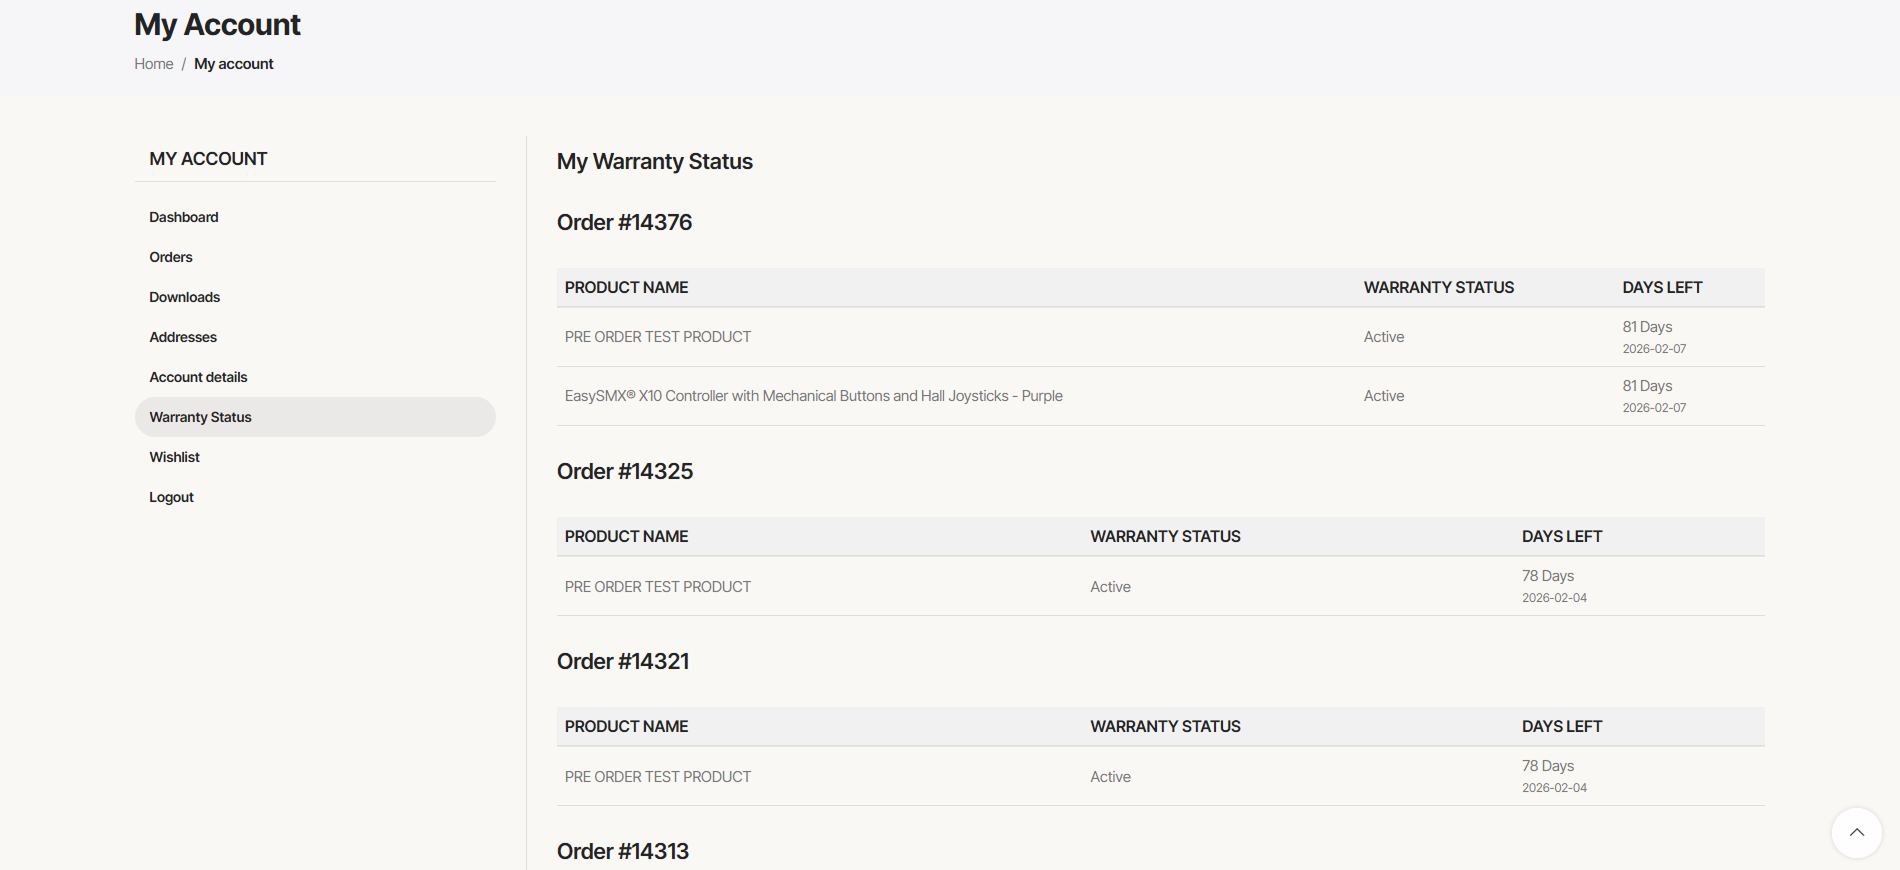
- Customers view all warranty data under My Account → Warranty Status.
屏幕截图:
![Use Shortcode [zag_warranty] on Single Product Page template / Product Description](https://cdn.jsdelivr.net/wp/zag-warranty-manager/assets/screenshot-2.png)
常见问题:
How does Zag Warranty Manager help me manage product warranties in WooCommerce?
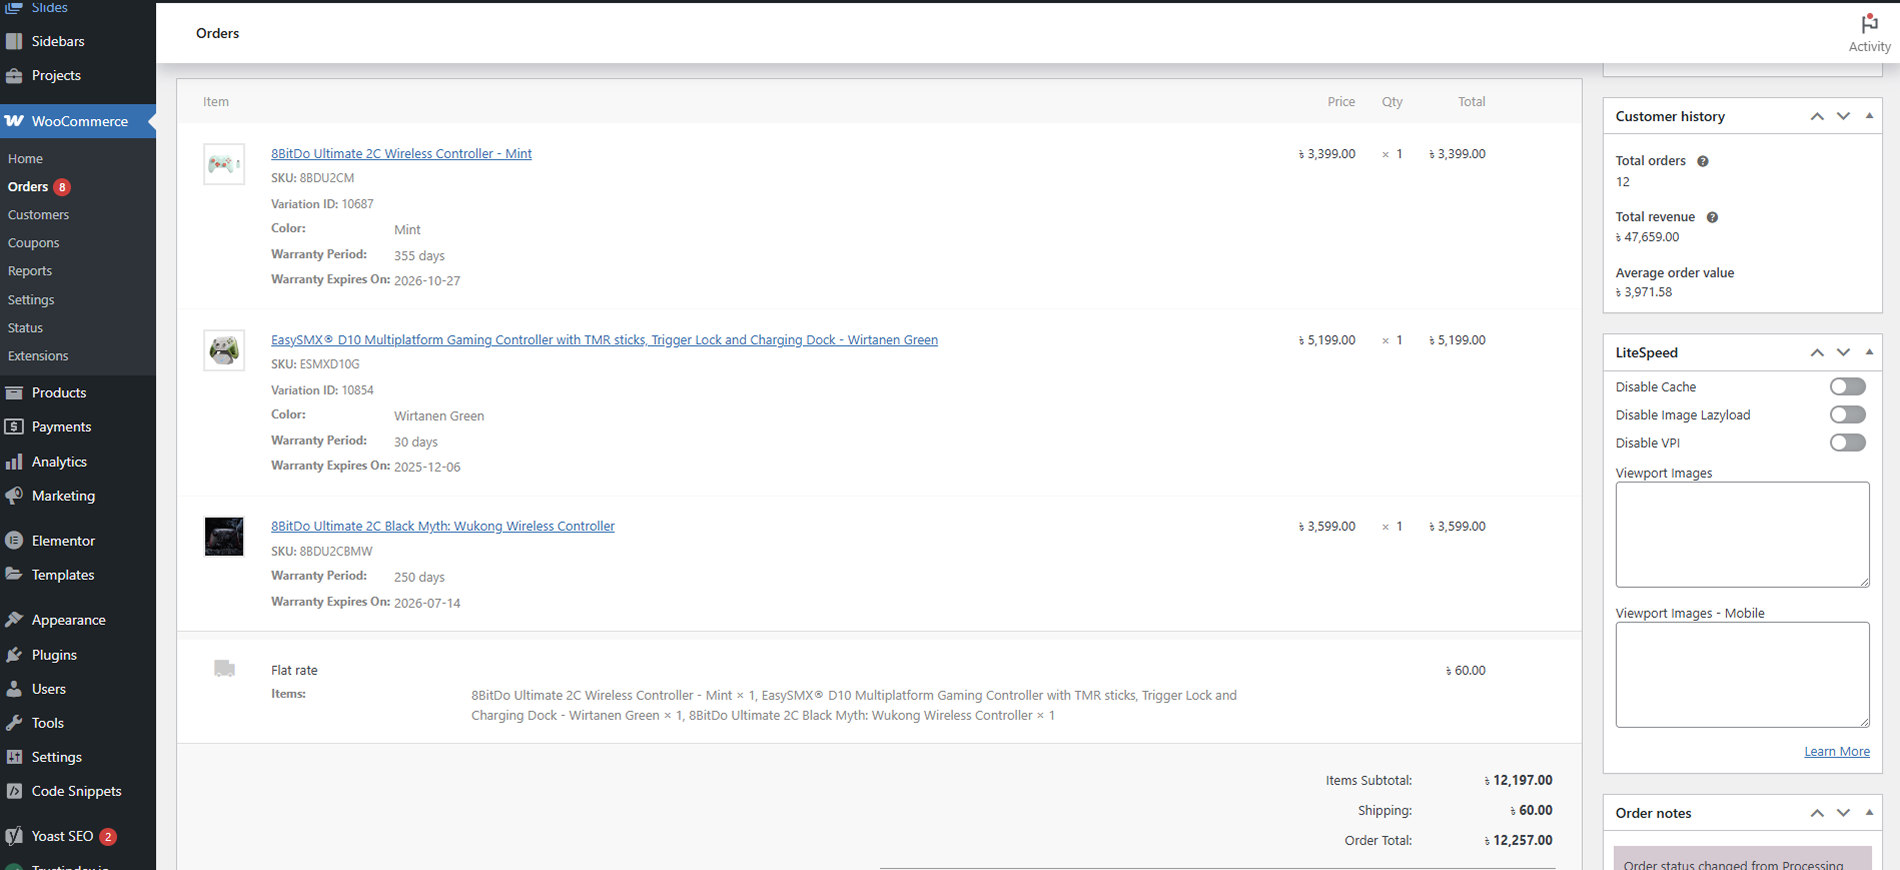
The Zag Warranty Manager allows you to set a specific warranty duration (in days) for each individual product in your WooCommerce store. Once a customer's order is completed, the plugin automatically starts the warranty countdown. Customers can then view the warranty status, expiry date, and days remaining directly in their My Account dashboard, streamlining post-sale support for both you and your buyers.
Can customers easily check the warranty status of their purchased items?
Yes, absolutely. Zag Warranty Manager automatically adds a new "Warranty Status" tab to the customer's My Account section. From this central dashboard, your customers can instantly see all their purchased products, the warranty period set, the activation date, the expiry date, and the number of days left on the warranty.
What is the process for setting up a warranty period for a product?
Setting up a warranty is very straightforward. After installing and activating the plugin, simply edit any product in your WooCommerce catalog. Within the product settings, you will find a dedicated field where you can input the desired warranty period in days. The warranty will then automatically be assigned to any new order for that product upon order completion.
When does the product warranty period officially begin?
The warranty period for a purchased product officially begins and the countdown starts automatically from the moment the customer's order is marked as 'completed' in WooCommerce. This ensures a consistent and traceable start date for all warranty calculations.
Is there a shortcode to display warranty information on a product page?
Yes, there is! You can use the shortcode [zag_warranty] to display relevant warranty information on any product page, post, or custom area of your site. This allows you to clearly communicate the warranty terms to potential buyers before they make a purchase.
更新日志:
- UI Fix on My Warranty Status Page.
- Show
No Warrantyon 0 Days or not warranty period assigned products.
- Hello World!