
Wild Apricot Login
| 开发者 | Wild Apricot |
|---|---|
| 更新时间 | 2026年7月11日 04:22 |
| 捐献地址: | 去捐款 |
| PHP版本: | 4.0.1 及以上 |
| WordPress版本: | 6.9.0 |
| 版权: | GPLv2 or later |
| 版权网址: | 版权信息 |
详情介绍:
安装:
- Log in to your WordPress site.
- Within your Dashboard, hover over the Plugins menu and choose the Add New option.
- Search for the Wild Apricot Login plugin.
- Once you've found the Wild Apricot Login plugin, click the Install Now button.
- When prompted to confirm your choice to install the plugin, click OK.
- After the plugin is installed, click the Activate Plugin link.
- Within your Dashboard, hover over the Settings menu and choose the Wild Apricot Login option.
- Within the Wild Apricot Login Settings, enter your Wild Apricot API key, Client ID, and Client secret values. You can obtain these values when you authorize WordPress from the Authorize applications screen in Wild Apricot.
- Optionally, you can change the default login button label.
- Click the Save Changes button. The API key, Client ID, and Client secret fields should now appear as set.
- Once those fields appear as set, you can click the Update button to update your WordPress roles with your Wild Apricot membership levels. No existing roles will be removed from your WordPress account.
- Click the Download link above to download the zip file containing the Wild Apricot plugin files.
- Within your Dashboard, hover over the Plugins menu and choose the Add New option.
- Click the Upload Plugin button.
- Click the Choose File button and locate the zip file you downloaded.
- Click the Install Now button.
- After the plugin is installed, click the Activate Plugin link.
- Within your Dashboard, hover over the Settings menu and choose the Wild Apricot Login option.
- Within the Wild Apricot Login Settings, enter your Wild Apricot API key, Client ID, and Client secret values. You can obtain these values when you authorize WordPress from the Authorize applications screen in Wild Apricot.
- Optionally, you can change the default login button label.
- Click the Save Changes button. The API key, Client ID, and Client secret fields should now appear as set.
- Once those fields appear as set, you can click the Update button to update your WordPress roles with your Wild Apricot membership levels. No existing roles will be removed from your WordPress account.
屏幕截图:
常见问题:
How do I add a button for single sign-on to my WordPress site?
You can display a login button for single sign-on by adding a widget - installed along with the Wild Apricot Login plugin - to the header in your WordPress theme layout, or by inserting a shortcode in your page content. To display the login button within your WordPress theme header - which can appear as a sidebar for some themes - follow these steps:
- Under your Dashboard, hover over Appearance then select the Themes option.
- From the Themes screen, click the Customize button for your current theme.
- Click the > button to the right of Widgets.
- Within the Widget area, click the Add a widget button.
- Search for the Wild Apricot Login widget.
- Within the settings for the Wild Apricot Login widget, you can change the Login button label and specify the name of the WordPress page you want to redirect members to after logging in. Leave the Redirect page field blank if you want them to remain the current page.
How do I restrict WordPress content to Wild Apricot members?
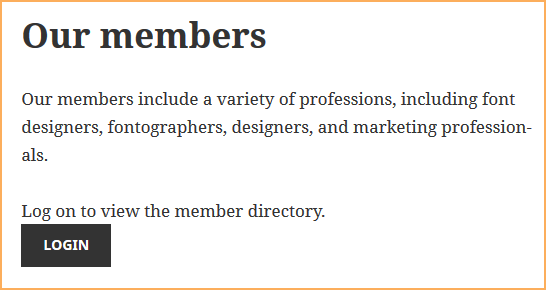
To restrict WordPress content to Wild Apricot members, add the following shortcode to a page or custom menu: [wa_restricted roles="Gold, Silver" message="Log on to view restricted content."] Restricted content. [/wa_restricted] where the following attributes are optional: roles - WordPress roles corresponding to Wild Apricot membership levels to which you want the content restricted message - Message appear in place of the restricted content. A login button will appear below the message The content between the open and close tags will only appear to authorized users. You can include widget code to display restricted Wild Apricot content. You can add a not: operator at the start of the roles attribute to specify all roles other than those specified. And use 'all' to specify all roles. [wa_restricted roles="not:Bronze" message="Log on to view restricted content."] Restricted content. [/wa_restricted]
更新日志:
- Fixed login for WA widgets to work without 3rd party cookies
- Fixed login for WA widgets
- Changed settings validation
- Fixed content restriction for wa members
- Fixed WA API key saving after WA oAuth update
- Fixed login for re-created WA users
- Removed an issue related with wysiwyg-editor crush
- Added buttons to editor for shortcodes, wa_login and wa_restricted
- Enabled nested shortcodes for wa_restricted shortcode
- Enabled "all" value for roles in wa_restricted shortcode
- Enabled html-markup in wa_restricted shortcode message
- Enabled api-request debugging for admin
- Removed an issue with pantheon.io
- Removed a conflict with Beaver Builder
- Removed a conflict with Wordfence Security
- Removed a conflict with WP-SpamFree
- Removed a conflict with WPFront User Role Editor
- Removed an issue with retaining plugin settings after its upgrade
- Removed a bug related to inability of logging in if WP was installed to non-root folder
- Initial stable release.