Integrate Rybbit
| 开发者 | makiit |
|---|---|
| 更新时间 | 2026年10月29日 20:19 |
| PHP版本: | 7.4 及以上 |
| WordPress版本: | 7.1 |
| 版权: | GPLv3 or later |
| 版权网址: | 版权信息 |
详情介绍:
- Works with Rybbit Cloud and with self-hosted Rybbit instances.
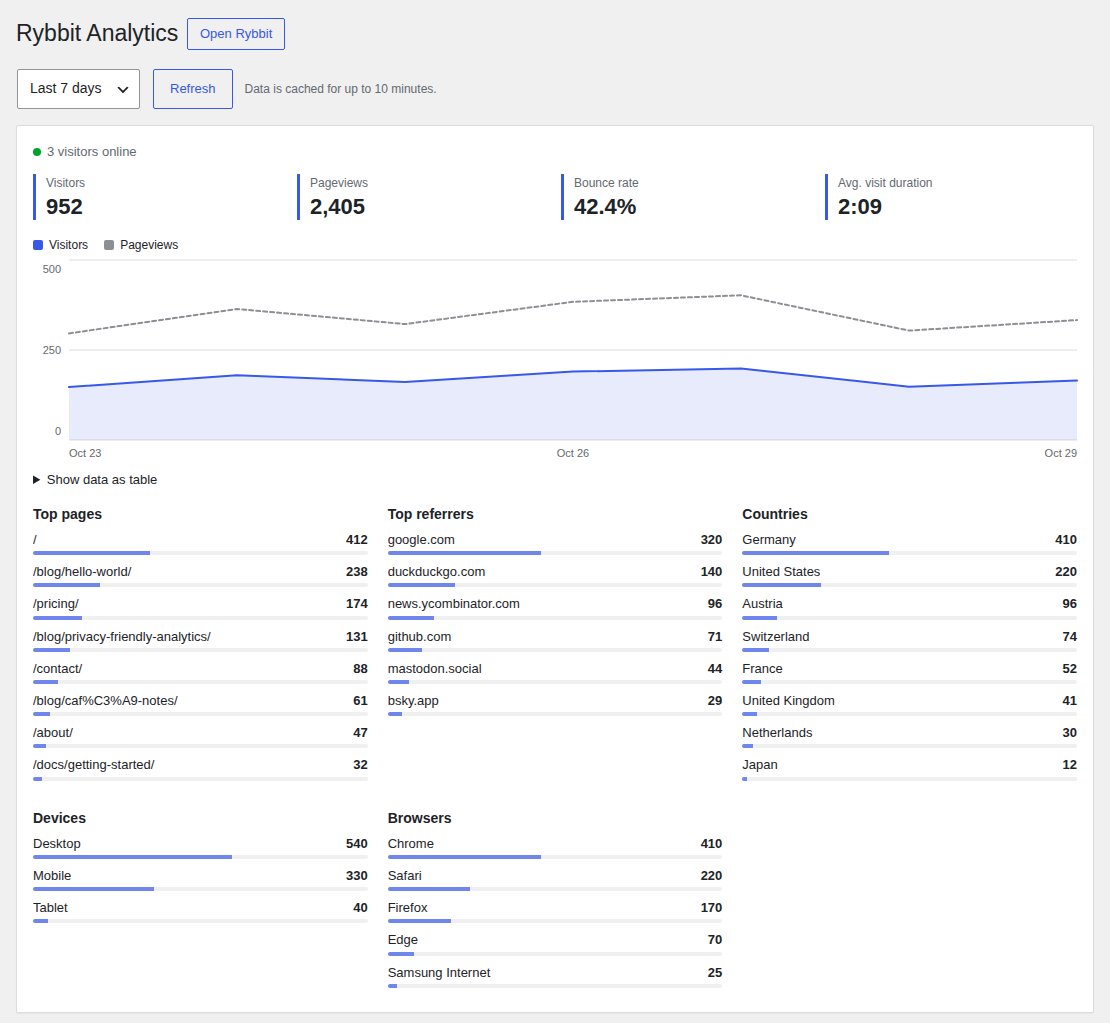
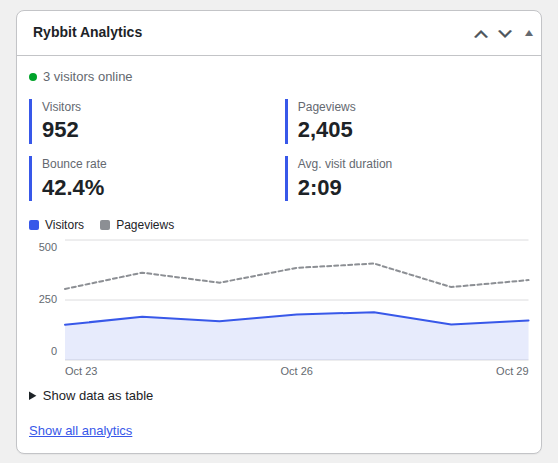
- Analytics dashboard in wp-admin: a widget on the WordPress dashboard and a page at Dashboard > Rybbit Analytics.
- Visitors, pageviews, bounce rate, visit duration and visitors online now.
- Chart of the visitors and pageviews for the last 24 hours, 7, 30 or 90 days.
- Top pages, top referrers, countries, devices and browsers.
- The data is cached. The API key stays on the server and is never sent to a browser.
- Do not track selected user roles. Administrators are excluded by default.
- Optional tracking inside wp-admin. It is off by default.
- Load the script with
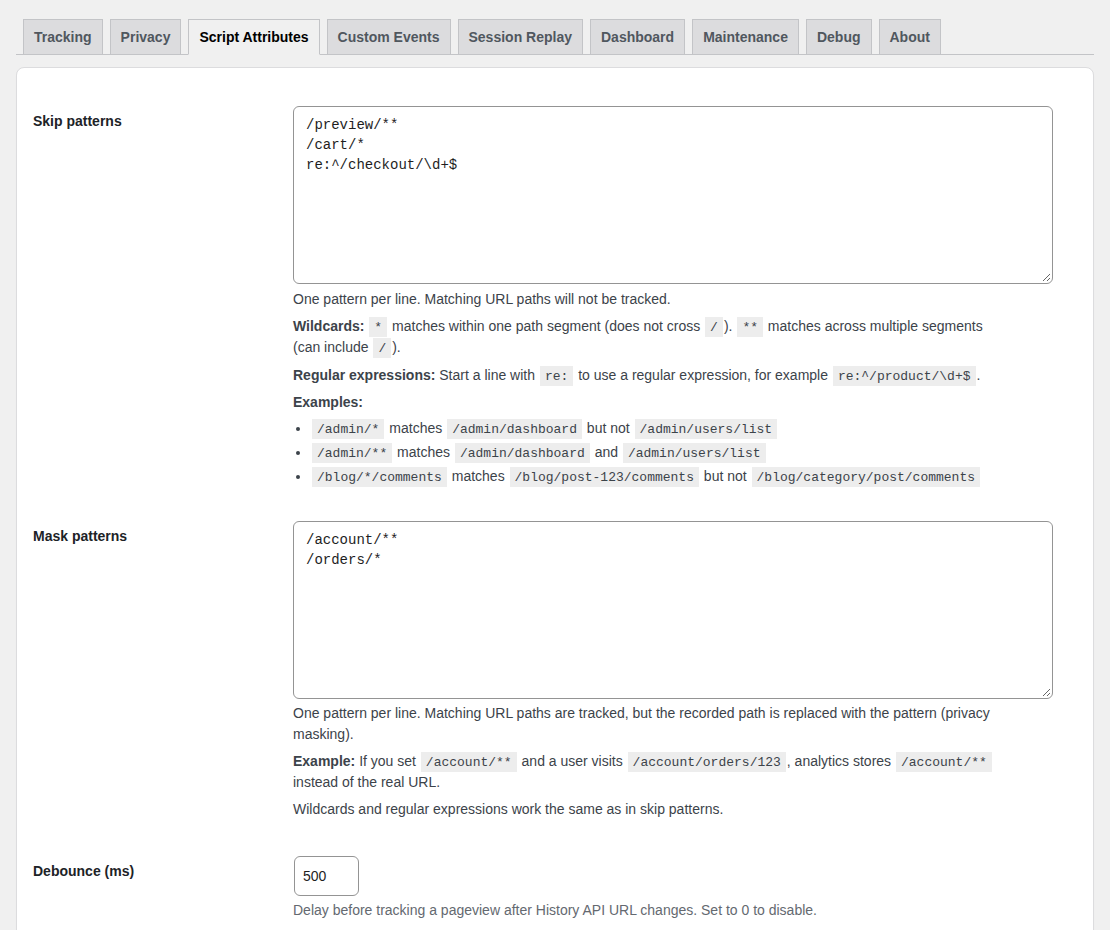
defer(recommended) orasync. - Skip patterns: do not track matching URL paths.
- Mask patterns: track matching URL paths, but replace the path with the pattern.
- Patterns support wildcards (
*and**) and regular expressions (re:prefix). - Add a custom tag to all events, for example to compare environments.
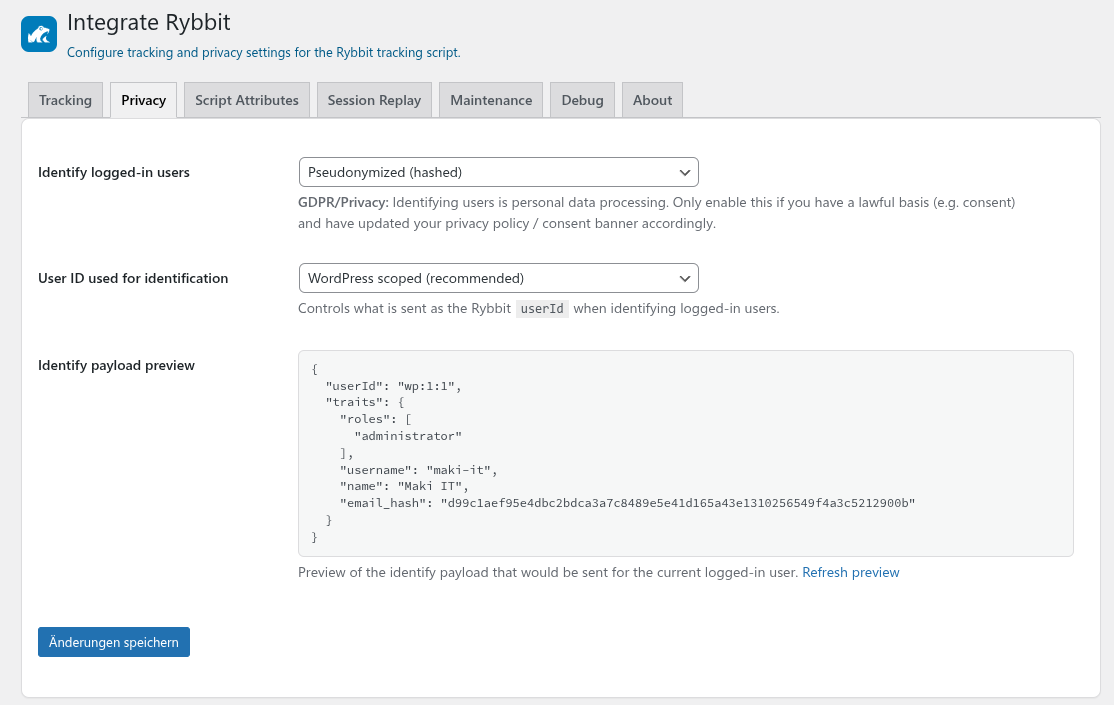
- Optional user identification for logged-in users. You choose how much data Rybbit receives:
- Pseudonymized mode: no cleartext email. Rybbit receives the user ID, roles, username, display name and a hash of the email.
- Full mode: Rybbit also receives the cleartext email.
- User ID strategies: WordPress scoped ID, keyed hash (HMAC), user ID, login, email or a user meta field.
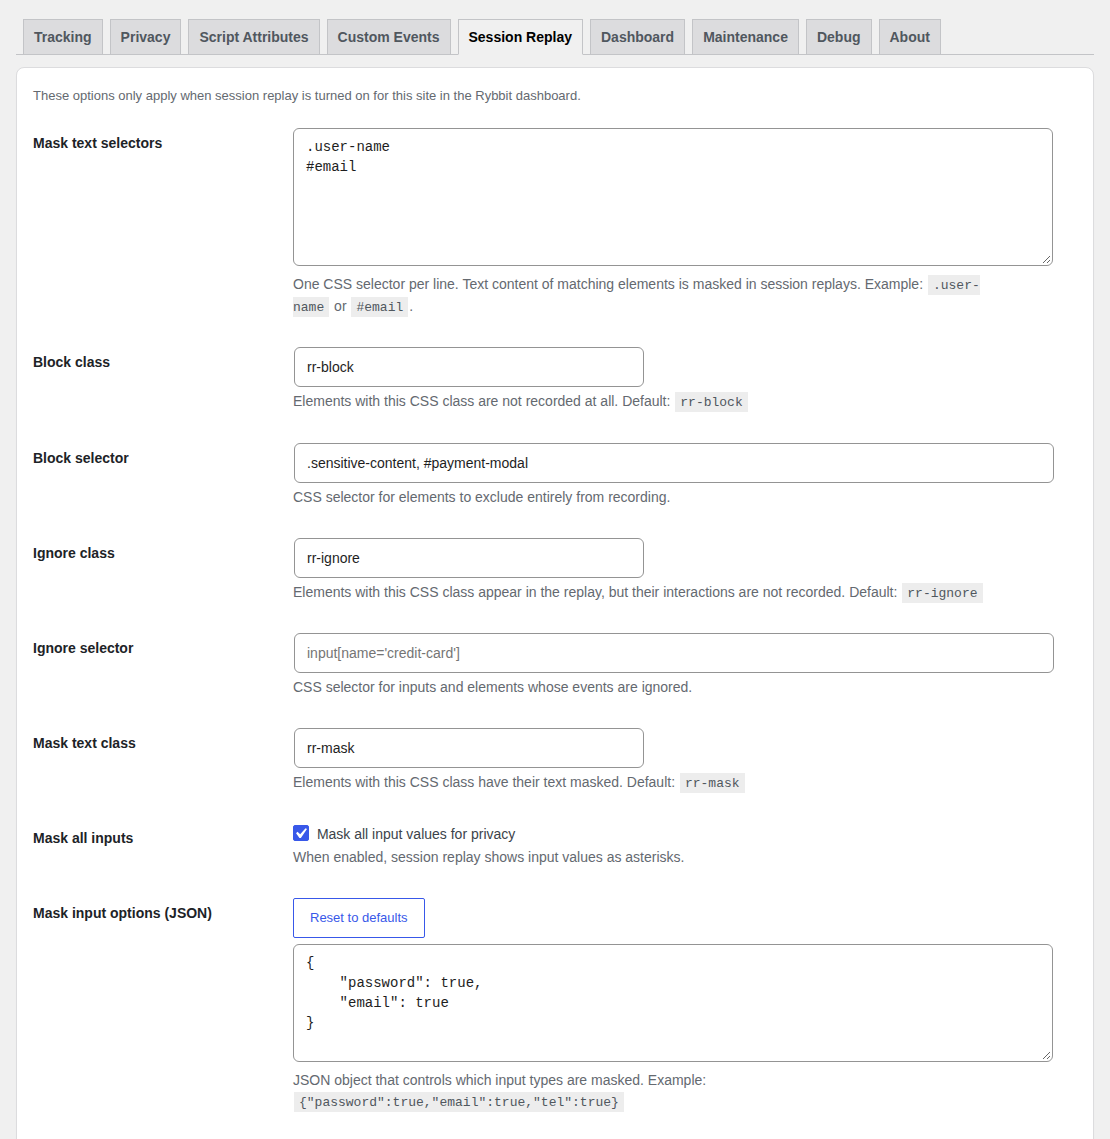
- Session replay privacy settings: block, ignore and mask elements, mask inputs, sampling and DOM slimming.
- Custom events: send an event to Rybbit when a visitor clicks an element. You set a CSS selector, an event name and optional properties on the Custom Events tab. You do not need to write JavaScript.
- Opt-out for visitors: add the shortcode
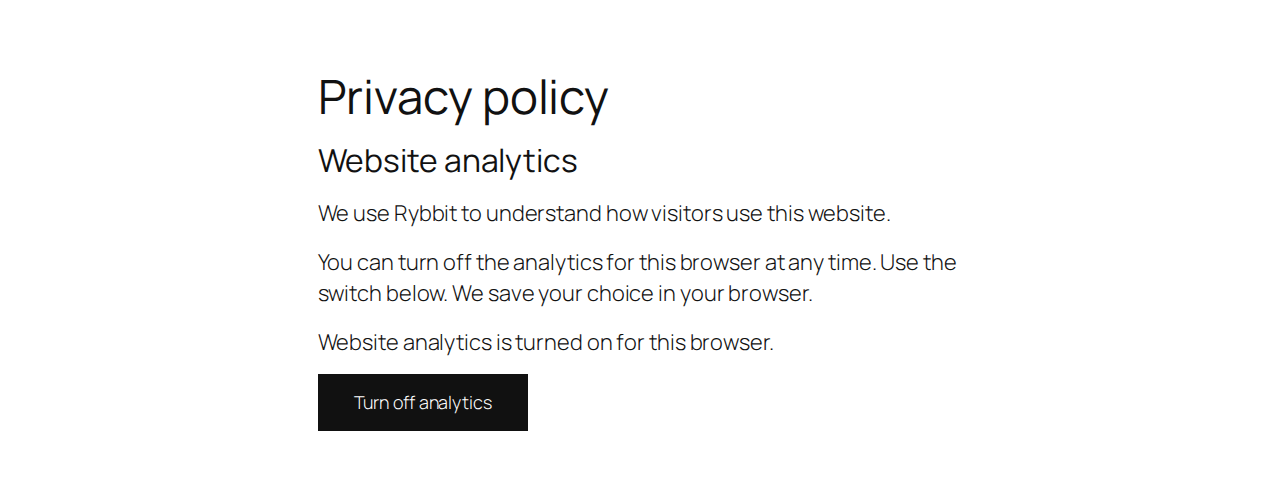
[rybbit_optout]or the block "Rybbit Opt-out" to a page, for example your privacy policy. Visitors can turn the analytics off and on again. - Debug tab with the effective settings and the generated script attributes.
- Accessible settings page with keyboard support for the tabs.
- Translation: German (
de_DEandde_DE_formal) is included. - Developer filters to change the behavior from code.
[rybbit_optout]
In the block editor, you can also use the block "Rybbit Opt-out". The block has a "Texts" panel in the sidebar.
The shortcode has these optional attributes:
optout_label: text of the button that turns the analytics off.optin_label: text of the button that turns the analytics on again.tracked_text: status text while the analytics is on.untracked_text: status text while the analytics is off.class: extra CSS classes for the wrapper element.
[rybbit_optout optout_label="Stop tracking me" tracked_text="We count your visit." class="my-style"]
Developer filters
integrate_rybbit_optout_html(string): Change the HTML of the opt-out shortcode and block. The second argument is the array of texts.integrate_rybbit_should_track(bool): Load the tracking script on the current request or not.integrate_rybbit_script_attributes(array): Change thedata-*attributes of the script tag. Use it for Rybbit options without a setting, for exampledata-namespace.integrate_rybbit_identify_user_id(string): Change the user ID that is sent to Rybbit.integrate_rybbit_identify_traits(array): Change the user traits that are sent to Rybbit.integrate_rybbit_custom_events(array): Change the custom event rules. Each rule is an array withselector(string),event(string) andprops(array of text values). The filter result is not saved. It does not appear in the settings.integrate_rybbit_dashboard_capability(string): Change the capability that is needed to see the analytics dashboard. The default ismanage_options.integrate_rybbit_api_http_args(array): Change the HTTP arguments of the requests to the Rybbit API, for example the timeout.
add_filter( 'integrate_rybbit_script_attributes', function ( $attributes ) { $attributes['data-namespace'] = 'myRybbit'; return $attributes; } );
安装:
- In wp-admin, go to Plugins > Add New and search for "Integrate Rybbit". You can also upload the plugin zip file or extract it to
/wp-content/plugins/integrate-rybbit. - Activate the plugin on the Plugins screen.
- Go to Settings > Integrate Rybbit.
- Enter your Rybbit Site ID and save the settings. Tracking starts immediately.
- If you host Rybbit yourself, change the Script URL to
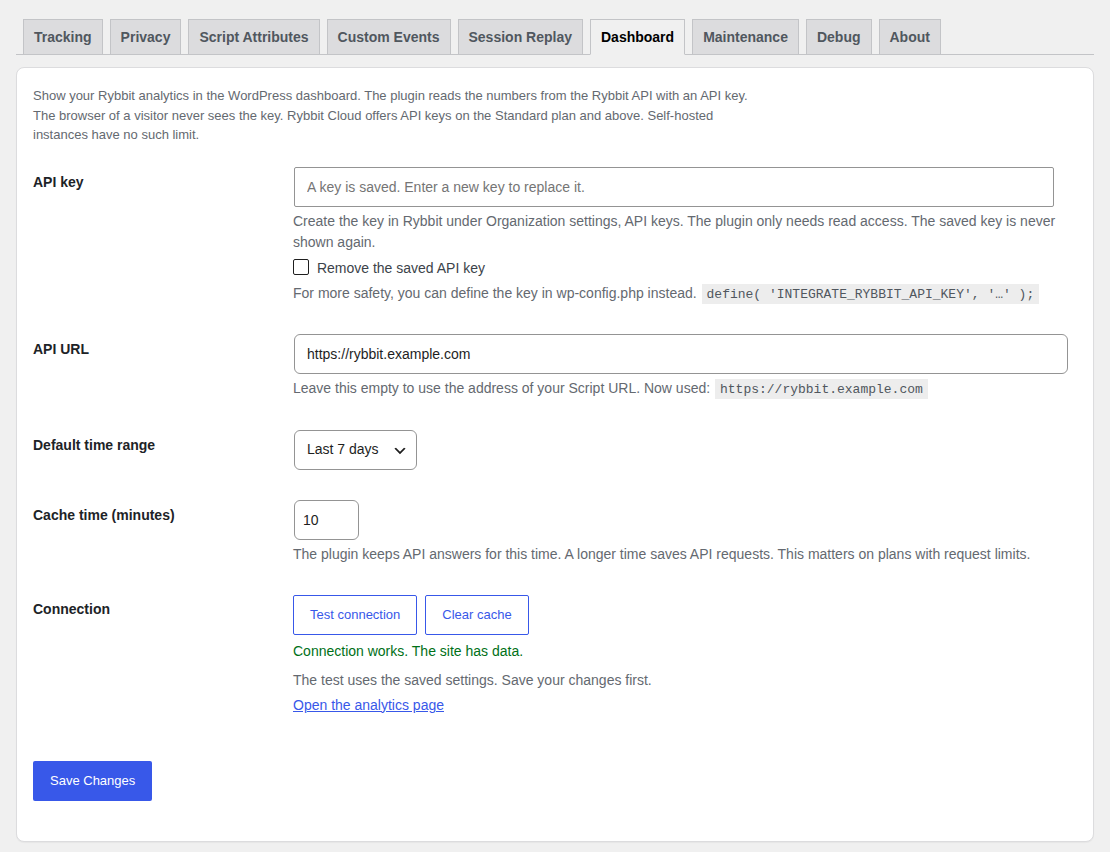
https://your-rybbit-domain/api/script.js. - Optional: to see your analytics in WordPress, create an API key in Rybbit and enter it on the Dashboard tab.
屏幕截图:
常见问题:
How do I get my Site ID?
Open your Rybbit dashboard. The Site ID is in the tracking settings of your site.
Can I use a self-hosted Rybbit instance?
Yes. Set the Script URL on the Tracking tab to the script.js URL of your instance, for example https://analytics.example.com/api/script.js.
How do I see my analytics in WordPress?
Create an API key in Rybbit (Organization settings, API keys). Enter it on the Dashboard tab of the plugin settings and save. Use "Test connection" to check the key. After this, a widget appears on the WordPress dashboard and a new page at Dashboard > Rybbit Analytics.
Which Rybbit plan do I need for the dashboard?
Rybbit Cloud offers API keys on the Standard plan and above. The Free and Basic plans have no API keys. Self-hosted instances have no such limit. The tracking works on every plan. Only the dashboard needs an API key.
Which permissions does the API key need?
Read access to "Analytics". If you create the key without restrictions, it works too. If you restrict the key to some resources, select "Analytics" with "read". Without it, Rybbit rejects the requests and the plugin shows the missing permission. The "Open Rybbit" button on the analytics page also needs "Sites" with "read". The plugin reads the number of your site from the site settings. Without this permission, the button opens the start page of Rybbit.
Is my API key safe?
The plugin sends the key only from your server to the Rybbit API. It never sends the key to a browser, and it does not show the saved key again. For more safety, define the key in wp-config.php: define( 'INTEGRATE_RYBBIT_API_KEY', 'your-key' );. This key replaces the key from the settings.
Why is the dashboard data not up to date?
The plugin keeps the API answers for 10 minutes by default. This saves API requests, which matters on plans with request limits. Change the time on the Dashboard tab, or use "Clear cache". The count of visitors online is cached for one minute at most.
Who can see the dashboard?
Only users who can manage the plugin settings (manage_options). Use the integrate_rybbit_dashboard_capability filter to change this.
Why do I not see my own visits?
Administrators are excluded by default. Change this on the Tracking tab. Ad blockers and browser privacy features can also block the tracking script. The Debug tab shows if your user is excluded by role.
Does the plugin work with page caching?
Yes. The script tag is the same for all visitors. User identification runs only for logged-in users, and page cache plugins usually do not cache pages for logged-in users. After a logout, the plugin marks the next page as not cacheable, because this page clears the Rybbit user ID.
Is user identification compliant with the GDPR?
User identification is off by default. If you turn it on, Rybbit receives a user ID for logged-in users. It also receives the roles, username and display name of the user. Full mode also sends the cleartext email. Make sure that you have a legal basis for this and update your privacy policy. The pseudonymized mode does not send the cleartext email, but username and display name are still personal data. To send less data, remove traits with the integrate_rybbit_identify_traits filter. The HMAC strategy gives a user ID that does not show the WordPress user ID. It uses the security keys of the site. If you change these keys, all users get a new ID in Rybbit.
How do I send a custom event?
Go to the Custom Events tab and click "Add event rule". Enter a CSS selector, for example .buy-button, and an event name, for example buy_click. Optionally add properties, one key=value pair per line. When a visitor clicks the element, or an element inside it, the plugin sends the event to Rybbit. Properties are sent as text. You can add up to 50 rules. Visitors with an excluded role do not send events. You can also use the data-rybbit-event and data-rybbit-prop-* attributes in your HTML. Rybbit reads them without this plugin.
How can visitors turn the tracking off?
Add the shortcode [rybbit_optout] or the block "Rybbit Opt-out" to a page, for example your privacy policy. The visitor sees a status text and a button. A click turns the analytics off for this browser. Another click turns it on again. The choice is saved in the local storage of the browser under the key disable-rybbit. It applies to this website and this browser only. It takes effect on the next page load. The shortcode needs a Site ID. Without a Site ID, only administrators see a notice.
Does the opt-out work with every Rybbit script?
The opt-out uses a feature of the Rybbit tracking script (version 1.1.0 or newer). Rybbit Cloud has this feature. Old self-hosted instances may not have it. Update your instance if the opt-out has no effect. If you set data-namespace with the integrate_rybbit_script_attributes filter, the plugin uses the same namespace for the storage key (disable-<namespace>). A visitor who clears the browser data also clears the opt-out.
What happens to my settings when I delete the plugin?
The settings stay in the database by default. To remove them, enable "Delete all plugin data on uninstall" on the Maintenance tab before you delete the plugin.
Does the plugin set cookies?
The plugin sets one technical cookie (rybbit_clear_user_id) when a user logs out. The next page view clears the Rybbit user ID and deletes the cookie. If user identification is active, the plugin also stores a small value in the local storage of the browser. This prevents duplicate identify requests. If a visitor turns the analytics off with the opt-out button, the plugin stores the key disable-rybbit in the local storage of the browser. For the data that the Rybbit script stores in the browser, see the Rybbit documentation.
更新日志:
- German translation: the plugin now includes
de_DEandde_DE_formal. The wording is neutral, so both languages use the same text. Texts in the settings page, the dashboard and the opt-out block are translated. - Restricted API keys work now. "Test connection" needs only the permission
Analytics(read), the same as the dashboard. Before, it neededSites(read) and failed for restricted keys. - If Rybbit rejects a request because a permission is missing, the error message names the permission.
- The button "Open Rybbit" opens your site in Rybbit (for example
/29). Before, it used the Site ID of the tracking script, which led to a wrong page. - If you restrict an API key, allow
Analytics(read). AddSites(read) if "Open Rybbit" should open your exact site. Without it, the button opens the Rybbit start page. The dashboard works in both cases. - If your site uses another language, the plugin stays in English.
- Analytics dashboard in wp-admin: a widget on the WordPress dashboard and a page at
Dashboard > Rybbit Analytics. It shows visitors, pageviews, bounce rate, visit duration and visitors online. It also has a chart for the last 24 hours, 7, 30 or 90 days, and the top pages, referrers, countries, devices and browsers. - New Dashboard tab with the API key, API URL, default time range, cache time, a connection test and a button to clear the cache. The dashboard is optional. The tracking works without it.
- Custom events: send an event to Rybbit when a visitor clicks an element. Set a CSS selector, an event name and optional properties on the new Custom Events tab. You do not need to write JavaScript. You can add up to 50 rules.
- Opt-out for visitors: the shortcode
[rybbit_optout]and the block "Rybbit Opt-out" show a button. A visitor can turn the analytics off and on again, for example on your privacy policy page. The choice is saved in the browser and takes effect on the next page load. The Privacy tab shows how to add it. - New developer filters:
integrate_rybbit_custom_events,integrate_rybbit_dashboard_capability,integrate_rybbit_api_http_argsandintegrate_rybbit_optout_html. - The API key stays on the server. The browser only calls a REST route of your site. You can also define the key in wp-config.php with
INTEGRATE_RYBBIT_API_KEY. This key replaces the saved key. - The plugin caches the answers of the Rybbit API (10 minutes by default). If Rybbit sends a rate limit error, the plugin waits for the time that Rybbit asks for.
- Only users with the capability manage_options can see the dashboard. Change it with the filter
integrate_rybbit_dashboard_capability. - The check for user identification runs only when it is needed.
- Uninstall also removes the new options and cached data.
- New and updated screenshots.
- Rybbit Cloud offers API keys on the Standard plan and above. Self-hosted instances have no such limit. The tracking works on every plan.
- If you enter an API key, the plugin reads statistics from the Rybbit API. It does not send visitor data. The readme describes this in the section "External services".
- The opt-out needs the Rybbit script v1.1.0 or newer. Old self-hosted instances may ignore it. The opt-out applies to one browser and one website only.
- WordPress 6.5 or newer is required.
- New option to track visits inside wp-admin. It is off by default.
- New user ID strategy "Keyed hash (HMAC)". The ID does not show the WordPress user ID. If you change the WordPress security keys, all users get a new ID.
- New option to add a custom tag to all events.
- New developer filters: integrate_rybbit_should_track, integrate_rybbit_script_attributes, integrate_rybbit_identify_user_id and integrate_rybbit_identify_traits.
- Excluded roles replace the old "Do not track administrators" setting. Existing settings are migrated.
- The Rybbit user ID is cleared after every logout, also when user identification is off.
- The page after a logout is not cached.
- The plugin sends the identify request only when the user data changes.
- The settings page is now one form and keeps the values of all tabs on save.
- The tabs of the settings page support the keyboard.
- Improved sanitizing and escaping of all settings.
- The plugin is tested with PHP 7.4 to 8.5.
- New Rybbit logo and updated screenshots.
- "Delete all plugin data on uninstall" was on by default in older versions. Check this setting on the Maintenance tab if you want to keep your settings after you delete the plugin.
- fix: remove automatic updates filter by @kimdre in https://github.com/maki-it/rybbit-wordpress-plugin/pull/39
- fix: enable automatic updates for the Integrate Rybbit plugin by @kimdre in https://github.com/maki-it/rybbit-wordpress-plugin/pull/38
- fix: enable auto-updates toggle for WordPress.org plugins by @kimdre in https://github.com/maki-it/rybbit-wordpress-plugin/pull/37
- docs: fix plugin path in installation instructions by @kimdre in https://github.com/maki-it/rybbit-wordpress-plugin/pull/36
- first release to Wordpress.org Plugin Directory!
- chore: prepare repository for svn deployment by @kimdre in https://github.com/maki-it/rybbit-wordpress-plugin/pull/34
- chore: prepare repository for svn deployment by @kimdre in https://github.com/maki-it/rybbit-wordpress-plugin/pull/35
- fix: use plugin version for script registration to enable cache busting by @kimdre in https://github.com/maki-it/rybbit-wordpress-plugin/pull/33
- fix: enhance tracking script handling by @kimdre in https://github.com/maki-it/rybbit-wordpress-plugin/pull/32 You can find all releases at: https://github.com/maki-it/rybbit-wordpress-plugin/releases